In the previous tutorial, I explained how to mention Manual Test Cases in Serenity Report. In this tutorial, I will explain how to attach test evidence to manual tests. Before this tutorial, I suggest you to refer the tutorial which explain How to generate Serenity Report.
It is always advisable to attach screenshots or other files to our manual test reports as additional evidence, specially for failed scenarios. The @manual-test-evidence tag allows you to do just this. You can either include a link to an external site, as shown here:
@manual
@manual-result:failed
@manual-last-tested:sprint-1
@manual-test-evidence:https://database/demo.png
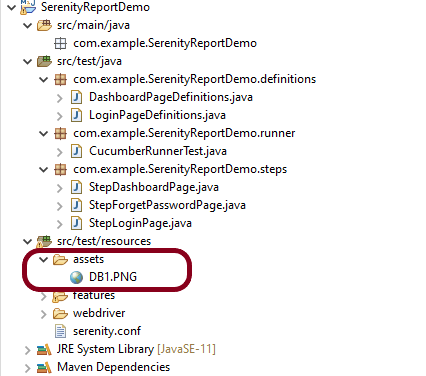
Mentioning the path of evidence in the test is not a very good way to attach test evidence to the manual tests. An alternative approach and favorable one is to place the image in the src/test/resources/assets folder and include a relative link to this file (starting with “assets/“):
    @manual
    @manual-result:failed
    @manual-last-tested:sprint-1
    @manual-test-evidence:assets/DB1.PNG
    Scenario: Verify different credentials are provided to Admin, Dev and QA to access Master Database

    Given User is connected to Master Database
    Then Different credentials are provided to Admin, Business, Dev and QA to access Master Database
Test Evidence is only displayed if the @manual-last-tested annotation is defined in serenity.properties.
serenity.project.name = Serenity and Cucumber Report Demo
current.target.version = sprint-1
Execute the test suite by using the below command
mvn clean verify
As we the the Serenity Reports (index.html and serenity-summary.html) are generated under target/site/serenity.
Below is the sample index.html report which has test evidence attached to the manual test.
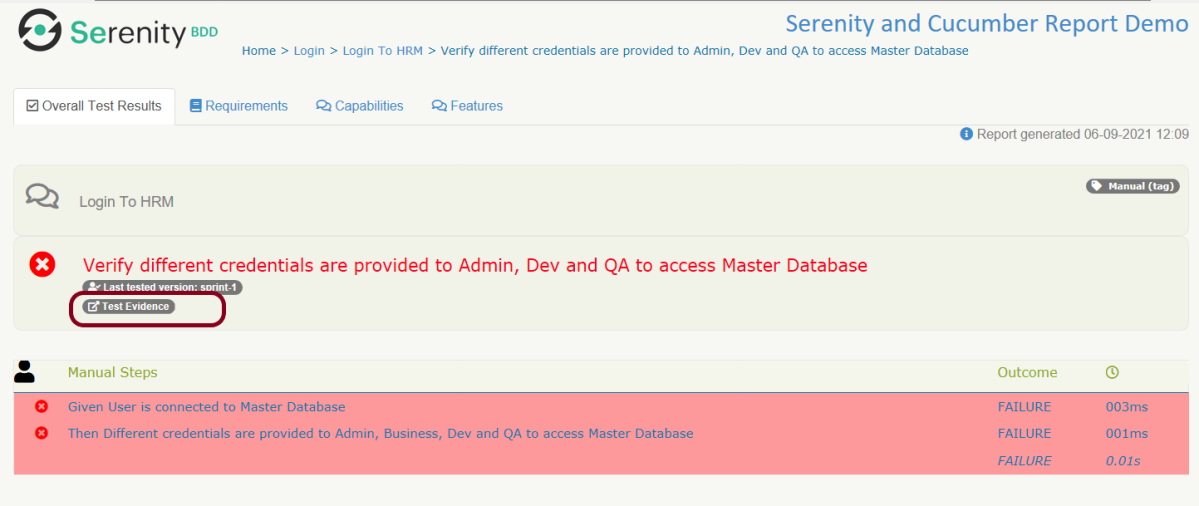
You can see that there is a new tag with name – Test Evidence. This is the screenshot I have placed under assets folder.

Click on the link and a new page with the screesnhot placed under assets folder opens.

Congratulations. You are able to attach the test evidence to manual tests in Serenity Report. Hope you enjoyed this tutorial. Cheers!!
