In this article we will see how we can see how we will merge 2 PDF files in a single PDF file using selenium Java.
Merging PDF documents in Selenium using Java requires some additional libraries because Selenium itself does not provide direct support for reading PDFs. The most commonly used library for reading PDFs in Java is Apache PDFBox.
We are using the Apache PDFBox to download PDF files.
We are using WebDriverWait to wait until the pdfs are downloaded.
// Download first PDF
WebElement downloadLink1 = driver.findElement(By.xpath("//*[@class='elementor-button-text']"));
downloadLink1.click();
//Wait for first PDF download to complete
File downloadedFile1 = new File(downloadFilepath + "/Free_Test_Data_100KB_PDF.pdf");
WebDriverWait wait1 = new WebDriverWait(driver, Duration.ofSeconds(30));
wait1.until((ExpectedCondition<Boolean>) wd -> downloadedFile1.exists());
System.out.println("PDF file1 is downloaded successfully.");
// Download second PDF
WebElement downloadLink2 = driver.findElement(By.xpath("//*[@id=\"post-81\"]/div/div/section[3]/div/div[1]/div/section[2]/div/div[2]/div/div/div/div/a/span/span"));
downloadLink2.click();
//Wait for first PDF download to complete
File downloadedFile2 = new File(downloadFilepath + "/260KB.pdf");
WebDriverWait wait2 = new WebDriverWait(driver, Duration.ofSeconds(30));
wait2.until((ExpectedCondition<Boolean>) wd -> downloadedFile2.exists());
System.out.println("PDF file2 is downloaded successfully.");
4. Merging the PDFs
We are using PDFMergerUtility from Apache PDFBox to merge the downloaded PDF files into a single PDF.
This is used to pause the execution for a specified amount of time (5 seconds here) to allow the file to download completely. It is not recommended to use Thread.sleep in production.
Thread.sleep(5000);
Step 6 – Verify the File Download
Check if the downloaded file exists in the specified download directory or not.
File downloadedFile = new File(downloadFilepath + "/Free_Test_Data_100KB_PDF.pdf");
if (downloadedFile.exists()) {
System.out.println("File is downloaded!");
} else {
System.out.println("File is not downloaded.");
}
Step 7 – Quit the WebDriver
driver.quit();
The complete program can be seen below:
package com.example;
import org.openqa.selenium.By;
import org.openqa.selenium.WebDriver;
import org.openqa.selenium.WebElement;
import org.openqa.selenium.edge.EdgeDriver;
import org.openqa.selenium.edge.EdgeOptions;
import org.openqa.selenium.firefox.FirefoxDriver;
import org.openqa.selenium.firefox.FirefoxOptions;
import java.io.File;
import java.util.HashMap;
import java.util.Map;
public class EdgeDownload_PDF {
public static void main(String[] args) throws InterruptedException {
String downloadFilepath = System.getProperty("user.dir") + File.separator + "downloads";
EdgeOptions options = new EdgeOptions();
Map<String, Object> prefs = new HashMap<>();
prefs.put("download.default_directory", downloadFilepath);
prefs.put("download.prompt_for_download", false);
WebDriver driver = new EdgeDriver(options);
driver.manage().window().maximize();
driver.get("https://freetestdata.com/document-files/pdf/");
// Locate and click the download link or button if necessary
WebElement downloadLink = driver.findElement(By.xpath("//*[@class=\"elementor-button-text\"]"));
downloadLink.click();
// Wait for the download to complete
try {
Thread.sleep(5000);
} catch (InterruptedException e) {
e.printStackTrace();
}
// Check if the file exists
File downloadedFile = new File(downloadFilepath + "/Free_Test_Data_100KB_PDF.pdf");
if (downloadedFile.exists()) {
System.out.println("File is downloaded from Edge!");
} else {
System.out.println("File is not downloaded.");
}
driver.quit();
}
}
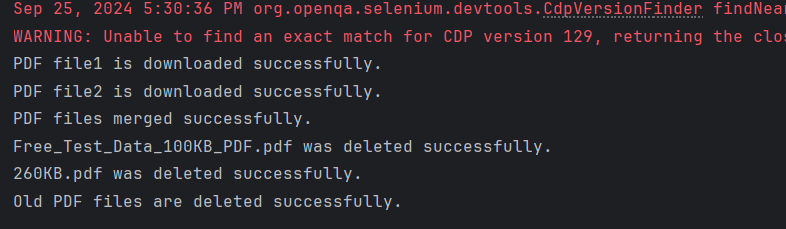
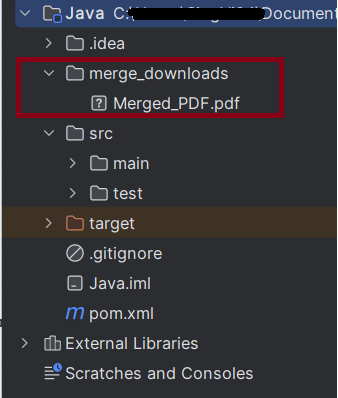
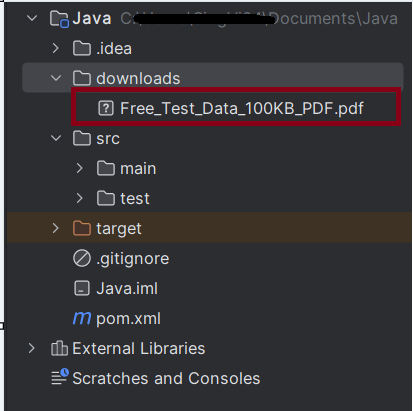
The output of the above program is
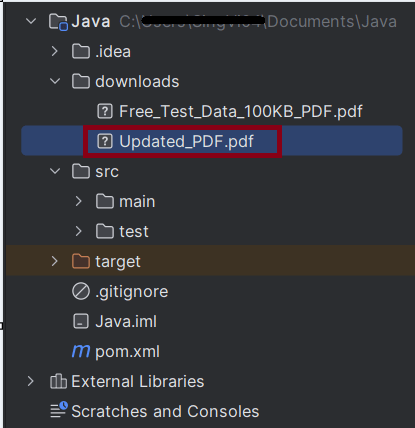
We can see that a downloads folder is created, and it has the downloaded pdf file – Free_Test_Data_100KB_PDF.pdf.
Summary:
Setup: Configures Chrome to automatically download PDFs and sets the download directory.
Download and Verify: Navigates to a specific URL, clicks the download link, waits for the download to complete, and verifies if the file exists in the specified directory.
Cleanup: Closes the browser session.
That’s it! Congratulations on making it through this tutorial and hope you found it useful! Happy Learning!!
In Automation, it is advisable to take screenshots of failed test cases for further analysis and proof of failure. Selenium provides the capability to take screenshot. But, before we see how to capture Screenshot in Selenium, we need to add below mentioned dependencies in the Maven project. In this tutorial, we will take screenshot of a specific element in the webpage.
Initialize the WebDriver. Here, it is FireFoxOptions. Open the desired web page.
FirefoxOptions options = new FirefoxOptions();
WebDriver driver = new FirefoxDriver(options);
driver.manage().window().maximize();
driver.get("https://www.selenium.dev/");
2. Locate the Element
Use Selenium methods to locate the element.
WebElement logo = driver.findElement(By.xpath("//div[@class='row']/div"));
3. Take the screenshot of the element
To capture a screenshot in Selenium, we can make use of an interface, called TakesScreenshot. This method indicates the driver, that it can capture a screenshot and store it in different ways
In order to capture screenshot and store it in a particular location, there is a method called “getScreenshotAs“, where OutputType defines the output type for a screenshot.
4. Specify the location to save the screenshot
File screenshotLocation = new File("src//test/resources//screenshot/specific_element_screenshot.png");
5. Save the screenshot to the specified location
We want to save the element in the screenshot folder present in src/test/resources directory. So, copy the screenshot in that folder.
FileUtils.copyFile(source, screenshotLocation);
5. Quit the browser
Make sure to quit the browser to free up all the resources.
driver.quit();
Let’s see the complete program
package com.example;
import org.openqa.selenium.*;
import org.openqa.selenium.firefox.FirefoxDriver;
import org.openqa.selenium.firefox.FirefoxOptions;
import org.apache.commons.io.FileUtils;
import java.io.File;
public class ScreenShot_Demo {
public static void main(String[] args) {
FirefoxOptions options = new FirefoxOptions();
WebDriver driver = new FirefoxDriver(options);
driver.manage().window().maximize();
driver.get("https://www.selenium.dev/");
// Locate the specific element
WebElement logo = driver.findElement(By.xpath("//div[@class='row']/div"));
// Take the screenshot of the element
File source = logo.getScreenshotAs(OutputType.FILE);
// Specify the location to save the screenshot
File screenshotLocation = new File("src//test/resources//screenshot/element_screenshot.png");
try {
// Save the screenshot to the specified location
FileUtils.copyFile(source, screenshotLocation);
System.out.println("Screenshot saved to: " + screenshotLocation.getAbsolutePath());
} catch (Exception e) {
System.out.println(e.getMessage());
}
System.out.println("The Screenshot is taken and saved under Screenshots folder");
driver.quit();
}
}
The output of the above program is
A folder with name screenshot is created inside src/test/resources directory and the screenshot is placed in that folder as you can see the image below
The Screenshot looks like something below
That’s it! Congratulations on making it through this tutorial and hope you found it useful! Happy Learning!!
In this article we will see how we can write in a pdf file using selenium Java.
Writing in a PDF document in Selenium using Java requires some additional libraries because Selenium itself does not provide direct support for reading PDFs. The most commonly used library for reading PDFs in Java is Apache PDFBox.
Use Selenium WebDriver to navigate to the PDF URL and download it to a desired location.
// Download first PDF
WebElement downloadLink = driver.findElement(By.xpath("//*[@class='elementor-button-text']"));
downloadLink.click();
//Wait for PDF download to complete
File downloadedFile = new File(downloadFilepath + "/Free_Test_Data_100KB_PDF.pdf");
WebDriverWait wait = new WebDriverWait(driver, Duration.ofSeconds(30));
wait.until((ExpectedCondition<Boolean>) wd -> downloadedFile.exists());
System.out.println("PDF File is downloaded successfully.");
4. Create a content stream to write to the PDF
We are using the Apache PDFBox to write to the downloaded PDF file.
Step 1 – PDPageContentStream class is used to insert data in the document. In this class, we need to pass the document object and page object as its parameter to insert data.
PDPageContentStream contentStream = new PDPageContentStream(doc, page, PDPageContentStream.AppendMode.APPEND, true);
Step 2 – When we insert text in the PDF document, we can also provide the start position of the text. beginText() method of the PDPageContentStream class is used to start the text content.
contentStream.beginText();
Step 3 – We can set the font style and font size of the text by using setFont() method of the PDPageContentStream class.
//Setting the font to the Content stream
PDFont pdfFont= new PDType1Font(TIMES_BOLD_ITALIC);
contentStream.setFont(pdfFont, 20);
Step 4 – We can set the position of the text by using newLineAtOffset() method of the PDPageContentStream class which can be shown in the following code.
//Setting the position for the line
contentStream.newLineAtOffset(40, 450);
Step 5 – We can insert text content in the PDF document by using the showText() method of the PDPageContentStream class.
//Adding text in the form of string
String text = "Hi!!! Added text to the existing PDF document.";
contentStream.showText(text);
Step 6 – When we insert text in the PDF document, we have to provide the end point of the text. endText() method of the PDPageContentStream class is used to end the text content.
contentStream.endText();
Step 7 – We can close the PDPageContentStream class by using close() method.
//Closing the content stream
contentStream.close();
Step 8 – After adding the required document, we have to save it to our desired location. save() method is used to save the document.
//Saving the document
doc.save(new File("downloads/Updated_PDF.pdf"));
Step 9 – After completing the task, we need to close the PDDocument class object by using the close()method.
//Closing the document
doc.close();
The complete program can be seen below:
package com.example;
import org.apache.pdfbox.Loader;
import org.apache.pdfbox.pdmodel.PDDocument;
import org.apache.pdfbox.pdmodel.PDPage;
import org.apache.pdfbox.pdmodel.PDPageContentStream;
import org.apache.pdfbox.pdmodel.font.PDFont;
import org.apache.pdfbox.pdmodel.font.PDType1Font;
import org.openqa.selenium.By;
import org.openqa.selenium.WebDriver;
import org.openqa.selenium.WebElement;
import org.openqa.selenium.chrome.ChromeDriver;
import org.openqa.selenium.chrome.ChromeOptions;
import org.openqa.selenium.support.ui.ExpectedCondition;
import org.openqa.selenium.support.ui.WebDriverWait;
import java.io.File;
import java.io.IOException;
import java.time.Duration;
import java.util.HashMap;
import java.util.Map;
import static org.apache.pdfbox.pdmodel.font.Standard14Fonts.FontName.TIMES_BOLD_ITALIC;
public class WritePDF_Chrome_Demo {
public static void main(String[] args) throws InterruptedException, IOException {
 String downloadFilepath = System.getProperty("user.dir") + File.separator + "downloads";

        ChromeOptions options = new ChromeOptions();
        Map<String, Object> prefs = new HashMap<>();
        prefs.put("plugins.always_open_pdf_externally", true);
        prefs.put("download.default_directory", downloadFilepath);
        options.setExperimentalOption("prefs", prefs);

        WebDriver driver = new ChromeDriver(options);
        driver.manage().window().maximize();
        driver.get("https://freetestdata.com/document-files/pdf/");
// Download first PDF
WebElement downloadLink = driver.findElement(By.xpath("//*[@class='elementor-button-text']"));
downloadLink.click();
//Wait for PDF download to complete
File downloadedFile = new File(downloadFilepath + "/Free_Test_Data_100KB_PDF.pdf");
WebDriverWait wait = new WebDriverWait(driver, Duration.ofSeconds(30));
wait.until((ExpectedCondition<Boolean>) wd -> downloadedFile.exists());
System.out.println("PDF File is downloaded successfully.");
driver.quit();
//Retrieving the pages of the document
PDDocument doc = Loader.loadPDF(downloadedFile);
PDPage page = doc.getPage(2);
PDPageContentStream contentStream = getPdPageContentStream(doc, page);
System.out.println("New Text Content is added in the PDF Document.");
//Closing the content stream
contentStream.close();
//Saving the document
doc.save(new File("downloads/Updated_PDF.pdf"));
//Closing the document
doc.close();
}
private static PDPageContentStream getPdPageContentStream(PDDocument doc, PDPage page) throws IOException {
PDPageContentStream contentStream = new PDPageContentStream(doc, page, PDPageContentStream.AppendMode.APPEND, true);
//Begin the Content stream
contentStream.beginText();
//Setting the font to the Content stream
PDFont pdfFont= new PDType1Font(TIMES_BOLD_ITALIC);
contentStream.setFont(pdfFont, 20);
//Setting the position for the line
contentStream.newLineAtOffset(10, 450);
String text = "Hi!!! Added text to the existing PDF document.";
//Adding text in the form of string
contentStream.showText(text);
//Ending the content stream
contentStream.endText();
return contentStream;
}
}
The output of the above program is
We can see that the updated pdf is placed in the documents folder.
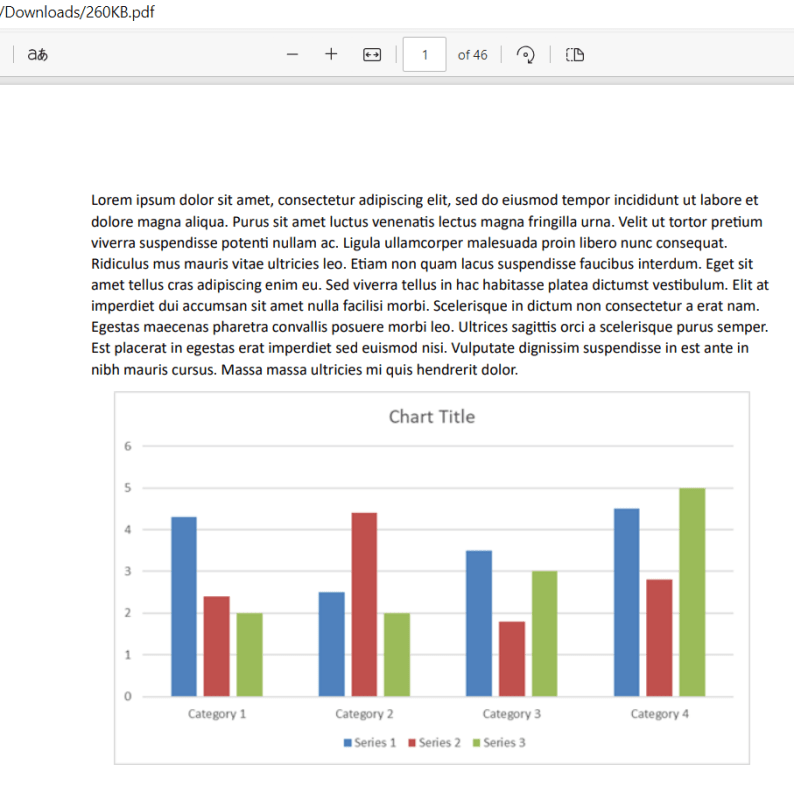
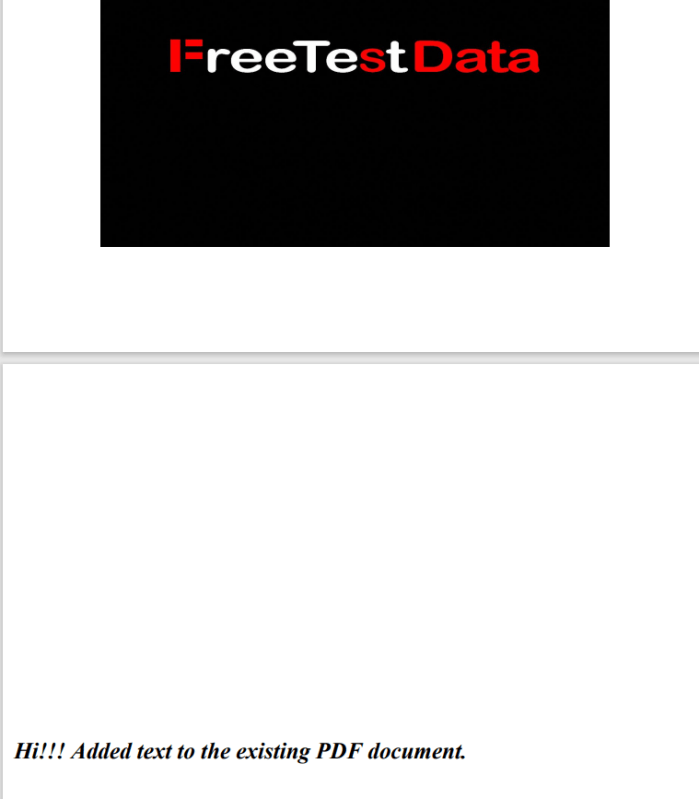
We can see that the text content is added to the PDF document.
Summary:
Setup WebDriver: Configure the browser to handle automatic downloads.
Trigger Download: Navigate to the webpage and trigger the download.
Wait for Completion: Implement a waiting mechanism to ensure the download completes.
Write to PDF: Use PDPageContentStream to write the data to PDF.
That’s it! Congratulations on making it through this tutorial and hope you found it useful! Happy Learning!!
In this article we will see how we can read a pdf file using seleniumjava.
Organizations frequently generate various types of PDF reports, such as mobile bills, electricity bills, financial reports, and revenue reports. Quality Assurance (QA) teams are then tasked with verifying the information contained in these reports. Typically, this process involves manually downloading the reports and reading the data they contain. To automate this process, the test framework must be capable of automatically downloading PDF reports and extracting the data without any human intervention.
Reading a PDF document in Selenium using Java requires some additional libraries because Selenium itself does not provide direct support for reading PDFs. The most commonly used library for reading PDFs in Java is Apache PDFBox.
Add the Selenium, commons and pdfbox dependencies to the project. To download the latest version of these dependencies, refer to the official Maven site – https://mvnrepository.com/.
Use Selenium WebDriver to navigate to the PDF URL and download it to a desired location.
String downloadFilepath = System.getProperty("user.dir") + File.separator + "downloads";
ChromeOptions options = new ChromeOptions();
Map<String, Object> prefs = new HashMap<>();
prefs.put("plugins.always_open_pdf_externally", true);
prefs.put("download.default_directory", downloadFilepath);
options.setExperimentalOption("prefs", prefs);
WebDriver driver = new ChromeDriver(options);
driver.manage().window().maximize();
driver.get("https://freetestdata.com/document-files/pdf/");
// Locate and click the download link or button if necessary
WebElement downloadLink = driver.findElement(By.xpath("//*[@class=\"elementor-button-text\"]"));
downloadLink.click();
//Wait for download to complete
File downloadedFile = new File(downloadFilepath + "/Free_Test_Data_100KB_PDF.pdf");
WebDriverWait wait = new WebDriverWait(driver, Duration.ofSeconds(30));
wait.until((ExpectedCondition<Boolean>) wd -> downloadedFile.exists());
// Check if the file exists
if (downloadedFile.exists()) {
System.out.println("File is downloaded!");
} else {
System.out.println("File is not downloaded.");
}
We are using the Apache PDFBox to read the downloaded PDF file and extract text.
Step 1 – Load PDF Document
File file = new File("Path of Document");
PDDocument doc = Loader.loadPDF(file);
Step 2 – Retrieve the text
PDFTextStripper class is used to retrieve text from a PDF document. We can instantiate this class as following
PDFTextStripper pdfStripper = new PDFTextStripper();
getText() method is used to read the text contents from the PDF document. In this method, we need to pass the document objectas a parameter.
String text = pdfStripper.getText(doc);
The complete program can be seen below:
import org.apache.pdfbox.Loader;
import org.apache.pdfbox.pdmodel.PDDocument;
import org.apache.pdfbox.text.PDFTextStripper;
import org.openqa.selenium.By;
import org.openqa.selenium.WebDriver;
import org.openqa.selenium.WebElement;
import org.openqa.selenium.chrome.ChromeDriver;
import org.openqa.selenium.chrome.ChromeOptions;
import org.openqa.selenium.support.ui.ExpectedCondition;
import org.openqa.selenium.support.ui.WebDriverWait;
import java.io.File;
import java.io.IOException;
import java.time.Duration;
import java.util.HashMap;
import java.util.Map;
public class ReadPDF_Chrome_Demo {
public static void main(String[] args) throws InterruptedException {
String downloadFilepath = System.getProperty("user.dir") + File.separator + "chrome_downloads";
ChromeOptions options = new ChromeOptions();
Map<String, Object> prefs = new HashMap<>();
prefs.put("plugins.always_open_pdf_externally", true);
prefs.put("download.default_directory", downloadFilepath);
options.setExperimentalOption("prefs", prefs);
WebDriver driver = new ChromeDriver(options);
driver.manage().window().maximize();
driver.get("https://freetestdata.com/document-files/pdf/");
// Locate the download link/button and click and wait for the download to complete
WebElement downloadLink = driver.findElement(By.xpath("//*[@class='elementor-button-text']"));
downloadLink.click();
//Wait for download to complete
File downloadedFile = new File(downloadFilepath + "/Free_Test_Data_100KB_PDF.pdf");
WebDriverWait wait = new WebDriverWait(driver, Duration.ofSeconds(30));
wait.until((ExpectedCondition<Boolean>) wd -> downloadedFile.exists());
// Check if the file exists
if (downloadedFile.exists()) {
System.out.println("File is downloaded!");
} else {
System.out.println("File is not downloaded.");
}
driver.quit();
// Read the downloaded PDF using PDFBox
PDDocument document = null;
try {
document = Loader.loadPDF(downloadedFile);
PDFTextStripper pdfStripper = new PDFTextStripper();
String text = pdfStripper.getText(document);
document.close();
// Print the PDF text content
System.out.println("Text in PDF: ");
System.out.println(text);
} catch (IOException e) {
System.err.println("An error occurred while loading or reading the PDF file: " + e.getMessage());
e.printStackTrace();
}
}
}
The output of the above program is
Summary:
### Summary
1. Setup WebDriver:Configure the browser to handle automatic downloads. 2. Trigger Download: Navigate to the webpage and trigger the download. 3. Wait for Completion: Implement a waiting mechanism to ensure the download completes. 4. Verify Content: Use a library like Apache PDFBox to read the content of the downloaded PDF.
That’s it! Congratulations on making it through this tutorial and hope you found it useful! Happy Learning!!
Selenium Quiz – You can test your knowledge with this Selenium Quiz. We have created this Selenium WebDriver Quiz Online Test to help you master Selenium.
In this article we will see how we can download a pdf file in chrome using selenium at a desired location in java.
When a PDF link on a website is clicked, the PDF file typically opens in Chrome’s default PDF viewer. While clicking on the PDF link itself is straightforward using Selenium, interacting with the PDF viewer afterward presents a challenge. This is because the PDF viewer is not part of the HTML DOM, and Selenium cannot interact with elements within it, such as the download button. As a result, we are unable to perform Selenium actions on controls within Chrome’s built-in PDF viewer.
To overcome this problem, we need to disable the default chrome pdf viewer plugin before launching the driver, and set the download directory where we need to download the file.
Implementation Steps
Step 1 – Download Path and Chrome Options Setup
Define the directory path where the PDF will be downloaded.
This line is setting a Chrome preference to always open PDF files using an external application (like Adobe Reader) instead of the Chrome PDF viewer. By setting this preference to true, Chrome will automatically download the PDF files rather than opening them in the built-in PDF viewer.
This line sets the default directory where downloaded files should be saved.
options.setExperimentalOption("prefs", prefs);
setExperimentalOptionis a method used to pass custom preferences to the ChromeDriver. This line applies the preferences you’ve set to the ChromeOptionsobject.
Step 3 – Initialize WebDriver and Open Webpage
WebDriver driver = new ChromeDriver(options);
driver.manage().window().maximize();
driver.get("https://freetestdata.com/document-files/pdf/");
Step 4 – Find and Click the Download Link
Locate the download link using XPath and click on it to start the download.
This is used to pause the execution for a specified amount of time (5 seconds here) to allow the file to download completely. It is not recommended to use Thread.sleep in production.
Thread.sleep(5000);
Step 6 – Verify the File Download
Check if the downloaded file exists in the specified download directory or not.
 File downloadedFile = new File(downloadFilepath + "/Free_Test_Data_100KB_PDF.pdf");
        if (downloadedFile.exists()) {
            System.out.println("File is downloaded!");
        } else {
            System.out.println("File is not downloaded.");
      }
Step 7 – Quit the WebDriver
driver.quit();
The complete program can be seen below:
import org.openqa.selenium.By;
import org.openqa.selenium.WebDriver;
import org.openqa.selenium.WebElement;
import org.openqa.selenium.chrome.ChromeDriver;
import org.openqa.selenium.chrome.ChromeOptions;
import java.io.File;
import java.util.HashMap;
import java.util.Map;
public class DownloadPDF_Chrome_Demo {
public static void main(String[] args) throws InterruptedException {
String downloadFilepath = System.getProperty("user.dir") + File.separator + "downloads";

ChromeOptions options = new ChromeOptions();
Map<String, Object> prefs = new HashMap<>();
prefs.put("plugins.always_open_pdf_externally", true);
prefs.put("download.default_directory", downloadFilepath);
options.setExperimentalOption("prefs", prefs);

WebDriver driver = new ChromeDriver(options);
driver.manage().window().maximize();
driver.get("https://freetestdata.com/document-files/pdf/");
// Locate and click the download link or button if necessary
WebElement downloadLink = driver.findElement(By.xpath("//*[@class=\"elementor-button-text\"]"));
downloadLink.click();
// Wait for the download to complete
Thread.sleep(5000);
// Check if the file exists
 File downloadedFile = new File(downloadFilepath + "/Free_Test_Data_100KB_PDF.pdf");
        if (downloadedFile.exists()) {
            System.out.println("File is downloaded!");
        } else {
            System.out.println("File is not downloaded.");
      }
driver.quit();
}
}
The output of the above program is
We can see that a downloads folder is created, and it has the downloaded pdf file – Free_Test_Data_100KB_PDF.pdf.
Summary:
Setup: Configures Chrome to automatically download PDFs and sets the download directory.
Download and Verify: Navigates to a specific URL, clicks the download link, waits for the download to complete, and verifies if the file exists in the specified directory.
Cleanup: Closes the browser session.
That’s it! Congratulations on making it through this tutorial and hope you found it useful! Happy Learning!!
In this tutorial, we will discuss the ToolTip and how to automate the ToolTip in Selenium.
What is ToolTip?
A ToolTip is a small, informational popup that appears when a user hovers over an element such as a button, image, or link. It provides additional context or information about the element. Tooltips are often implemented using the titleattribute in HTML or through JavaScript and CSS for custom tooltips.
Tool Tips are implemented in different ways–
The basic implementation is based on HTML’s “title”attribute. getAttribute(title) gets the value of the tooltip.
Another tool tip implementation is using Action Class.
This tutorial explains the steps to automate the Custome ToolTip where no title attribute is present.
Let’s understand how one can automate the process of verifying tooltip in Selenium.
To test tooltips in Selenium, you generally follow these steps:
1. Locate the Element with Tooltip: Identify the element that contains the tooltip. 2. Hover Over the Element: Use Actions class to simulate mouse hover event. 3. Capture the Tooltip Text: Retrieve the text from the tooltip element. 4. Validate the Text: Assert that the tooltip text matches the expected value.
Implementation Steps
Locate the Tooltip Element
Identify the element that contains the tooltip. Here, the element has been found using By.id().
Identify the element that contains the tooltip using Actionsclass to hover over the element.
Actions actions = new Actions(driver);
actions.moveToElement(elementWithTooltip).perform();
Retrieve Tooltip Text
Capturing the tooltip text typically found in the titleattribute. But in this case, there is no title in page source, so I have created an xpath using contains(text()) to find the tooltip text.
WebDriverWait wait = new WebDriverWait(driver, Duration.ofSeconds(5));
WebElement tooltip = wait.until(ExpectedConditions.visibilityOfElementLocated(By.xpath("//*[contains(text(),'You hovered over the Button')]")));
Validate the Text
Comparing the captured text with the expected tooltip text.
  if (expectedTooltipText.equals(actualTooltipText)) {
            System.out.println("Tooltip text is correct!");
        } else {
            System.out.println("Tooltip text is incorrect!");
 }
The complete program is shown below:
package com.example;

import org.openqa.selenium.By;
import org.openqa.selenium.WebDriver;
import org.openqa.selenium.WebElement;
import org.openqa.selenium.chrome.ChromeDriver;
import org.openqa.selenium.chrome.ChromeOptions;
import org.openqa.selenium.interactions.Actions;
import org.openqa.selenium.support.ui.ExpectedConditions;
import org.openqa.selenium.support.ui.WebDriverWait;

import java.time.Duration;

public class TooltipTest_Demo {

    static WebDriver driver;
    static String expectedTooltipText = "You hovered over the Button";
    static String actualTooltipText;

    public static void main(String[] args) {

        ChromeOptions options = new ChromeOptions();
        driver = new ChromeDriver(options);
        driver.manage().window().maximize();

        driver.get("https://demoqa.com/tool-tips");

        // Locate the element with the tooltip
        WebElement elementWithTooltip = driver.findElement(By.id("toolTipButton"));

        // Perform hover action using Actions class
        Actions actions = new Actions(driver);
        actions.moveToElement(elementWithTooltip).perform();

        // Wait for the tooltip to be visible
        WebDriverWait wait = new WebDriverWait(driver, Duration.ofSeconds(5));
        WebElement tooltip = wait.until(ExpectedConditions.visibilityOfElementLocated(By.xpath("//*[contains(text(),'You hovered over the Button')]")));

        // Check the tooltip text
        actualTooltipText = tooltip.getText();
        System.out.println("Actual Tooltip Text: " + actualTooltipText);

        if (expectedTooltipText.equals(actualTooltipText)) {
            System.out.println("Tooltip text is correct!");
        } else {
            System.out.println("Tooltip text is incorrect!");
        }

        driver.quit();
    }

}
The output of the above program is
We are using WebDriverWaitto wait for the hover text to appear.
Summary
Custom ToolTip can be automated using Action class.
moveToElement(element) of Actions class is used to mouse hover an element.
Build() method of Actions class builds the sequence of user actions into an Action object.
Perform() of Action class executes all the sequence of user actions at once.
A keyword-driven framework is a software testing framework that separates the test script logic from the test data through a set of keywords or actions.
1. Keywords: Keywords or actions represent the basic building blocks of the test script. Examples of keywords can include “click,” “sendKeys,” “verifyText,” etc. These keywords are defined in a central repository or spreadsheet, along with the associated test data and expected results.
2. Test Data: Test data is the input or parameters required to perform a specific keyword action. It can be stored in a separate data source such as an Excel spreadsheet or XML file. Test data includes information like usernames, passwords, URLs, input values, and expected outcomes.
3. Test Scripts: Test scripts are developed to execute the keywords. Each test script consists of a series of actions driven by the keywords. The test script fetches the keyword from the central repository and performs the associated action using the test data. It also captures and verifies the results against the expected outcome.
4. Central Repository: The central repository contains all the keywords, associated test data, and expected results. It acts as a bridge between test scripts and test data, allowing for easy maintenance and modification.
Project Structure
Here is the final snapshot of our project.
Dependency List
Selenium – 4.21.0
TestNG – 7.10.2
Apache POI – 5.2.5
Commons – 2.16.1
Maven Surefire – 3.2.5
Maven Compiler – 3.13.0
Java 17
Maven – 3.9.6
Implementation Steps
Step 1- Download and Install Java
Selenium needs Java to be installed on the system to run the tests. Click here to learn How to install Java.
Step 2 – Download and setup Eclipse IDE on the system
The Eclipse IDE (integrated development environment) provides strong support for Java developers, which is needed to write Java code. Click here to learn How to install Eclipse.
Step 3 – Setup Maven
To build a test framework, we need to add many dependencies to the project. It is a very tedious and cumbersome process to add each dependency manually. So, to overcome this problem, we use a build management tool. Maven is a build management tool that is used to define project structure, dependencies, build, and test management. Click here to learn How to install Maven.
Step 6 – Create a Java Keyword Class for each page
In this example, we will access 2 web pages, “Login” and “Home” pages.
Hence, we will create 2 Java classes for keywords – LoginPageKeywords.java and HomePageKeywords.java and a BasePage class to initialize the driver using PageFactory.
BasePage
package com.example.pages;

import org.openqa.selenium.WebDriver;
import org.openqa.selenium.support.PageFactory;

public class BasePage {
    public WebDriver driver;

    public BasePage(WebDriver driver) {
        this.driver = driver;
        PageFactory.initElements(driver,this);
    }

}
LoginPageKeywords
package com.example.keywords;

import com.example.utils.ExcelUtils;
import org.openqa.selenium.WebDriver;
import org.openqa.selenium.WebElement;
import org.openqa.selenium.support.FindBy;

public class LoginPageKeywords extends BasePage{

    public LoginPageKeywords(WebDriver driver) {
        super(driver);

    }

    @FindBy(name = "username")
    public WebElement userName;

    @FindBy(name = "password")
    public WebElement password;

    @FindBy(xpath = "//*[@class='oxd-form']/div[1]/div/span")
    public WebElement missingUsernameErrorMessage;

    @FindBy(xpath = "//*[@class='oxd-form']/div[2]/div/span")
    public WebElement missingPasswordErrorMessage;

    @FindBy(xpath = "//*[@class='oxd-form']/div[3]/button")
    public WebElement loginBtn;

    @FindBy(xpath = "//*[@id='app']/div[1]/div/div[1]/div/div[2]/div[2]/div/div[1]/div[1]/p")
    public  WebElement errorMessage;


    public void enterUsername(String strUserName) {
        userName.sendKeys(strUserName);
    }

    public void enterPassword(String strPassword) {
        password.sendKeys(strPassword);
    }

    public void login() {
        loginBtn.click();
    }

    public void login(String strUserName, String strPassword) {

        userName.sendKeys(strUserName);
        password.sendKeys(strPassword);
    }

    public String getMissingUsernameText() {
        return missingUsernameErrorMessage.getText();
    }

    public String getMissingPasswordText() {
        return missingPasswordErrorMessage.getText();
    }

    public String getErrorMessage() {
        return errorMessage.getText();
    }

    public LoginPageKeywords saveTestResults(int row, int column) {
        ExcelUtils.rowNumber = row ;
        ExcelUtils.columnNumber = column;
        return this;
    }

}
HomePageKeywords
package com.example.keywords;

import org.openqa.selenium.WebDriver;
import org.openqa.selenium.WebElement;
import org.openqa.selenium.support.FindBy;

public class HomePageKeywords extends BasePage {

    public HomePageKeywords(WebDriver driver) {
        super(driver);

    }

    @FindBy(xpath = "//*[@id='app']/div[1]/div[1]/header/div[1]/div[1]/span/h6")
    public  WebElement homePageUserName;

    public String verifyHomePage() {
        return homePageUserName.getText();
    }
}
Step 7 – Create an ExcelUtils Class
To manipulate Excel files and do Excel operations, we should create an Excel file and call it “ExcelUtils” under the utilspackage as shown below.
package com.example.utils;

import org.apache.poi.ss.usermodel.DataFormatter;
import org.apache.poi.xssf.usermodel.XSSFCell;
import org.apache.poi.xssf.usermodel.XSSFRow;
import org.apache.poi.xssf.usermodel.XSSFSheet;
import org.apache.poi.xssf.usermodel.XSSFWorkbook;

import java.io.FileInputStream;
import java.io.FileOutputStream;
import java.io.IOException;

public class ExcelUtils {


    public static String testDataExcelPath = null; //Location of Test data excel file
    private static XSSFWorkbook excelWorkBook; //Excel WorkBook
    private static XSSFSheet excelWorkSheet; //Excel Sheet
    private static XSSFCell cell; //Excel cell
    private static XSSFRow row; //Excel row
    public static int rowNumber; //Row Number
    public static int columnNumber; //Column Number
    public static FileInputStream ExcelFile;

    public static DataFormatter formatter;
    public static FileOutputStream fileOut;


    // This method has two parameters: "Test data excel file name" and "Excel sheet name"
    // It creates FileInputStream and set excel file and excel sheet to excelWBook and excelWSheet variables.
    public static void setExcelFileSheet(String sheetName) throws IOException {

        testDataExcelPath = Constants.currentDir + Constants.resourcePath;

        // Open the Excel file
        ExcelFile = new FileInputStream(testDataExcelPath + Constants.testDataExcelFileName);
        excelWorkBook = new XSSFWorkbook(ExcelFile);
        excelWorkSheet = excelWorkBook.getSheet(sheetName);

    }

    //This method reads the test data from the Excel cell.
    public static String getCellData(int rowNum, int colNum) {
        cell = excelWorkSheet.getRow(rowNum).getCell(colNum);
        formatter = new DataFormatter();
        return formatter.formatCellValue(cell);
    }

    //This method takes row number as a parameter and returns the data of given row number.
    public static XSSFRow getRowData(int rowNum) {
        row = excelWorkSheet.getRow(rowNum);
        return row;
    }

    //This method gets excel file, row and column number and set a value to the that cell.
    public static void setCellData(String value, int rowNum, int colNum) throws IOException {
        row = excelWorkSheet.getRow(rowNum);
        cell = row.getCell(colNum);
        if (cell == null) {
            cell = row.createCell(colNum);
            cell.setCellValue(value);
        } else {
            cell.setCellValue(value);
        }

        // Write to the workbook
        fileOut = new FileOutputStream(testDataExcelPath + Constants.testDataExcelFileName);
        excelWorkBook.write(fileOut);
        fileOut.flush();
        fileOut.close();
    }
}
In this file, I wrote all Excel operation methods.
setExcelFileSheet: This method has two parameters: “testdata.xlsx” and “LoginData”. It creates FileInputStream and sets Excel file and Excel sheet to excelWorkBook and excelWorkSheet variables.
getCellData: This method reads the test data from the Excel cell. We are passing row numbers and column numbers as parameters.
getRowData: This method takes the row number as a parameter and returns the data of the given row number.
setCellData: This method gets an Excel file, row, and column number andsets a value to that cell.
Step 8 – Create a Listener Class
We need to create a TestNG Listener class to check the status of each of the tests.
import com.example.tests.BaseTests;
import org.openqa.selenium.WebDriver;
import org.testng.ITestContext;
import org.testng.ITestListener;
import org.testng.ITestResult;
import java.io.IOException;

public class TestListener implements ITestListener {

    private static String getTestMethodName(ITestResult iTestResult) {
        return iTestResult.getMethod().getConstructorOrMethod().getName();
    }

    @Override
    public void onStart(ITestContext iTestContext) {
        System.out.println("I am in onStart method :" + iTestContext.getName());
    }

    @Override
    public void onFinish(ITestContext iTestContext) {
        System.out.println("I am in onFinish method :" + iTestContext.getName());
    }

    @Override
    public void onTestStart(ITestResult iTestResult) {
        System.out.println("I am in onTestStart method :" + getTestMethodName(iTestResult) + ": start");
    }

    @Override
    public void onTestSuccess(ITestResult iTestResult)  {
        System.out.println("I am in onTestSuccess method :" + getTestMethodName(iTestResult) + ": succeed");
        try {
            ExcelUtils.setCellData("PASSED", ExcelUtils.rowNumber, ExcelUtils.columnNumber);
        } catch (IOException e) {
            throw new RuntimeException(e);
        }
    }

    @Override
    public void onTestFailure(ITestResult iTestResult)  {
        System.out.println("I am in onTestFailure method :" + getTestMethodName(iTestResult) + " failed");
        try {
            ExcelUtils.setCellData("FAILED", ExcelUtils.rowNumber, ExcelUtils.columnNumber);
        } catch (IOException e) {
            throw new RuntimeException(e);
        }
    }

    @Override
    public void onTestSkipped(ITestResult iTestResult) {
        System.out.println("I am in onTestSkipped method :" + getTestMethodName(iTestResult) + ": skipped");
        try {
            ExcelUtils.setCellData("SKIPPED", ExcelUtils.rowNumber, ExcelUtils.columnNumber);
        } catch (IOException e) {
            throw new RuntimeException(e);
        }
    }

    @Override
    public void onTestFailedButWithinSuccessPercentage(ITestResult iTestResult) {
        System.out.println("Test failed but it is in defined success ratio " + getTestMethodName(iTestResult));
    }
}
Step 9 – Create a Constant Class
Create a new class file named “Constants” in the utils package in which the tester will define constants like URL, filePath, and excelData. The source code looks as below:
package com.example.utils;

public class Constants {

    public static final String testDataExcelFileName = "Test_Cases.xlsx"; //Global test data excel file
    public static final String currentDir = System.getProperty("user.dir");  //Main Directory of the project
    public static final String resourcePath = "\\src\\test\\resources\\";  //Main Directory of the project
    public static final String excelTestDataName = "LoginData";
}
Step 10 – Create a BaseTests Class
This BaseTests class contains the setup and tearDown methods to initialize the driver at the start of the test and exit the driver at the end of the test.
import org.openqa.selenium.WebDriver;
import org.openqa.selenium.chrome.ChromeDriver;
import org.openqa.selenium.chrome.ChromeOptions;
import org.testng.annotations.AfterMethod;
import org.testng.annotations.BeforeMethod;

import java.time.Duration;

public class BaseTests {

    public static WebDriver driver;
    public final static int TIMEOUT = 10;

    @BeforeMethod
    public void setup() {

        ChromeOptions options = new ChromeOptions();
        options.addArguments("--remote-allow-origins=*");
        options.addArguments("--no-sandbox");
        options.addArguments("--disable-dev-shm-usage");
        options.addArguments("--headless");
        driver = new ChromeDriver(options);
        driver.manage().window().maximize();
        driver.get("https://opensource-demo.orangehrmlive.com/");
        driver.manage().timeouts().implicitlyWait(Duration.ofSeconds(TIMEOUT));

    }

    @AfterMethod
    public void tearDown() {
        driver.quit();
    }

}
Step 11 – Create a Test Excel File
Create a test file – Test_Cases.xlsx and place it in src/test/resources. I have stored the following data in the file.
Sno – Numbering of the test cases
Name – Name of the test case
Step_ID – Number of each step of a test case
Description – Detail of each keyword
Keyword – Keyword defined for each step
InputData – This is an optional field. We need this field to provide the input data like username, password, error message, and other validations.
ExpectedResponse – This is the response we expect to get from the execution for the particular test.
ActualResponse – This is the response we get after the execution of the particular test
Status – This could be pass, fail, skip
Step 12 – Create the Tests in src/test/java
In the below LoginPageTests class, we have 2 different tests and the test result will be saved in Test_Cases.xlsx file for both the tests.
1) b) Selenium is the open-source test automated tool to test web-based UI which supports many different languages like Java, Python, Perl, PHP, Ruby, and C#.
2) a) Interface
WebDriver is an interface in Selenium which provides a simple interface to interact with and test web applications. It encompasses several implementations like ChromeDriver, FirefoxDriver, and others, each corresponding to different web browsers.
3) e) WebElement
WebElement is not considered a standalone component of Selenium; instead, it is an interface within Selenium WebDriver used to represent elements on a web page.
4) b) ASP
5) b) Compilation error- Cannot instantiate the type WebDriver
In Selenium, WebDriveris an interface, and you cannot instantiate an interface directly. You need to create an instance of a class that implements the WebDriverinterface, such as ChromeDriver, FirefoxDriver, etc.
WebDriver driver = new ChromeDriver();
6) c) Chromedriver
To run Selenium WebDriver scripts on the Chrome browser, we use ChromeDriver.
// Initialize ChromeDriver
WebDriver driver = new ChromeDriver();
7) d) i, ii, iii
8) a) thread.sleep();
It can be used to pause the execution in Java (and consequently in Selenium tests) for a specified duration, it is not considered a Selenium-specific wait mechanism.
11) b) driver.close() closes the current window and d) driver.quit() closes every associated window with this driver and quits the driver
12) b) //tag-name[@attribute=’attribute value’]
13) a) isDisplayed()
It returns true if the element is visible and false if it is not.
14) b) isEnabled()
It returns true if the element is enabled and false if it is not.
15) b) StaleElementReferenceException
This exception is thrown when a web element that was previously located is no longer present in the DOM (Document Object Model). If the web page is refreshed or modified after locating an element, the reference to that element may become stale, leading to this exception.
16) b) .*
17) a) WebElement element = driver.findElement(By.xpath(“//*[contains(text(), ‘ QAAutomation’)]”));
i. navigate().to("url") - driver.navigate().to("https://www.qaautomation.expert");
ii. open("url") - driver.get("https://www.qaautomation.expert");
20) a) sendKeys() is used to enter the text inthe textbox.
// Locate the text box element
WebElement textBox = driver.findElement(By.id("textboxId"));

// Enter text into the text box
textBox.sendKeys("Sample text");