Integration Of Jenkins With Selenium WebDriver

HOME

What is Jenkins?

Jenkins is a well-known open-source tool that aids in the implementation of Continuous Integration (CI) and Continuous Deployment/Continuous Delivery (CD) processes by automating parts of the software development pipeline such as building, testing, and deployment.

What is Selenium?

Selenium is an open-source automation tool that has been widely used for testing web applications.  It is basically a suite of software or a set of JAR files to automate web browsers across various browsers. Selenium is used by many companies, but a few to mention are Netflix, Google, HubSpot, Fitbit, and more.  Selenium supports multiple languages like Python, Pearl, Ruby, .Net, Java, C#, PHP. 

Selenium supports parallel test execution. That means we can open multiple browsers at the same time and execute the test cases. This decrease the execution time significantly. Selenium supports Cross browser test execution.

Jenkins Integration With Selenium 

It is recommended to go through these tutorials:-

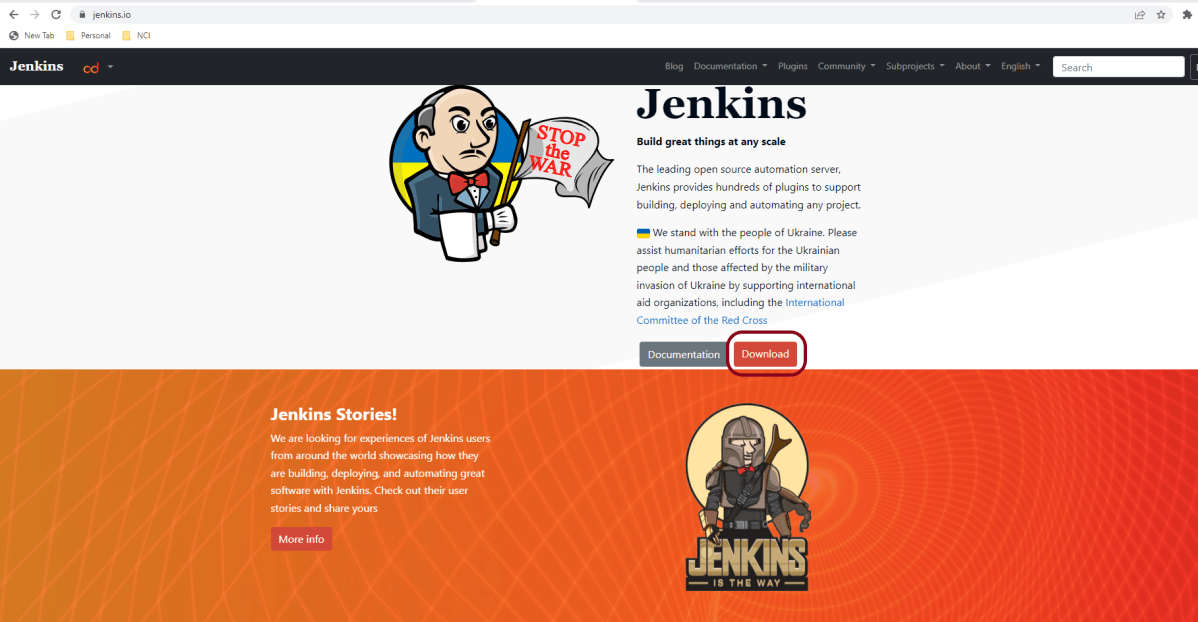
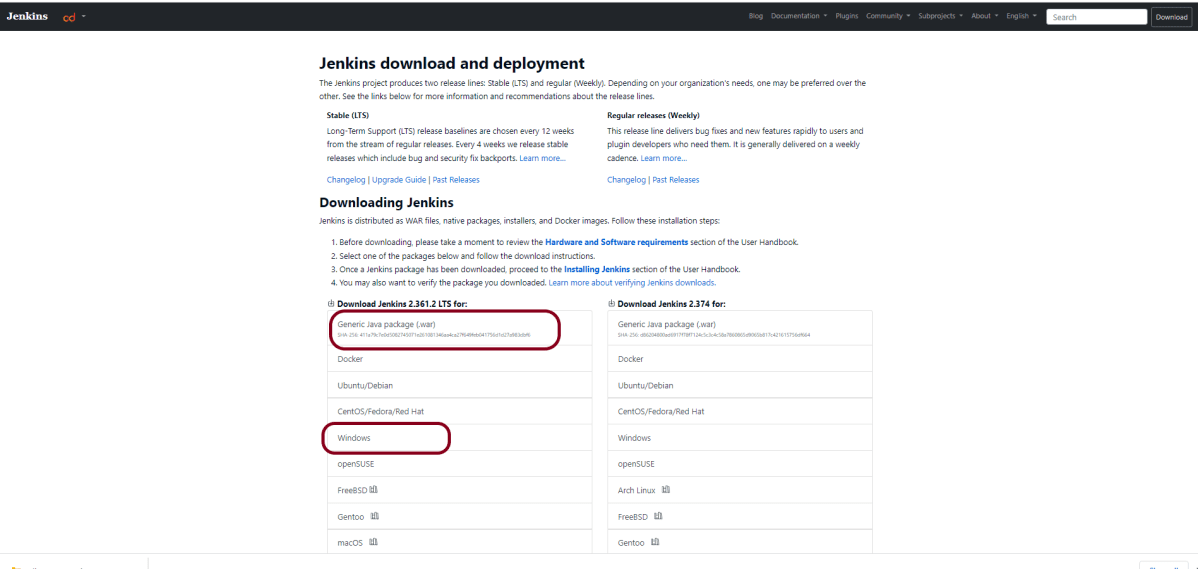
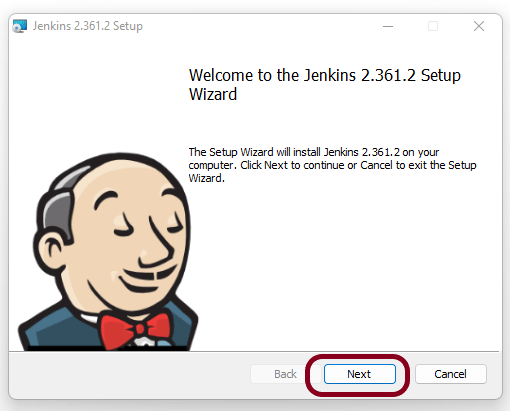
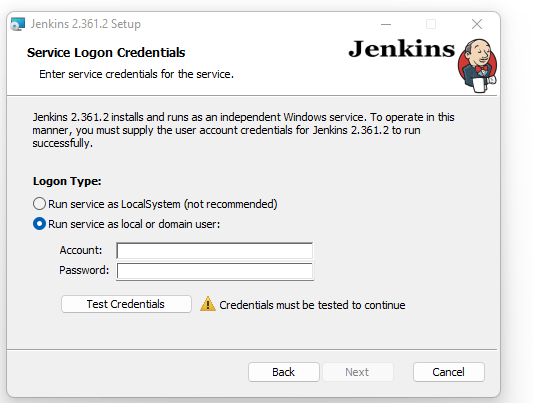
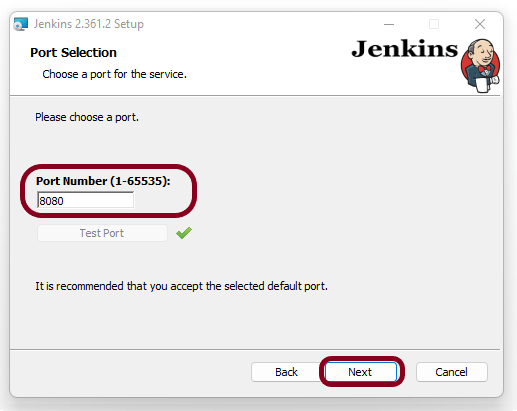
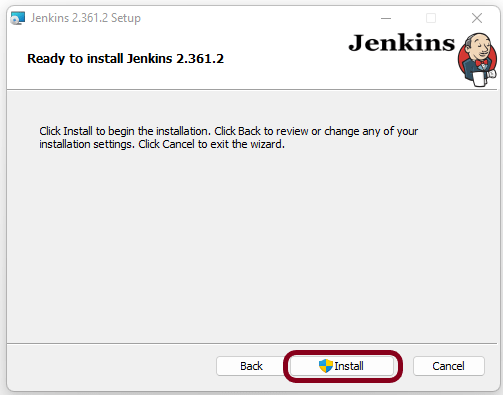
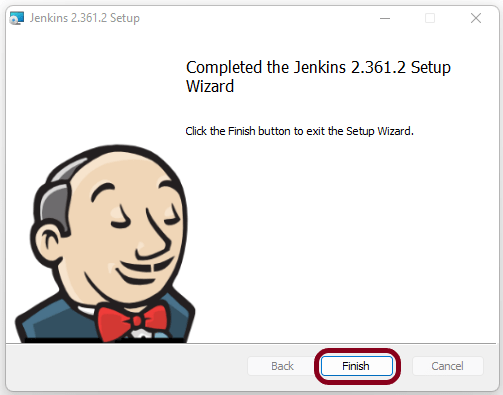
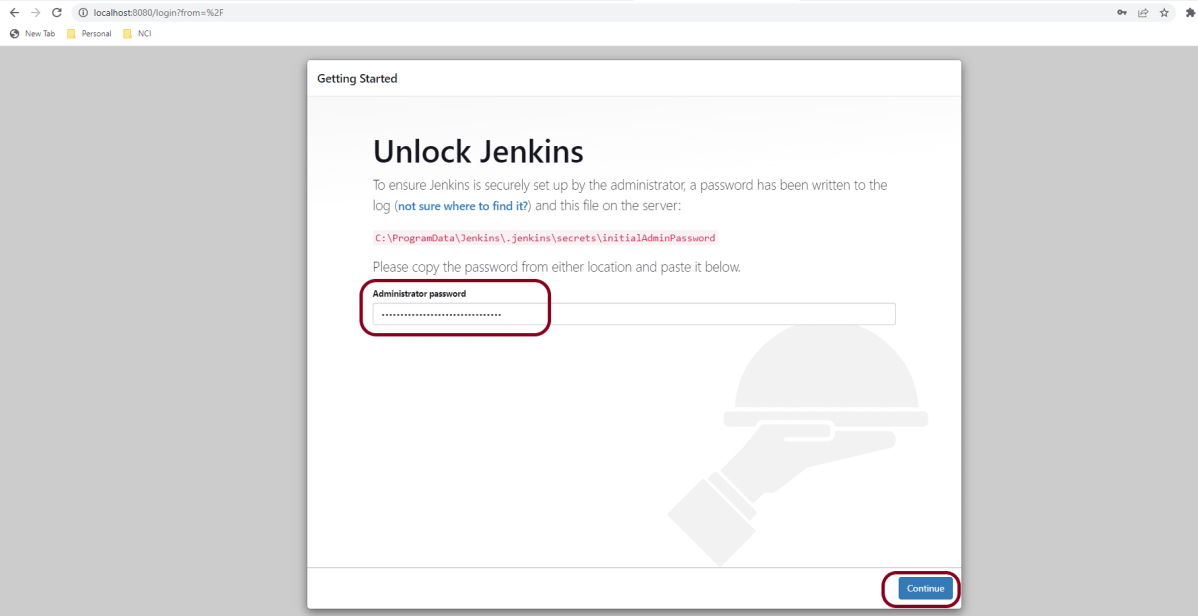
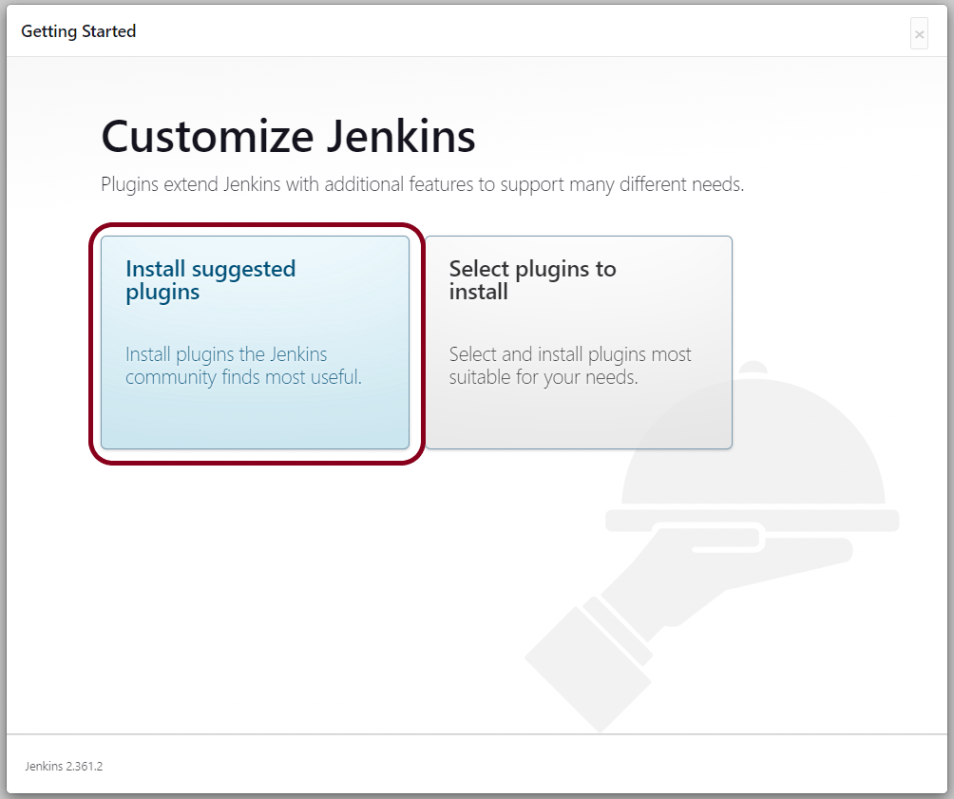
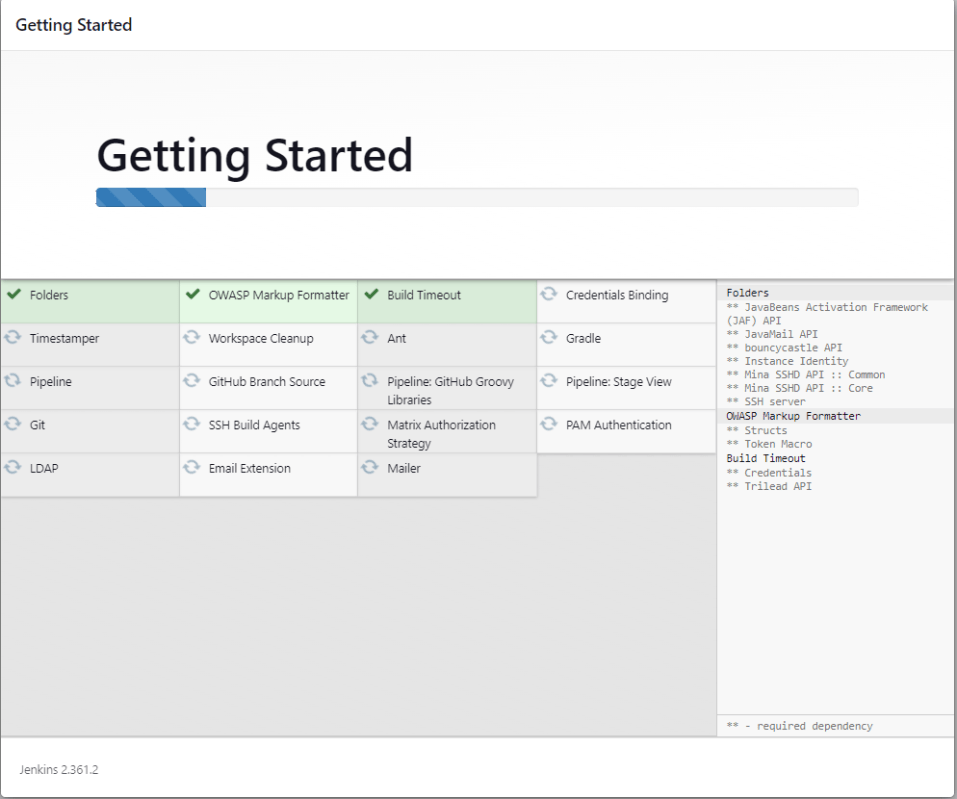
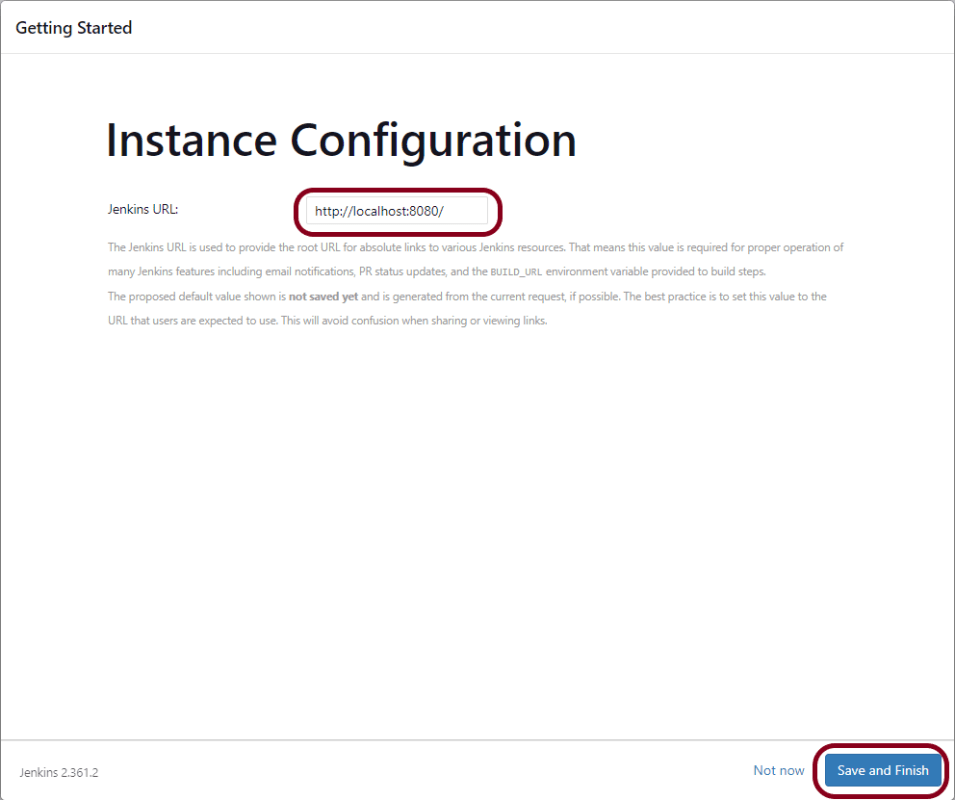
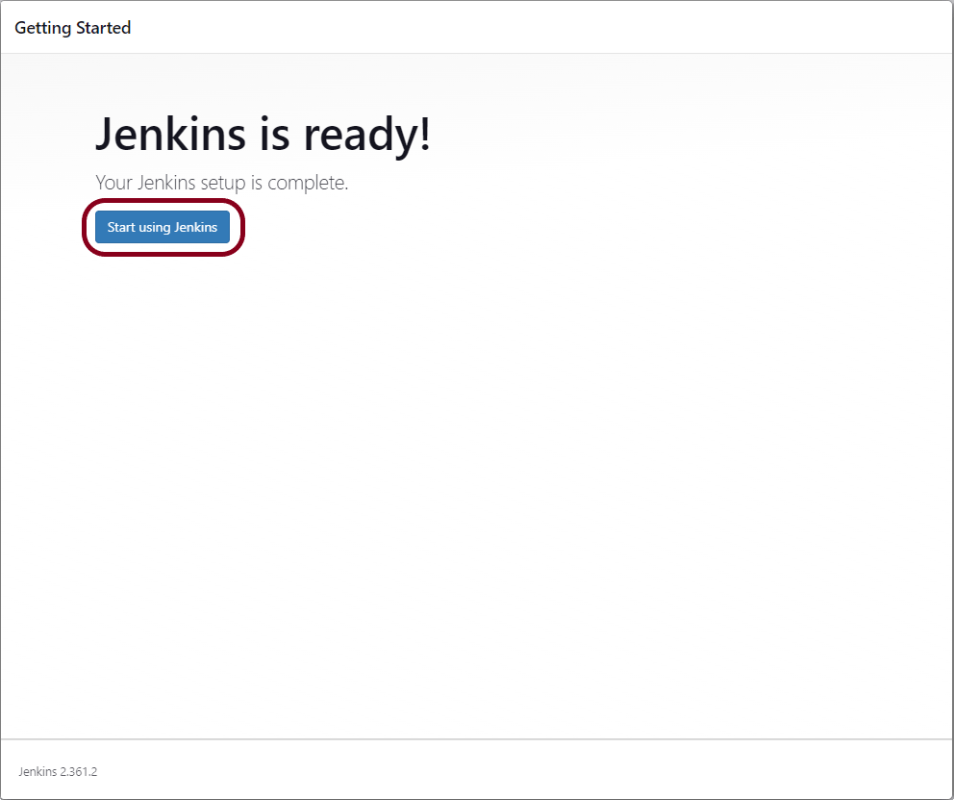
Download and install Jenkins on Windows10

Configure JAVA_HOME and MAVEN_HOME

Implementation Steps

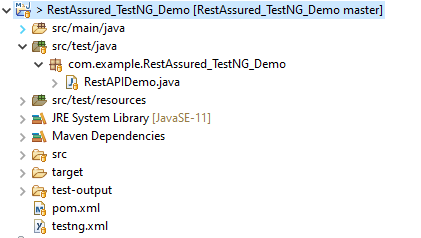
Step 1 – Create a project for running the tests using Selenium WebDriver and TestNG

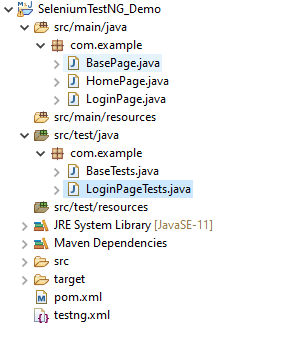
Step 2 – Create the Test Code

Below is the sample POM.xml.

<project xmlns="http://maven.apache.org/POM/4.0.0" xmlns:xsi="http://www.w3.org/2001/XMLSchema-instance" xsi:schemaLocation="http://maven.apache.org/POM/4.0.0 https://maven.apache.org/xsd/maven-4.0.0.xsd">
	<modelVersion>4.0.0</modelVersion>
	<groupId>com.example</groupId>
	<artifactId>SeleniumTestNG_Demo</artifactId>
	<version>0.0.1-SNAPSHOT</version>

	<properties>
		<project.build.sourceEncoding>UTF-8</project.build.sourceEncoding>
		<selenium.version>4.3.0</selenium.version>
		<testng.version>7.6.0</testng.version>
		<webdrivermanager.version>5.2.1</webdrivermanager.version>
		<apache.common.version>2.4</apache.common.version>
		<maven.compiler.plugin.version>3.10.1</maven.compiler.plugin.version>
		<maven.compiler.source.version>11</maven.compiler.source.version>
		<maven.compiler.target.version>11</maven.compiler.target.version>
		<maven.surefire.plugin.version>3.0.0-M7</maven.surefire.plugin.version>

	</properties>

	<dependencies>

		<!-- Selenium -->
		<dependency>
			<groupId>org.seleniumhq.selenium</groupId>
			<artifactId>selenium-java</artifactId>
			<version>${selenium.version}</version>
		</dependency>

		<!-- TestNG -->
		<dependency>
			<groupId>org.testng</groupId>
			<artifactId>testng</artifactId>
			<version>${testng.version}</version>
			<scope>test</scope>
		</dependency>

		<!-- Web Driver Manager -->
		<dependency>
			<groupId>io.github.bonigarcia</groupId>
			<artifactId>webdrivermanager</artifactId>
			<version>${webdrivermanager.version}</version>
		</dependency>

		<dependency>
			<groupId>org.hamcrest</groupId>
			<artifactId>hamcrest</artifactId>
			<version>2.2</version>
			<scope>test</scope>
		</dependency>
			
		<!-- Allure Report -->	
		<dependency>
        <groupId>io.qameta.allure</groupId>
        <artifactId>allure-testng</artifactId>
        <version>${allure.testng.version}</version>
        <scope>test</scope>
    </dependency>

	</dependencies>

	<build>
		<plugins>
			<plugin>
				<groupId>org.apache.maven.plugins</groupId>
				<artifactId>maven-compiler-plugin</artifactId>
				<version>${maven.compiler.plugin.version}</version>
				<configuration>
					<source>${maven.compiler.source.version}</source> 
					<target>${maven.compiler.target.version}</target> 
				</configuration>
			</plugin>
			 <plugin>
              <groupId>org.apache.maven.plugins</groupId>
              <artifactId>maven-surefire-plugin</artifactId>
              <version>${maven.surefire.plugin.version}</version>
              <configuration>
                    <suiteXmlFiles>
                        <suiteXmlFile>testng.xml</suiteXmlFile>
                    </suiteXmlFiles>
             </configuration>          
        </plugin>
      </plugins>
  </build>
</project>

BasePage

package com.example;

import org.openqa.selenium.WebDriver;
import org.openqa.selenium.support.PageFactory;

public class BasePage {
	
	  public WebDriver driver;

	  public BasePage(WebDriver driver) {
		  this.driver = driver;
		  PageFactory.initElements(driver,this);
	}

}

HomePage

import org.openqa.selenium.WebDriver;
import org.openqa.selenium.WebElement;
import org.openqa.selenium.support.FindBy;

public class HomePage extends BasePage {

	public HomePage(WebDriver driver) {
		super(driver);

	}

	  @FindBy(xpath = "//*[@id='app']/div[1]/div[1]/header/div[1]/div[1]/span/h6")
	  public  WebElement homePageUserName;

	  public String getHomePageText() {
	       return homePageUserName.getText();
   }

}

LoginPage

import org.openqa.selenium.WebDriver;
import org.openqa.selenium.WebElement;
import org.openqa.selenium.support.FindBy;

public class LoginPage extends BasePage{
	
	 public LoginPage(WebDriver driver) {
		 super(driver);
		
    }
	
	@FindBy(name = "username")
    public WebElement userName;
 
    @FindBy(name = "password")
    public WebElement password;
 
    @FindBy(xpath = "//*[@id='app']/div[1]/div/div[1]/div/div[2]/div[2]/form/div[3]/button")
    public WebElement login;
 
    @FindBy(xpath = "//*[@id='app']/div[1]/div/div[1]/div/div[2]/div[2]/div/div[1]/div[1]/p")
    public  WebElement errorMessage;
   
    
    public void login(String strUserName, String strPassword) {
    	 
    	userName.sendKeys(strUserName);
    	password.sendKeys(strPassword);
    	login.click();
 
    }
  
   
    public String getErrorMessage() {
        return errorMessage.getText();
    }
    
}

BaseTests

import java.time.Duration;
import org.openqa.selenium.WebDriver;
import org.openqa.selenium.chrome.ChromeDriver;
import org.testng.annotations.AfterMethod;
import org.testng.annotations.BeforeMethod;
import io.github.bonigarcia.wdm.WebDriverManager;

public class BaseTests {
	
	public static WebDriver driver;
	public final static int TIMEOUT = 10;    
 
	@BeforeMethod
    public void setup() {
    	WebDriverManager.chromedriver().setup();
	    driver = new ChromeDriver();
	    driver.manage().window().maximize();
	    driver.get("https://opensource-demo.orangehrmlive.com/");	    
	    driver.manage().timeouts().implicitlyWait(Duration.ofSeconds(TIMEOUT));

    }
   
    @AfterMethod
    public void tearDown() {
        driver.quit();
    }
    
}

LoginPageTests

import org.testng.Assert;
import org.testng.annotations.Test;

public class LoginPageTests extends BaseTests{
	 

    @Test
    public void invalidCredentials() {
   
	    LoginPage objLoginPage = new LoginPage(driver);
    	objLoginPage.login("admin$$", "admin123");
    	 
    	// Verify Error Message
    	 Assert.assertEquals("Invalid credentials",objLoginPage.getErrorMessage());
    
    }
    

    @Test
    public void validLogin() {
   
	    LoginPage objLoginPage = new LoginPage(driver);
    	objLoginPage.login("Admin", "admin123");
    	 
    	HomePage objHomePage = new HomePage(driver);
    	
    	// Verify Home Page
    	Assert.assertEquals("Dashboard",objHomePage.getHomePageText());
    
    }
     
}

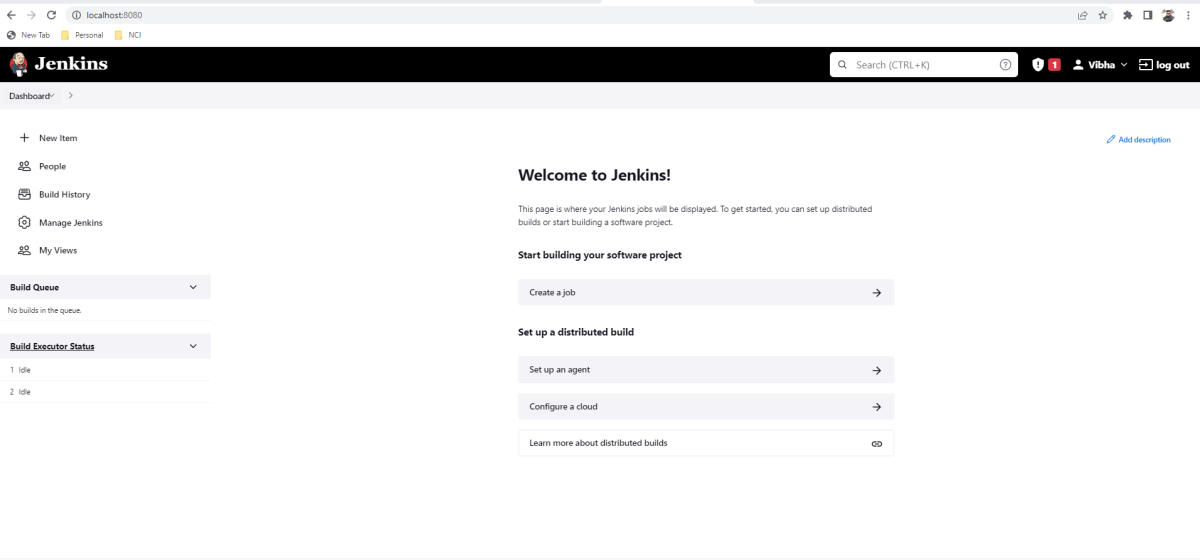
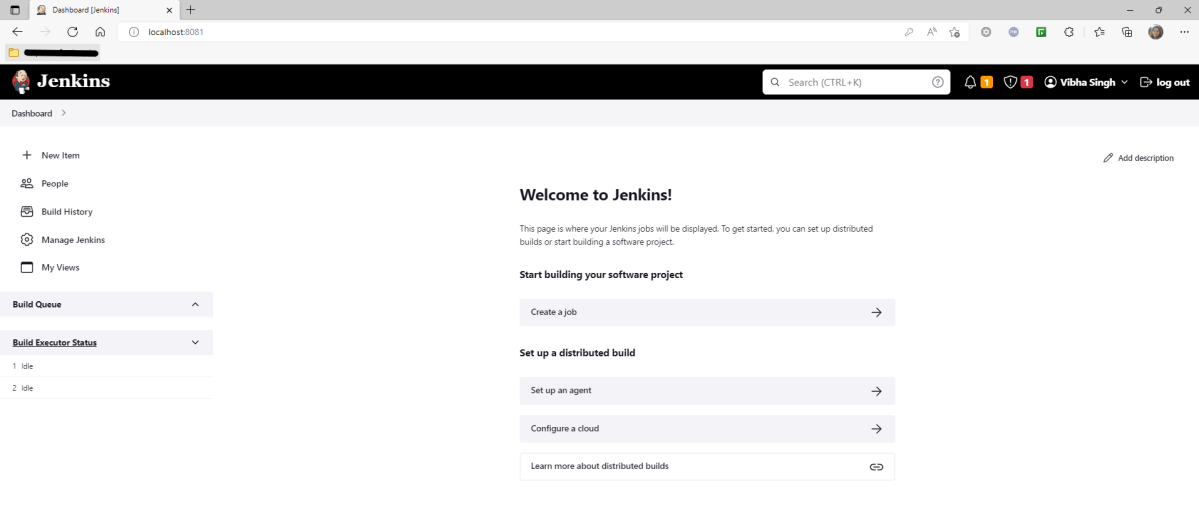
Step 3 – Start Jenkins

Open the Jenkins dashboard – http://localhost:8081/.  In the Jenkins dashboard, click New Item to create a new project.  

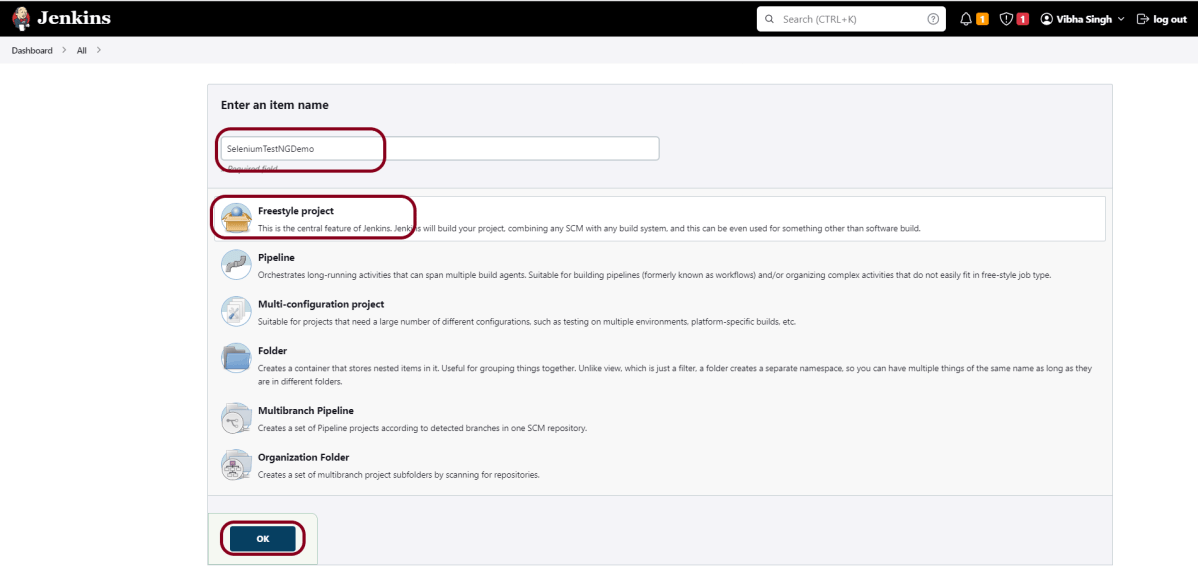
Step 4 – Create a FreeStyle project in Jenkins

Specify the name of the project and click the Freestyle Project option. Click the OK button.

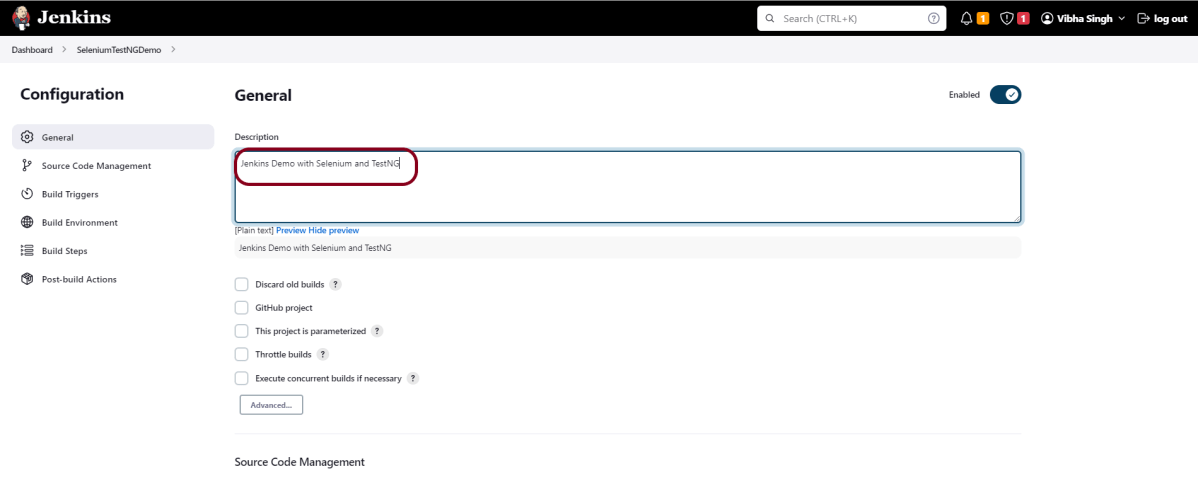
Step 5 – Mention the description

In the General section, enter the project description in the Description box.

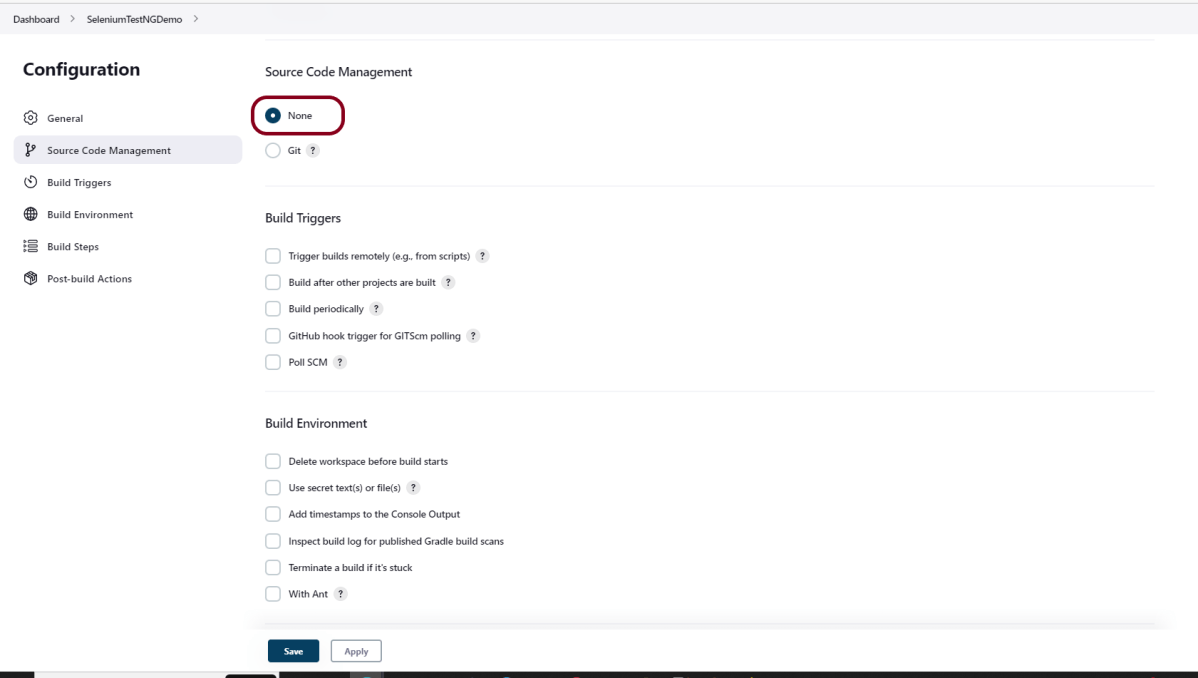
Step 6 – Source Management

In the Source Code Management section, select None.


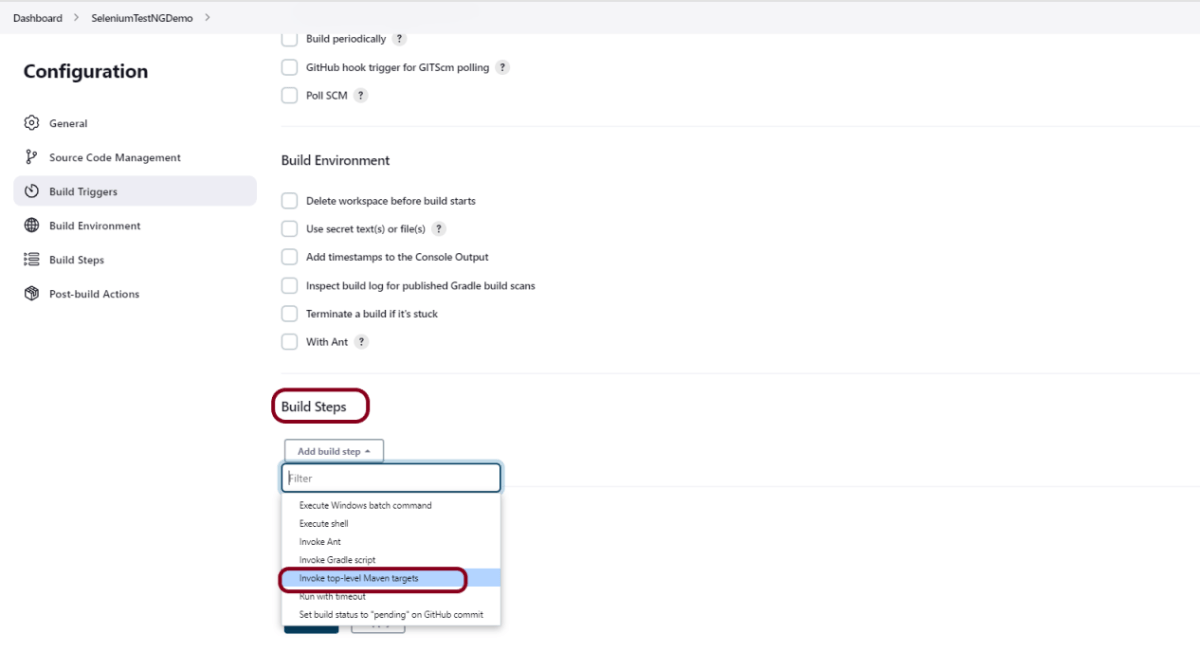
Step 7 – Select Invoke top-level Maven targets in build steps

In the Build Steps section, select Invoke top-level Maven targets.

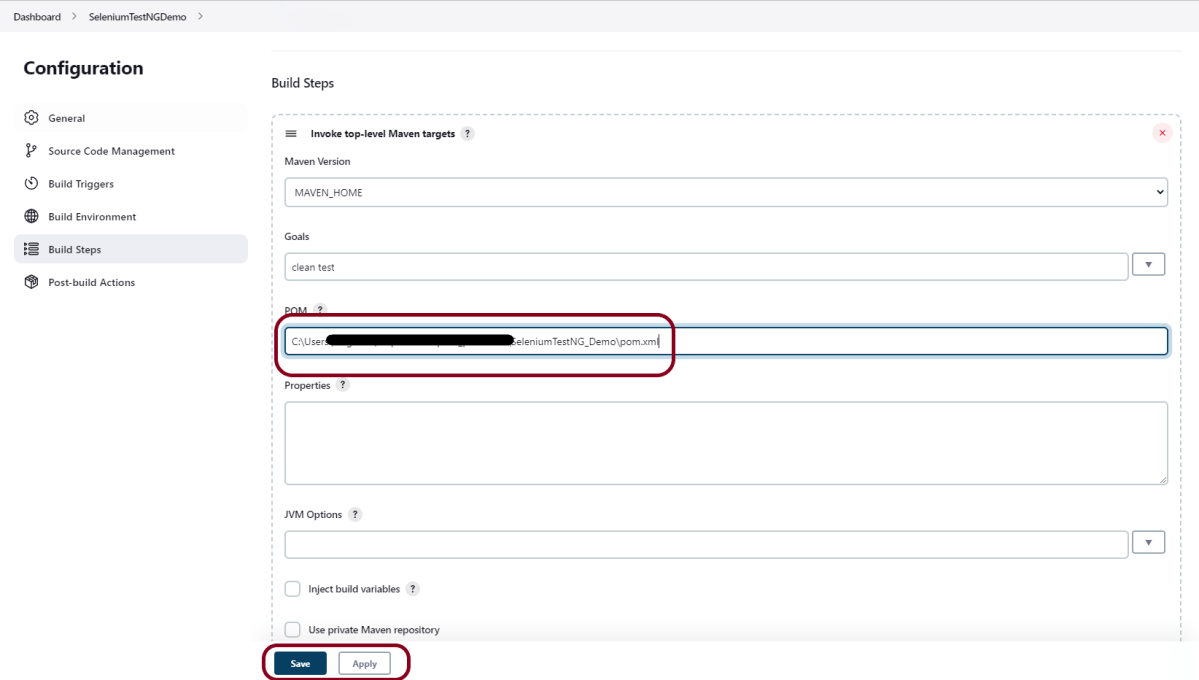
Step 8 – Provide the build steps

The Build Steps window will extend. Mention the below details:-

Maven Version – MAVEN_HOME

Goals – clean test

Click on the Advanced button.

Step 9 – Mention the path of the project

Specify the full path to pom.xml in POM. Click on the Apply Button and then on the Save button.

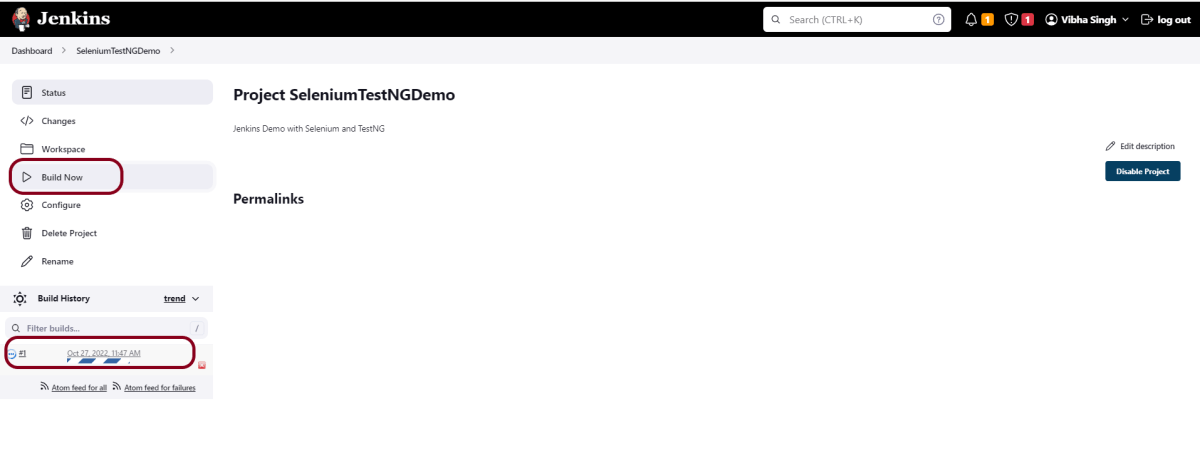
Step 10 – Verify the the project is created in Jenkins

The below screen shows that a new project with the name of SeleniumTestNGDemo is created.

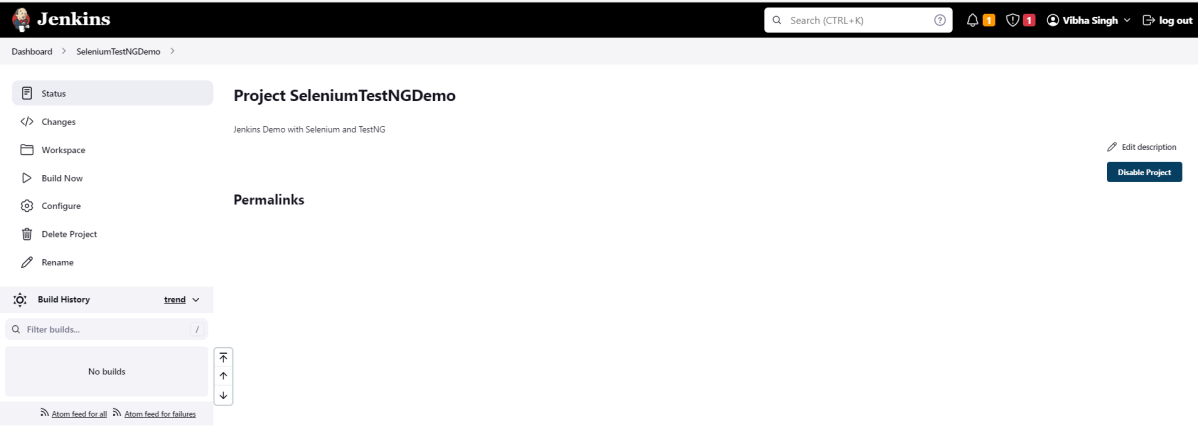
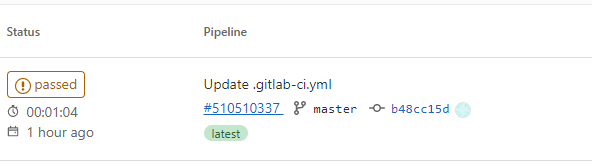
Step 11 – Execute the tests

Click on the Build Now option to run the tests.

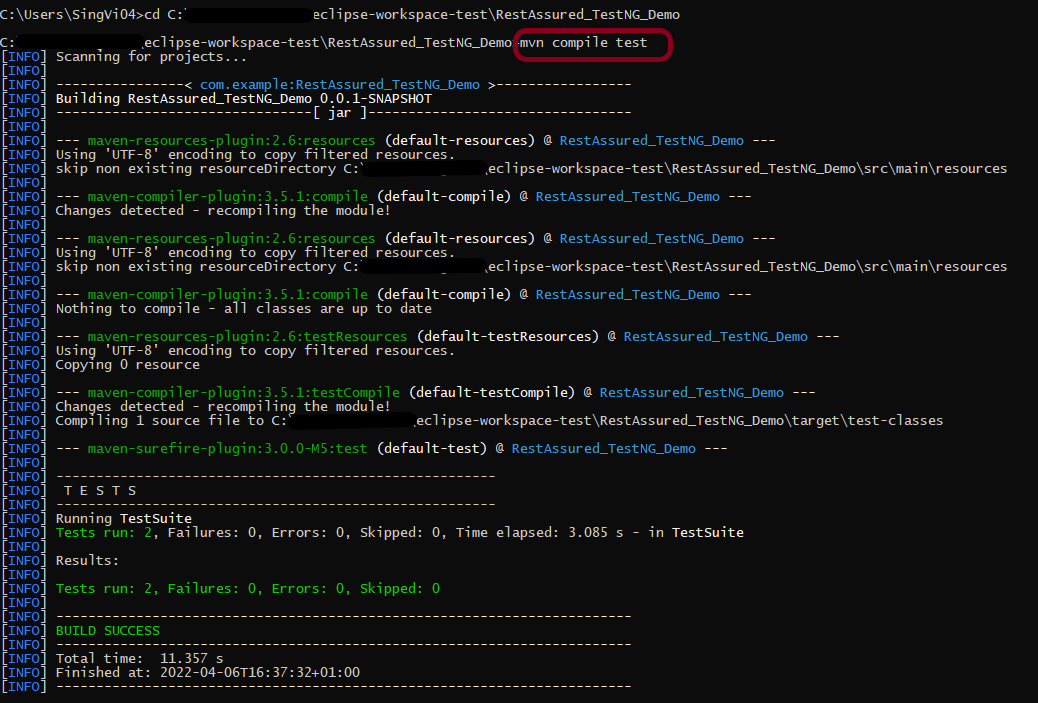
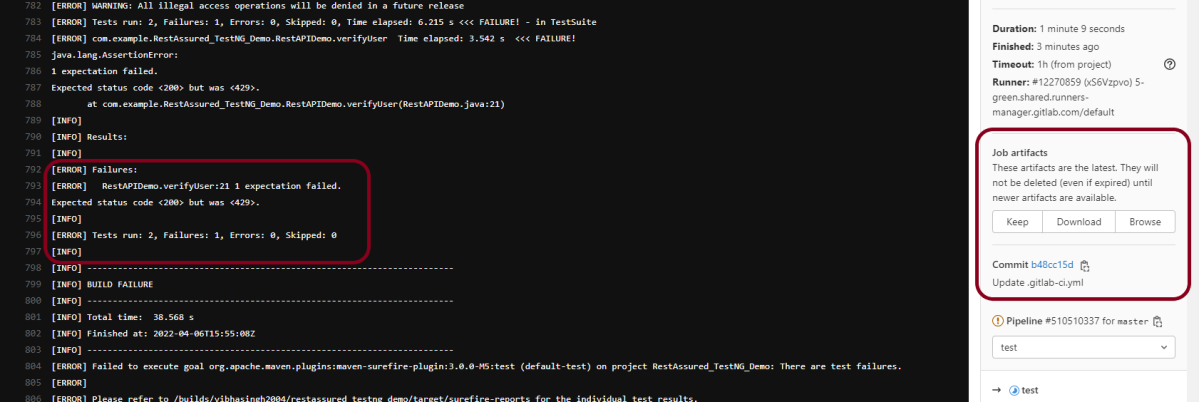
Step 12 – View the execution result

Click on the Console Output to see the test execution result.

Congratulations on making it through this tutorial and hope you found it useful! Happy Learning!! Cheers!!

Additional Tutorials on Jenkins

How to install Jenkins on Windows 10

HOME

What is Jenkins?

Jenkins is a well-known open-source tool that aids in the implementation of Continuous Integration (CI) and Continuous Deployment/Continuous Delivery (CD) processes by automating parts of the software development pipeline such as building, testing, and deployment.

It provides a centralized platform for automating the entire build pipeline, from code changes to automatic build creation, auto-execution of all layers of tests (Unit, Integration, and End to End), and finally, auto-deploying the successful build.

This allows developers to make more frequent changes while also giving end users more freedom by making new features available more frequently.

What are the prerequisites for the installation of Jenkins?

Hardware Requirements

  • 256 MB of RAM, although more than 2 GB is recommended
  • 10 GB of drive space (for Jenkins and your Docker image)

Software Requirement

  • Java 11 or Java 17
  • Docker (navigate to Get Docker site to access the Docker download that’s suitable for your platform)
  • Web Browser – Any of the browsers such as Google Chrome, Mozilla Firefox, Microsoft Internet Explorer, Microsoft Edge, Safari
  • Operating System – Jenkins supports almost all the modern operating systems such as Windows, macOS, Linux flavors such as Red Hat, Ubuntu, OpenSUSE, Gentoo, etc.

Installation Steps

Step 1 – Firstly, go to the official Jenkins website and click on the Download button.

Step 2 –  After clicking on the Download button, we will be redirected to the download page.

As we can see, Jenkins produces two releases, one is a stable release, and the other one is the regular bug fixes, which comes every week for all the operating system. I prefer to use the stable version.

Click on the window, and it will download jenkins.msi.

Step 3 – Double-click on jenkins.msi and a dialog box will appear

Step 4 – Choose the location where you want to have the Jenkins instance installed (default location is C:\Program Files\Jenkins), then click on the Next button.

Step 5 – Enter the service logon credentials. It is recommended to select the second option “Run service as local or domain user” as it is more secure.

To run the Jenkins service using this option, you have to enter the domain username and password. Click on the “Test Credentials” button to test your domain credentials, and you will enable the “Next” button. Then, click on the “Next” button after it appears.

Step 6 – Enter the port on which Jenkins will be running. Click on the “Test Port” button to validate if it is free. 

Step 7 – Select the Java home directory, and then click on the “Next” button.

Step 8 – Select any other services that need to be installed with Jenkins and click on the “Next” button.

Step 9 – Click the “Install” button to start the installation process.

Step 10 – When done, click on “Finish” to complete the installation process. Now that the installation process is out of the way, you need to follow a few more quick steps before you start using Jenkins on Windows.

Unlock Jenkins For Windows

 Step 1 – You will automatically be redirected to a local Jenkins page, or you can paste the URL http://localhost:8080 in a browser.

Step 2 – Copy the content of the initialAdminPassword file and paste it into the Administrator password field. Then, click the Continue button.

Step 3 – You can install either the suggested plugins or the selected plugins you choose based on your needs. To keep it simple, we will install the suggested plugins that the Jenkins community finds most useful.

Step 4 – Wait until the plugins are completely installed.

Step 5 – The next thing that you should do is create an Admin user for Jenkins. Then, enter your details and click Save and Continue.

Step 6 – Click on Save and Finish to complete the Jenkins installation.

Step 7 – Now, click on the “Start using Jenkins” button to start Jenkins.

Step 8 – Finally, here is the default Jenkins page. Jenkins is now installed and running on Windows, and you are ready to start building your CI/CD pipeline.

Congratulations!! We have installed Jenkins on Windows 10 successfully.

How to run Rest API Tests in GitLab CI/CD

HOME

This tutorial explains the process to run the Rest API Tests in the GitLab pipeline. This is a significant step towards achieving CI/CD. Ideally, the tests need to run after any change (minor/major) before merging the change to the master branch. Suppose there are 100 changes in a day, and any QA won’t want to start the tests manually 100 times in a day. So, now adding tests to the GitLab pipeline comes into the picture. We can add a test stage to the pipeline and the tests will run automatically when the pipeline run, or we can schedule the tests to run automatically every hour or day using GitLab pipeline.

Prerequisite:

  1. Rest Assured – 4.3.3
  2. Java 11
  3. Maven / Gradle
  4. TestNG /JUnit
  5. GitLab account

To use GitLab CI/CD, we need to keep 2 things in mind:-

a) Make sure a runner is available in GitLab to run the jobs. If there is no runner, install GitLab Runner and register a runner for your instance, project, or group.

b) Create a .gitlab-ci.yml file at the root of the repository. This file is where you define your CI/CD jobs.

Step 1 – Create a new Maven Project

Step 2 – Add dependencies to the project

<dependencies>
      
      <dependency>
         <groupId>org.testng</groupId>
         <artifactId>testng</artifactId>
         <version>7.4.0</version>
         <scope>test</scope>
      </dependency>
      
      <dependency>
         <groupId>io.rest-assured</groupId>
         <artifactId>rest-assured</artifactId>
         <version>4.3.3</version>
         <scope>test</scope>
      </dependency>
      
      <dependency>
         <groupId>org.json</groupId>
         <artifactId>json</artifactId>
         <version>20210307</version>
      </dependency>
   </dependencies>
   
<build>
    <plugins>
        
        <!-- Compiler plug-in -->
         <plugin>
            <groupId>org.apache.maven.plugins</groupId>
            <artifactId>maven-compiler-plugin</artifactId>
            <version>3.5.1</version>
            <configuration>
               <source>11</source>
               <target>11</target>
            </configuration>
         </plugin>

         <!-- Added Surefire Plugin configuration to execute tests -->
         <plugin>
            <groupId>org.apache.maven.plugins</groupId>
            <artifactId>maven-surefire-plugin</artifactId>
            <version>3.0.0-M5</version>
            <configuration>
               <suiteXmlFiles>
                  <suiteXmlFile>testng.xml</suiteXmlFile>
               </suiteXmlFiles>
            </configuration>
         </plugin>
      </plugins>
   </build>
</project>

It is needed to add maven-surefire plugin to run the TestNG tests through command line. To know more about this, please refer to this tutorial.

Step 3 – Create the Test Code to test the Rest API

Here, 2 tests are created. One of the tests gets all the employee data (GET) whereas another test creates an employee (POST).

import static io.restassured.RestAssured.given;
import static org.hamcrest.Matchers.equalTo;

import org.json.JSONObject;
import org.testng.annotations.Test;

import io.restassured.http.ContentType;

public class RestAPIDemo {

	@Test(description = "To get the details of employee with id 2", priority = 0)
	public void verifyUser() {

		// Given
		given()
				// When
				.when().get("http://dummy.restapiexample.com/api/v1/employee/2")
				
               // Then
				.then().statusCode(200).statusLine("HTTP/1.1 200 OK")
				
                // To verify booking id at index 2
				.body("data.employee_name", equalTo("Garrett Winters"))
				.body("message", equalTo("Successfully! Record has been fetched."));
	}

	@Test(description = "To create a new employee", priority = 1)
	public void createUser() {

		JSONObject data = new JSONObject();

		// Map<String, String> map = new HashMap<String, String>();

		data.put("employee_name", "APITest");
		data.put("employee_salary", "99999");
		data.put("employee_age", "30");

		// GIVEN
		given().baseUri("http://dummy.restapiexample.com/api").contentType(ContentType.JSON).body(data.toString())

				// WHEN
				.when().post("/v1/create")

				// THEN
				.then().statusCode(200).body("data.employee_name", equalTo("APITest"))
				.body("message", equalTo("Successfully! Record has been added."));

	}
}

Step 4 – Create testng.xml to run the tests through TestNG

Now, let’s create a testng.xml to run the TestNG tests. If JUnit is used instead of TestNG, then this step is not needed.

<?xml version="1.0" encoding="UTF-8"?>
<!DOCTYPE suite SYSTEM "https://testng.org/testng-1.0.dtd">
<suite name="Suite">
  <test name="Test">
    <classes>
      <class name="com.example.RestAssured_TestNG_Demo.RestAPIDemo"/>
    </classes>
  </test> <!-- Test -->
</suite> <!-- Suite -->

Step 5 – Run the tests through the command line

Now, let us execute the tests through the command line. Go to the place where pom.xml of the project is placed and use the below command to run the tests. This step makes sure that all the tests are running as expected.

GitLab Section

Step 6 – Create a blank project in GitLab

Refer to this tutorial to create a new blank project – How to create a new project in GitLab.

Step 7 – Push the project from the local repository to GitLab Repository

Refer to this tutorial to push the changes – How to push new local GIT Repository to GitLab.

Step 8 – Create .gitlab-ci.yml file in the project in GitLab

It is a YAML file where you configure specific instructions for GitLab CI/CD. In the .gitlab-ci.yml, we can define:

  • The scripts you want to run.
  • Other configuration files and templates you want to include.
  • Dependencies and caches.
  • The commands you want to run in sequence and those you want to run in parallel.
  • The location to deploy your application.
  • Whether you want to run the scripts automatically or trigger any of them manually.

image: adoptopenjdk/maven-openjdk11

stages:
  - test

variables:
  MAVEN_OPTS: "-Dmaven.repo.local=.m2/repository"

test:
  stage: test
  allow_failure: true

# Run the tests
  script:
    - mvn $MAVEN_OPTS clean package
    - mvn compile test

# Store artifacts
  artifacts:
    when: always
    name: "report"
    paths:
    - target/surefire-reports/*
    expire_in: 1 h

Step 9 – Run the tests in the GitLab pipeline

Now, when a new change is committed, a pipeline kicks off and it runs all the tests.

Step 10 – Check the status of the pipeline

Once the Status of the pipeline changes to either failed or passed.. that means the tests are already executed. Here, the pipeline is passed with brown colour means that the execution of the test is completed with some failures.

I have added an artifact in the gitalb-ci.yml with the name “report”. This artifact creates a folder with the name “report” and the reports in this folder come from the path /target/surefire-reports. This artifact gives us an option to download the reports or browse the report. This report will be available for 1 hour only as mentioned in the gitlab-ci.yml.

Step 11 – Download the report

Click on the Download button and the report zip file is downloaded. Unzip the folder, and it contains all different types of surefire-reports.

Example of Emailable-Report.html

Example of Index.html

Congratulations. This tutorial has explained the steps to run Selenium tests in GitLab CI/CD. Happy Learning!!

Run Selenium Tests in GitLab CI/CD

Last Updated on

HOME

This tutorial explains the process to run the Selenium Tests in the GitLab pipeline. This is a very important step towards achieving CI/CD. Ideally, the tests need to run after any change (minor/major) before merging the latest change to the master branch. Suppose there are 100 changes merged to the master branch in a day. It is expected to run the tests every time before deployment. In this case, any QA won’t want to start the tests manually 100 times in a day. Now, what should be done to overcome this problem. Now, adding tests to the GitLab pipeline comes into the picture. We can add a test stage to the pipeline and the tests will run automatically when the pipeline run.

Table of Contents

  1. Prerequisite
  2. What is GitLab CI/CD Workflow?
  3. What is a headless browser?
  4. Implementation Steps
    1. Create a new Maven Project
    2. Add the dependencies to the POM.xml
    3. Create the Test Code
    4. Create testng.xml to run the tests
    5. Run the tests through command line
  5. GitLab Section
    1. Create a blank project in GitLab
    2. Push the project from local repository to Gitlab Repository
    3. Create a .gitlab-ci.yml file in the project in GitLab
    4. Run the tests in the GitLab pipeline
    5. Check the status of the pipeline
    6. Download the report

Prerequisite

  1. Selenium
  2. TestNG/JUnit (for Assertions)
  3. Java 11
  4. Maven/ Gradle
  5. GitLab Account

What is GitLab CI/CD Workflow?

Build the proposed changes. Then, push the commits to a feature branch. This branch should be in a remote repository that’s hosted in GitLab. The push triggers the CI/CD pipeline for your project. Then, GitLab CI/CD runs automated scripts (sequentially or in parallel) to build as well as to test the application. After a successful run of the test scripts, GitLab CI/CD deploys your changes automatically to any environment (DEV/QA/UAT/PROD). But if the test stage is failed in the pipeline, then the deployment is stopped.

After the implementation works as expected:

  • Get the code reviewed and approved.
  • Merge the feature branch into the default branch.
    • GitLab CI/CD deploys your changes automatically to a production environment.

To use GitLab CI/CD, we need to keep 2 things in mind:

a) Make sure a runner is available in GitLab to run the jobs. If there is no runner, install GitLab Runner and register a runner for your instance, project, or group.

b) Create a .gitlab-ci.yml file at the root of the repository. This file is where CI/CD jobs are defined.

The Selenium tests run on a headless browser in the pipeline.

What is a headless browser?

A headless browser is like any other browser, but without a Head/GUI (Graphical User Interface).  A headless browser is used to automate the browser without launching the browser. While the tests are running, we cannot see the browser. However, we can see the test results coming on the console.

To explain, I have created 2 Selenium tests and used TestNG for asserting the tests. The tests will run on a headless Chrome browser. One more thing to keep in mind is that when tests run on a headless Chrome browser, the window screen won’t be full screen. So, the screen needs to be maximized explicitly otherwise some of the tests would fail.

Implementation Steps

Step 1 – Create a new Maven Project

Step 2- Add the dependencies to the POM.xml

Add the below-mentioned dependencies that need to add to the project to the pom.xml in Maven Project.

 <dependencies>

        <dependency>
            <groupId>io.github.bonigarcia</groupId>
            <artifactId>webdrivermanager</artifactId>
            <version>5.1.0</version>
        </dependency>

        <dependency>
            <groupId>org.seleniumhq.selenium</groupId>
            <artifactId>selenium-java</artifactId>
            <version>3.141.59</version>
        </dependency>

        <dependency>
            <groupId>org.testng</groupId>
            <artifactId>testng</artifactId>
            <version>7.5</version>
            <scope>test</scope>
        </dependency>
                   
    </dependencies>
    <build>
     <plugins>
     
     <!--  Compiler Plugin -->
    
    <plugin>
        <groupId>org.apache.maven.plugins</groupId>
        <artifactId>maven-compiler-plugin</artifactId>
        <version>3.8.1</version>
        <configuration>
           <source>11</source>
           <target>11</target>
        </configuration>
    </plugin>
     
      <!--  Plugin used to execute tests -->
      <plugin>
        <groupId>org.apache.maven.plugins</groupId>
        <artifactId>maven-surefire-plugin</artifactId>
        <version>3.0.0-M5</version>
        <configuration>
          <suiteXmlFiles>
            <suiteXmlFile>testng.xml</suiteXmlFile>
          </suiteXmlFiles>
        </configuration>
      </plugin>
     </plugins>
  </build>
</project>

As explained in one of the previous tutorial, it is needed to add the maven-surefire-plugin to run the TestNG tests through the command line.

Step 3 – Create the Test Code

This is the BaseTest Class. The WebDriver is initialized here. It operates in headless mode and full screen. At the end, the WebDriver is closed.

import org.openqa.selenium.WebDriver;
import org.openqa.selenium.chrome.ChromeDriver;
import org.openqa.selenium.chrome.ChromeOptions;
import org.testng.annotations.AfterMethod;
import org.testng.annotations.BeforeMethod;

import io.github.bonigarcia.wdm.WebDriverManager;

public class BaseTest {
	
	WebDriver driver;
	
	@BeforeMethod
	public void beforeTests() {
        WebDriverManager.chromedriver().setup();
        ChromeOptions options=new ChromeOptions();
        options.setHeadless(true);
        options.addArguments("window-size=1920,1200");
        driver=new ChromeDriver(options);
        driver.get("https://opensource-demo.orangehrmlive.com/");
    }

	@AfterMethod
    public void afterTests() {
        driver.quit();
    }

}

There are 2 different pages that need to be tested – LoginPage and ForgetPasswordPage

LoginPage contains the tests to log in to the application. After successful login, the application moves to the next webpage – HomePage. You can see that BaseTest class is extended in both the Test classes.

import org.openqa.selenium.By;
import org.testng.Assert;
import org.testng.annotations.Test;

@Test
public class LoginPage extends BaseTest{
	
	@Test
	public void validCredentials() throws InterruptedException {

	        driver.findElement(By.name("txtUsername")).sendKeys("Admin");	        
	        driver.findElement(By.name("txtPassword")).sendKeys("admin123");
	        driver.findElement(By.id("btnLogin")).click();
	         String newPageText = driver.findElement(By.xpath("//*[@id='content']/div/div[1]/h1")).getText();
	        System.out.println("newPageText :" + newPageText);
	        Assert.assertEquals(newPageText,"Dashboard");

	}

}

ForgetPasswordPage

import org.openqa.selenium.By;
import org.testng.Assert;
import org.testng.annotations.Test;

@Test
public class ForgetPasswordPage extends BaseTest{
	
	@Test
	public void getHeading() {
		
		Thread.sleep(1000);
		driver.findElement(By.xpath("//*[@id='forgotPasswordLink']/a")).click();
		String heading = driver.findElement(By.xpath("//*[@id='content']/div[1]/div[2]/h1")).getText();
		System.out.println("Title : "+ heading );
		Assert.assertEquals(heading, "Forgot Your Password?");
	}
	
}

Step 4 – Create testng.xml to run the tests

Now, let’s create a testng.xml to run the TestNG tests. If JUnit is used instead of TestNG, then this step is not needed.

<?xml version="1.0" encoding="UTF-8"?>
<!DOCTYPE suite SYSTEM "https://testng.org/testng-1.0.dtd">
<suite name="Suite">
  <test name="Test">
    <classes>
      <class name="org.example.DockerDemo.LoginPage"/>
      <class name="org.example.DockerDemo.ForgetPasswordPage"/>
    </classes>
  </test> <!-- Test -->
</suite> <!-- Suite -->

Step 5 – Run the tests through command line

Now, let us execute the tests through the command line. Go to the place where the pom.xml of the project is placed and use the below command to run the tests. This step makes sure that all the tests are running as expected.

mvn compile test

GitLab Section

Step 6 – Create a blank project in GitLab

To know, how to create a blank new project in GitLab, please refer to this tutorial.

Step 7 – Push the project from local repository to Gitlab Repository

To know, how to push the changes in GitLab, please refer to this tutorial.

Step 8 – Create a .gitlab-ci.yml file in the project in GitLab

There are many ways to create a new file in GitLab. One of the ways is to create a file as shown in the below image.

It is a YAML file where you configure specific instructions for GitLab CI/CD. In the .gitlab-ci.yml, we can define:

  • The scripts you want to run.
  • Other configuration files and templates you want to include.
  • Dependencies and caches.
  • The commands you want to run in sequence and those you want to run in parallel.
  • The location to deploy your application to.
  • Whether you want to run the scripts automatically or trigger any of them manually.
image: markhobson/maven-chrome

stages:
  - test

variables:
  MAVEN_OPTS: "-Dmaven.repo.local=.m2/repository"

test:
  stage: test
  allow_failure: true

# Run the tests  
  script:
    - mvn $MAVEN_OPTS clean package
    - mvn compile test

# Store artifacts
  artifacts:
    when: always
    name: "report"
    paths:
    - target/surefire-reports/*
    expire_in: 1 h

Image – markhobson/maven-chrome is used in this test. It is a docker image for Java automated UI tests.

This gitlab-ci.yml has only 1 stage. It is a test stage that contains the command to run the tests. It also creates an artifact that contains all the surefire reports. These reports can be saved as Test Evidence.

Step 9 – Run the tests in the GitLab pipeline

Now, when a new change is committed, a pipeline kicks off and it runs all the tests.

Step 10 – Check the status of the pipeline

Once the Status of the pipeline changes to either failed or passed.. that means the tests are already executed.

As you can see the Status is failed here which means that the execution is completed. Let us see the logs of the execution it shows that out of 2 tests, 1 test passed and 1 test failed. This shows that tests are running successfully in the GitLab pipeline.

As I have added an artifact also in the gitalb-ci.yml, which is highlighted in the image. This artifact creates a folder with the name “report” and the reports in this folder come from the path /target/surefire-reports. This artifact gives us the option to download the reports or browse the report. This report will be available for 1 hour only as mentioned in the gitlab-ci.yml.

Step 11 – Download the report

Once, will click on the download button, it will download “report.zip”. Unzip the folder and it looks like something as shown below:

Example of Emailable-Report.html

Example of Index.html

Congratulations. This tutorial has explained the steps to run Selenium tests in GitLab CI/CD. Happy Learning!!