In the previous post, I have explained how to capture screenshots in Selenium using FileUtils. In this post, will see another way of capturing the screenshots in Selenium.
FileHandler is new Class in Selenium which help us to store screenshots, create directory and so on. You can get full documentation of FileHandler here.
Step 1- Import the new package which is
import org.openqa.selenium.io.FileHandler;
Step 2 – To capture a screenshot in Selenium, we can make use of an interface, called TakesScreenshot. This method indicates the driver, that it can capture a screenshot and store it in different ways
TakesScreenshot ts = (TakesScreenshot) driver;
Step 3 – In order to capture screenshot and store it in a particular location, there is a method called “getScreenshotAs“, where OutputType defines the output type for a screenshot.
File source = ts.getScreenshotAs(OutputType.FILE);
Step 4- Call copy method of FileHandler Class which is static method and will ask two argument First is src and another is destination. Code will look like
FileHandler.copy(source, new File("/Screenshots/SeleniumScreenshot" + System.currentTimeMillis() + ".png"));
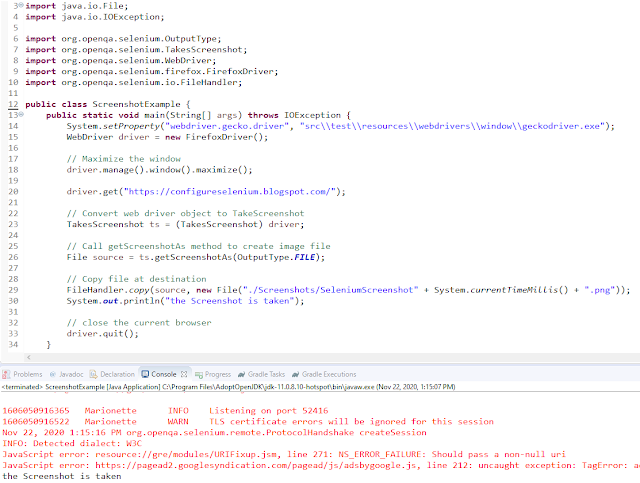
Let’s see this in a Selenium program:-
import java.io.File;

import java.io.IOException;
import org.openqa.selenium.OutputType;
import org.openqa.selenium.TakesScreenshot;
import org.openqa.selenium.WebDriver;
import org.openqa.selenium.firefox.FirefoxDriver;
import org.openqa.selenium.io.FileHandler;

public class ScreenshotExample {
      public static void main(String[] args) throws IOException {

            System.setProperty("webdriver.gecko.driver", "src\\test\\resources\\webdrivers\\window\\geckodriver.exe");
            WebDriver driver = new FirefoxDriver();

            // Maximize the window
            driver.manage().window().maximize();
            driver.get("https://configureselenium.blogspot.com/");

            // Convert web driver object to TakeScreenshot
            TakesScreenshot ts = (TakesScreenshot) driver;

            // Call getScreenshotAs method to create image file
            File source = ts.getScreenshotAs(OutputType.FILE);

            // Copy file at destination
            FileHandler.copy(source, new File("./Screenshots/SeleniumScreenshot" + System.currentTimeMillis() + ".png"));
            System.out.println("the Screenshot is taken");

            // close the current browser
            driver.quit();
      }

}
A folder with name “Screenshots” created and the screenshot placed in that folder as you can see the image below

The Screenshot looks like something as shown below