In this article, we will discuss in detail how we can perform API testing in Robot Framework.
Table of Contents
Prerequisite:
- Install Python
- Install PIP
- Install Robot Framework
- Install Robot framework Selenium Library
- Install PyCharm IDE
Please refer to this tutorial to install Robot Framework – How to install and setup Robot Framework for Python.
What is RequestLibrary?
RequestLibrary is a Robot Framework library aimed to provide HTTP API testing functionalities by wrapping the well-known Python Requests Library.
Implementation Steps:
Step 1 – Create a new project
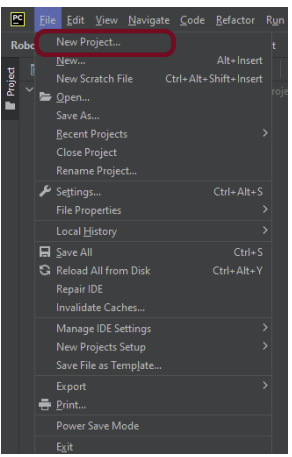
Step 1.1 – Open PyCharm and create a new project. Go to File and select New Project from the main menu.
Step 1.2 – Choose the project location. Click the “Browse” button next to the Location field and specify the directory for your project.
Deselect the Create a main.py welcome script checkbox because you will create a new Python file for this tutorial.
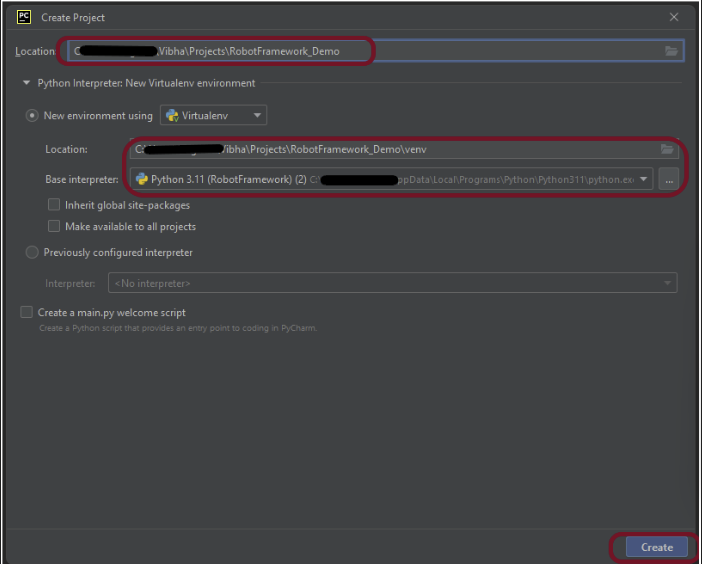
Click on the “Create” Button.
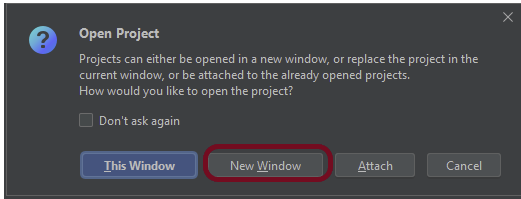
Step 1.3 – A new dialog appears asking to open the project using any one of the given options. I have selected New Window as I like to have separate windows for each project.
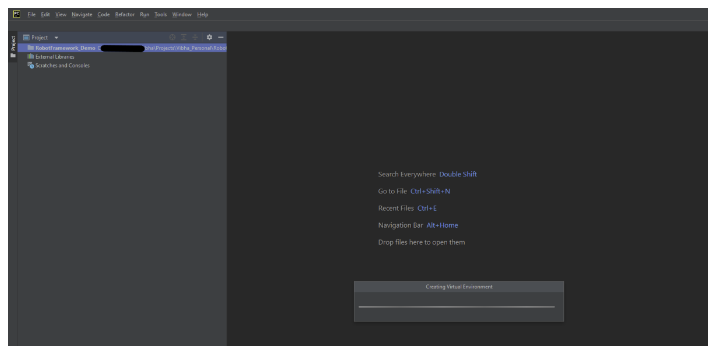
Below is the image of the new project created in PyCharms.
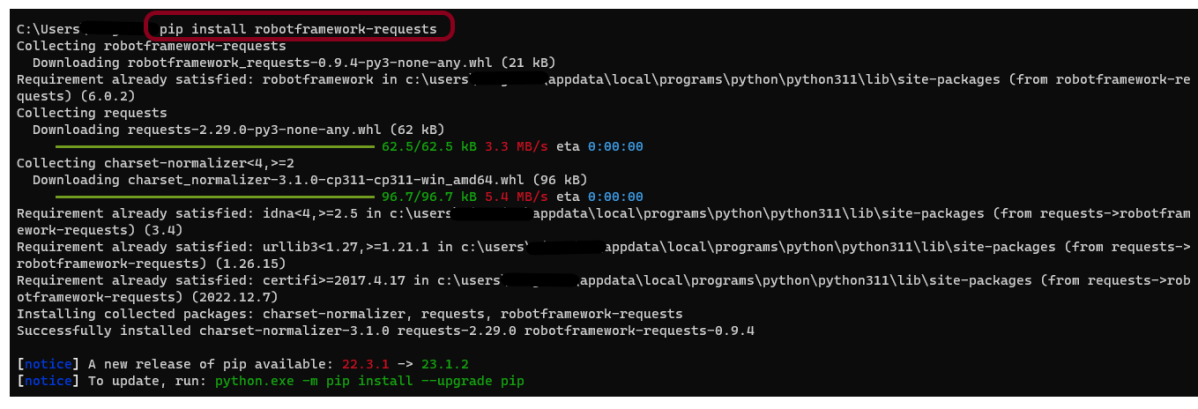
Step 2 – Install RequestLibrary
To install RequestLibrary, you need to use the below command:
pip install robotframework-requests
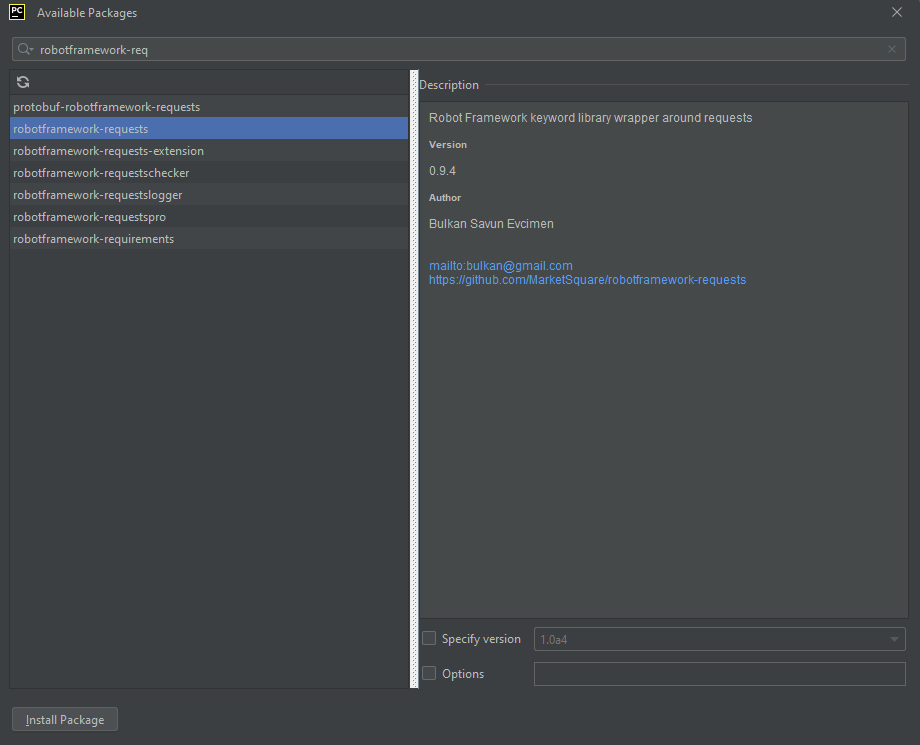
Step 3 – Add robotframework-requests package to the PyCharms
Go to File->Settings ->Project:RobotFramework_Demo ->Python Interpreter.
Click on the “+” sign and enter pabot in the search bar. It will show a list of packages. Select the “robotframework-requests” package and click on the “Install Package”.
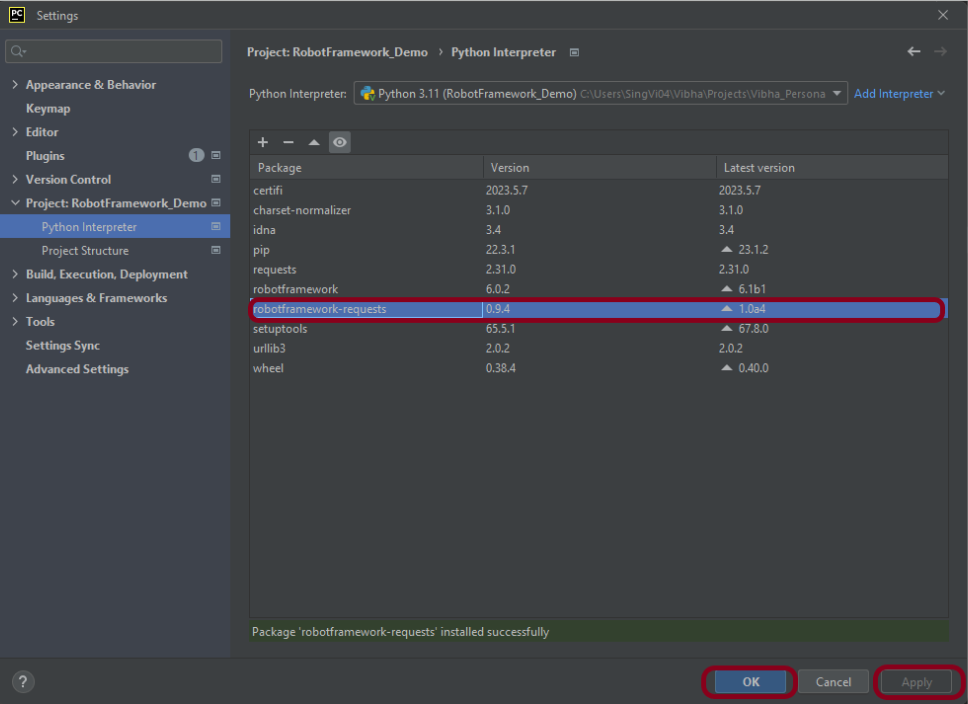
Once the package is installed, we will see the message that the package is installed successfully.

Once the package is installed, it can be seen under the package list as shown below:
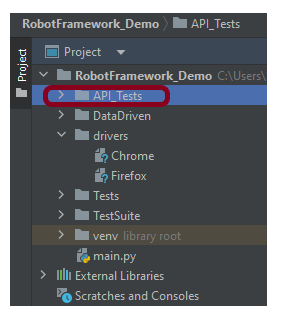
Step 4 – Create a new directory in the new project
Right-Click on the project, select New->Directory, and provide the name as API_Tests

Below is the image of the new directory.
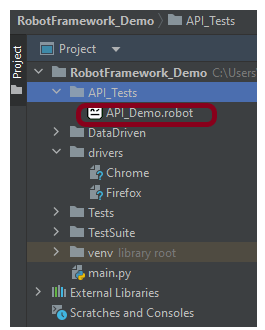
Right-click on the new directory and select New File and provide the name as API_Demo.robot as shown below:
Step 5 – Create API tests in Robot Framework
GET Request
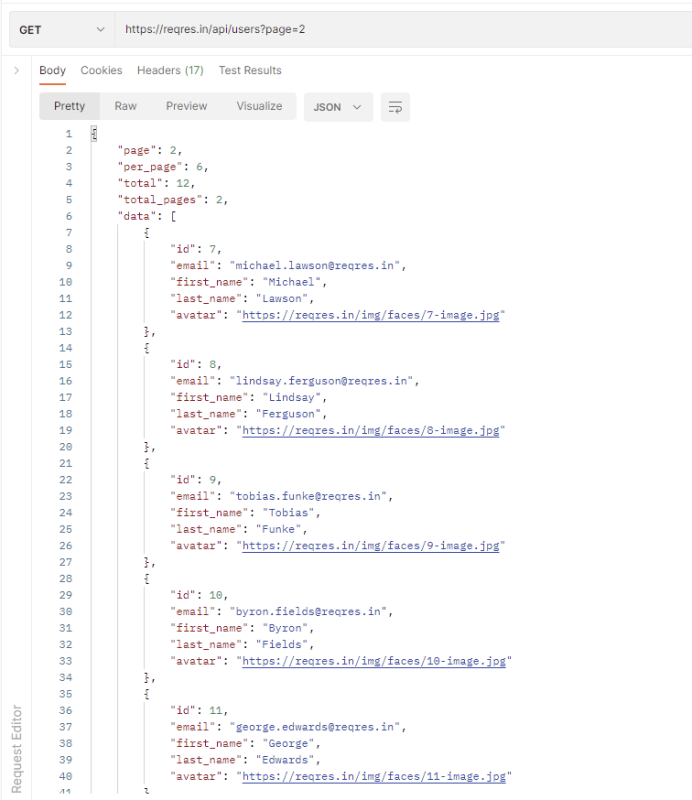
The corresponding API Test in Robot Framework.
*** Settings ***
Library     RequestsLibrary
Library     Collections


*** Variables ***
${base_url}         https://reqres.in/api/users
${page_id}          2


*** Test Cases ***

Quick Get Request Test
    ${response}=    GET      ${base_url}     params=page=${page_id}   expected_status=200
    log    ${response.json()}
    Should Be Equal As Strings    6  ${response.json()}[per_page]
    Should Be Equal As Strings    12  ${response.json()}[total]
    Should Be Equal As Strings    7  ${response.json()}[data][0][id]
The corresponding log of this request is

${response}= We are saving the response of the GET operation in the ${response} variable.
The response is logged in the log by using the below command:
log ${response.json()}
POST Request
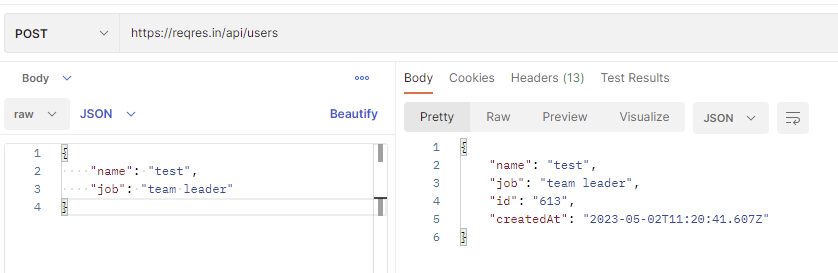
The corresponding API Test in Robot Framework.
*** Settings ***
Library     RequestsLibrary
Library     Collections


*** Variables ***
${base_url}         https://reqres.in/api/users
${page_id}          2
${expectedname}     test
${expectedjob}      team leader


*** Test Cases ***

Quick POST Request Test
    &{req_body}=  Create Dictionary    name=test        job=team leader
    ${response}=     POST        ${base_url}     json=${req_body}    expected_status=201
    log      ${response.json()}
    Dictionary Should Contain Key     ${response.json()}     id
    ${name}=    Get From Dictionary     ${response.json()}    name
    Should Be Equal As Strings    ${expectedname}   ${name}

    ${job}=    Get From Dictionary     ${response.json()}    job
    Should Be Equal As Strings    ${expectedjob}    ${job}
The corresponding log of this request is
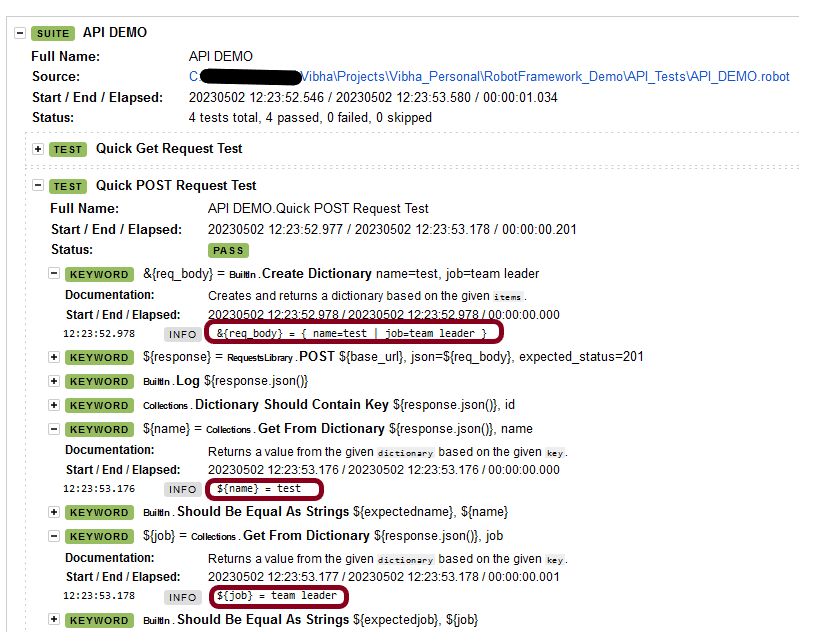
1.Create Dictionary – This keyword is used from BuiltIn Library. It creates and returns a dictionary based on the given Items. Items are typically given using the key=value syntax.
2. Dictionary should contain key – This keyword is used from Collections library. It is used to verify if the specified key is present in the dictionary.
3. Get From Dictionary – This keyword is used from the Collections library. It is used to return a value from the given dictionary based on the given key. Here, it is used to check the values of the key name and job.
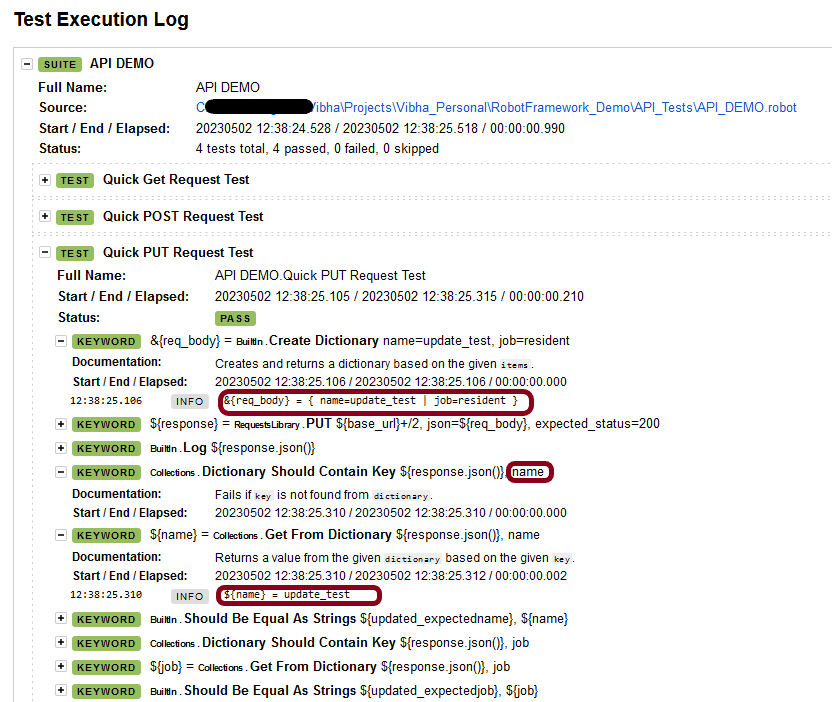
PUT Request

The corresponding API Test in Robot Framework.
*** Settings ***
Library     RequestsLibrary
Library     Collections


*** Variables ***
${base_url}         https://reqres.in/api/users
${updated_expectedname}     update_test
${updated_expectedjob}      resident


*** Test Cases ***

Quick PUT Request Test
    &{req_body}=  Create Dictionary    name=update_test        job=resident
    ${response}=     PUT        ${base_url}+/2     json=${req_body}    expected_status=200
    log      ${response.json()}

    Dictionary Should Contain Key     ${response.json()}     name
    ${name}=    Get From Dictionary     ${response.json()}    name
    Should Be Equal As Strings    ${updated_expectedname}    ${name}

    Dictionary Should Contain Key     ${response.json()}     job
    ${job}=    Get From Dictionary     ${response.json()}    job
    Should Be Equal As Strings    ${updated_expectedjob}    ${job}
The corresponding log of this request is
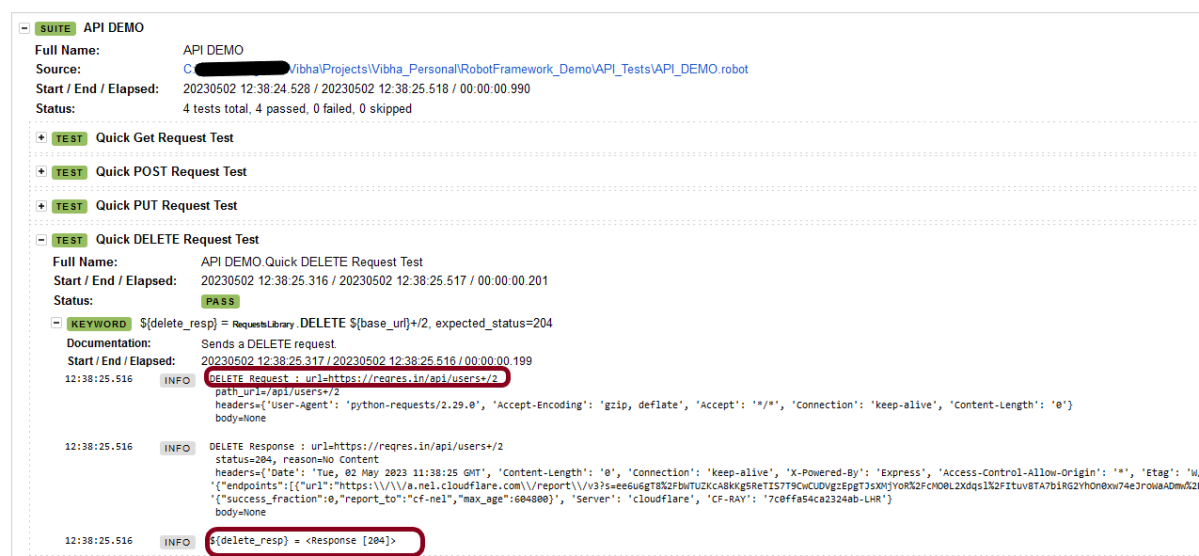
DELETE Request

The corresponding API Test in Robot Framework.
*** Settings ***
Library     RequestsLibrary


*** Variables ***
${base_url}         https://reqres.in/api/users


*** Test Cases ***

Quick DELETE Request Test
     ${delete_resp}=   DELETE    ${base_url}+/2           expected_status=204
The corresponding log of this request is
The complete program looks like

Step 6 – Execute the tests
We need the below command to run the Robot Framework script.
robot API_DEMO.robot
The output of the above program is

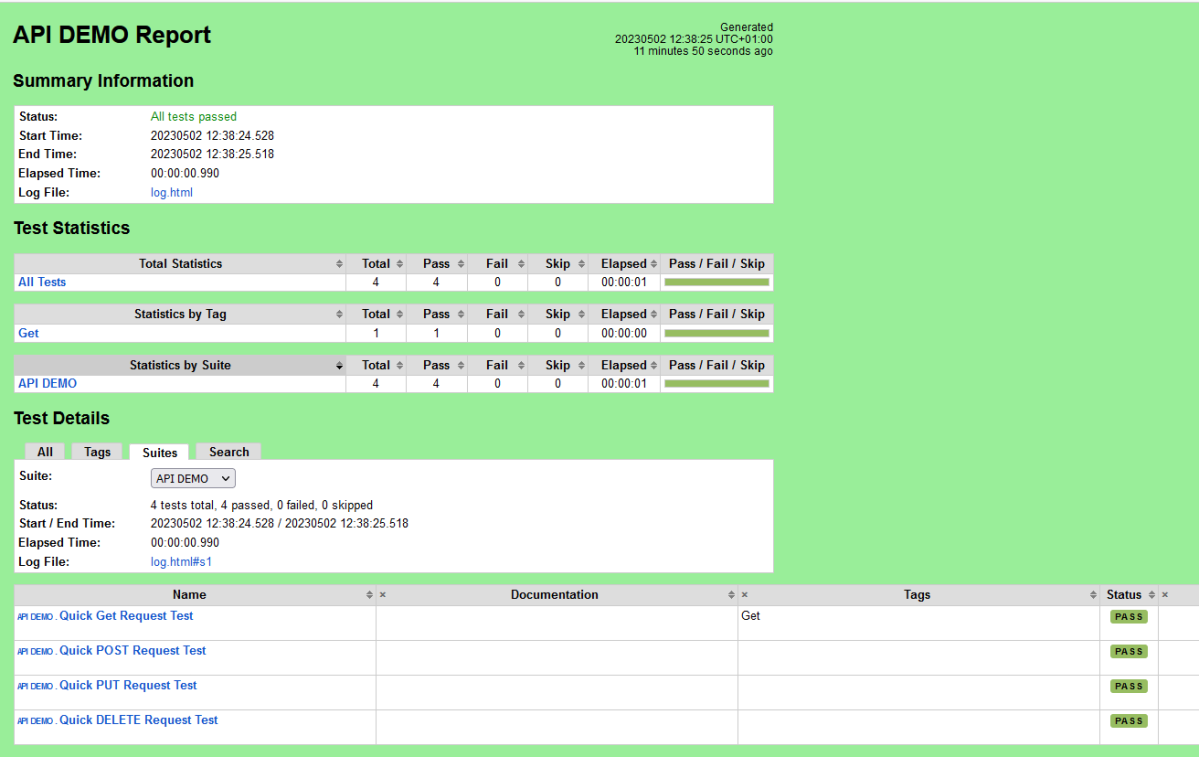
Step 7 – View Report and Log
We have the test case passed. The Robot Framework generates log.html, output.xml, and report.html by default.
Let us now see the report and log details.
Report
Right-click on report.html. Select Open In->Browser->Chrome(any browser of your wish).
The Report generated by the framework is shown below:
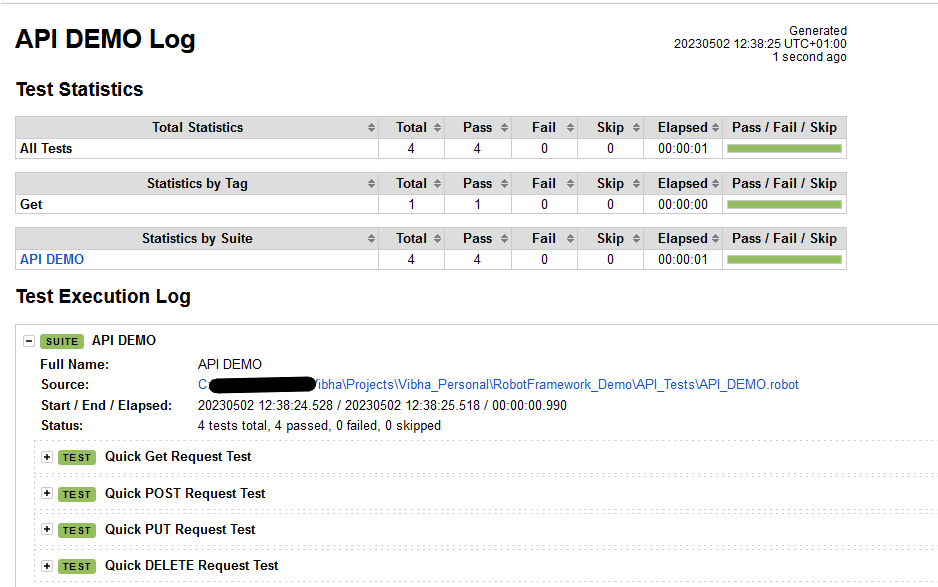
Log
Robot Framework has multiple log levels that control what is shown in the automatically generated log file. The default Robot Framework log level is INFO.
Right-click on log.html. Select Open In->Browser->Chrome(any browser of your wish).
That’s it! Congratulations on making it through this tutorial and hope you found it useful! Happy Learning!!
Additional Tutorials

Great article on performing API testing with Robot Framework! The clear explanation and practical steps make it easy to understand how to set up and execute API tests. For those looking to further streamline their API testing efforts, exploring frameworks like vStellar could be beneficial. vStellar provides a structured solution for automating various testing processes, including API testing, to improve efficiency and accuracy. Check it out here: vStellar.io.
LikeLike