Apache JMeter is a popular open-source performance testing tool. It is a 100% pure Java application designed to load test functional behaviour and measure performance. It was originally designed for testing Web Applications but has since expanded to other test functions.
In this tutorial, we will explain how to create a JMeter Test Plan for a Web Application.
Create a Web Test Plan in JMeter
Step 1 – Add Thread Group
Select Test Plan on the tree
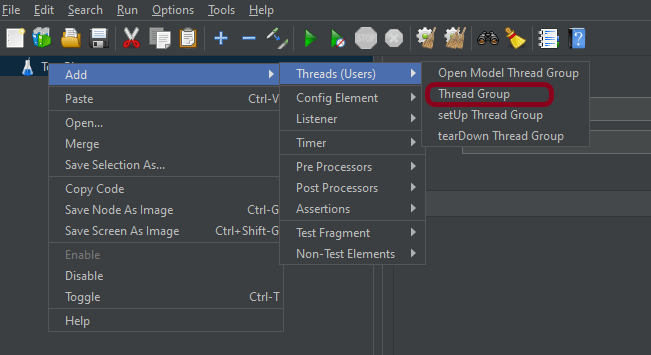
Add Thread Group Right-click on Test Plan> Add > Threads
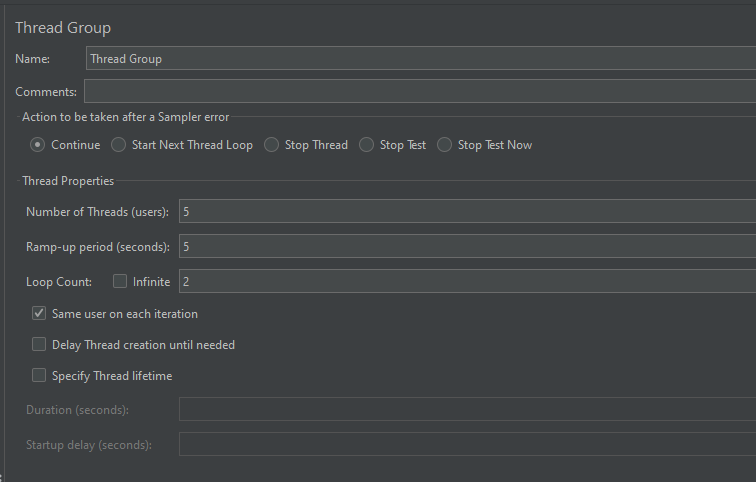
In the Thread Group control panel, enter Thread Properties as follows: We will take an example of row no 5
Number of Threads: 5 – Number of users connects to the target website Ramp-Up Period: 5 – It tells JMeter how long to delay before starting the next user. For example, if we have 5 users and a 5 -second Ramp-Up period, then the delay between starting users would be 1 second (5 seconds /5 users).
Loop Count: 2 – Number of times to execute testing
Step 2 – Adding JMeter elements
2.1 Add HTTP Request Defaults Here, we need to enter the URL of the testing site. Right-click on Thread Group> Add > Config Element > HTTP Request Defaults
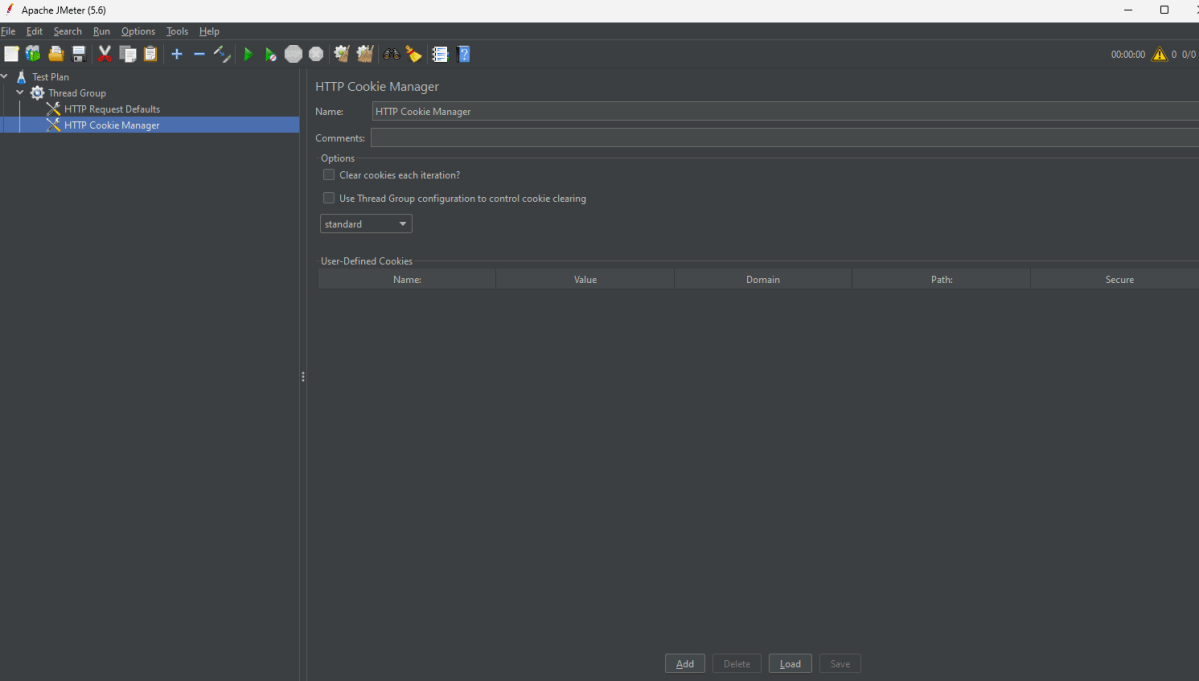
2.2 Add HTTP Cookie Manager
The cookie policy should be set to Compatibility. Right-click on Thread Group > Add > Config Element > HTTP Cookie Manager
Below is the HTTP Cookie Manager added to the plan.
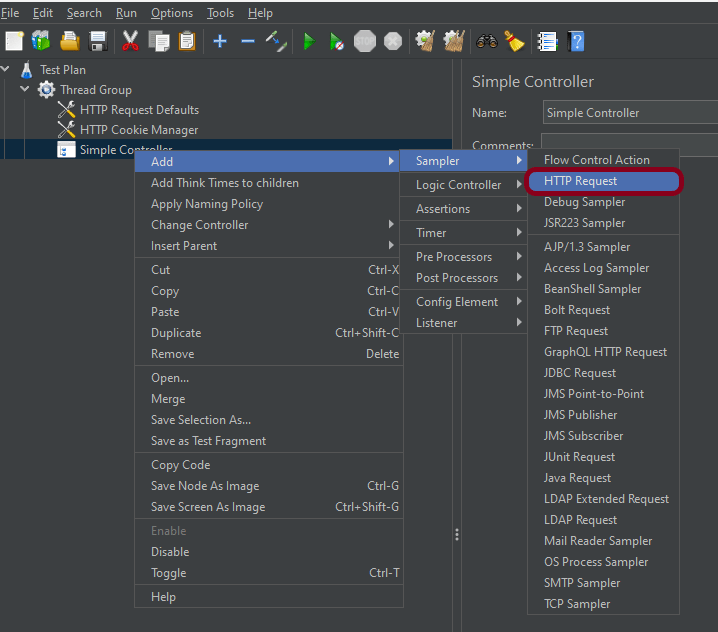
2.3 Add the Simple Controller
A simple controller is used as a container for the request. We add the login and home page under the simple Controller. Right-click on Thread Group > Add > Logic Controller > Simple Controller
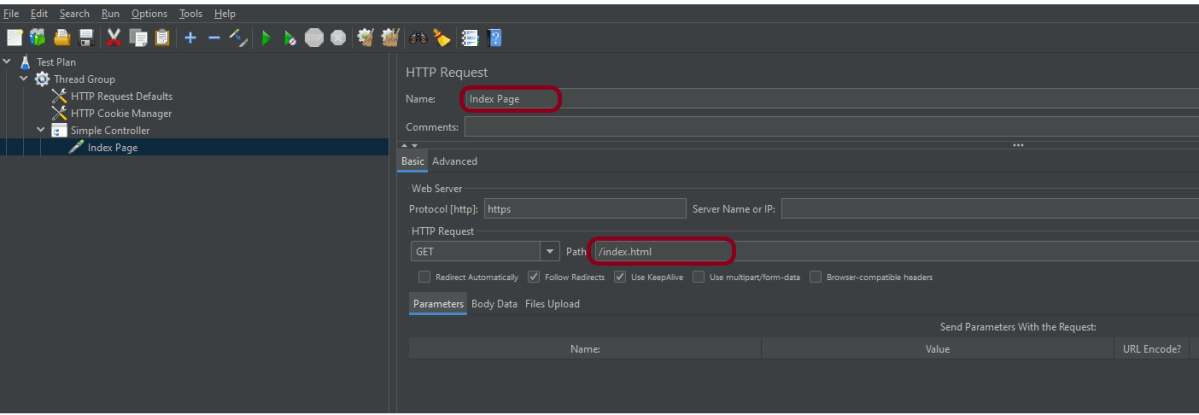
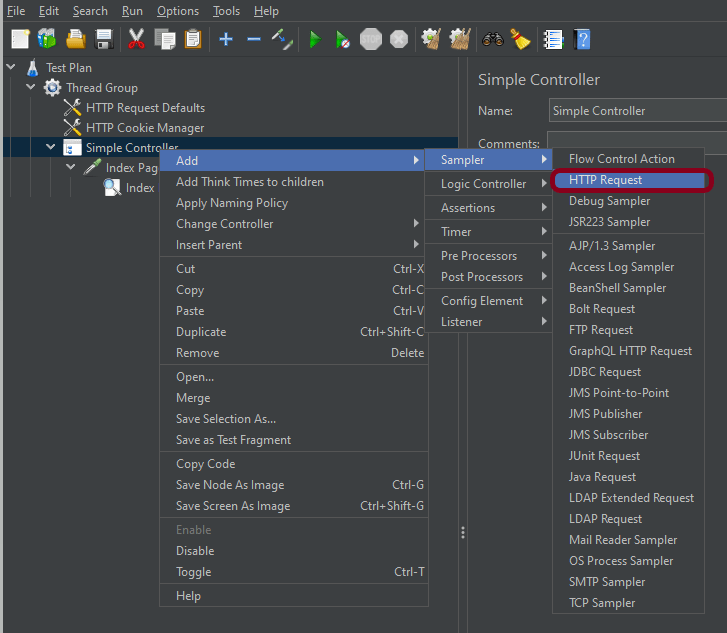
2.4 Add HTTP Request Sampler
It is used for HTTP page requests. Right-click on Simple Controller> Add >Sampler> HTTP Request
The below-mentioned are the values used in HTTP Request to perform the test
Name – Index Page
Server Name or IP – Blank
Port – Blank
Method – GET
Path – /index.html
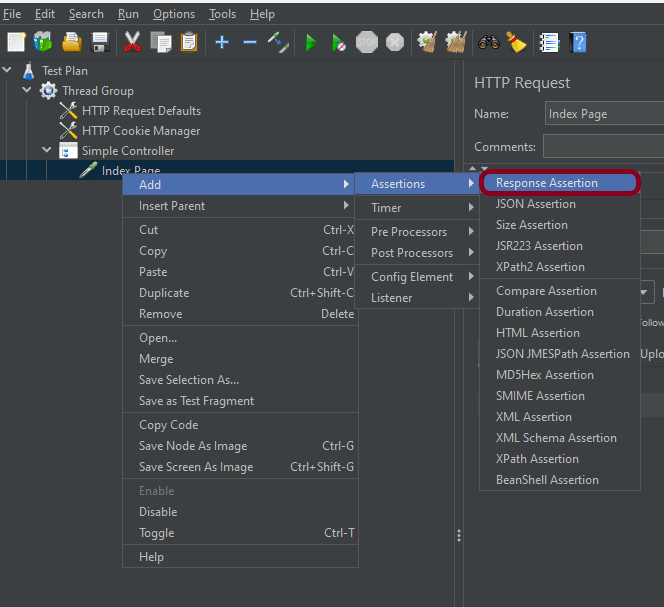
2.5 Add Response Assertion
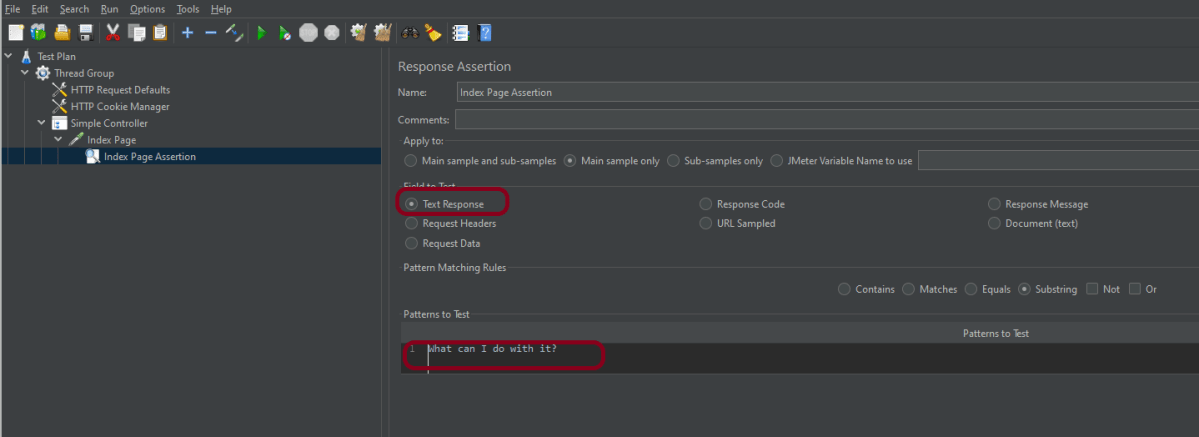
Add the Assertion method to verify the Index page. Right-click on Index Page (HTTP request) > Add > Assertions > Response Assertion
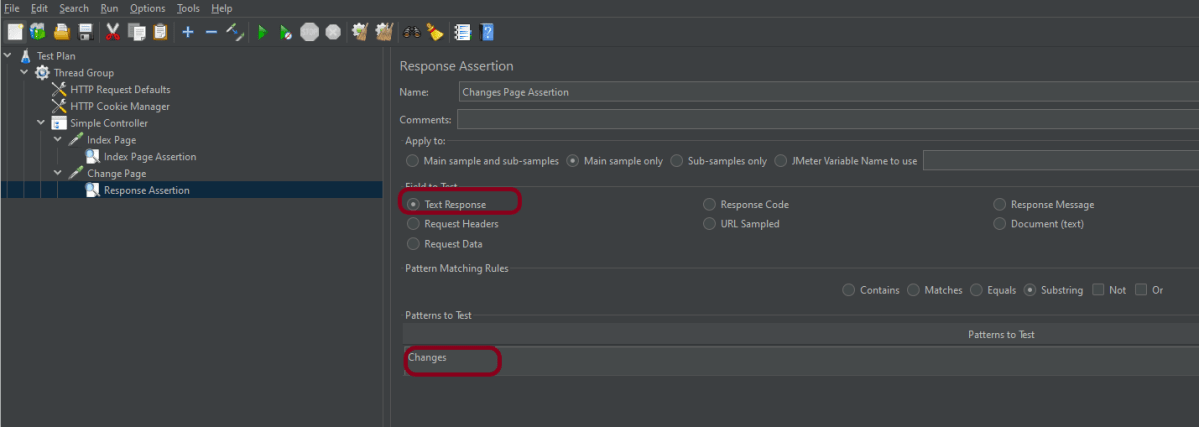
Add text to verify the Index Page
2.6 Add Second HTTP Request Sampler
It is used for HTTP page requests for the Change page. Right-click on Simple Controller> Add >Sampler> HTTP Request
The below-mentioned are the values used in HTTP Request to perform the test
Name – Change Page
Server Name or IP – Blank
Port – Blank
Method – GET
Path – /changes.html
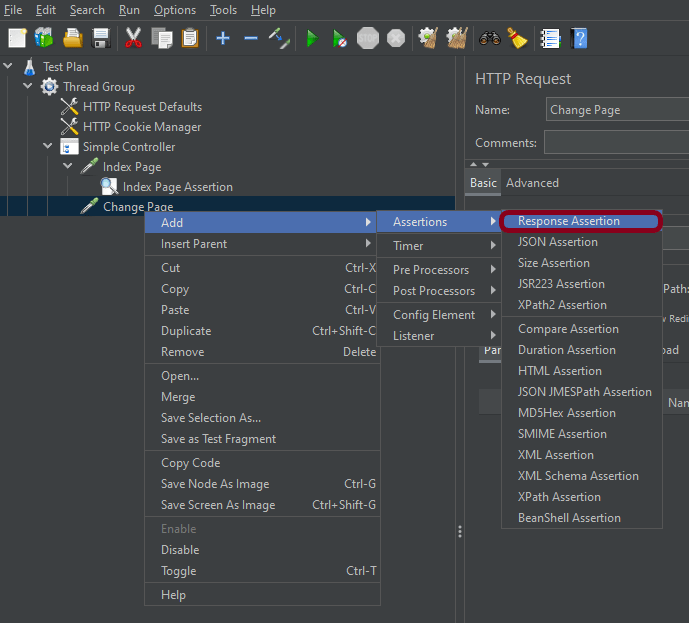
2.7 Add Second Response Assertion
Add the Assertion method to verify the Change page. Right-click on Index Page (HTTP request) > Add > Assertions > Response Assertion
Add text to verify the Changes Page
Step 3 – Adding Listeners to Test Plan
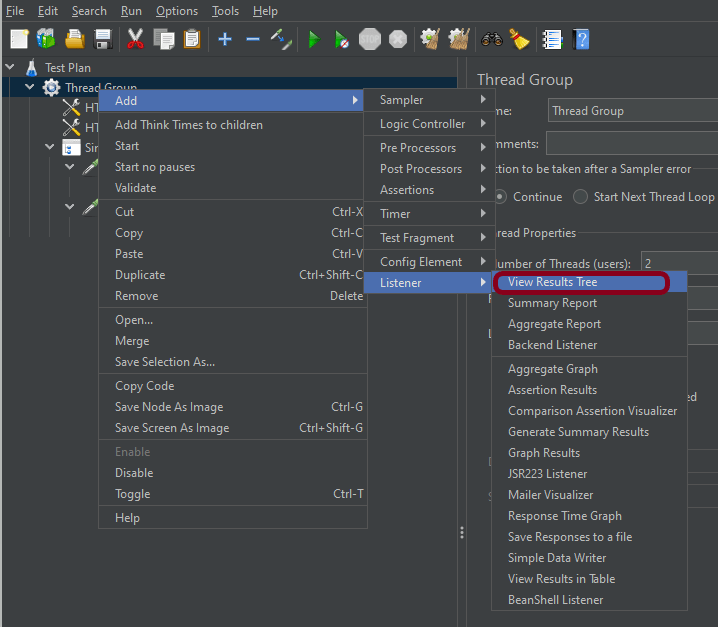
Listeners – They show the results of the test execution. They can show results in a different format such as a tree, table, graph, or log file We are adding the View Result Tree listener
View Result Tree – View Result Tree shows the results of the user request in basic HTML format Right-click on Test Plan, Add -> Listener -> View Result Tree
Aggregate Report
It is almost the same as Summary Report except Aggregate Report gives a few more parameters like, “Median”, “90% Line”, “95% Line” and “99% Line”.
Right Click on Thread Group > Add > Listener > Aggregate Report
Step 4 – Save the Test Plan
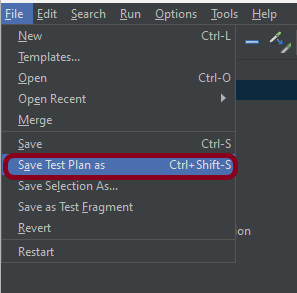
To Save: Click File Select -> Save Test Plan as ->Give the name of the Test Plan. It will be saved in .jmx format.
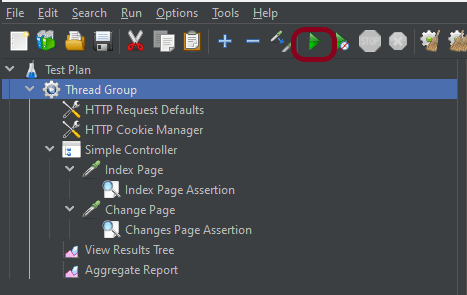
Step 5 – Run the Test Plan
Click on the Green Triangle as shown at the top to run the test.
Step 6 – View the Execution Status
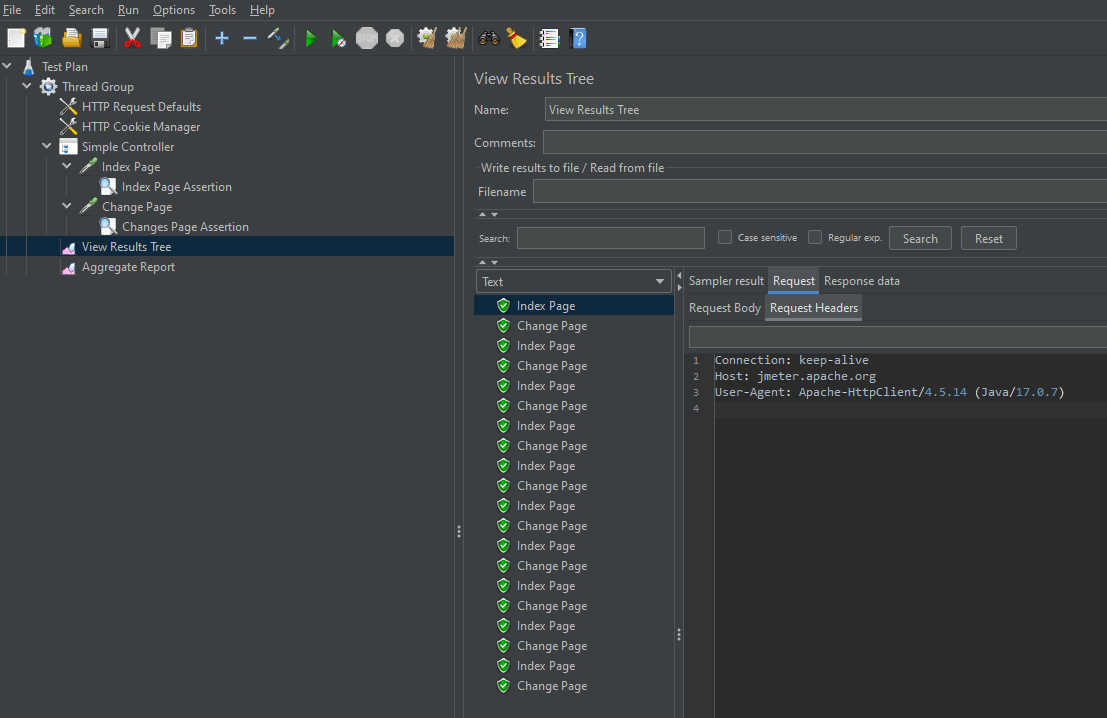
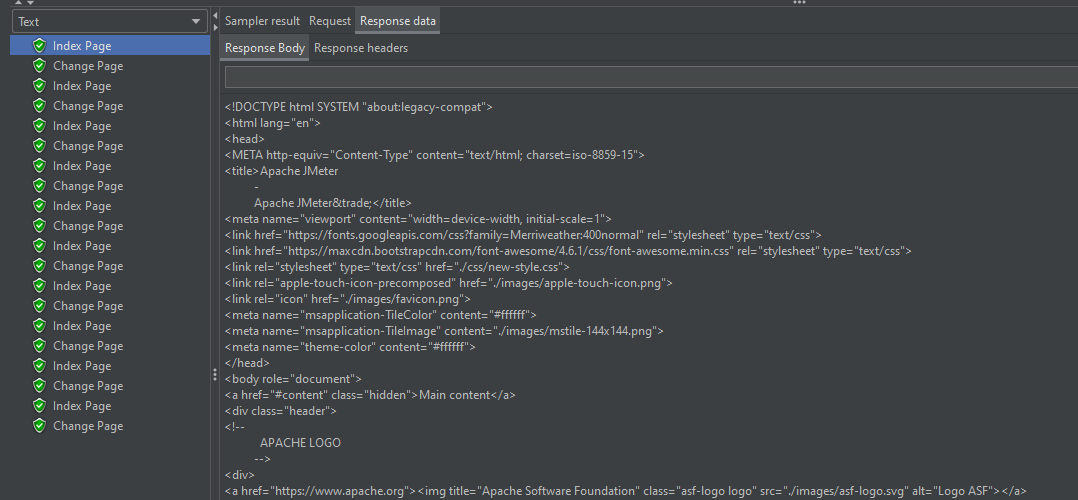
Click on View Result Tree to see the status of Run. A successful request will be of a Green in the Text Section.
Click on Response data and Response Header to view other information about Response.
Click on Aggregate Report Result to see the aggregated status of Run.
We are done! Congratulations on making it through this tutorial and hope you found it useful! Happy Learning!!