How to capture Screenshot of specific element in Selenium

HOME

<dependency>
      <groupId>org.seleniumhq.selenium</groupId>
      <artifactId>selenium-java</artifactId>
      <version>4.24.0</version>
    </dependency>

    <dependency>
      <groupId>commons-io</groupId>
      <artifactId>commons-io</artifactId>
      <version>2.16.1</version>
</dependency>

FirefoxOptions options = new FirefoxOptions();
WebDriver driver = new FirefoxDriver(options);
driver.manage().window().maximize();
driver.get("https://www.selenium.dev/");
WebElement logo = driver.findElement(By.xpath("//div[@class='row']/div"));

 File source = logo.getScreenshotAs(OutputType.FILE);

In order to capture screenshot and store it in a particular location, there is a method called “getScreenshotAs“, where OutputType defines the output type for a screenshot.

4. Specify the location to save the screenshot

 File screenshotLocation = new File("src//test/resources//screenshot/specific_element_screenshot.png");

 FileUtils.copyFile(source, screenshotLocation);
driver.quit();

Let’s see the complete program

package com.example;

import org.openqa.selenium.*;
import org.openqa.selenium.firefox.FirefoxDriver;
import org.openqa.selenium.firefox.FirefoxOptions;
import org.apache.commons.io.FileUtils;
import java.io.File;

public class ScreenShot_Demo {

    public static void main(String[] args) {

        FirefoxOptions options = new FirefoxOptions();
        WebDriver driver = new FirefoxDriver(options);
        driver.manage().window().maximize();
        driver.get("https://www.selenium.dev/");

        // Locate the specific element
        WebElement logo = driver.findElement(By.xpath("//div[@class='row']/div"));

        // Take the screenshot of the element
        File source = logo.getScreenshotAs(OutputType.FILE);

        // Specify the location to save the screenshot
        File screenshotLocation = new File("src//test/resources//screenshot/element_screenshot.png");

        try {
            // Save the screenshot to the specified location
            FileUtils.copyFile(source, screenshotLocation);
            System.out.println("Screenshot saved to: " + screenshotLocation.getAbsolutePath());
        } catch (Exception e) {
            System.out.println(e.getMessage());
        }

        System.out.println("The Screenshot is taken and saved under Screenshots folder");
        driver.quit();
    }

}

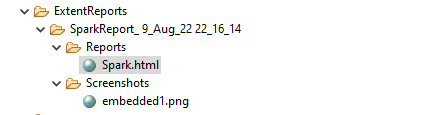
A folder with name screenshot is created inside src/test/resources directory and the screenshot is placed in that folder as you can see the image below

The Screenshot looks like something below

How to add Screenshot to Cucumber ExtentReports

Last Updated On

HOME

The previous tutorial explained the generation of Extent Report 5 for Cucumber7 and TestNG. This tutorial explains how to add screenshots to the Extent Report.

Table of Contents

  1. Project Structure
    1. Add Screenshot configuration in extent.properties
    2. Add a method to capture the screenshot

Project Structure

To set up the above project, please refer to this tutorial – ExtentReports Version 5 for Cucumber 7 and TestNG.

We want to add screenshots of failed tests to the Extent Report Version 5.

Step 1 – Add Screenshot configuration in extent.properties

extent.reporter.spark.start=true
extent.reporter.spark.out=Reports/Spark.html

#FolderName
basefolder.name=ExtentReports/SparkReport_
basefolder.datetimepattern=d_MMM_YY HH_mm_ss

#Screenshot
screenshot.dir=/Screenshots/
screenshot.rel.path=../Screenshots/

In the above example, we have provided the name “ExtentReports/SparkReport_”. It means that a folder starts with the name “SparkReport_” under the “ExtentReports” folder. The date-time pattern we have provided in another format is the basis of a valid pattern. It will concatenate with the folder name to generate a unique folder for each execution.

As seen in the image above, the “Reports” and “Screenshots” folders get created inside the new folder of SparkReports_. If we look inside the folder, we can see that the report was generated.

We can browse the screenshot folder to see all the screenshots taken during each step. Additionally, screenshots will be generated and named automatically.

Step 2 – Add a method to capture the screenshot

@After
public static void tearDown(Scenario scenario) {

		//validate if scenario has failed
		if(scenario.isFailed()) {
			final byte[] screenshot = ((TakesScreenshot) driver.getScreenshotAs(OutputType.BYTES);
			scenario.attach(screenshot, "image/png", scenario.getName()); 
		}	

In the preceding example, the tearDown() method accepts a Scenario type object. The Scenario can be found within the io.cucumber. We used Selenium’s standard screenshot feature within the method. As an example, we’d like to read the file as a byte[] type. As a parameter, the attach method accepts byte[] type objects. Scenario.attach also includes a screenshot with each step of the scenario. To get the complete project, please refer to this tutorial – ExtentReports Version 5 for Cucumber 6 and TestNG.

The updated Hooks class will be as shown below:

import org.openqa.selenium.OutputType;
import org.openqa.selenium.TakesScreenshot;
import com.example.utils.HelperClass;
import io.cucumber.java.After;
import io.cucumber.java.Before;
import io.cucumber.java.Scenario;

public class Hooks {
	
	@Before
    public static void setUp() {

       HelperClass.setUpDriver();
    }

	@After
	public static void tearDown(Scenario scenario) {

		//validate if scenario has failed
		if(scenario.isFailed()) {
			final byte[] screenshot = ((TakesScreenshot) HelperClass.getDriver()).getScreenshotAs(OutputType.BYTES);
			scenario.attach(screenshot, "image/png", scenario.getName()); 
		}	
		
		HelperClass.tearDown();
	}
}

Let’s open the report and view the report. As you can see, besides the scenario, an attachment sign is available, which means something attaches to the scenario. As we have only one failed step, only one screenshot has been captured, as seen in the above image. Right-click on Spark.html and select Open with Web Browser.

The report also has a summary section that displays the summary of the execution. The summary includes the overview of the pass/fail using a pictogram, start time, end time, and pass/fail details of features as shown in the image below.

Congratulations!! We can attach screenshots of the failed tests. Happy Learning!!

Gradle – Extent Report Version 5 for Cucumber, Selenium, and TestNG
Integration of Allure Report with Rest Assured and JUnit4
ExtentReports Version 5 for Cucumber 6 and JUnit4
PDF ExtentReport for Cucumber and TestNG

How to manage screenshots in Serenity Report

HOME

Serenity provides a wide range of options to manage screenshots in the report. By default, Serenity has set option serenity.take.screenshots=BEFORE_AND_AFTER_EACH_STEP, which means the screenshot is saved before and after each step as shown in the below image. Before this tutorial, refer to the previous tutorial on How to generate Serenity Report.

However, recording many screenshots can slow down test execution. So, maybe we like to record the screenshot of failed steps in the scenario. To achieve this flexibility, configure serenity.take.screenshots property in serenity.properties file.

There are various other types of options for managing screenshots in Serenity Report. This property can take the following values:

  1. FOR_EACH_ACTION: Saves a screenshot at every web element action (like click(), typeAndEnter(), type(), typeAndTab() etc.).
  2. BEFORE_AND_AFTER_EACH_STEP: Saves a screenshot before and after every step.
  3. AFTER_EACH_STEP: Saves a screenshot after every step
  4. FOR_FAILURES: Saves screenshots only for failing steps.
  5. DISABLED: Doesn’t save screenshots for any steps.

In the below option, I have used FOR_FAILURES option in the serenity.properties file.

serenity.project.name = Serenity and Cucumber Report Demo
current.target.version = sprint-1
serenity.take.screenshots = FOR_FAILURES

Below is the screenshot of the passed test case. We can see that there is no screenshot attached to any of the test steps.

Below is the screenshot of the failed test case. We can see that there is a screenshot attached to the failed test step only, not all the test steps. In below example, it is a scenario outline with four different test data. Out of four, only one set of test data has failed. So, the screenshot is generated for the failed step of that particular test data.

We are done! Congratulations on making it through this tutorial and hope you found it useful! Happy Learning!!

Screenshot of Failed Test Cases in Selenium WebDriver

HOME

In the previous tutorials, I have explained how we can take screenshots in Selenium using FileUtils or FileHandler. In this tutorial, I will explain how to capture screenshots of Failed Test Cases in Selenium.

We are going to use TestNG to capture screenshot of failed test cases.

We will be using below mentioned features of TestNG

1) ITestResult – This  Interface will provide us the result of test case execution. @AfterMethod method can declare a parameter of type ITestResult, which will reflect the result of the test method that was just run.

2) @AfterMethod – The annotated method will be run after each test method. Any @AfterMethod can declare a parameter of type java.lang.reflect.Method. This parameter will receive the test method that will be called once this after the method as run.

3) result.getName() – will return name of test case so that screenshot name will be same as test case name

4) @BeforeTest – The annotated method will be run before any test method belonging to the classes inside the tag is run.

5) @AfterTest – The annotated method will be run after all the test methods belonging to the classes inside the tag have run.

We are executing 2 test cases. One of the Test Case will pass and another will fail. This program will only capture the screenshot of failed test case, not the passed one as we have used condition

if (ITestResult.FAILURE == result.getStatus())

Let see this as a program. 

import java.io.File;
import org.apache.commons.io.FileUtils;
import org.openqa.selenium.By;
import org.openqa.selenium.OutputType;
import org.openqa.selenium.TakesScreenshot;
import org.openqa.selenium.WebDriver;
import org.openqa.selenium.firefox.FirefoxDriver;
import org.testng.Assert;
import org.testng.ITestResult;
import org.testng.annotations.AfterMethod;
import org.testng.annotations.AfterTest;
import org.testng.annotations.BeforeTest;
import org.testng.annotations.Test;
 
public class ScreenshotFailedCases {
    static WebDriver driver;
 
    @BeforeTest
    public static void init() {
        System.setProperty("webdriver.gecko.driver", "src\\test\\resources\\webdrivers\\window\\geckodriver.exe");
 
        // Initiate Firefox browser
        driver = new FirefoxDriver();
 
        // Maximize the browser
        driver.manage().window().maximize();
 
        // Pass application url
        driver.get("https://duckduckgo.com/");
        System.out.println("BeforeTest");
    }
 
    @Test
    public void captureCorrectScreenMethod() throws Exception {
        String Text = driver.findElement(By.xpath("//*[@id='logo_homepage_link']")).getText();
        // Verify the text on the landing page
        Assert.assertTrue(Text.contains("About DuckDuckGo"));
    }
 
    @Test
    public void captureIncorrectScreenMethod() throws Exception {
                        
		// Fail test by using incorrect XPath to find the search box
        driver.findElement(By.xpath("//*[@name='qe']")).sendKeys("agile");
    }
 
    @AfterTest
    public static void exit() {
                        
		// Close the WebPage
        driver.quit();
    }
 
    // AfterMethod annotation - This method executes after every test execution
    @AfterMethod
    public void screenShot(ITestResult result) {
 
        // ITestResult.FAILURE is equals to result.getStatus then it enter into
        // if condition
                        
	if (ITestResult.FAILURE == result.getStatus()) {
            try {
                    
		         // To create reference of TakesScreenshot
                 TakesScreenshot screenshot = (TakesScreenshot) driver;
 
                 // Call method to capture screenshot
                 File src = screenshot.getScreenshotAs(OutputType.FILE);
 
                 // Copy files to specific location result.getName() will 
                 // return  name of test case so that screenshot name will be same as test case name
                    
		   FileUtils.copyFile(src, new File("./Screenshots/" + result.getName() + System.currentTimeMillis() + ".png"));
                    System.out.println("Successfully captured a screenshot");
                } catch (Exception e) {
                    System.out.println("Exception while taking screenshot " + e.getMessage());
           }
        }
    }
}

A folder with name Screenshots is created and the screenshot is placed in that folder as you can see the image below

Execution Status as shown below

TestNG Report – Go to test-output folder and open emailable-report.html

How to use FileHandler Class to take Screenshot in Selenium WebDriver

 HOME

In the previous post, I have explained how to capture screenshots in Selenium using FileUtils. In this post, will see another way of capturing the screenshots in Selenium.

FileHandler is new Class in Selenium which help us to store screenshots, create directory and so on. You can get full documentation of FileHandler here

Step 1- Import the new package which is

import org.openqa.selenium.io.FileHandler;

Step 2 – To capture a screenshot in Selenium, we can make use of an interface, called TakesScreenshot. This method indicates the driver, that it can capture a screenshot and store it in different ways

TakesScreenshot ts = (TakesScreenshot) driver;

Step 3 – In order to capture screenshot and store it in a particular location, there is a method called “getScreenshotAs“, where OutputType defines the output type for a screenshot.

File source = ts.getScreenshotAs(OutputType.FILE);

Step 4- Call copy method of FileHandler Class which is static method and will ask two argument First is src and another is destination. Code will look like 

FileHandler.copy(source, new File("/Screenshots/SeleniumScreenshot" + System.currentTimeMillis() + ".png"));

Let’s see this in a Selenium program:-

import java.io.File;
 
import java.io.IOException; 
import org.openqa.selenium.OutputType;
import org.openqa.selenium.TakesScreenshot;
import org.openqa.selenium.WebDriver;
import org.openqa.selenium.firefox.FirefoxDriver;
import org.openqa.selenium.io.FileHandler;
 
public class ScreenshotExample {
      public static void main(String[] args) throws IOException {

            System.setProperty("webdriver.gecko.driver", "src\\test\\resources\\webdrivers\\window\\geckodriver.exe");
            WebDriver driver = new FirefoxDriver();

            // Maximize the window
            driver.manage().window().maximize();
            driver.get("https://configureselenium.blogspot.com/");

            // Convert web driver object to TakeScreenshot
            TakesScreenshot ts = (TakesScreenshot) driver;

            // Call getScreenshotAs method to create image file
            File source = ts.getScreenshotAs(OutputType.FILE);

            // Copy file at destination
            FileHandler.copy(source, new File("./Screenshots/SeleniumScreenshot" + System.currentTimeMillis() + ".png"));
            System.out.println("the Screenshot is taken");

            // close the current browser
            driver.quit();
      } 
 
}

A folder with name “Screenshots” created and the screenshot placed in that folder as you can see the image below

The Screenshot looks like something as shown below

How to Capture Screenshot in Selenium Webdriver

 HOME

In Automation, it is advisable to take screenshots of failed test cases for further analysis and proof of failure. Selenium provides the capability to take screenshot. But, before we see how to capture Screenshot in Selenium, we need to add a dependency in the Maven project.

Recently Selenium has done some changes in recent version so if you are using Selenium 3.6.0 then you need to add below jar to project or if you are using then you can provide below dependency in project.

https://mvnrepository.com/artifact/commons-io/commons-io

To capture a screenshot in Selenium, we can make use of an interface, called TakesScreenshot. This method indicates the driver, that it can capture a screenshot and store it in different ways

TakesScreenshot ts = (TakesScreenshot) driver;

In order to capture screenshot and store it in a particular location, there is a method called “getScreenshotAs“, where OutputType defines the output type for a screenshot.

File source = ts.getScreenshotAs(OutputType.FILE);

Copy file to Desired Location

FileUtils.copyFile(source, newFile("./Screenshots/Selenium" + System.currentTimeMillis() + ".png"));

Let’s see the complete program

import java.io.File;
 
import java.io.IOException;
import org.apache.commons.io.FileUtils;
import org.openqa.selenium.OutputType;
import org.openqa.selenium.TakesScreenshot;
import org.openqa.selenium.WebDriver;
import org.openqa.selenium.chrome.ChromeDriver;
 
public class ScreenshotDemo {
      public static void main(String[] args) throws IOException {
                        
          System.setProperty("webdriver.chrome.driver", "src\\test\\resources\\webdrivers\\window\\chromedriver.exe");
          WebDriver driver = new ChromeDriver();
                        
          // Maximize the window
          driver.manage().window().maximize();
          driver.get("https://configureselenium.blogspot.com/");
                        
          // Convert web driver object to TakeScreenshot
          TakesScreenshot ts = (TakesScreenshot) driver;
                        
          // Call getScreenshotAs method to create image file
           File source = ts.getScreenshotAs(OutputType.FILE);
                        
          // Copy file at destination
          FileUtils.copyFile(source, new File("./Screenshots/Selenium" + System.currentTimeMillis() + ".png"));
           System.out.println("the Screenshot is taken");
                        
          // close the current browser
          driver.quit();
     }
 
}

A folder with name Screenshots created and the screenshot is placed in that folder as you can see the image below

The Screenshot looks like something below

If you don’t want to use Maven Dependency common-io, then you can use FileHandler from

import org.openqa.selenium.io.FileHandler;
 
FileHandler.copy(source, new File("C:\\Screenshots\\Selenium" + System.currentTimeMillis() + ".png"));