Many organizations aim to execute automation tests across various browsers, such as Chrome, Firefox, Edge, and others, to ensure a consistent user experience. Serenity offers the capability to run tests on different browsers, supporting this need.
We can set up multiple driver configurations using the environments section, as demonstrated below.
mvn clean verify -Denvironment=chrome
The complete framework using Serenity with JUnit5 can be found here – Testing of Web Application using Serenity with JUnit5.
We need to add serenity.conf in src/test/resources.
To apply the driver settings, simply set the environment system property to the desired environment, for example:
environments {
  chrome {
    webdriver {
      driver = chrome
      autodownload = true
      capabilities {
        browserName = "chrome"
        acceptInsecureCerts = true
        "goog:chromeOptions" {
          args = ["test-type", "ignore-certificate-errors", "headless", "--window-size=1000,800"
            "incognito", "disable-infobars", "disable-gpu", "disable-default-apps", "disable-popup-blocking"]
        }
      }
    }
  }
  edge {
    webdriver {
      capabilities {
        browserName = "MicrosoftEdge"
        "ms:edgeOptions" {
          args = ["test-type", "ignore-certificate-errors", "headless",
            "incognito", "disable-infobars", "disable-gpu", "disable-default-apps", "disable-popup-blocking"]
        }
      }
    }
  }
  firefox {
    webdriver {
      capabilities {
        browserName = "firefox"
        pageLoadStrategy = "normal"
        acceptInsecureCerts = true
        unhandledPromptBehavior = "dismiss"
        strictFileInteractability = true

        "moz:firefoxOptions" {
          args = ["-headless"],
          prefs {
            "javascript.options.showInConsole": false
          },
          log {"level": "info"},
        }
      }
    }
  }
}
Chrome Browser
To run the tests using the chrome browser, use the below command:
mvn clean verify -Denvironment="chrome"
Serenity Report shows that the tests are executed in the Chrome Browser.

Firefox Browser
To run the tests using the chrome browser, use the below command:
mvn clean verify -Denvironment="firefox"
Serenity Report shows that the tests are executed in the Firefox Browser.

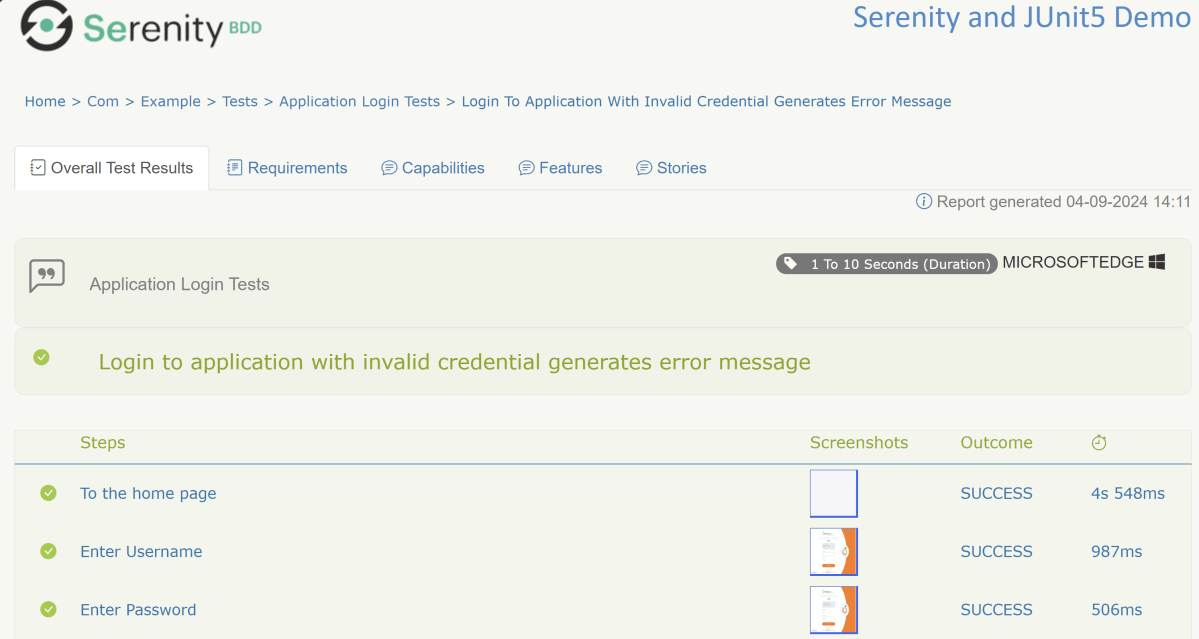
Edge Browser
To run the tests using the chrome browser, use the below command:
mvn clean verify -Denvironment="edge"
Serenity Report shows that the tests are executed in the Edge Browser.
We are done! Congratulations on making it through this tutorial and hope you found it useful! Happy Learning!!