In this article we will see how we can write in a pdf file using selenium Java.
Writing in a PDF document in Selenium using Java requires some additional libraries because Selenium itself does not provide direct support for reading PDFs. The most commonly used library for reading PDFs in Java is Apache PDFBox.
Table of Contents
- Add the dependencies
- Setup ChromeOptions and open the browser
- Download the PDF Document
- Create a content stream to write to the PDF
Below is an example of sample PDF we will use.
Sample PDF File

1. Add the dependencies
  <dependency>
      <groupId>org.seleniumhq.selenium</groupId>
      <artifactId>selenium-java</artifactId>
      <version>4.24.0</version>
    </dependency>

    <dependency>
      <groupId>commons-io</groupId>
      <artifactId>commons-io</artifactId>
      <version>2.16.1</version>
    </dependency>

    <dependency>
      <groupId>org.apache.pdfbox</groupId>
      <artifactId>pdfbox</artifactId>
      <version>3.0.3</version>
    </dependency>
2. Setup ChromeOptions and open the browser
This includes setting the browser to always download PDFs instead of opening them in the browser, and specifying the default download directory.
String downloadFilepath = System.getProperty("user.dir") + File.separator + "downloads";

ChromeOptions options = new ChromeOptions();
Map<String, Object> prefs = new HashMap<>();
prefs.put("plugins.always_open_pdf_externally", true);
prefs.put("download.default_directory", downloadFilepath);
options.setExperimentalOption("prefs", prefs);

WebDriver driver = new ChromeDriver(options);
driver.manage().window().maximize();
driver.get("https://freetestdata.com/document-files/pdf/");
3. Download the PDF Document
Use Selenium WebDriver to navigate to the PDF URL and download it to a desired location.
// Download first PDF
WebElement downloadLink = driver.findElement(By.xpath("//*[@class='elementor-button-text']"));
downloadLink.click();
//Wait for PDF download to complete
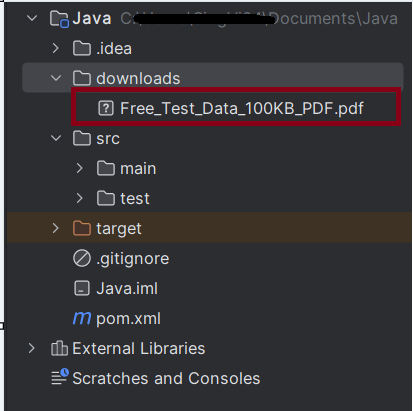
File downloadedFile = new File(downloadFilepath + "/Free_Test_Data_100KB_PDF.pdf");
WebDriverWait wait = new WebDriverWait(driver, Duration.ofSeconds(30));
wait.until((ExpectedCondition<Boolean>) wd -> downloadedFile.exists());
System.out.println("PDF File is downloaded successfully.");
4. Create a content stream to write to the PDF
We are using the Apache PDFBox to write to the downloaded PDF file.
Step 1 – PDPageContentStream class is used to insert data in the document. In this class, we need to pass the document object and page object as its parameter to insert data.
PDPageContentStream contentStream = new PDPageContentStream(doc, page, PDPageContentStream.AppendMode.APPEND, true);
Step 2 – When we insert text in the PDF document, we can also provide the start position of the text. beginText() method of the PDPageContentStream class is used to start the text content.
contentStream.beginText();
Step 3 – We can set the font style and font size of the text by using setFont() method of the PDPageContentStream class.
//Setting the font to the Content stream
PDFont pdfFont=  new PDType1Font(TIMES_BOLD_ITALIC);
contentStream.setFont(pdfFont, 20);
Step 4 – We can set the position of the text by using newLineAtOffset() method of the PDPageContentStream class which can be shown in the following code.
//Setting the position for the line
contentStream.newLineAtOffset(40, 450);
Step 5 – We can insert text content in the PDF document by using the showText() method of the PDPageContentStream class.
//Adding text in the form of string
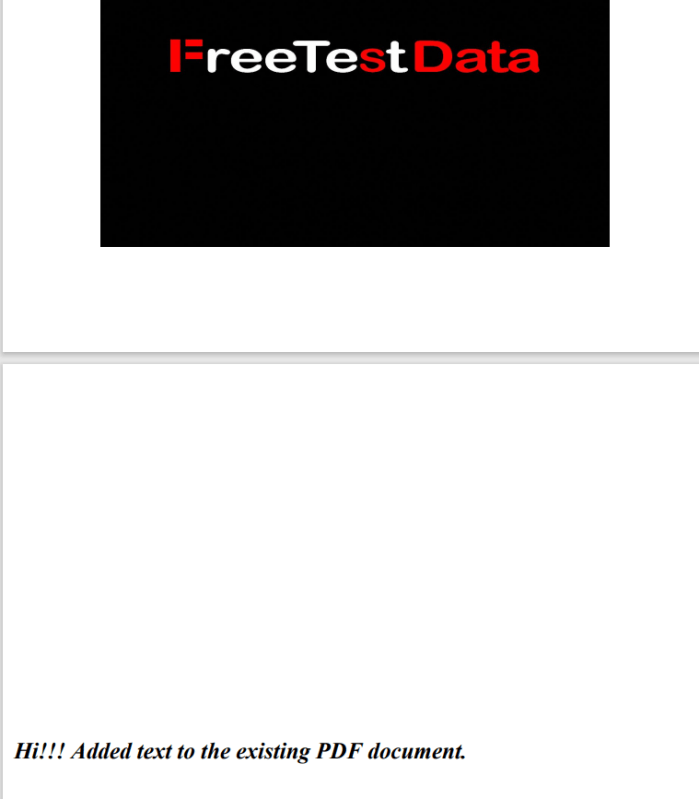
String text = "Hi!!! Added text to the existing PDF document.";
contentStream.showText(text);
Step 6 – When we insert text in the PDF document, we have to provide the end point of the text. endText() method of the PDPageContentStream class is used to end the text content.
contentStream.endText();
Step 7 – We can close the PDPageContentStream class by using close() method.
//Closing the content stream
contentStream.close();
Step 8 – After adding the required document, we have to save it to our desired location. save() method is used to save the document.
//Saving the document
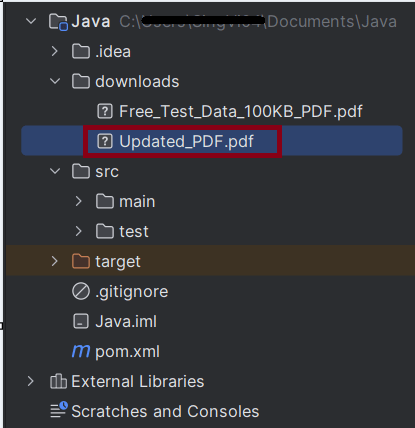
doc.save(new File("downloads/Updated_PDF.pdf"));
Step 9 – After completing the task, we need to close the PDDocument class object by using the close() method.
//Closing the document
doc.close();
The complete program can be seen below:
package com.example;

import org.apache.pdfbox.Loader;
import org.apache.pdfbox.pdmodel.PDDocument;
import org.apache.pdfbox.pdmodel.PDPage;
import org.apache.pdfbox.pdmodel.PDPageContentStream;
import org.apache.pdfbox.pdmodel.font.PDFont;
import org.apache.pdfbox.pdmodel.font.PDType1Font;
import org.openqa.selenium.By;
import org.openqa.selenium.WebDriver;
import org.openqa.selenium.WebElement;
import org.openqa.selenium.chrome.ChromeDriver;
import org.openqa.selenium.chrome.ChromeOptions;
import org.openqa.selenium.support.ui.ExpectedCondition;
import org.openqa.selenium.support.ui.WebDriverWait;

import java.io.File;
import java.io.IOException;
import java.time.Duration;
import java.util.HashMap;
import java.util.Map;

import static org.apache.pdfbox.pdmodel.font.Standard14Fonts.FontName.TIMES_BOLD_ITALIC;

public class WritePDF_Chrome_Demo {

    public static void main(String[] args) throws InterruptedException, IOException {

        String downloadFilepath = System.getProperty("user.dir") + File.separator + "downloads";

        ChromeOptions options = new ChromeOptions();
        Map<String, Object> prefs = new HashMap<>();
        prefs.put("plugins.always_open_pdf_externally", true);
        prefs.put("download.default_directory", downloadFilepath);
        options.setExperimentalOption("prefs", prefs);

        WebDriver driver = new ChromeDriver(options);
        driver.manage().window().maximize();
        driver.get("https://freetestdata.com/document-files/pdf/");

        // Download first PDF
        WebElement downloadLink = driver.findElement(By.xpath("//*[@class='elementor-button-text']"));
        downloadLink.click();

        //Wait for PDF download to complete
        File downloadedFile = new File(downloadFilepath + "/Free_Test_Data_100KB_PDF.pdf");
        WebDriverWait wait = new WebDriverWait(driver, Duration.ofSeconds(30));
        wait.until((ExpectedCondition<Boolean>) wd -> downloadedFile.exists());
        System.out.println("PDF File is downloaded successfully.");

        driver.quit();

        //Retrieving the pages of the document
        PDDocument doc = Loader.loadPDF(downloadedFile);
        PDPage page = doc.getPage(2);
        PDPageContentStream contentStream = getPdPageContentStream(doc, page);
        System.out.println("New Text Content is added in the PDF Document.");

        //Closing the content stream
        contentStream.close();

        //Saving the document
        doc.save(new File("downloads/Updated_PDF.pdf"));

        //Closing the document
        doc.close();
    }

    private static PDPageContentStream getPdPageContentStream(PDDocument doc, PDPage page) throws IOException {

        PDPageContentStream contentStream = new PDPageContentStream(doc, page, PDPageContentStream.AppendMode.APPEND, true);

        //Begin the Content stream
        contentStream.beginText();

        //Setting the font to the Content stream
        PDFont pdfFont=  new PDType1Font(TIMES_BOLD_ITALIC);
        contentStream.setFont(pdfFont, 20);

        //Setting the position for the line
        contentStream.newLineAtOffset(10, 450);

        String text = "Hi!!! Added text to the existing PDF document.";

        //Adding text in the form of string
        contentStream.showText(text);

        //Ending the content stream
        contentStream.endText();

        return contentStream;
    }

}
The output of the above program is

We can see that the updated pdf is placed in the documents folder.
We can see that the text content is added to the PDF document.
Summary:
- Setup WebDriver: Configure the browser to handle automatic downloads.
- Trigger Download: Navigate to the webpage and trigger the download.
- Wait for Completion: Implement a waiting mechanism to ensure the download completes.
- Write to PDF: Use PDPageContentStream to write the data to PDF.
That’s it! Congratulations on making it through this tutorial and hope you found it useful! Happy Learning!!