Large test suites can be structured to optimize ease of authoring and maintenance. Page object models are one such approach to structure the test suite. In this tutorial blog, we will learn to create and set up the project using Page Object Model in Playwright Java and TestNG.
Table of Contents
- What is Page Object Model?
- Why is Page Object Model Important?
- System requirements
- Implementation Steps
- Recap of Key Points
What is Page Object Model?
Page Object Model (POM) is a design pattern used in test automation that enhances test maintenance and reduces code duplication where web pages are represented as classes, and the various elements on the page are defined as variables in the class and all possible user interactions can then be implemented as methods in the class.
Why is Page Object Model Important?
1. Improved Test Maintenance: POM allows for easy updates to test scripts when the UI changes. By separating the test logic from the page definitions, only the page objects need to be updated rather than all test scripts.
2. Maintainability: In this model, separate classes are created for different pages of a web application like login page, the home page, employee detail page, change password page, etc. So, if there is any change in any element of a website then we only need to make changes in one class, and not in all classes.
3. Reusability of Code: Shared page objects can be reused across multiple test cases, reducing redundancy. This ensures consistent interactions with web elements and actions, making the test code more efficient and easier to manage.
4. Facilitates Collaboration: A well-structured POM increases collaboration among teams, as each contributor can work on different parts of the application without interfering with one another. This approach helps in managing multiple test scenarios simultaneously.
5. Ease of Debugging: With POM, finding and fixing bugs becomes more straightforward since each page action is located in a specific place. Developers can easily pinpoint the location of a problem without sifting through complex test logic.
System requirements
The following prerequisites are required to be installed on the machine to begin with a smooth setup and installation.
- Java 11 or higher
- IntelliJ IDE or any other IDE to create a project
- Maven
- Browsers on which tests need to be run, like Chrome, Firefox, etc.
Implementation Steps
1. Create a new Maven Project
The first step in setup is to create a new Maven project. I will be using IntelliJ in this tutorial. The following steps need to be followed to create a new Maven project :
Open IntelliJ, Navigate to File >> New >> Project

2. In the New Project window, enter the following details:
- Name of the Project – Playwright_TestNG_Demo
- Location/path where the project needs to be saved – Documents/Playwright (my location)
- Select JDK version — I am using JDK 17
- Archetype — Search for “quickstart” and select maven-archetype-quickstart from the results
Click on the Create button to create the project.
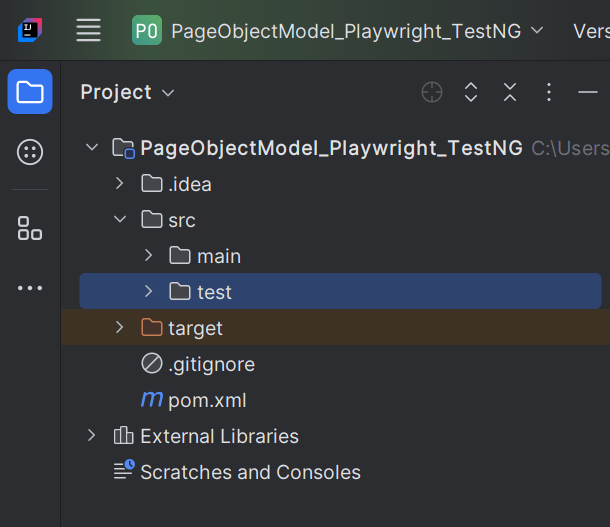
This will create a project as shown below in the IntelliJ.
2. Set Up the Environment
Add the Playwright and TestNG dependencies to the pom.xml. The latest dependency can be found here.
<project xmlns="http://maven.apache.org/POM/4.0.0" xmlns:xsi="http://www.w3.org/2001/XMLSchema-instance"
  xsi:schemaLocation="http://maven.apache.org/POM/4.0.0 http://maven.apache.org/xsd/maven-4.0.0.xsd">
  <modelVersion>4.0.0</modelVersion>

  <groupId>com.example</groupId>
  <artifactId>Playwright_TestNG_Demo</artifactId>
  <version>1.0-SNAPSHOT</version>
  <packaging>jar</packaging>

  <name>Playwright_TestNG_Demo</name>
  <url>http://maven.apache.org</url>

  <properties>
    <project.build.sourceEncoding>UTF-8</project.build.sourceEncoding>
    <playwright.version>1.57.0</playwright.version>
    <testng.version>7.11.0</testng.version>
    <maven.compiler.plugin.version>3.13.0</maven.compiler.plugin.version>
    <maven.compiler.source.version>17</maven.compiler.source.version>
    <maven.compiler.target.version>17</maven.compiler.target.version>
    <maven.surefire.plugin.version>3.5.4</maven.surefire.plugin.version>
  </properties>

  <dependencies>

    <dependency>
      <groupId>com.microsoft.playwright</groupId>
      <artifactId>playwright</artifactId>
      <version>${playwright.version}</version>
    </dependency>

    <dependency>
      <groupId>org.testng</groupId>
      <artifactId>testng</artifactId>
      <version>${testng.version}</version>
      <scope>test</scope>
    </dependency>
  </dependencies>

  <build>
    <plugins>
      <plugin>
        <groupId>org.apache.maven.plugins</groupId>
        <artifactId>maven-compiler-plugin</artifactId>
        <version>${maven.compiler.plugin.version}</version>
        <configuration>
          <source>${maven.compiler.source.version}</source>
          <target>${maven.compiler.target.version}</target>
        </configuration>
      </plugin>
      <plugin>
        <groupId>org.apache.maven.plugins</groupId>
        <artifactId>maven-surefire-plugin</artifactId>
        <version>${maven.surefire.plugin.version}</version>
        <configuration>
          <suiteXmlFiles>
            <suiteXmlFile>testng.xml</suiteXmlFile>
          </suiteXmlFiles>
        </configuration>
      </plugin>
    </plugins>
  </build>
</project>
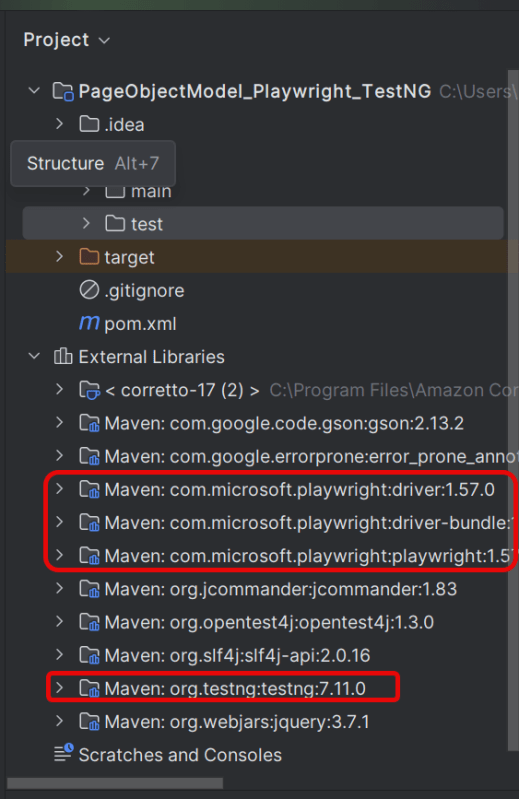
After adding the dependency, refresh the project. We will see that the Playwright jar files are downloaded in External Libraries.
3. Project Structure for Maintainability
Creating a well-organized project structure is crucial for maintaining a scalable and efficient automation framework.
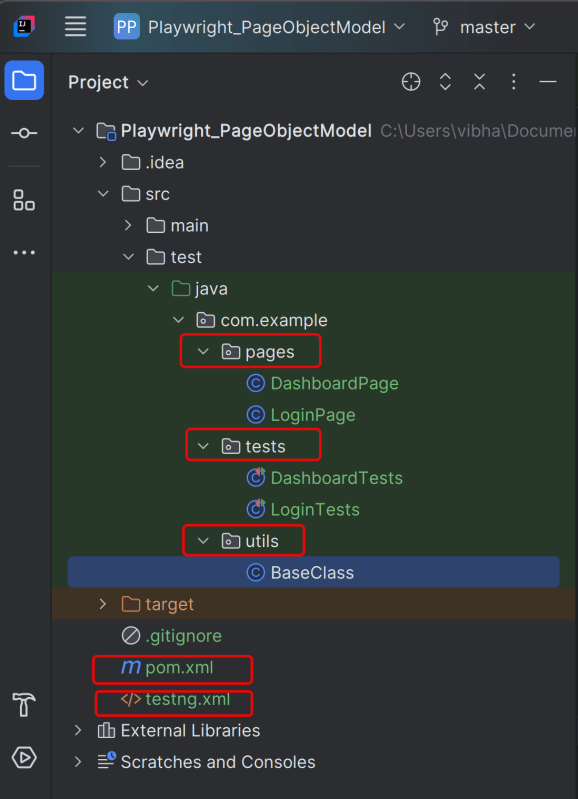
1. Page Classes (src/main/java/.../pages/): Each web page in your application should have a corresponding page class. This class encapsulates all the functionalities of the web page, following the Page Object Model.
2. Utility Classes (src/main/java/.../utils/): These classes can include various utilities like configuration readers, helper methods for common tasks, etc.
3. Test Classes (src/test/java/.../tests/): Here, you write your actual test cases, utilizing the page classes.
4. Test Data Files (src/test/resources/testdata/): Keep your test data in external files. This ensures easy management. It also helps to avoid hardcoding usernames and passwords.
5. Maven Configuration (pom.xml): This file manages project dependencies, plugins, and other configurations.
6. testng.xml: This file is the central configuration file that defines how the test suite should be executed.
4. Creating Page Object Classes
Page classes serve as an interface to a web page’s UI elements. Each page class corresponds to a page in your application, encapsulating the actions that can be performed on that page.
- Identify the UI Elements: Determine all the elements on the web page that your test will interact with, such as text boxes, buttons, and links.
- Define Selectors: Store the selectors for these elements in your page class. It’s a best practice to externalize these selectors, but for simplicity, we’ll define them directly in the class.
- Implement Actions: Create methods for each action that can be performed on the page, like entering text, clicking buttons, etc.
Creating LoginPage Class
import com.microsoft.playwright.Page;

public class LoginPage {

    private Page page;

    //Locators
    private final String usernameLocator = "input[name='username']";
    private final String passwordLocator = "input[name='password']";
    private final String submitButton = "button[type='submit']";
    private final String errorMessage = "//p[contains(@class, 'oxd-text oxd-text--p oxd-alert-content-text')]";

    //Constructor
    public LoginPage(Page page){
        this.page = page;
    }

    public void login(String username, String password) {
        page.fill(usernameLocator,username);
        page.fill(passwordLocator,password);
        page.click(submitButton);
    }

    public String getErrorMessage(){
        return page.textContent(errorMessage);
    }
}
Creating DashboardPage Class
package org.example.pages;

import com.microsoft.playwright.Page;

public class DashboardPage {

    private Page page;

    //Locators
    private final String dashboardHeading = "//h6[contains(@class, 'oxd-topbar-header-breadcrumb-module')]";

    //Constructor
    public DashboardPage(Page page) {
        this.page = page;
    }

    // Methods
    public String getHeading() {
        return page.textContent(dashboardHeading);
    }
}
5. Write the Test Scripts
Create a Test files under src/test/java. Use these page classes in your test scripts to perform end-to-end scenarios. This will keep your tests clean and focused on logic rather than details about the UI elements.
A typical test class includes:
- Setup Method: Initializes the Playwright browser and other prerequisites before each test.
- Test Methods: Individual test cases, each representing a different scenario.
- Teardown Method: Closes the browser and performs any cleanup after each test.
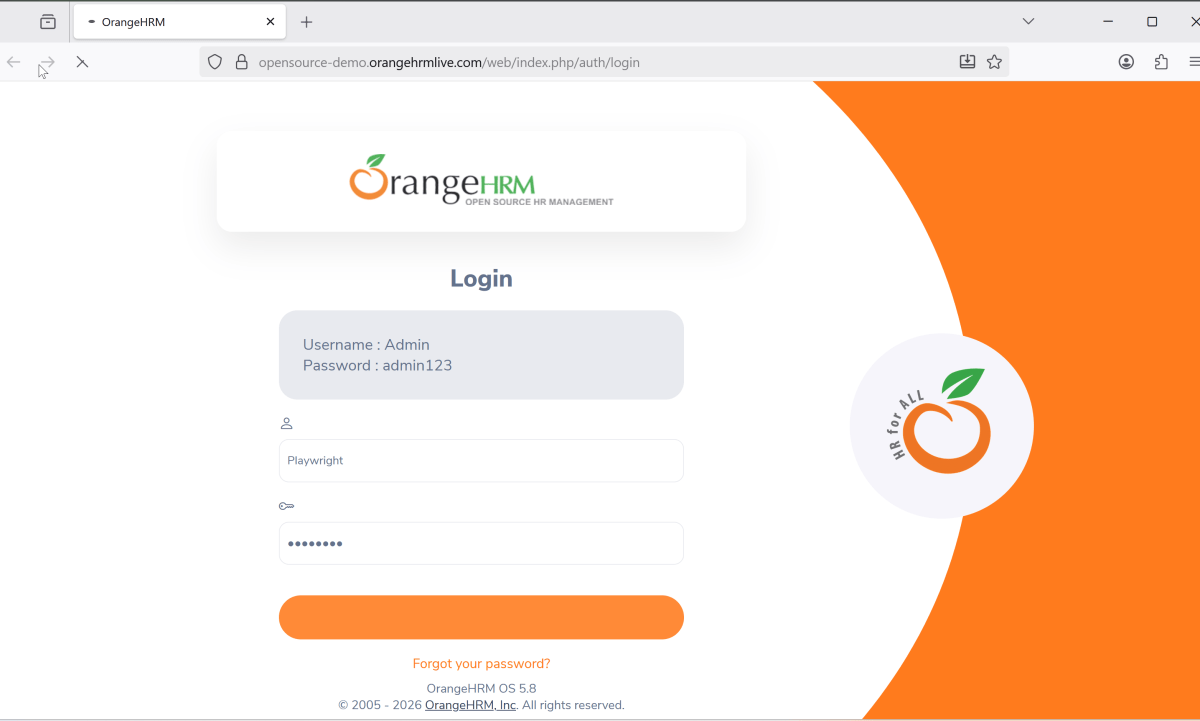
We will be automating the following test scenario using Playwright Java and run them in Chromium.
- Verify that the Home page title of “https://opensource-demo.orangehrmlive.com/web/index.php/auth/login” is equal to “OrangeHRM”
- Verify the invalid username generates error message “Invalid credentials”
Creating BaseClass
This class contains the common variables and methods used throughout the project, like setup and teardown methods.
package org.example.utils;

import com.microsoft.playwright.*;
import org.testng.annotations.AfterClass;
import org.testng.annotations.AfterMethod;
import org.testng.annotations.BeforeClass;
import org.testng.annotations.BeforeMethod;

public class BaseTests {

    // Shared between all tests in this class.
    protected Playwright playwright;
    protected Browser browser;

    // New instance for each test method.
    protected BrowserContext context;
    protected Page page;

    @BeforeClass
    public void launchBrowser() {
        playwright = Playwright.create();
        browser = playwright.chromium().launch(new BrowserType.LaunchOptions().setHeadless(false));
    }

    @BeforeMethod
    public void createContextAndPage() {
        context = browser.newContext();
        page = context.newPage();
        page.navigate("https://opensource-demo.orangehrmlive.com/web/index.php/auth/login");
    }

    @AfterMethod
    public void closeContext() {
        context.close();
    }

    @AfterClass
    public void closeBrowser() {
        playwright.close();
    }
}
Explanation
1. Playwright playwright:
Initialized to manage the browser automation session, allowing interactions with different browsers.
2. Browser browser:
Declared to store the browser instance that will be shared across test methods within the class.
Playwright playwright;
Browser browser = null;
3. BrowserContext context:
Created anew for each test method to simulate independent browser sessions. This ensures that the browser state doesn’t carry over between tests.
4. Page page:
Represents a single tab or window in a browser used for performing actions and assertions.
BrowserContext context;
Page page;
5. @BeforeClass:
This method is annotated with @BeforeClass, indicating it runs once before any test methods in the current class.
The browser is launched in non-headless mode (setHeadless(false)), meaning an actual browser window is opened.
@BeforeClass
public void launchBrowser() {
        playwright = Playwright.create();
        browser = playwright.chromium().launch(new BrowserType.LaunchOptions().setHeadless(false));
}
6. @BeforeMethod createContextAndPage()
This method runs before each test method in the class, as indicated by the @BeforeMethod annotation.
It creates a new BrowserContext and a Page, ensuring each test runs in a clean, isolated state.
The method also navigates to a login page (“https://opensource-demo.orangehrmlive.com/web/index.php/auth/login”), setting up the initial state for each test.
@BeforeMethod
void createContextAndPage() {
      context = browser.newContext();
      page = context.newPage();
      page.navigate("https://opensource-demo.orangehrmlive.com/web/index.php/auth/login");
}
7. @AfterMethod closeContext()
Runs after each test method, annotated with @AfterMethod.
Closes the BrowserContext, effectively closing the browser tab and cleaning up resources.
@AfterMethod
void closeContext() {
       context.close();
}
8. @AfterClass closeBrowser()
Runs once after all test methods in the current class have executed, as indicated by the @AfterClass annotation.
Closes the Playwright instance, freeing up all resources used for automation.
@AfterClass
void closeBrowser() {
      playwright.close();
}
Creating a Login Page Test Class:
package org.example.tests;

import org.example.pages.DashboardPage;
import org.example.pages.LoginPage;
import org.example.utils.BaseTests;
import org.testng.Assert;
import org.testng.annotations.Test;

public class LoginTests extends BaseTests {

    @Test
    public void loginToApplication(){
        LoginPage loginPage = new LoginPage(page);
        loginPage.login("Admin","admin123");
        DashboardPage dashboardPage = new DashboardPage(page);
        String actualHeading = dashboardPage.getHeading();
        Assert.assertEquals(actualHeading,"Dashboard", "Unable to login to the application");
    }

    @Test
    public void invalidCredentials() {
        LoginPage loginPage = new LoginPage(page);
        loginPage.login("Playwright","test");
        Assert.assertEquals(loginPage.getErrorMessage(), "Invalid credentials" ,"Incorrect Error Message is displayed");

    }
}
Explanation
1. loginToApplication
This method enters correct credentials and login to the application.
2. verifyInvalidCredentials
This method enter the invalid username and password and click on the Submit button. Then, it assert that the error message generated by the application is equal to “Invalid credentials”.
6. Create testng.xml
We need to specify the values of browser in the TestNG XML file that will pass to the test case file. Let’s create a testng.xml file to run the test using TestNG.
Right click on the project, New >> File
Below is the sample testng.xml file.
<?xml version="1.0" encoding="UTF-8"?>
<!DOCTYPE suite SYSTEM "http://testng.org/testng-1.0.dtd">
<suite name="Page Object Model Playwright test suite">
    <test name="Chrome Test">
        <parameter name="browser" value="chromium" />
        <classes>
            <class name="org.example.tests.LoginTests"/>
        </classes>
    </test>
</suite>
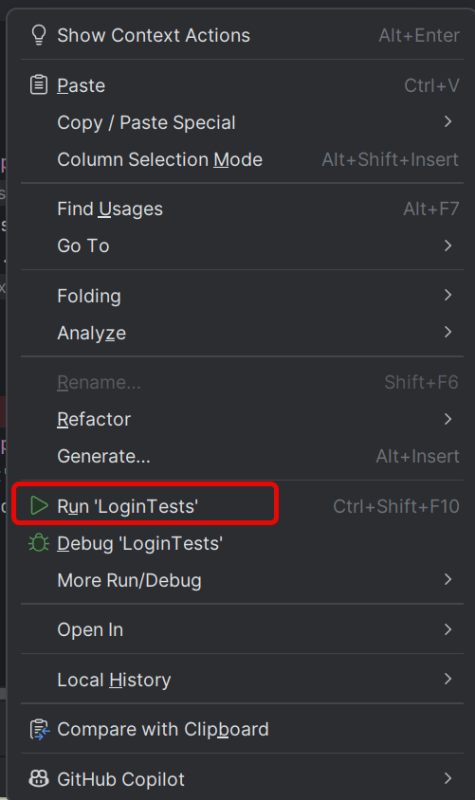
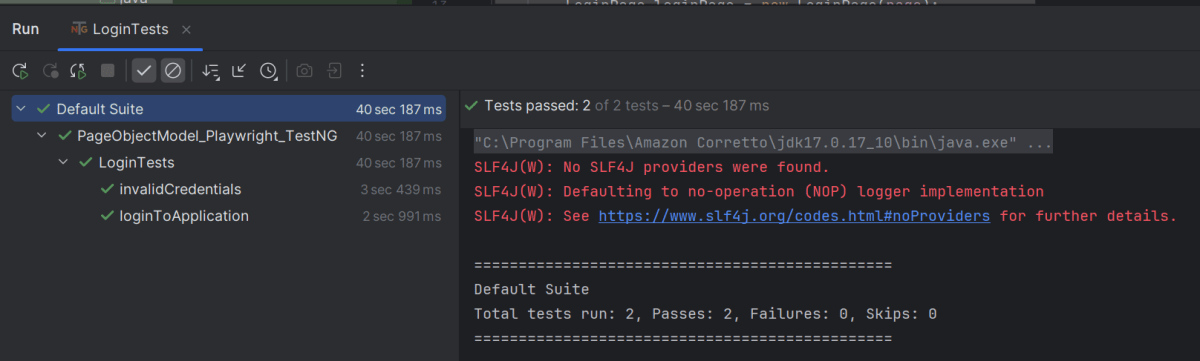
7. Test Execution through IntelliJ
Go to the Test class and right-click and select Run ‘LoginTests’. The tests will run as TestNG tests (in IntelliJ).
Below is the test execution result.
8. Run the tests from TestNG.xml
Execute the tests by right-clicking on testng.xml and select Run ‘…testng.xml’
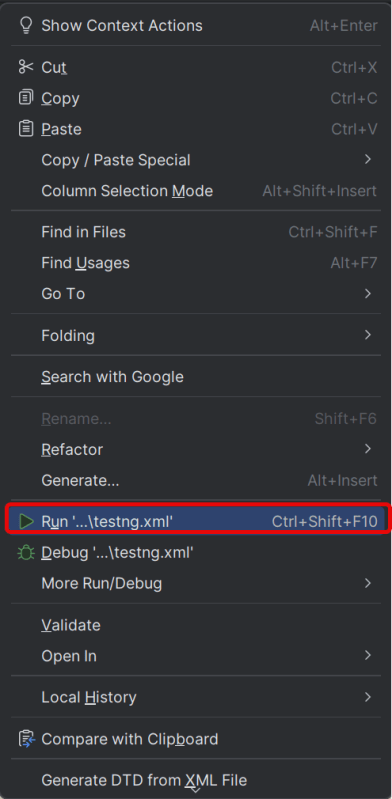
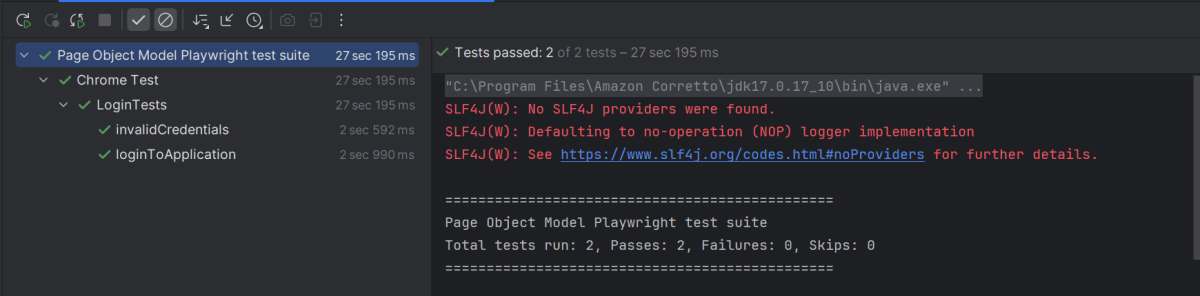
This will run the tests in chromium as mentioned in the .xml file.
The output of the above program is
9. TestNG Report Generation
TestNG generates various types of reports under test-output folder like emailable-report.html, index.html, testng-results.xml.
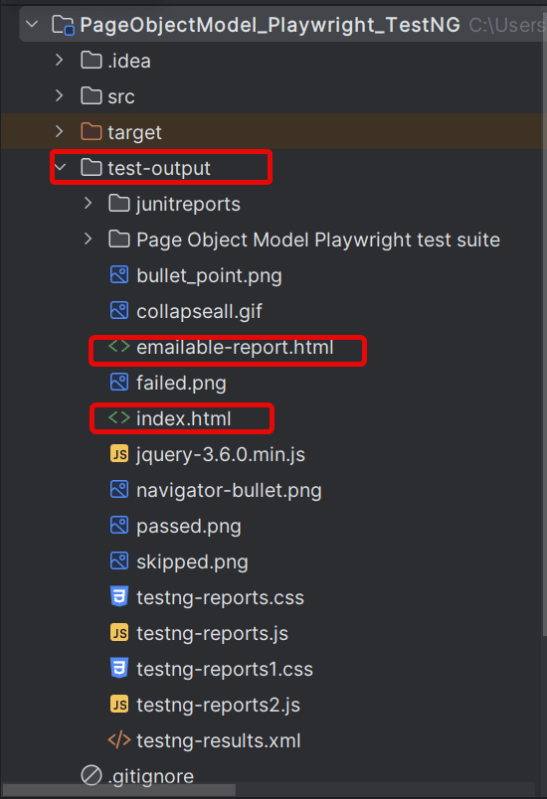
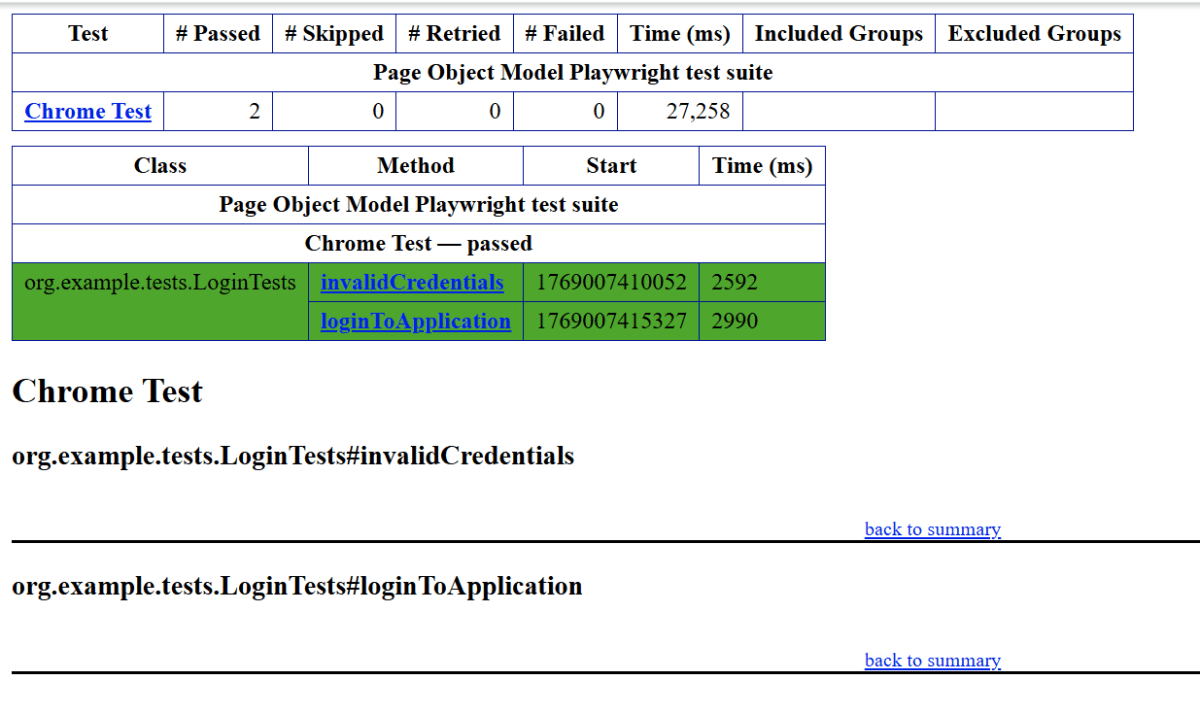
We are interested in the “emailable-report.html” report. Open “emailable-report.html“, as this is an HTML report, and open it with the browser. The below image shows emailable-report.html.
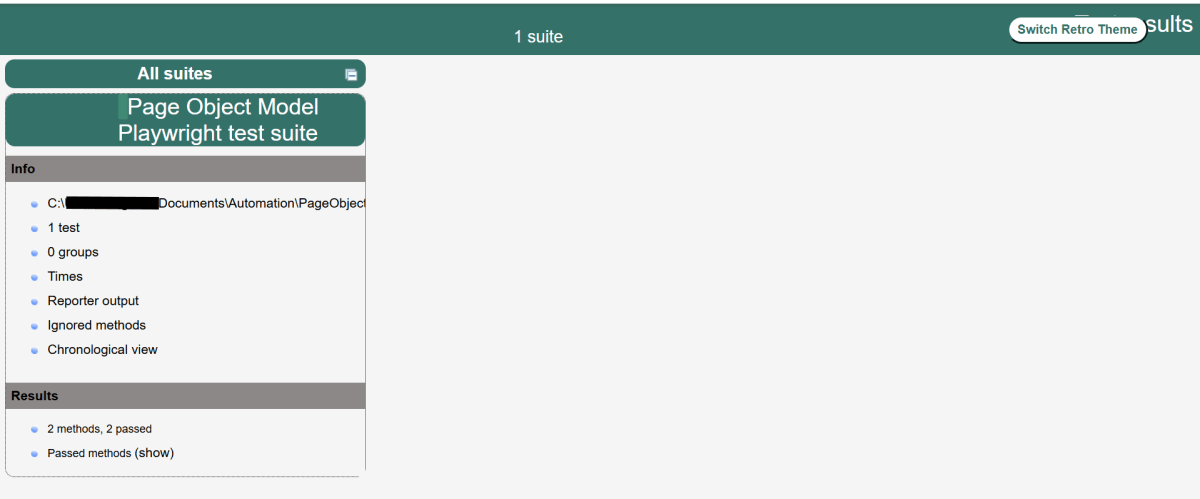
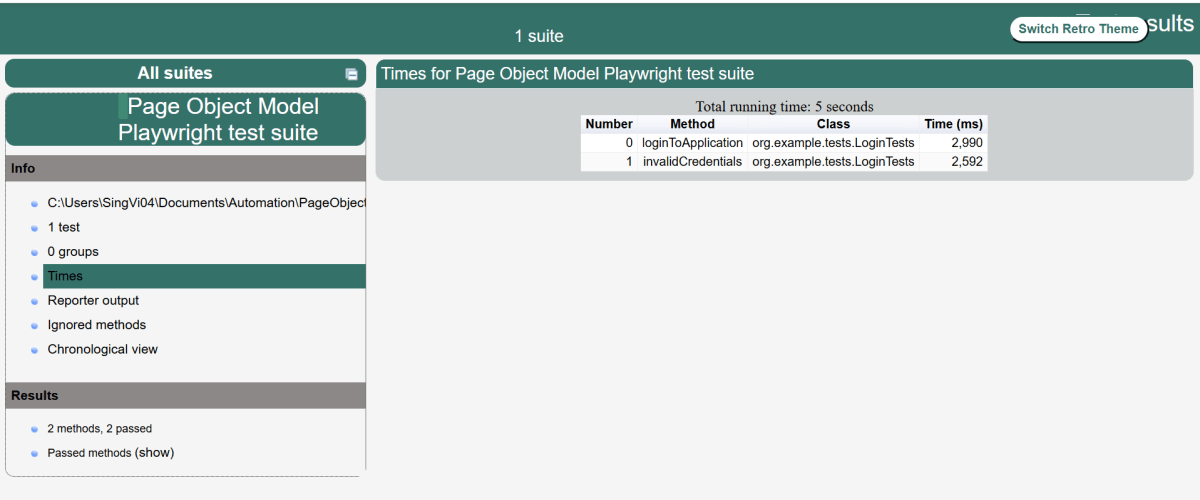
TestNG also produces an “index.html” report, and it resides under the test-output folder. The below image shows the index.html report. This is the latest theme of the report.
Recap of Key Points:
- Playwright and Java: We explored the powerful combination of Playwright with Java. We highlighted the benefits of this duo in automated testing.
- Project Structure: An optimal project layout was discussed, emphasizing maintainability and organization.
- Page Object Model (POM): The implementation of POM was outlined, showcasing its importance in creating scalable and maintainable test scripts.
- Page Classes: We explored how to create page classes, which are a core component of POM. We also provided examples to illustrate their structure. These examples demonstrate their functionality.
- Test Classes: We covered the structure and best practices for writing effective test classes. This ensures clarity and efficiency in your tests.
