In this tutorial, we will learn to create and set up the project using Cross Browser Testing in Playwright Java.
Cross-browser testing with Playwright and Java allows us to ensure consistent functionality in a web application. This can be achieved across major browser engines using a single, unified API. Playwright supports Chromium (Chrome/Edge), Firefox, and WebKit (Safari), enabling true engine-level testing rather than browser emulation.
Table of Contents
- What is Cross-Browser Testing?
- Why is Cross-Browser Testing Important?
- System requirements
- Implementation Steps
What is Cross-Browser Testing?
Cross-browser testing is the process of checking whether a website or web application functions correctly and looks consistent across multiple web browsers, operating systems, and devices. This includes checking compatibility with various versions of browsers like Chrome, Firefox, Safari, Edge, and Internet Explorer, among others.
Why is Cross-Browser Testing Important?
1. User Experience: Different users use different browsers. Ensuring your website works smoothly across all of them enhances the overall user experience.
2. Functionality Testing: Different browsers can interpret HTML, CSS, and JavaScript differently. Cross-browser testing ensures all the functionality of your website works correctly, without errors or display issues.
Real Example:
Imagine a large e-commerce website like Amazon. Their site needs to function seamlessly across all browsers. This ensures users can view products. They can add items to the cart. They can also make purchases smoothly. Amazon employs cross-browser testing to ensure that images load correctly. Checkout processes function without glitches. Every element displays properly across various browsers and devices.
System requirements
The following prerequisites are required to be installed on the machine to begin with a smooth setup and installation.
- Java 8 or higher
- IntelliJ IDE or any other IDE to create a project
- Maven
- Browsers on which tests need to be run, like Chrome, Firefox, etc.
Implementation Steps
1. Create a new Maven Project
The first step in setup is to create a new Maven project. I will be using IntelliJ in this tutorial. The next steps need to be followed to create a new Maven project :
Open IntelliJ, Navigate to File >> New >> Project

2. In the New Project window, enter the following details:
- Name of the Project – Playwright_TestNG_Demo
- Location/path where the project needs to be saved – Documents/Playwright (my location)
- Select JDK version — I am using JDK 17
- Archetype — Search for “quickstart” and select maven-archetype-quickstart from the results
Click on the Create button to create the project.

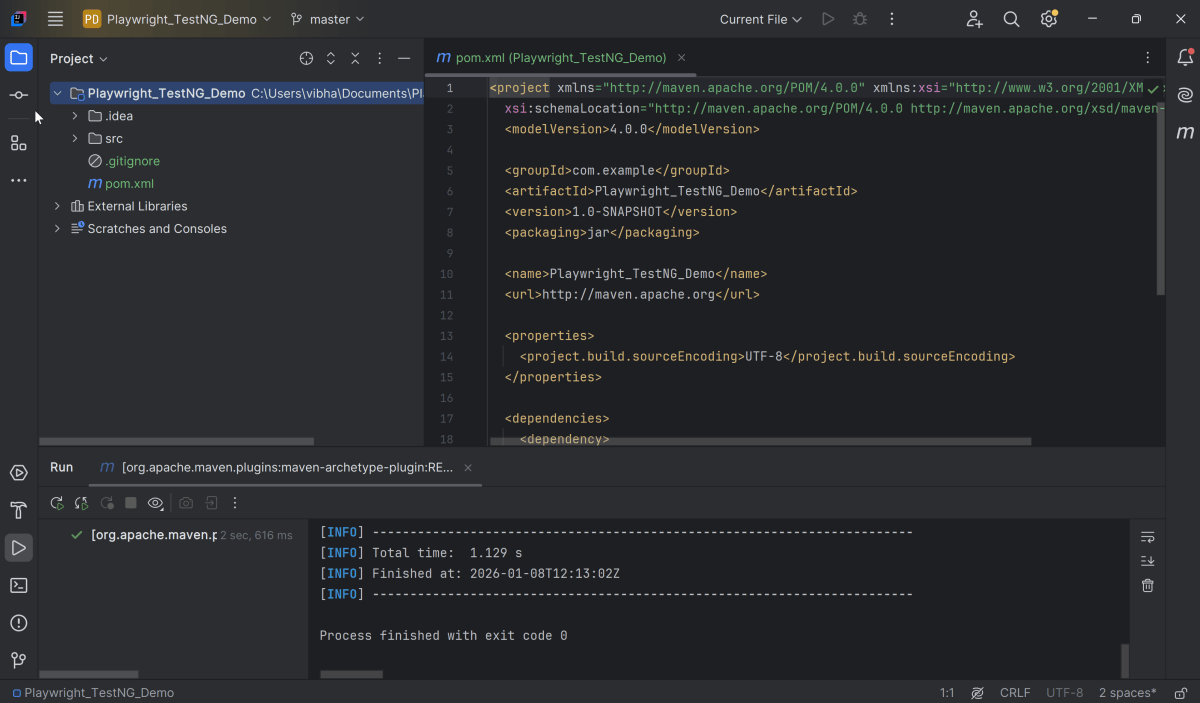
This will create a project as shown in IntelliJ.
2. Setup Playwright with Java
Add the Playwright Java and TestNG dependencies to the pom.xml. The latest dependency can be found here.
<project xmlns="http://maven.apache.org/POM/4.0.0" xmlns:xsi="http://www.w3.org/2001/XMLSchema-instance"
  xsi:schemaLocation="http://maven.apache.org/POM/4.0.0 http://maven.apache.org/xsd/maven-4.0.0.xsd">
  <modelVersion>4.0.0</modelVersion>

  <groupId>com.example</groupId>
  <artifactId>Playwright_TestNG_Demo</artifactId>
  <version>1.0-SNAPSHOT</version>
  <packaging>jar</packaging>

  <name>Playwright_TestNG_Demo</name>
  <url>http://maven.apache.org</url>

  <properties>
    <project.build.sourceEncoding>UTF-8</project.build.sourceEncoding>
    <playwright.version>1.57.0</playwright.version>
    <testng.version>7.11.0</testng.version>
    <maven.compiler.plugin.version>3.13.0</maven.compiler.plugin.version>
    <maven.compiler.source.version>17</maven.compiler.source.version>
    <maven.compiler.target.version>17</maven.compiler.target.version>
    <maven.surefire.plugin.version>3.5.4</maven.surefire.plugin.version>
  </properties>

  <dependencies>

    <dependency>
      <groupId>com.microsoft.playwright</groupId>
      <artifactId>playwright</artifactId>
      <version>${playwright.version}</version>
    </dependency>

    <dependency>
      <groupId>org.testng</groupId>
      <artifactId>testng</artifactId>
      <version>${testng.version}</version>
      <scope>test</scope>
    </dependency>
  </dependencies>

  <build>
    <plugins>
      <plugin>
        <groupId>org.apache.maven.plugins</groupId>
        <artifactId>maven-compiler-plugin</artifactId>
        <version>${maven.compiler.plugin.version}</version>
        <configuration>
          <source>${maven.compiler.source.version}</source>
          <target>${maven.compiler.target.version}</target>
        </configuration>
      </plugin>
      <plugin>
        <groupId>org.apache.maven.plugins</groupId>
        <artifactId>maven-surefire-plugin</artifactId>
        <version>${maven.surefire.plugin.version}</version>
        <configuration>
          <suiteXmlFiles>
            <suiteXmlFile>testng.xml</suiteXmlFile>
          </suiteXmlFiles>
        </configuration>
      </plugin>
    </plugins>
  </build>
</project>
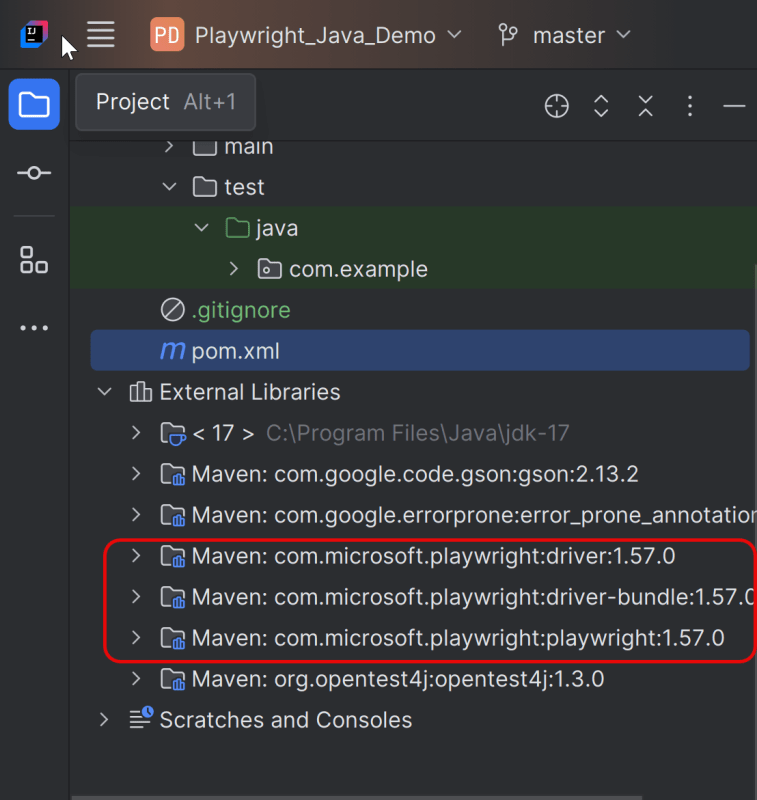
After adding the dependency, refresh the project. We will see that the Playwright jar files are downloaded in External Libraries.
3. Writing the tests
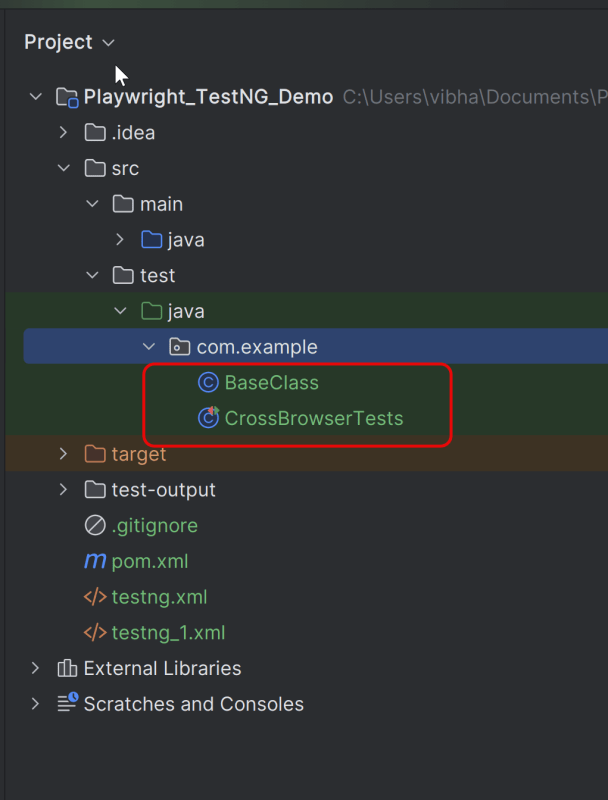
Create the Test files under src/test/java.
We will be automating the following test scenario using Playwright Java and running it in Chromium, Firefox, and WebKit
- Verify that the Home page title of “https://opensource-demo.orangehrmlive.com/web/index.php/auth/login” is equal to “OrangeHRM”
- Verify that the invalid username generates an error message “Invalid credentials”
Let us create a helper class that includes the methods to initialize and close the browser.
package com.example;

import com.microsoft.playwright.*;
import org.testng.annotations.*;

public class BaseClass {

    // Shared between all tests in this class.
    Playwright playwright;
    Browser browser = null;

    // New instance for each test method.
    BrowserContext context;
    Page page;

    @BeforeClass
    @Parameters("browser")
    void launchBrowser(String browserName) {

        playwright = Playwright.create();
        BrowserType browserType = null;

        if (browserName.equals("chromium")) {
            browserType = playwright.chromium();
        } else if (browserName.equals("firefox")) {
            browserType = playwright.firefox();
        } else if (browserName.equals("webkit")) {
            browserType = playwright.webkit();
        }

        browser = browserType.launch(new BrowserType.LaunchOptions().setHeadless(false));
    }

    @BeforeMethod
    void createContextAndPage() {
        context = browser.newContext();
        page = context.newPage();
        page.navigate("https://opensource-demo.orangehrmlive.com/web/index.php/auth/login");
    }

    @AfterMethod
    void closeContext() {
        context.close();
    }

    @AfterClass
    void closeBrowser() {
        playwright.close();
    }
}
Explanation
1. Playwright playwright:
Initialized to manage the browser automation session, allowing interactions with different browsers.
2. Browser browser:
Declared to store the browser instance that will be shared across test methods within the class.
Playwright playwright;
Browser browser = null;
3. BrowserContext context:
Created anew for each test method to simulate independent browser sessions. This ensures that the browser state doesn’t carry over between tests.
4. Page page:
Represents a single tab or window in a browser used for performing actions and assertions.
BrowserContext context;
Page page;
5. @BeforeClass:
This method is annotated with @BeforeClass, indicating it runs once before any test methods in the current class.
It is parameterized (@Parameters(“browser”)) to accept a browser name as input, allowing the test to be run with different browsers.
Depending on the browserName (chromium, firefox, or webkit), the corresponding Playwright BrowserType is used.
The browser is launched in non-headless mode (setHeadless(false)), meaning an actual browser window is opened.
@BeforeClass
    @Parameters("browser")
    void launchBrowser(String browserName) {

        playwright = Playwright.create();
        BrowserType browserType = null;

        if (browserName.equals("chromium")) {
            browserType = playwright.chromium();
        } else if (browserName.equals("firefox")) {
            browserType = playwright.firefox();
        } else if (browserName.equals("webkit")) {
            browserType = playwright.webkit();
        }

        browser = browserType.launch(new BrowserType.LaunchOptions().setHeadless(false));
    }
6. @BeforeMethod createContextAndPage()
This method runs before each test method in the class, as indicated by the @BeforeMethod annotation.
It creates a new BrowserContext and Page, ensuring each test runs in a clean, isolated state.
The method also navigates to a login page (“https://opensource-demo.orangehrmlive.com/web/index.php/auth/login”), setting up the initial state for each test.
@BeforeMethod
void createContextAndPage() {
      context = browser.newContext();
      page = context.newPage();
      page.navigate("https://opensource-demo.orangehrmlive.com/web/index.php/auth/login");
}
7. @AfterMethod closeContext()
Runs after each test method, annotated with @AfterMethod. Closes the BrowserContext, effectively closing the browser tab and cleaning up resources.
@AfterMethod
   void closeContext() {
       context.close();
}
8. @AfterClass closeBrowser()
Runs once after all test methods in the current class have executed, as indicated by the @AfterClass annotation.
Closes the Playwright instance, freeing up all resources used for automation.
@AfterClass
void closeBrowser() {
      playwright.close();
}
Below is the Java file that holds the tests.
CrossBrowserTests
package com.example;

import org.testng.annotations.*;

import static org.testng.Assert.assertEquals;

public class CrossBrowserTests extends BaseClass{

    @Test
    void verifyPageTitle() {
        System.out.println("Page Title :" + page.title());
        assertEquals("OrangeHRM", page.title());
    }

    @Test
    void verifyInvalidCredentials() {
        page.locator("input[name='username']").fill("Playwright");
        page.locator("input[name='password']").fill("admin123");
        page.locator("button[type='submit']").click();
        String expectedValue = page.locator("//p[contains(@class, \"oxd-text oxd-text--p oxd-alert-content-text\")]").textContent();
        assertEquals(expectedValue,"Invalid credentials");
    }

}
Explanation
1. verifyPageTitle
This method verifies that the title of the web page is “OrangeHRM”.
2. verifyInvalidCredentials
This method enters an invalid username and password and clicks on the Submit button. Then, it asserts that the error message generated by the application is equal to “Invalid credentials”.
4. Create testng.xml
We need to specify the values of the browser in the TestNG XML file that will be passed to the test case file. Let’s create a testng.xml file to run the test using TestNG.
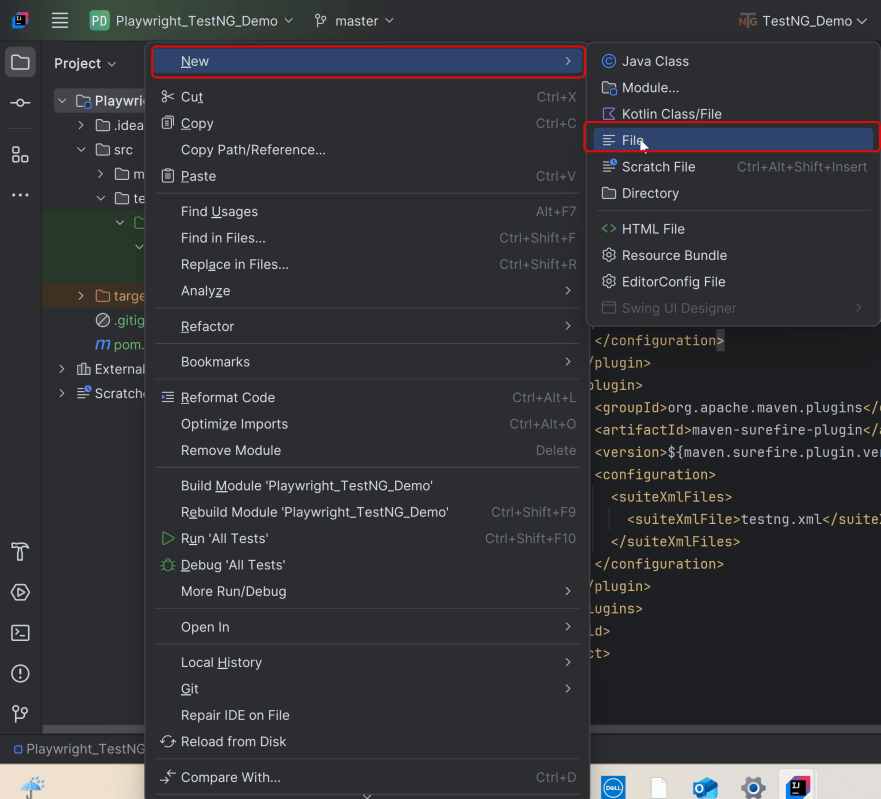
Right click on the project, New >> File
Below is the example testng.xml file.
<?xml version="1.0" encoding="UTF-8"?>
<!DOCTYPE suite SYSTEM "http://testng.org/testng-1.0.dtd">
<suite name="Playwright test suite">
    <test name="Chrome Test">
        <parameter name="browser" value="chromium" />
        <classes>
           <class name="com.example.CrossBrowserTests"/>
    </classes>
    </test>
    <test name="firefox Test">
        <parameter name="browser" value="firefox" />
        <classes>
            <class name="com.example.CrossBrowserTests"/>
        </classes>
    </test> <!-- Test -->

    <test name="WebKit Test">
        <parameter name="browser" value="webkit" />
        <classes>
            <class name="com.example.CrossBrowserTests"/>
        </classes>
    </test> <!-- Test -->
</suite>
5. Test Execution through IntelliJ
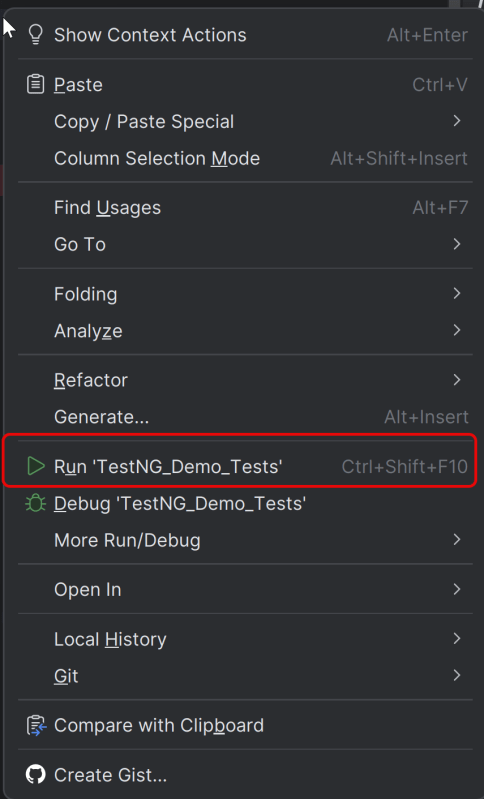
Go to the Test class and right-click and select Run ‘TestNG_Demo_Tests’. The tests will run as TestNG tests (in IntelliJ).
Below is the test execution result.
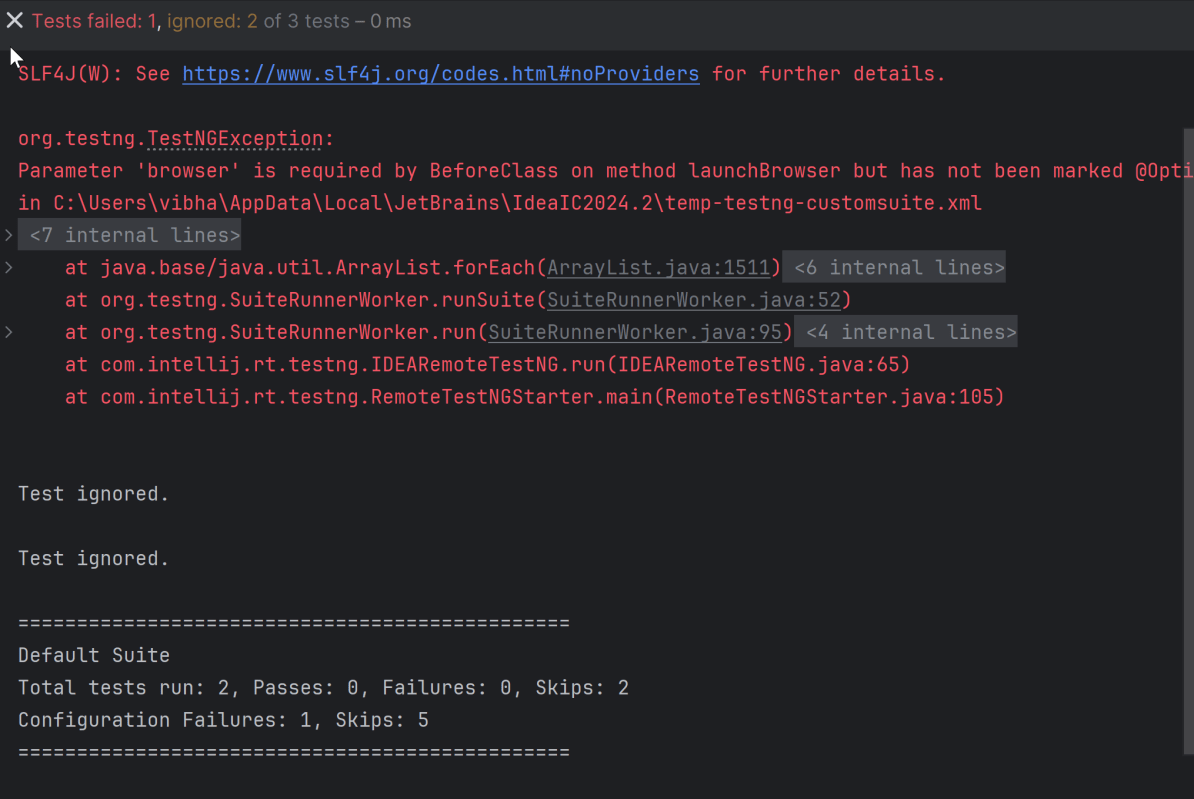
All the tests have failed with the error message – Parameter ‘browser’ is required by BeforeClass on method launchBrowser but has not been marked @Optional or defined. Parameter is expecting to get the browser name either through the command line or testng.xml which we have not provided.
We can mark the launchBrowser() method with Optional, so that if we don’t provide the browser name through testng.xml, it will run the tests on Chromium.
void launchBrowser(@Optional ("chromium") String browserName)
6. Run the tests from TestNG.xml
Execute the tests by right-clicking on crossbrowser_testng.xml and select Run ‘…\crossbrowser_testng.xml’
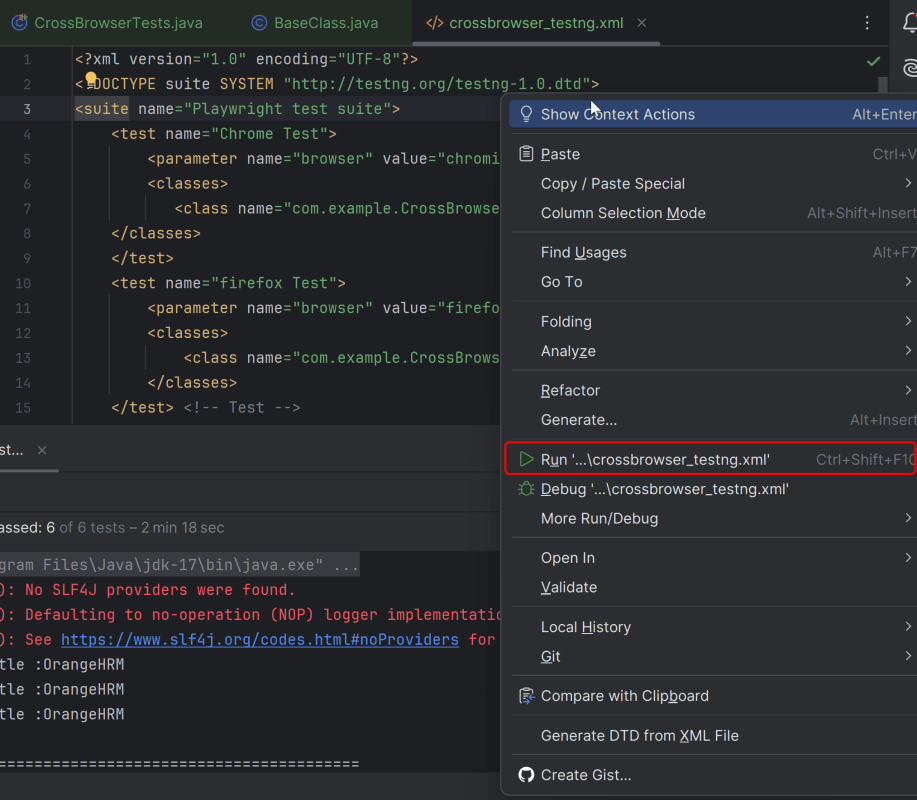
This will run the tests in all 3 browsers as mentioned in the .xml file.
Chromium
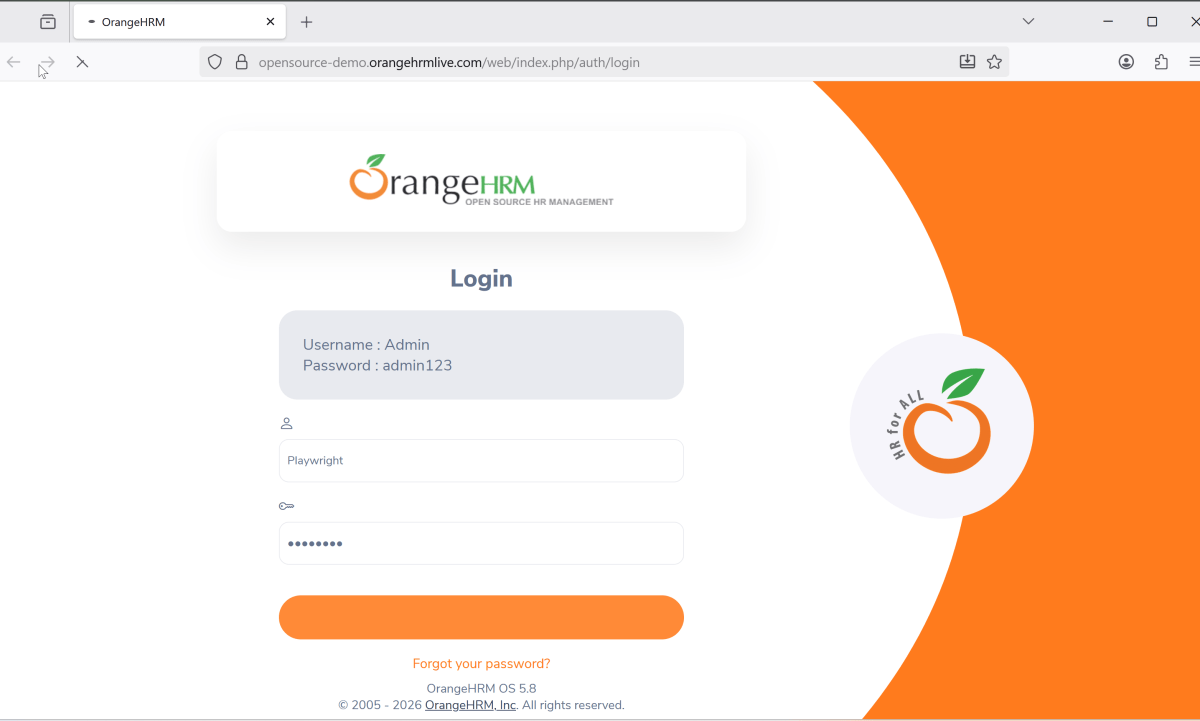
Firefox

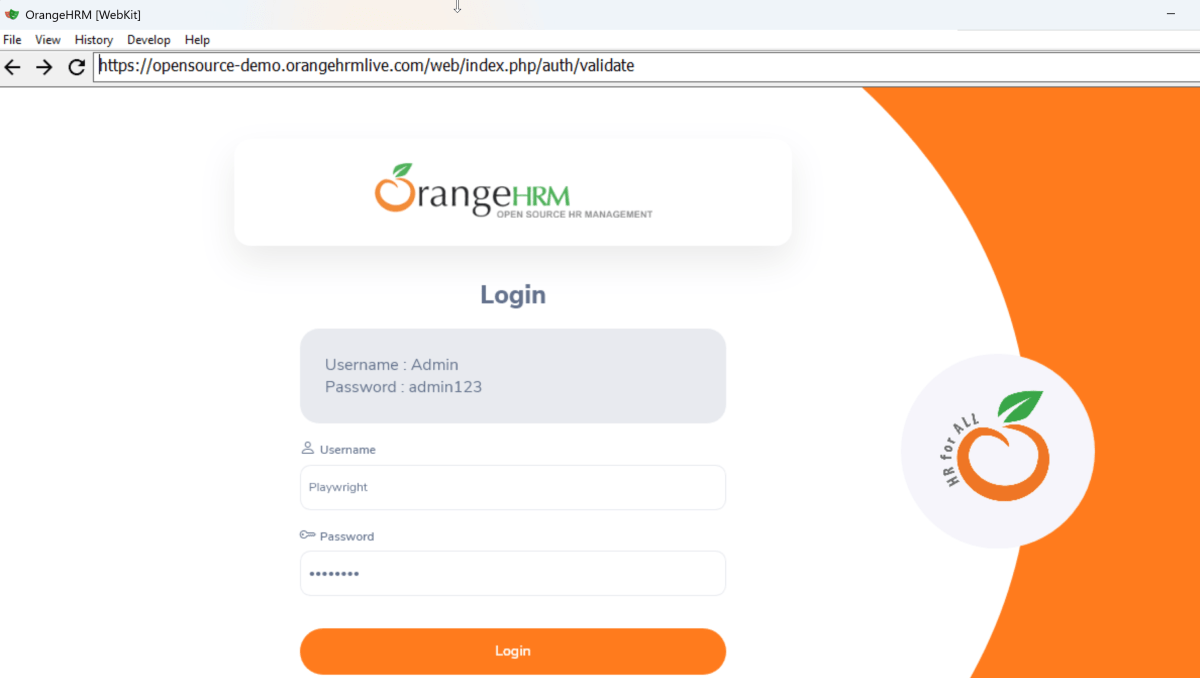
Webkit
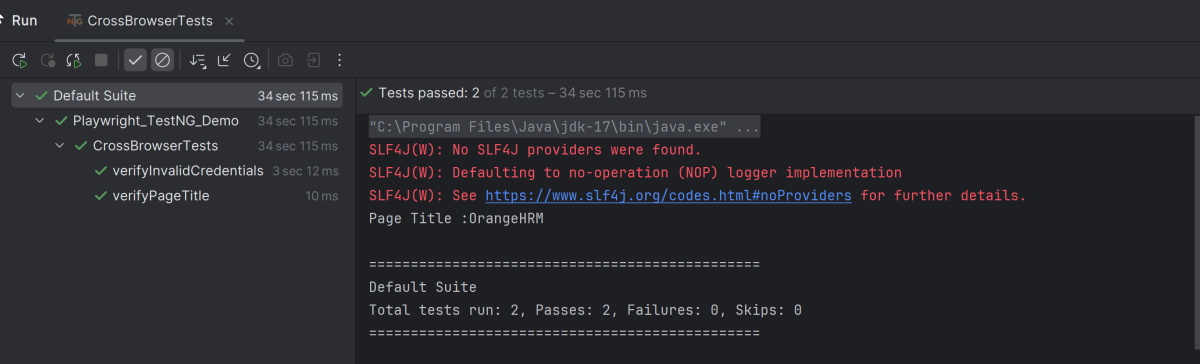
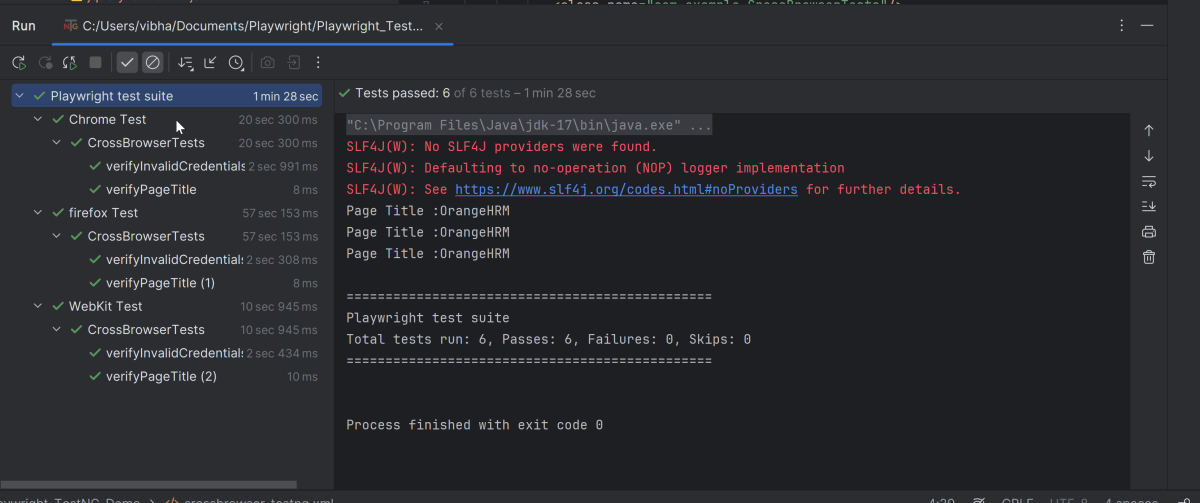
The output of the above program is
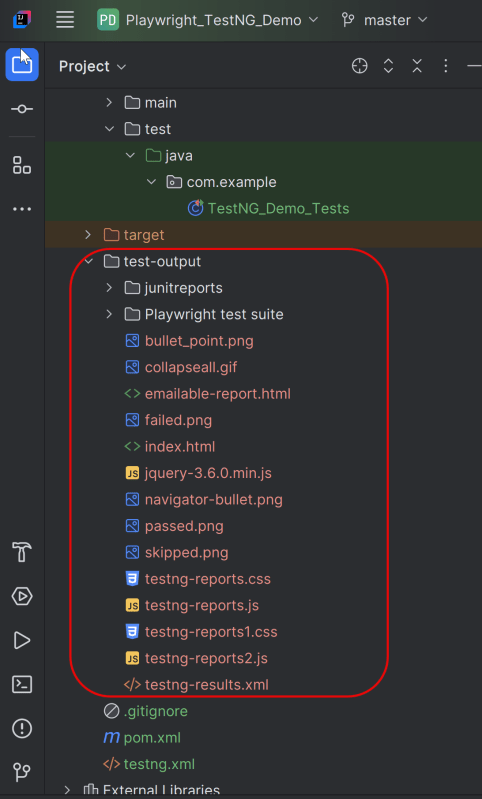
7. TestNG Report Generation
TestNG generates various types of reports under test-output folder like emailable-report.html, index.html, testng-results.xml.
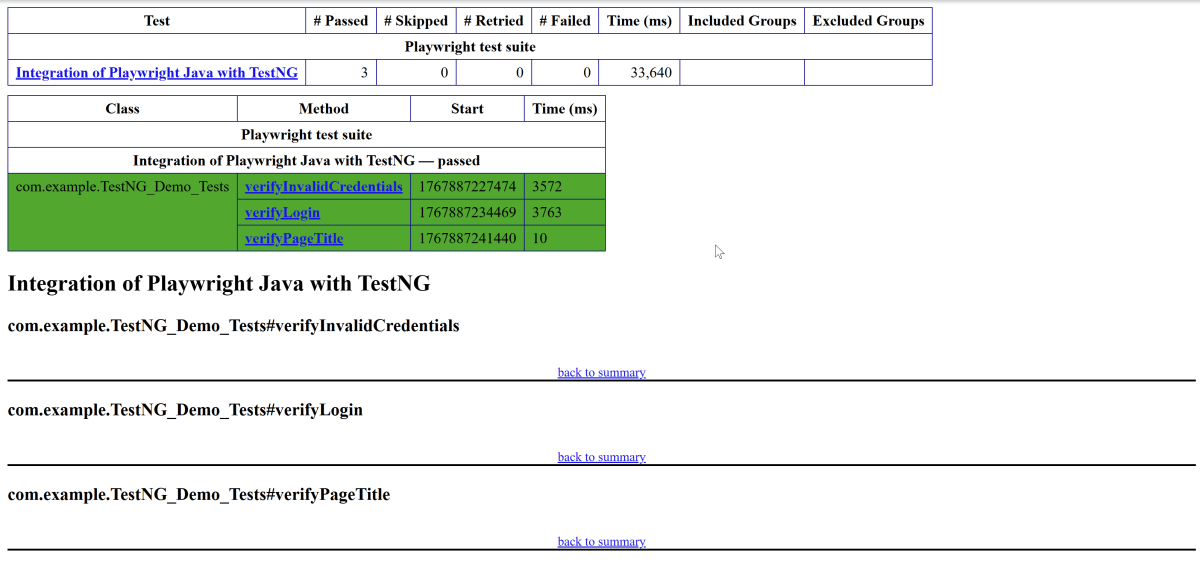
We are interested in the “emailable-report.html” report. Open “emailable-report.html”, as this is an HTML report, and open it with the browser. The image shows emailable-report.html.
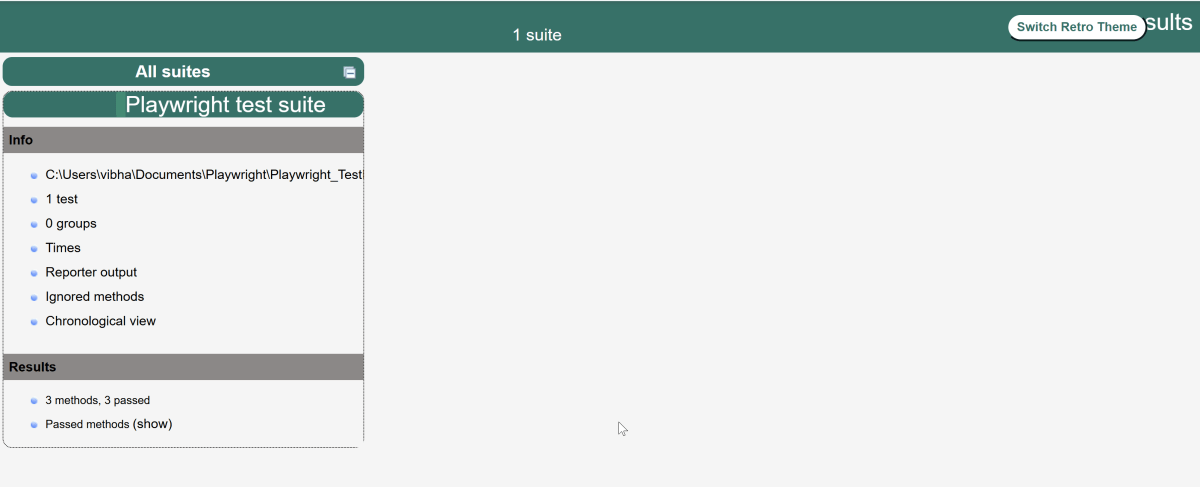
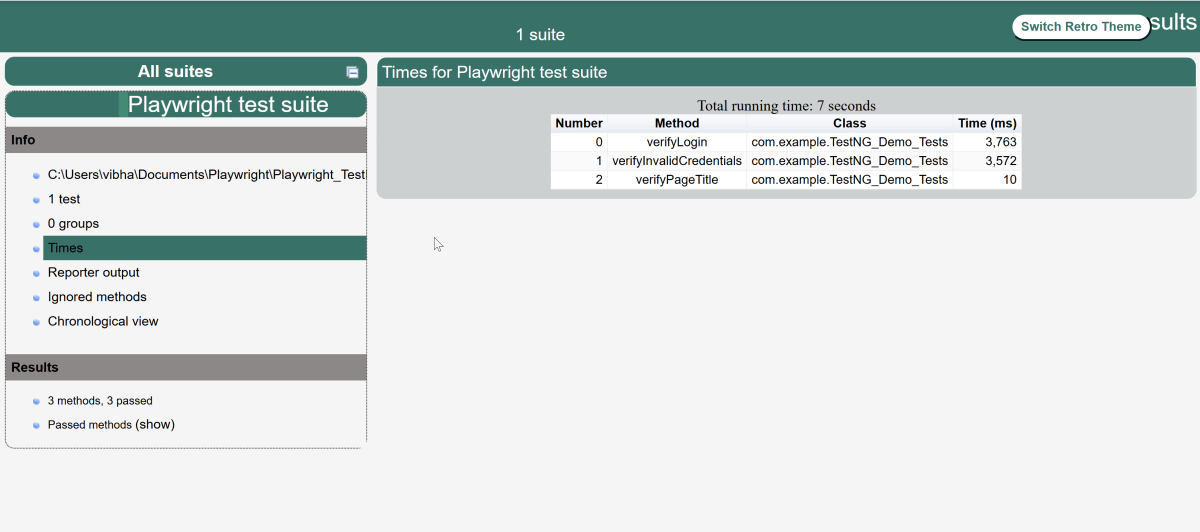
TestNG also produces an “index.html” report, and it resides under the test-output folder. The image shows the index.html report.
Conclusion:
Playwright and Java: We explored the powerful combination of Playwright with Java, highlighting the benefits of this duo in automated testing.
Setup & Configuration: Playwright integrates easily with Java projects via Maven or Gradle and manages browser installation automatically. Minimal configuration is required to get started.
TestNG Parameters: Dynamically inject browsers into tests.
Browser Support: Playwright supports Chromium (Chrome, Edge), Firefox, and WebKit (Safari). Tests run against real browser engines, offering high confidence in cross-browser compatibility.
Test Execution Approach: The same test logic can be executed across different browsers. This is done by switching the browser type programmatically or via system properties. This avoids code duplication and improves maintainability.
