In the previous tutorial, we showed you What is Feature File in Cucumber is. This tutorial will show you how to run this feature file.
Once the Feature file is created, we need to create a class called Runner class to run the tests. This class will use the JUnit annotation @RunWith(), which tells JUnit what is the test runner class.
We cannot run a Feature file on its own in a cucumber-based framework. We need to create a Java class, which will run the Feature File. It is the starting point for JUnit to start executing the tests. TestRunner class is created under src/test/java. In this tutorial, Cucumber uses the JUnit framework to run the tests. Apart from JUnit, we can also use the TestNG Test Runner class to run the cucumber tests.
JUnit Test Runner Class
First, we need to add the below dependencies to the POM.xml (in the case of the Maven project).
<dependencies>

  <dependency>
    <groupId>io.cucumber</groupId>
    <artifactId>cucumber-java</artifactId>
    <version>7.16.1</version>
  </dependency>

  <dependency>
    <groupId>io.cucumber</groupId>
    <artifactId>cucumber-junit</artifactId>
    <version>7.16.1</version>
    <scope>test</scope>
  </dependency>

  <dependency>
      <groupId>junit</groupId>
      <artifactId>junit</artifactId>
      <version>4.13.2</version>
      <scope>test</scope>
  </dependency>

</dependencies>
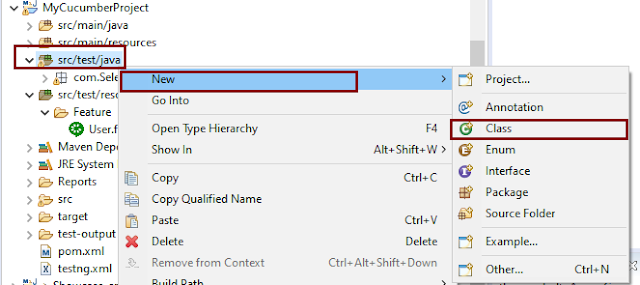
Create a new runner class file called CucumberRunnerTest.
Select and Right-Click on the package outline. Click on the New→Class.
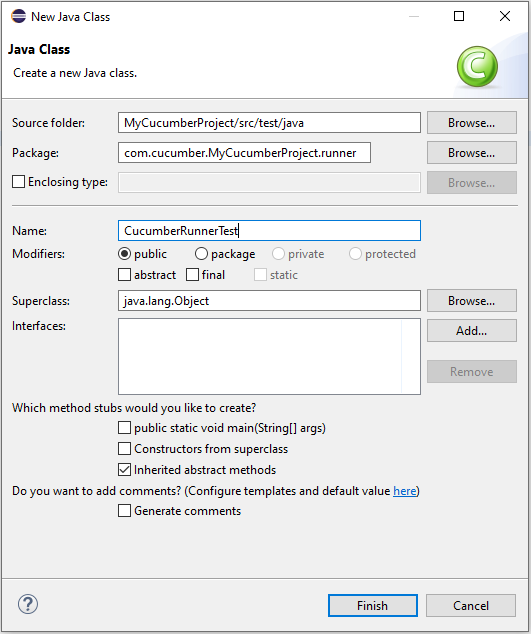
Provide the Java class a name, such as CucumberRunnerTest, and click the Finish button.
Import Statements
1) @RunWith annotation tells JUnit that tests should run using the Cucumber class.
import org.junit.runner.RunWith;
2) Cucumber.class is imported from:
import io.cucumber.junit.Cucumber;
3) @CucumberOptions annotation tells Cucumber where to look for feature files, what reporting system to use, and some other things also. But as of now, in the above test, we have just told it for the Feature file folder. It is imported from:
import io.cucumber.junit.CucumberOptions;
The CucumberRunnerTest class looks like shown below:
import org.junit.runner.RunWith;
import io.cucumber.junit.Cucumber;
import io.cucumber.junit.CucumberOptions;

@RunWith(Cucumber.class)
@CucumberOptions(plugin = "pretty", features = "src/test/resources/Features/MyHoliday.feature", tags = "@BookOneWayFlight")

public class CucumberRunnerTest {

}
The first parameter, called features, provides the location of the feature file. Similarly, the second parameter, called tags, provides the tag name (scenario) which needs to run. Apart from these, we can use plugins, and glue, in the CucumberOptions.
The feature file is placed under src/test/resources, so it is added as the path for the Feature file.
Run the Cucumber Test
As we know, the Feature file is already created in the previous tutorial. TestRunner class is created to run the Cucumber Tests.
Right Click on CucumberRunnerTest class and Click Run As > JUnit Test Application

The output of the Test Execution looks as shown below image.

This output shows that the Feature file is created, and Test Runner is able to run the Feature File. But this error shows that we should implement these methods so that the Steps mentioned in the Feature file can be traced to Java methods, which can be executed while executing the feature file. Don’t worry about this error. We will see how to create step definitions in the next tutorial.
Congratulations on making it through this tutorial and hope you found it useful! Happy Learning!! Cheers!!
