In this tutorial, we will create a PyTest test with Selenium in BDD (Behavioural Driven Development).
Prerequisite:
- Python is installed on the machine
- PIP is installed on the machine
- PyCharm or another Python Editor is installed on the machine
If you need help installing Python, please refer to this tutorial – How to Install Python on Windows 11.
If you need help installing PyCharms, please refer to this tutorial – How to install PyCharms on Windows 11.
What is PyTest – BDD?
Pytest BDD is a behaviour-driven development (BDD) framework for writing tests in Python using the pytest testing framework. It combines the simplicity and power of the pytest framework with the expressive syntax of the Gherkin language used in BDD.
pytest-bdd is a pytest plugin that allows you to write behaviour-driven development (BDD) style tests using the Gherkin syntax. Unlike many other BDD tools, it does not require a separate runner and benefits from the power and flexibility of pytest. It enables unifying unit and functional tests, reduces the burden of continuous integration server configuration, and allows the reuse of test setups.
Project Structure

Implementation Steps
Step 1 – Install pytest
Use the below command to install PyTest on your machine.
pip install pytest
Step 2 – Install pytest-bdd
Use the below command to install PyTest on your machine.
pip install pytest-bdd

Step 3 – Install pytest-selenium
Use the below command to install pytest-selenium plugin on your machine.
pip install pytest-selenium
Step 4 – Create a new project in PyCharm
Create a new project folder and open it in PyCharm.

Step 5 – Create a new directory
Go to the project folder and create a new directory – tests.
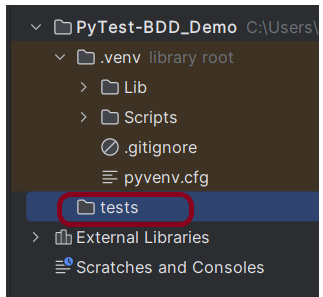
Step 6 – Create python directories
Go to the test directory and create a new directory within it – features and another Python directory – stepdefinitions.

Step 7 – Add pytest-selenium and pytest-bdd packages to the PyCharms
Go to File->Settings ->Project: PyTest-BDD_Demo->Python Interpreter.
Click on the “+” sign and enter allure-r in the search bar. It will show a list of packages. Select the “pytest-selenium” package and click on the “Install Package”.

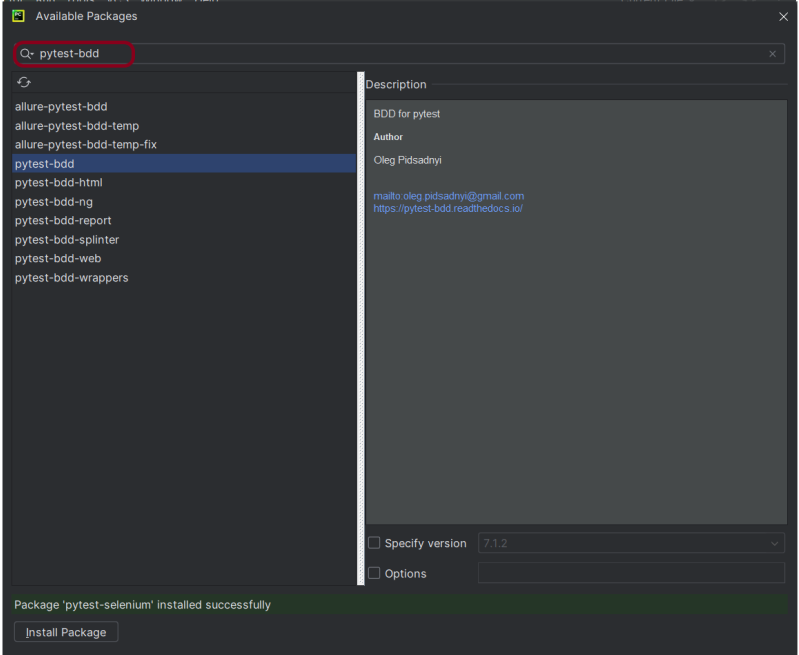
Once the package is installed, we will see the message that the package is installed successfully.

Step 8 – Create a feature file
Create a feature file – Login.feature in the features directory.

Below is the sample feature file.
Feature: Login Page

    Scenario: Successful Application Login
        Given User is on login page
        When User enter username "Admin" and password "admin123"
        Then User should be able to login successfully and new page open "Dashboard"
Step 9 – Create the test code in stepdefinitions directory
The step definition of the Login.feature file is created in the stepdefinitions directory – test_login_definitions.py.

Below is the sample code.
import pytest

from pytest_bdd import scenarios, given, when, then, parsers
from selenium import webdriver
from selenium.webdriver.common.by import By

# Constants
TIMEOUT = 4
URL = 'https://opensource-demo.orangehrmlive.com/'


# Scenarios
scenarios('../features/Login.feature')


# Fixtures
@pytest.fixture
def driver():
    driver = webdriver.Firefox()
    driver.implicitly_wait(TIMEOUT)
    driver.maximize_window()
    yield driver
    driver.quit()


# Given Steps
@given('User is on login page')
def open_browser(driver):
    driver.get(URL)


# When Steps
@when(parsers.parse('User enter username "{username}" and password "{password}"'))
def search_phrase(driver, username, password):
    driver.find_element(By.NAME, "username").send_keys(username)
    driver.find_element(By.NAME, "password").send_keys(password)
    driver.find_element(By.XPATH, "//*[@class='oxd-form']/div[3]/button").click()


# Then Steps
@then(parsers.parse('User should be able to login successfully and new page open "{heading}"'))
def search_results(driver, heading):
    homepage_title = driver.find_element(By.XPATH, "//*[@class='oxd-topbar-header-breadcrumb']/h6").text
    assert homepage_title == heading
To bind all scenarios found in the Login.feature, we need to use the below syntax:
scenarios('../features/Login.feature')
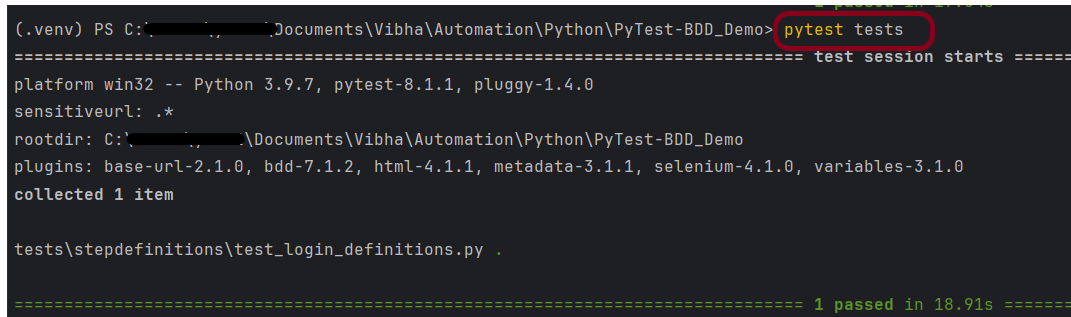
Step 10 – Execute the tests
As we know the stepdefinitions file is present in the tests directory, so to run this test, use the below command:
pytest tests
The output of the above execution is
Step 11 – Generate the HTML Report
To generate an HTML Report, please refer to this tutorial – How to generate HTML Report in PyTest Framework.
Generate an HTML Report using the below command:
pytest tests --html=Report.html -s
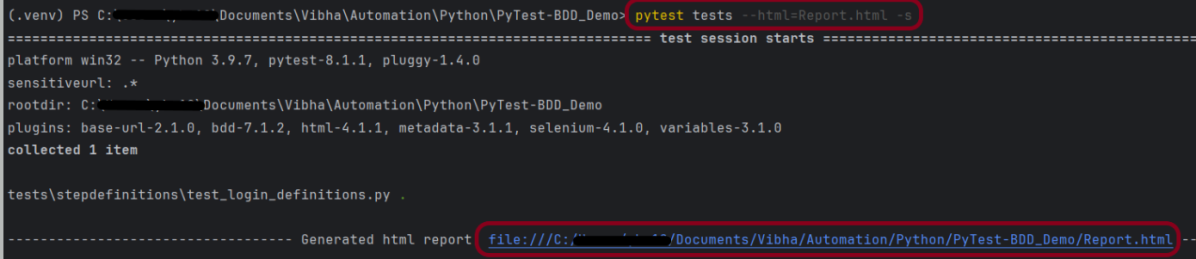
The Report.html report will be generated in the root directory.

Step 12 – View the HTML report
Right-click and open with Web Browser.

That’s it! Congratulations on making it through this tutorial and hope you found it useful! Happy Learning!!
