This tutorial explains the process to run the Serenity Tests in the GitLab pipeline. This is a very important step towards achieving CI/CD.
Table of Contents:
What is GitLab CI/CD Workflow?
GitLab automatically enables CI/CD pipelines for new projects. It’s just a matter of adding a new configuration file called .gitlab-ci.yml to your code repository with instructions for GitLab on what to run. So simply create the following basic workflow in your main repository directory and commit it:
The Serenity tests run on a headless browser in the pipeline.
What is a headless browser?
A headless browser is like any other browser but without a Head/GUI (Graphical User Interface). A headless browser is used to automate the browser without launching the browser. While the tests are running, we could not see the browser, but we can see the test results coming on the console. The tests can run in the GitLab pipeline if the tests run in the headless mode.
Prerequisite:
- Serenity – 3.2.3
- Serenity Cucumber – 3.2.3
- JUnit Jupiter – 5.8.0
- JUnit Vintage – 5.8.0
- Java 11
- Maven – 3.8.1
- Selenium – 3.141.59
- Maven Compiler Plugin – 3.8.1
- Maven Surefire Plugin – 3.0.0-M5
- Maven FailSafe Plugin – 3.0.0-M5
- GitLab Account
Please refer to this tutorial to get the structure and code of the Serenity Project – Integration of Serenity with Cucumber and JUnit5.
GitLab Section
Step 1 – Create a blank project in GitLab
To know, how to create a blank new project in GitLab, please refer to this tutorial.
Step 2 – Push the project from the local repository to GitLab Repository
To know, how to push the changes in GitLab, please refer to this tutorial.
Step 3 – Create a .gitlab-ci.yml file in the project in GitLab
There are many ways to create a new file in GitLab. One of the ways is to create a file as shown in the below image.

It is a YAML file where you configure specific instructions for GitLab CI/CD. In the .gitlab-ci.yml, we can define:
- The scripts you want to run.
- Other configuration files and templates you want to include.
- Dependencies and caches.
- The commands you want to run in sequence and those you want to run in parallel.
- The location to deploy your application to.
- Whether you want to run the scripts automatically or trigger any of them manually.
Below is a sample example to run the Serenity tests in the GitLab pipeline.
image: markhobson/maven-chrome

stages:
  - test

variables:
  MAVEN_OPTS: "-Dmaven.repo.local=.m2/repository"

test:
  stage: test
  allow_failure: true

# Run the tests
  script:
    - echo "Executing BDD scenarios with maven"
    - mvn clean verify

# Store artifacts
  artifacts:
    when: always
    name: "Serenity Report"
    paths:
    - target/site/*
    expire_in: 24 h
Image – markhobson/maven-chrome is used in this test. It is a docker image for Java automated UI tests.
This command lets the pipeline continue running subsequent jobs, even if the previous job is failed.
allow_failure: true
The below command is used to execute the tests from Maven in the docker image.
mvn clean verify
The below command means that the artifact should be generated every time the pipeline is run, irrespective of the fact if the job is successful or failed.
artifacts:
    when: always
The below command provides the name of the artifact. If this is not used, then the artifacts file is named artifacts, which becomes artifacts.zip when downloaded.
artifacts:
    name: "Serenity Report"
The below command provides the path of the files that should be present in the artifact.
artifacts:
    paths:
    - target/site/*
Pipeline configuration begins with jobs. Jobs are the most fundamental element of a .gitlab-ci.yml file.
Jobs are:
- Defined with constraints stating under what conditions they should be executed.
- Top-level elements with an arbitrary name and must contain at least the script clause.
- Not limited in how many can be defined.
Jobs can output an archive of files and directories. This output is known as a job artifact. The expire_in keyword determines how long GitLab keeps the job artifacts. Here, it shows 24 hrs to retain the artifacts.
Step 4 – Run the tests in the GitLab pipeline
Now, when a new change is committed, a pipeline kicks off and it runs all the tests.
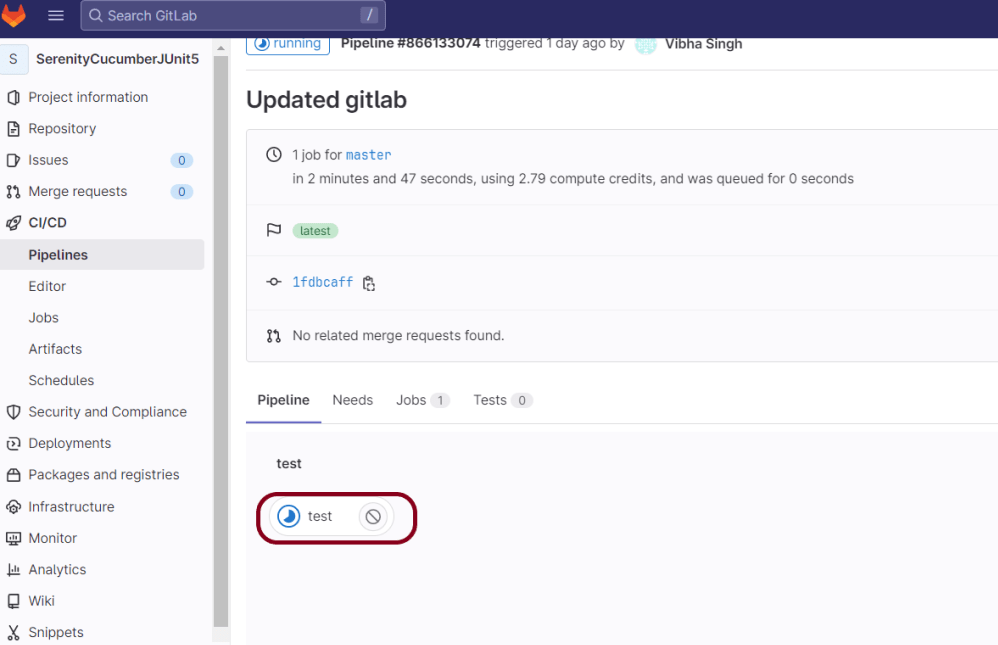
Step 5 – Check the status of the pipeline
Once the Status of the pipeline changes to either failed or passed, that means the tests are already executed.
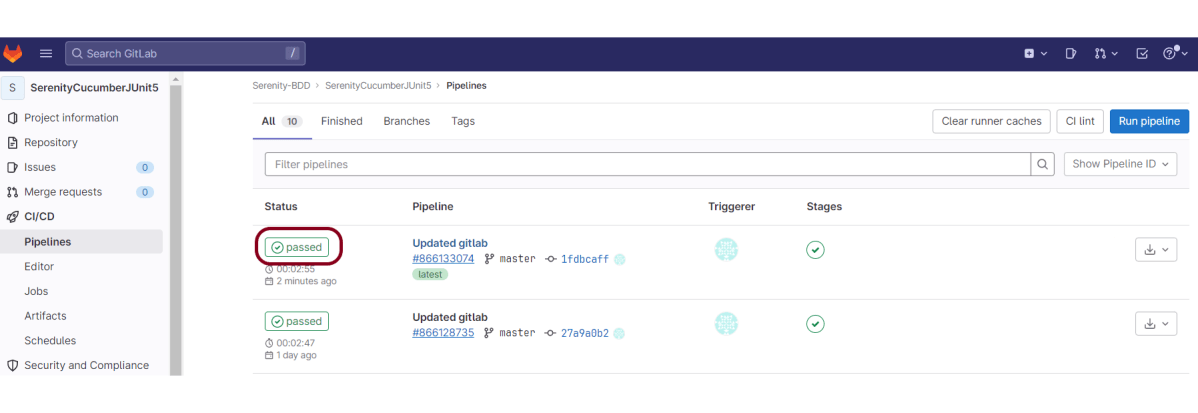
As you can see, the Status is passed, its green colour. This means all the tests present in the test suite are executed and passed. If any test fails in the test suite, the final execution status will be brown. The reason for the brown colour is we have mentioned allow_failure: true.
Below is the execution status report in the GitLab pipeline.
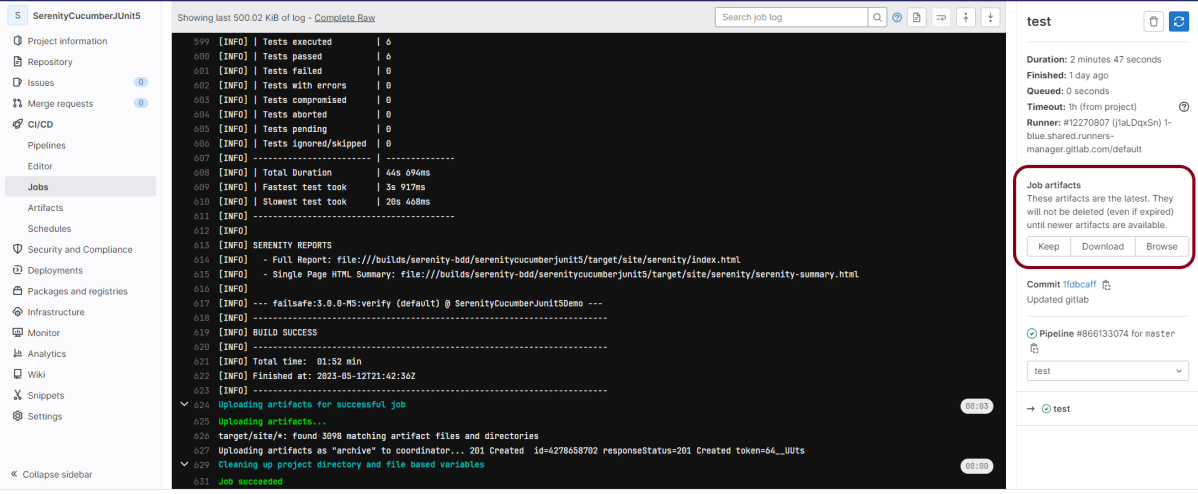
As I have added an artifact also in the .gitalb-ci.yml, which is highlighted in the image. This artifact creates a folder with the name “Serenity_Report” and the reports in this folder come from the path /target/site. This artifact gives us the option to download the reports or browse the report. This report will be available for 24 hours only as mentioned in the gitlab-ci.yml.
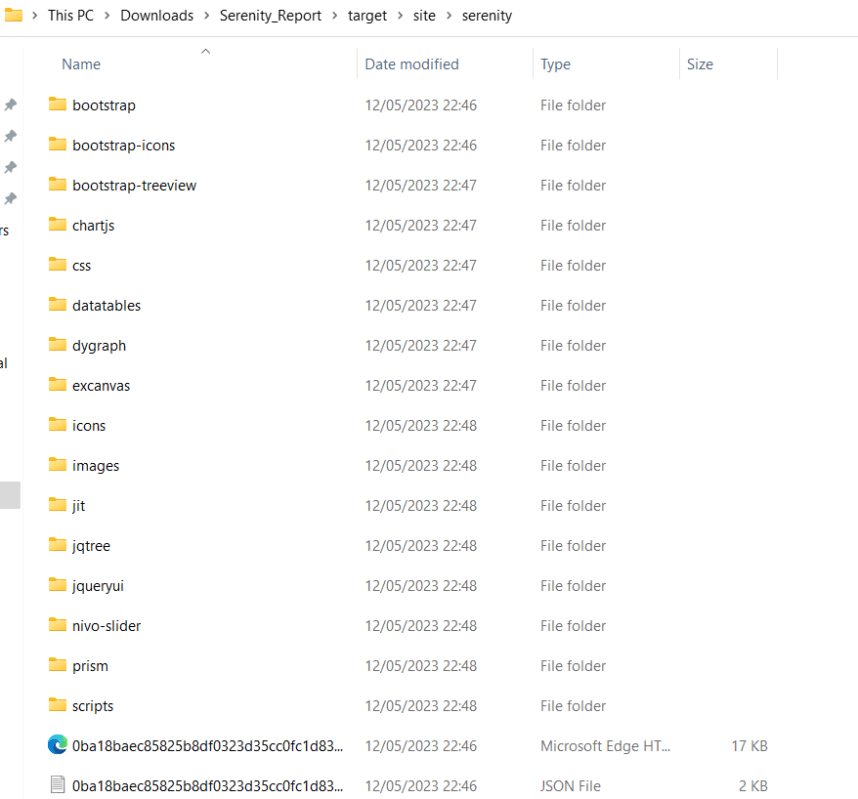
Step 6 – Download the report
Once, will click on the download button, it will download “Serenity_Report.zip”. Unzip the folder and it looks like something as shown below:
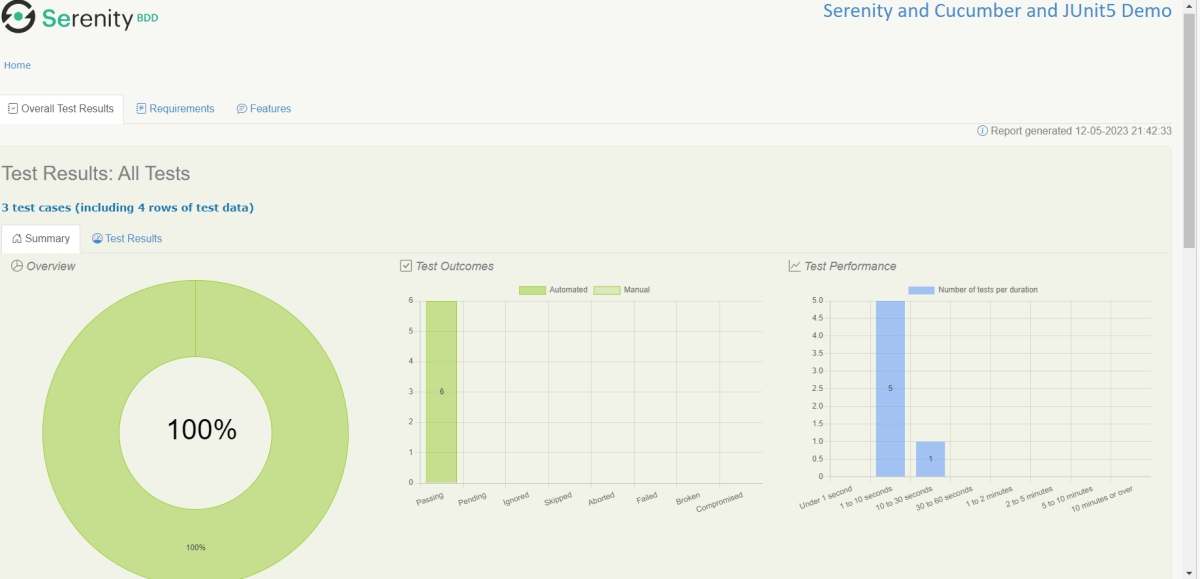
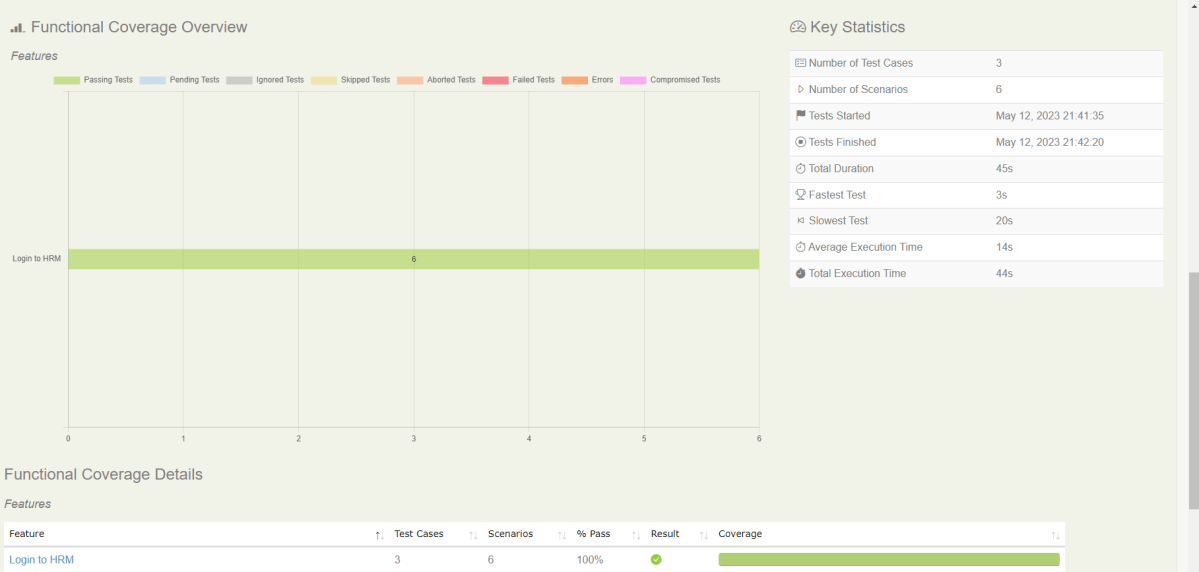
Example of Index.html
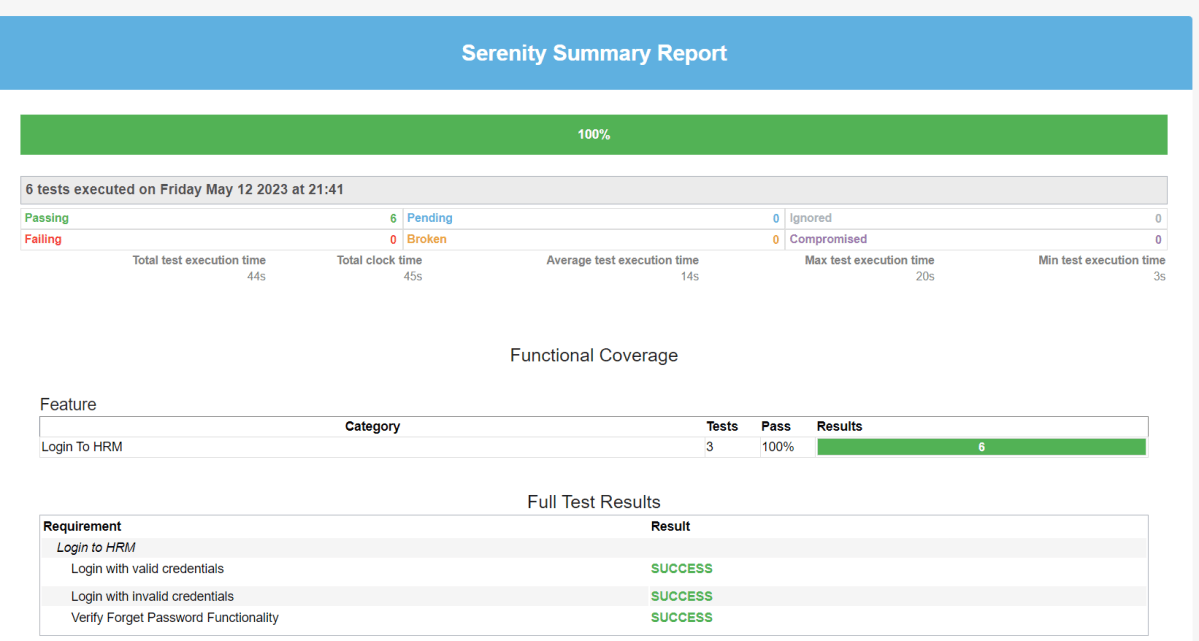
Example of Serenity Summary Report
Congratulations. This tutorial has explained the steps to run Serenity tests in GitLab CI/CD. Happy Learning!!

Can you also show us your serenity.conf, docker and serenity.properties files?
Because I’m using selenium/standalone-chrome:latest and when I run the job from GitLab CI then the test is failing and it saying Could not instantiate class org.openqa.selenium.chrome.ChromeDriver. Also please share the full gitlab ci file.
Please help me to solve this issue.
LikeLike
The gitlab-ci.yml file mentioned in the tutorial is the complete one. Try to run your tests using the docker image markhobson/maven-chrome and if it runs, then the problem is with the image you are using. Make sure you are trying to run the tests in the headless mode. This is the tutorial for the project setup – https://qaautomation.expert/2023/12/13/integration-of-serenity-with-cucumber6-and-junit5/.
LikeLike