In the last tutorial, I explained How to test GET Request using Rest Assured. In this tutorial, I will automate a POST Request using Rest Assured. I will verify the status code, line of Status, and content of the Response. To set up a basic Rest Assured Maven Project, click here and Gradle project, click here.
Add the below-mentioned dependencies to the pom.xml. The latest dependency can be downloaded from here.
<dependency>
      <groupId>junit</groupId>
      <artifactId>junit</artifactId>
      <version>4.13.2</version>
      <scope>test</scope>
</dependency>

<dependency>
      <groupId>io.rest-assured</groupId>
      <artifactId>rest-assured</artifactId>
      <version>5.5.1</version>
      <scope>test</scope>
</dependency>
What is the POST Method?
An HTTP POST method is used to create a new resource in the collection of resources. The request body is passed as a JSON/XML or in a different format. If a resource is created successfully by the endpoint or server, it returns a status code 201(Created). It also provides a Location header with a link to the newly-created resource with the 201 HTTP status. It may return 200 (OK) and 204 (No Content) status code as well, based on how the API is developed.
POST is neither safe nor idempotent. It is therefore recommended for non-idempotent resource requests. Making two identical POST requests will most result in two resources containing the same information.
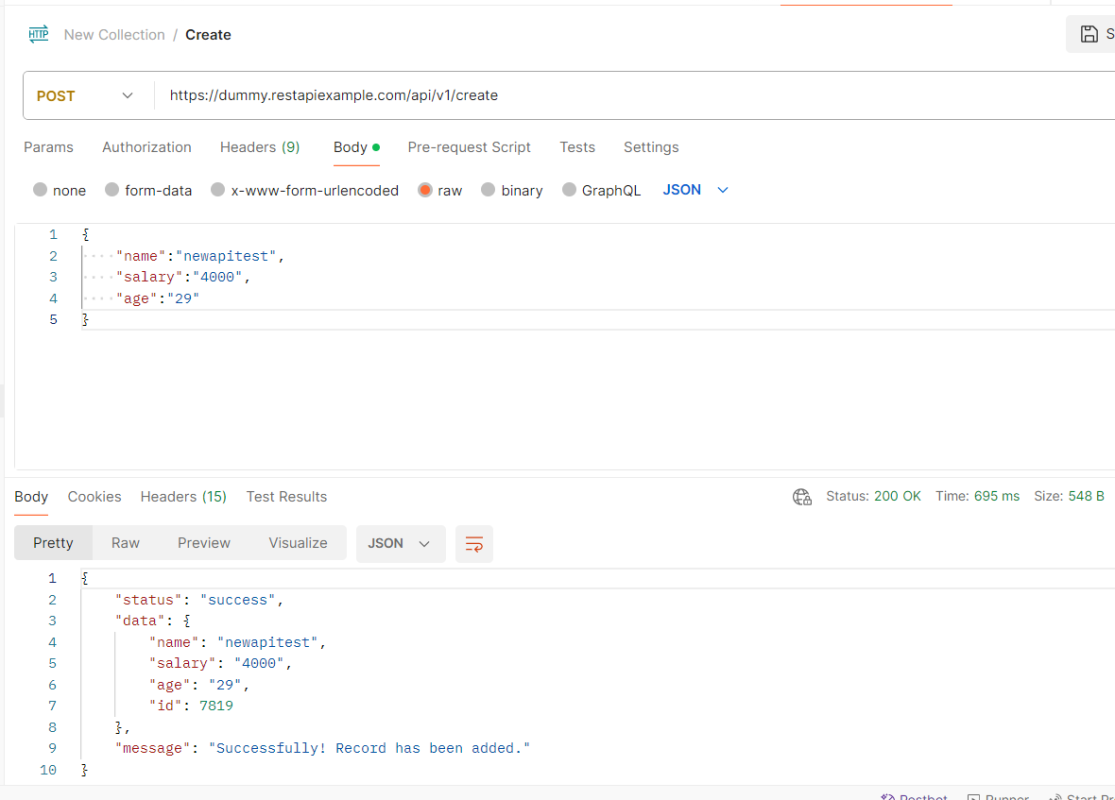
Below is an example of a Request performing POST operation in Postman.
Below are the steps to test a POST Request using Rest Assured:
Step 1 – Specify the base URL to the RESTful web service using the RestAssured class.
RestAssured.baseURI = "https://dummy.restapiexample.com/api/v1/create";
Step 2 – Every Request in the Rest-Assured library is represented by an interface called RequestSpecification. This interface allows modifying the request, like adding headers or adding authentication details. Use the RestAssured class to generate a RequestSpecification.
requestSpecification = RestAssured.given();
RequestSpecification is imported from package:
import io.restassured.specification.RequestSpecification;
Step 3 – Set the content type. This step specifies the format in which the request payload will be sent to the server. Here, the Content-Type is JSON.
requestSpecification.contentType(ContentType.JSON);
contentType is imported from restassured.http package:
import io.restassured.http.ContentType;
Step 4 – Pass Request Body as String.
requestSpecification.body(jsonString);
Step 5 – Send the POST request to the server. Then receive the response of the request made by REST Assured. This response contains every detail returned by hitting request i.e. response body, response headers, status code, status lines, cookies, etc. The response is imported from package:
import io.restassured.response.Response;
Step 6 – To validate a response like status code or value, we need to get the reference of type ValidatableResponse.
ValidatableResponse is an interface. A validatable response to a request made by, REST Assured. ValidatableResponse is imported from package:
import io.restassured.response.ValidatableResponse;
PrettyPrint() – It prints the response body if possible and returns it as a string. Pretty printing is possible for content-types JSON, XML, and HTML.
Below is the example of testing a POST request in Non-BDD format. I have used ValidatableResponse for the assertion of status. It is also used for the status line and body of the Response.
import io.restassured.RestAssured;
import io.restassured.http.ContentType;
import io.restassured.response.Response;
import io.restassured.response.ValidatableResponse;
import io.restassured.specification.RequestSpecification;
import org.junit.Test;
import static org.hamcrest.CoreMatchers.equalTo;

public class POST_NonBDDDemo {

    RequestSpecification requestSpecification;
    Response response;
    ValidatableResponse validatableResponse;

    @Test
    public void verifyStatusCode() {

        String jsonString = "{\"name\":\"newapitest\",\"salary\":\"4000\",\"age\":\"29\"}";

        RestAssured.baseURI = "https://dummy.restapiexample.com/api/v1/create";

        // Create a request specification
        requestSpecification = RestAssured.given();

        // Setting content type to specify format in which request payload will be sent.
        requestSpecification.contentType(ContentType.JSON);

        // Adding body as string
        requestSpecification.body(jsonString);

        // Calling POST method
        response = requestSpecification.post();

        // Let's print response body.
        String responseString = response.prettyPrint();

        /*
         * To perform validation on response, we need to get ValidatableResponse type of
         * response
         */
        validatableResponse = response.then();

        // Check status code
        validatableResponse.statusCode(200);

        // It will check if status line is as expected
        validatableResponse.statusLine("HTTP/1.1 200 OK");

        // Check response body - name attribute
        validatableResponse.body("data.name", equalTo("newapitest"));

        // Check response body - message attribute
        validatableResponse.body("message", equalTo("Successfully! Record has been added."));

    }
}
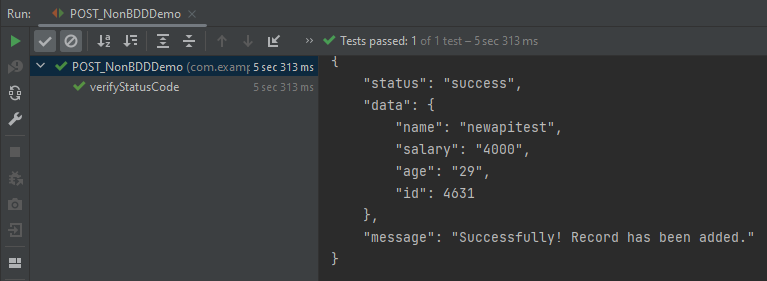
The below image shows the test result of the above test.
Test implemented in BDD Format
1. equalTo is used for assertion, and is imported from a static hamcrest package:
import static org.hamcrest.Matchers.equalTo;
2. given is a static import from package:
import static io.restassured.RestAssured.given;
Below is an example of a BDD Test.
import io.restassured.http.ContentType;
import io.restassured.response.ValidatableResponse;
import org.junit.Test;
import static io.restassured.RestAssured.given;
import static org.hamcrest.CoreMatchers.equalTo;

public class POST_BDDDemo {

    ValidatableResponse validatableResponse;

    @Test
    public void createUser() {

        String json = "{\"name\":\"apitest\",\"salary\":\"5000\",\"age\":\"30\"}";

        // GIVEN
        validatableResponse = given()
                .baseUri("https://dummy.restapiexample.com/api")
                .contentType(ContentType.JSON)
                .body(json)

                // WHEN
                .when()
                .post("/v1/create")

                // THEN
                .then()
                .assertThat().statusCode(200).body("data.name", equalTo("apitest"))
                .body("message", equalTo("Successfully! Record has been added."));

        System.out.println("Response :" + validatableResponse.extract().asPrettyString());
    }

}
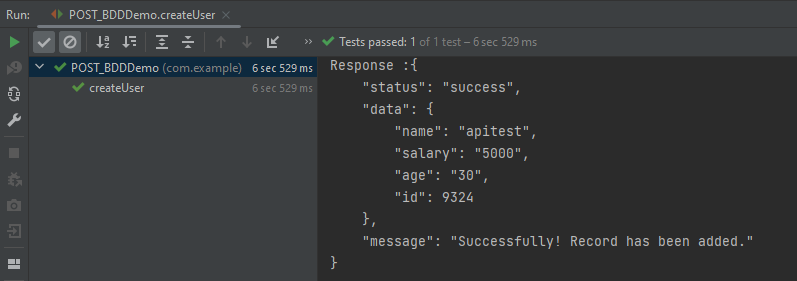
The below image shows the test result of the above test.
Explanation:
1. This string represents the JSON payload that will be sent in the body of the POST request. It includes fields like name, salary, and age.
String json = "{\"name\":\"apitest\",\"salary\":\"5000\",\"age\":\"30\"}";
2. GIVEN: Specifies the initial conditions or setup for the test.
- “given()”: Starts the BDD chain.
- Sets the base URI for the API endpoint.
.baseUri("https://dummy.restapiexample.com/api")
- Specifies that the content type of the request is JSON.
.contentType(ContentType.JSON)
- Includes the JSON payload in the request body.
.body(json)
3. WHEN: Describes the action or event that triggers the response.
.when().post(“/v1/create”)`: Sends a POST request to the specified endpoint `/v1/create` relative to the base URI.
4. THEN: Asserts expected outcomes of the request.
- “.then()”: Starts the section for response validation.
- Asserts that the HTTP status code of the response is 200, which typically indicates success.
".assertThat().statusCode(200)"
- Asserts that the “name” field in the “data” object of the response matches “apitest”. Asserts that the “message” field in the response is as expected.
.body("data.name", equalTo("apitest"))
.body("message", equalTo("Successfully! Record has been added."))
The above tests can be used in both Maven and Gradle projects.
Congratulations on making it through this tutorial and hope you found it useful! Happy Learning!! Cheers!!

Post request is not working. it displays error as Expected status code <201> but was <405>. In postman could see the message as “An Error Occurred: Method Not Allowed”.
LikeLike
Hi, I have checked and the post request shown in this tutorial is working and returning 200. If you are using any other request and you are getting 405 error, that means you are trying to use the incorrect method, like sending a post request for put operation or so on.
LikeLike