The listener is defined as an interface that modifies the default TestNG’s behaviour. There are several interfaces that allow you to modify TestNG’s behaviour that are called “TestNG Listeners”. It allows customizing TestNG reports or logs. There are many types of TestNG listeners available. Here are a few listeners:
- IAnnotationTransformer
- IAnnotationTransformer2
- IHookable
- IInvokedMethodListener
- IMethodInterceptor
- IReporter
- ISuiteListener
- ITestListener
When you implement one of these interfaces, you can let TestNG know about it in either of the following ways:
- Using in your testng.xml file.
- Using the @Listeners annotation on any of your test classes.
ITestListener has the following methods
- OnStart – Invoked before running all the test methods belonging to the classes inside the tag and calling all their Configuration methods.
- onTestSuccess – onTestSuccess method is called on the success of any Test.
- onTestFailure – onTestFailure method is called on the failure of any Test.
- onTestSkipped – onTestSkipped method is called on skipped of any Test.
- onTestFailedButWithinSuccessPercentage– method is called each time Test fails but is within success percentage. Invoked each time a method fails but has been annotated with successPercentage and this failure still keeps it within the success percentage requested.
- onFinish – Invoked after all the test methods belonging to the classes inside the tag have run and all their Configuration methods have been called.
- onTestStart – Invoked each time before a test will be invoked. The ITestResult is only partially filled with the references to class, method, start millis, and status.
Here, I explain the use of listener – ITestListener in a program mentioned below
Step 1) Create a class “ListenerDemo” that implements ‘ITestListener’. Add methods like onTestFailure, onTestSkipped, onTestStart, onTestSuccess to this class
Step 2) Create another class “ListenerTestCases” for the login process automation. Selenium will execute these ‘TestCases’ to login automatically.
Step 3) Next, implement this listener in our regular project class i.e. “ListenerTestCases “. There are two different ways to connect to the class and interface.
The first way is to use Listeners annotation (@Listeners) as shown below:
@Listeners(com.selenium.testng.TestNGDemo.ListenerDemo.class)
Step 4): Execute the “ListenerTestCases” class. Methods in class “TestPass ” are called automatically according to the behaviour of methods annotated as @Test.
Step 5): Verify the Output that logs display at the console.
import org.testng.ITestContext;
import org.testng.ITestListener;
import org.testng.ITestResult;

public class ListenerDemo implements ITestListener {

            // When Test case get failed, this method is called.
            public void onTestFailure(ITestResult Result) {
                        System.out.println("The name of the testcase failed is :" + Result.getName());
            }

            // When Test case get Skipped, this method is called.
            public void onTestSkipped(ITestResult Result) {
                        System.out.println("The name of the testcase Skipped is :" + Result.getName());
            }

            // When Test case get Started, this method is called.
            public void onTestStart(ITestResult Result) {
                        System.out.println(Result.getName() + " test case started");
            }

            // When Test case get passed, this method is called.
            public void onTestSuccess(ITestResult Result) {
                        System.out.println("The name of the testcase passed is :" + Result.getName());
            }
}
In the below test, there are 2 test cases. One Test passes and another fails. When we are executing ListenerTestCases, it will call the ListenersDemo internally.
import org.openqa.selenium.By;
import org.openqa.selenium.WebDriver;
importorg.openqa.selenium.chrome.ChromeDriver;
import org.testng.Assert;
import org.testng.annotations.Listeners;
import org.testng.annotations.Test;

@Listeners(com.selenium.testng.TestNGDemo.ListenerDemo.class)
public class ListenerTestCases {

            static WebDriver driver;

            @Test
            public void TestPass() {
                        System.setProperty("webdriver.chrome.driver",
                                    "C:\\Users\\Vibha\\Desktop\\SeleniumKT\\chromedriver_win32\\chromedriver.exe");
                        driver= new ChromeDriver();
                        driver.get("https://opensource-demo.orangehrmlive.com/");
                        driver.findElement(By.name("txtUsername")).sendKeys("Admin");
                        driver.findElement(By.name("txtPassword")).sendKeys("admin123");
                        driver.findElement(By.id("btnLogin")).submit();
                        String dashboardTitle = driver.findElement(By.id("welcome")).getText();
                        Assert.assertTrue(dashboardTitle.contains("Welcome"));
            }

            @Test
            public void TestFail() {
                        System.setProperty("webdriver.chrome.driver",
                                    "C:\\Users\\Vibha\\Desktop\\SeleniumKT\\chromedriver_win32\\chromedriver.exe");
                        driver= new ChromeDriver();
                        driver.get("https://opensource-demo.orangehrmlive.com/");
                        driver.findElement(By.name("txtUsername")).sendKeys("Admin");
                        driver.findElement(By.name("txtPassword")).sendKeys("admin123");
                        driver.findElement(By.id("btnLogin")).submit();
                        String dashboardTitle = driver.findElement(By.id("welcome")).getText();
                        Assert.assertTrue(dashboardTitle.contains("Hello"));
            }
}

Output
TestFail test case started
The name of the testcase failed is :TestFail
TestPass test case started
The name of the testcase passed is :TestPass
PASSED: TestPass
FAILED: TestFail
java.lang.AssertionError: did not expect to find [true] but found [false]
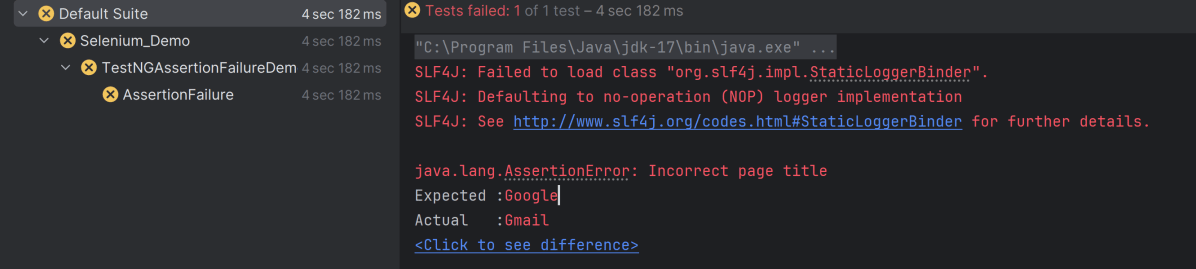
The output of the above program is

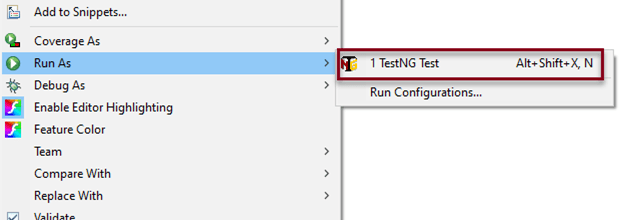
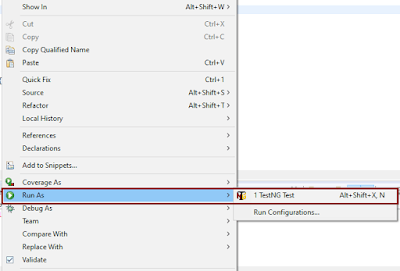
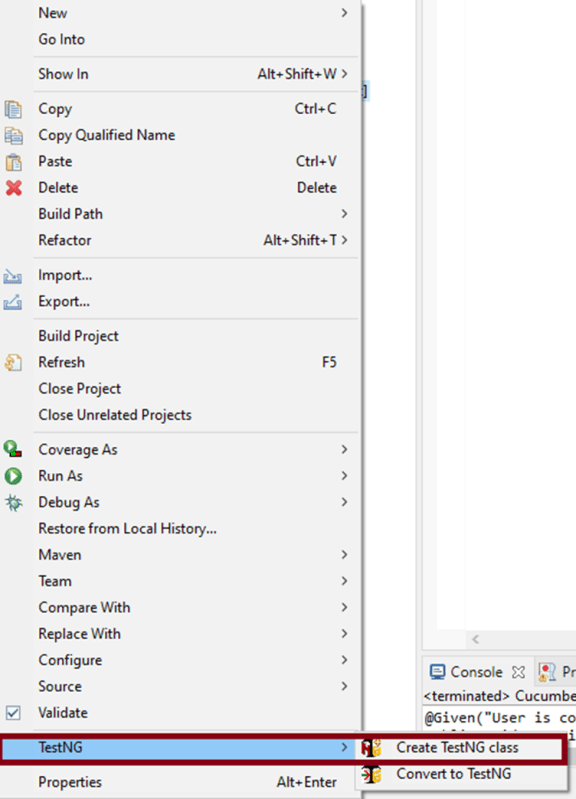
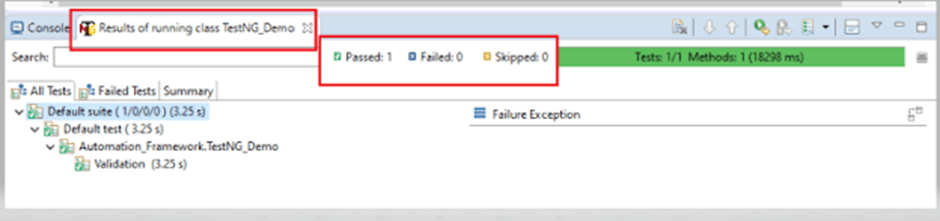
To execute this program, we need to Right-click and select Run as – TestNG.

There is another way to execute the Listener class, which is using testng.xml. There is a Listener class named “ListenerDemo” where the implementation of various methods of the listener is present. If we want to run the tests using testng.xml, then there is no need of mentioning Listeners in the ListenerTestCases class.
<?xml version = "1.0"encoding = "UTF-8"?>
<!DOCTYPE suite SYSTEM "http://testng.org/testng-1.0.dtd">
<suite name = "TestSuite">
<listeners>
<listener class-name ="com.selenium.testng.TestNGDemo.ListenerDemo"/>
</listeners>

<test name ="Test">
<classes>
<class name="com.selenium.testng.TestNGDemo.ListenerTestCases"/>
</classes>
</test>
</suite>
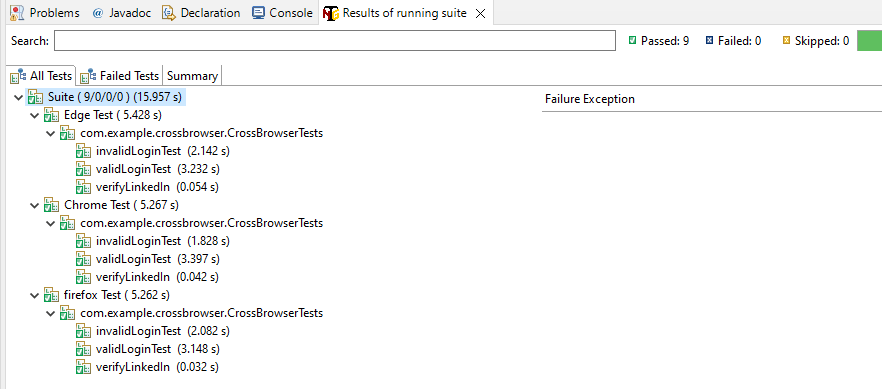
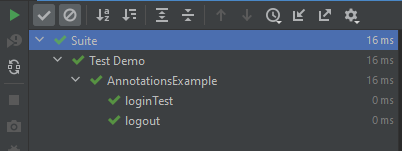
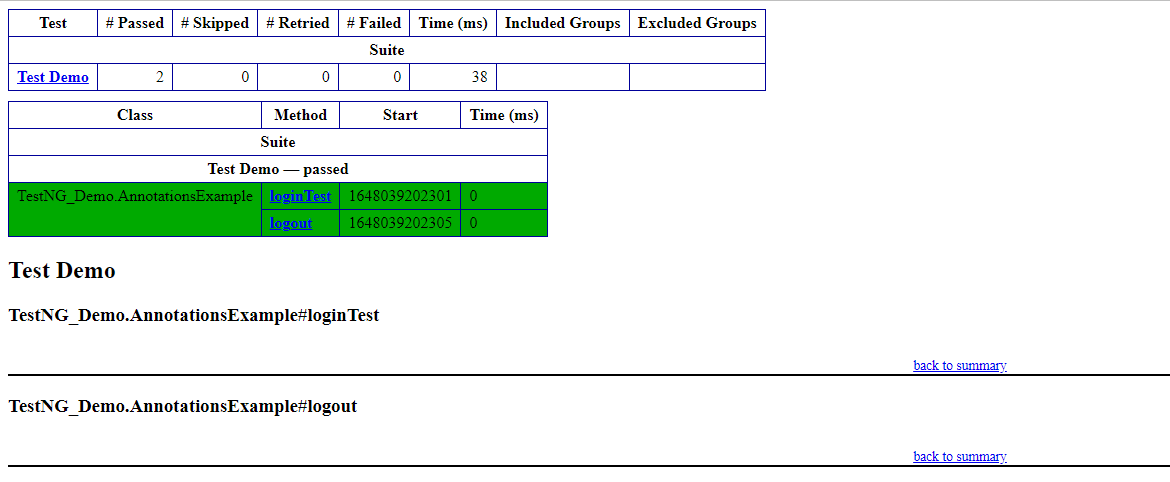
The test execution result will look like something shown below.

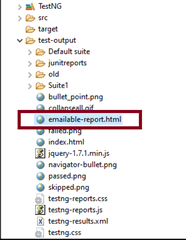
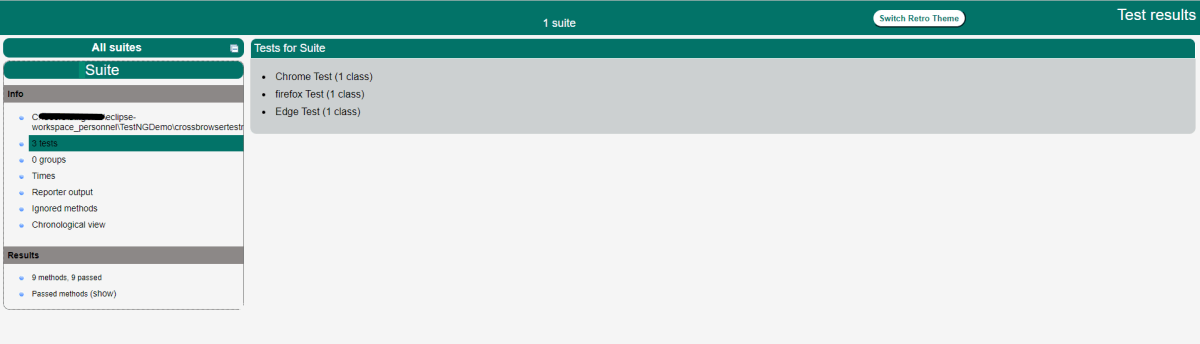
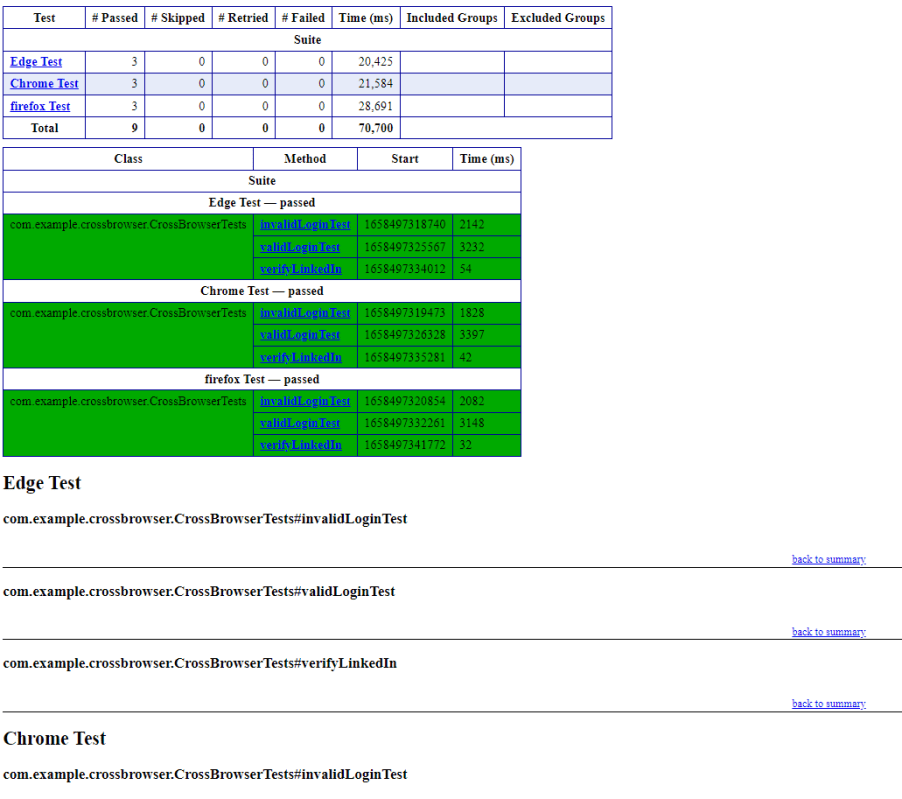
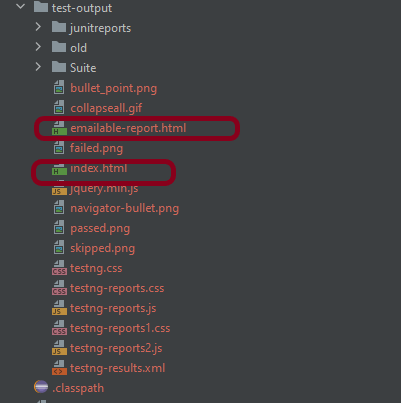
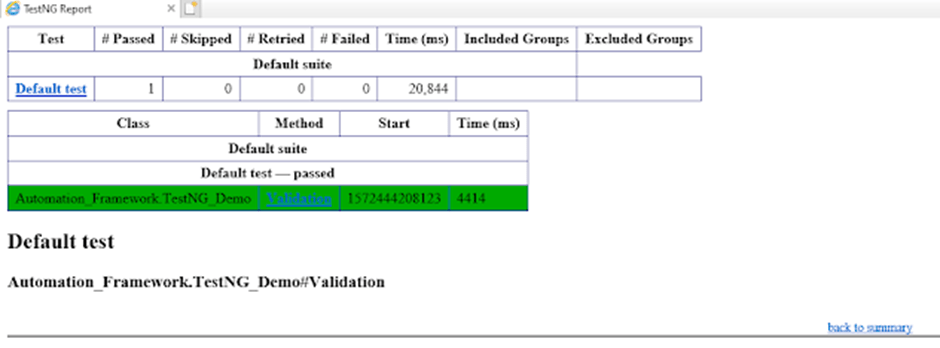
TestNG generates various types of reports under the test-output folder. Open “emailable-report.html”, as this is an HTML report open it with the browser. It will look like something below.

TestNG also produces an “index.html” report, and it resides under the test-output folder.

There is another example of Listener –ITestResult.
We are done! Congratulations on making it through this tutorial and hope you found it useful! Happy Learning!!


