What is Assertion?
Assertions in TestNG are a way to verify that the expected result and the actual result matches or not in the test case. A test is considered successful ONLY if it is completed without throwing any exception. An example of assertion can be logging into the website, checking the title of the webpage, verifying the functionality of an input box that takes only integers, etc.
Below are few commonly used assertions in TestNG.
1. Assert.assertEquals(String actual, String expected) – It takes two string arguments and checks whether both strings are equal or not. If they are not, it will fail the test and an AssertionError is thrown.
2. Assert.assertEquals(String actual, String expected, String message) – It takes two string arguments and checks whether both strings are equal or not. If they are not, it will fail the test and an AssertionError is thrown with message provided as argument.
3. Assert.assertEquals(boolean actual, boolean expected) – It takes two Boolean arguments and checks whether both are equal or not. If they are not, it will fail the test and an AssertionError is thrown.
4. Assert.assertEquals(java.util.Collection actual, java.util.Collection expected, java.lang.String message) – It takes two collection objects and verifies both collections contain the same elements and with the same order. If they are not, it will fail the test and an AssertionError is thrown.
5. Assert.assertTrue(condition) – It takes one boolean argument and checks that a condition is true or not. If not, it will fail the test and an AssertionError is thrown.
6. Assert.assertTrue(condition, message) – It takes one boolean argument and checks that a condition is true or not. If not, it will fail the test and an AssertionError is thrown with message provided as argument.
7. Assert.assertFalse(condition) – It takes one boolean argument and checks that a condition is false or not. If not, it will fail the test and an AssertionError is thrown.
8. Assert.assertFalse(condition, message) – It takes one boolean argument and checks that a condition is false or not. If not, it will fail the test and an AssertionError is thrown with message provided as argument.
9. Assert.assertSame(String actual, String expected) – It asserts that two objects refer to the same object. If they do not, an AssertionError is thrown.
10. Assert.assertNotSame(String actual, String expected) – It asserts that two objects do not refer to the same object. If they do, an AssertionError is thrown.
package com.example;
import org.testng.Assert;
import org.testng.annotations.Test;

public class testAssertions {

    @Test
    public void testAssertions() {

        // test data
        String str1 = new String("TestNG");
        String str2 = new String("TestNG");
        String str3 = null;
        String str4 = "TestNG";
        String str5 = "TestNG";
        String str6 = new String("Not_TestNG");

        int val1 = 5;
        int val2 = 6;

        // Check that two objects are equal
        Assert.assertEquals(str1, str2);
        System.out.println("Equals Assertion is successful");

        // Check that two objects are not equal
        Assert.assertNotEquals(str1, str6);
        System.out.println("NotEquals Assertion is successful");

        // Check that a condition is true
        Assert.assertTrue(val1 < val2);
        System.out.println("True Assertion is successful");

        // Check that a condition is false
        Assert.assertFalse(val1 > val2);
        System.out.println("False Assertion is successful");

        // Check that an object isn't null
        Assert.assertNotNull(str1);
        System.out.println("Not Null Assertion is successful");

        // Check that an object is null
        Assert.assertNull(str3);

        // Check if two object references point to the same object
        Assert.assertSame(str4, str5);
        System.out.println("Same Assertion is successful");

        // Check if two object references not point to the same object
        Assert.assertNotSame(str1, str3);
        System.out.println("Not Same Assertion is successful");
    }
}
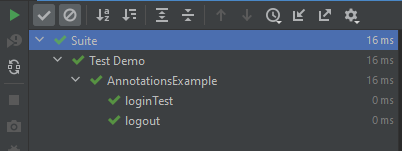
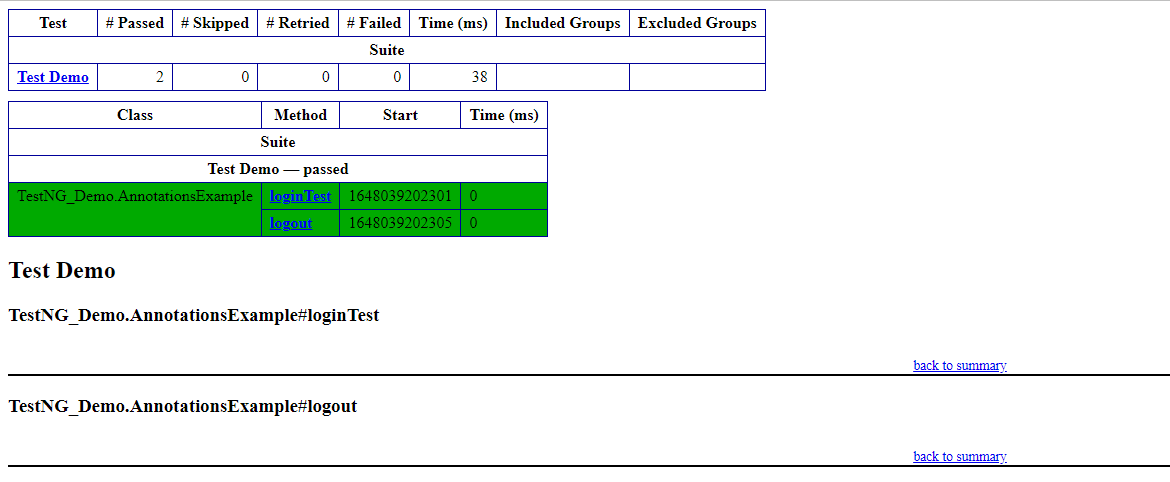
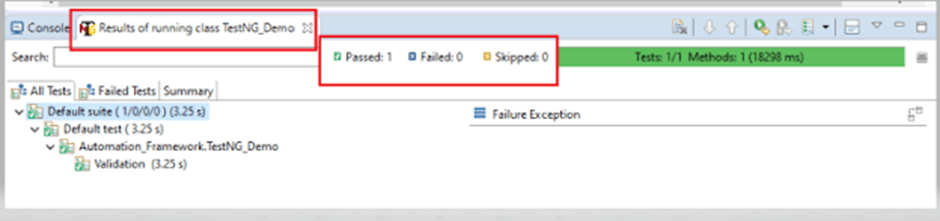
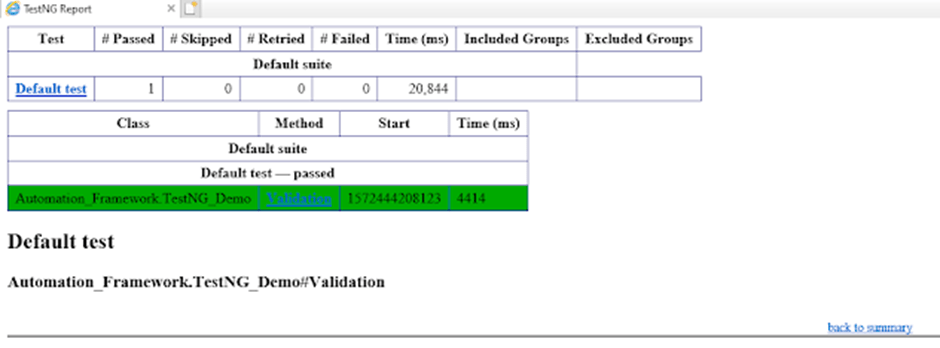
The output of the above program is

Lets see if an assertion fails, how the output looks shown below. In the below example, we are verifying the pageTitle of Gmail. If the test fails, we should see the message provided in the assertion also.
import org.openqa.selenium.WebDriver;
import org.openqa.selenium.firefox.FirefoxDriver;
import org.openqa.selenium.firefox.FirefoxOptions;
import org.testng.Assert;
import org.testng.annotations.Test;

public class TestNGAssertionFailureDemo {

    @Test
    public void AssertionFailure() throws InterruptedException {

        FirefoxOptions options = new FirefoxOptions();
        WebDriver driver = new FirefoxDriver(options);
        // Test Condition 1: If Page title matches with actualTitle then it finds email
        // title and enters the value which we pass
        driver.get("https://www.gmail.com");
        String actualTitle = "Google";
        String expectedTitle = driver.getTitle();
        Assert.assertEquals(expectedTitle, actualTitle, "Incorrect page title");
    }
}
The output of the above program is
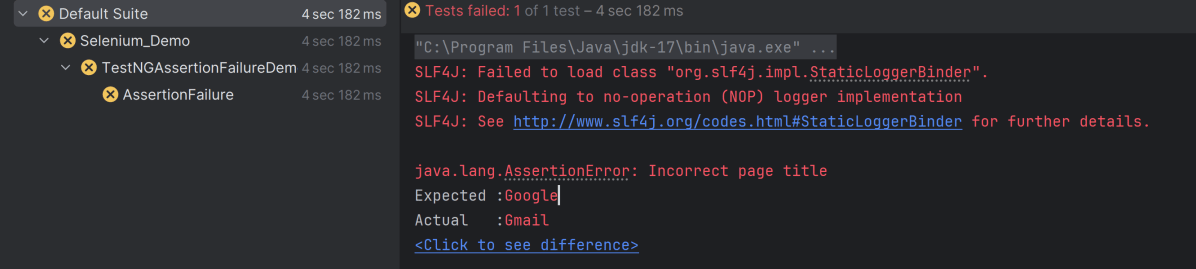
You can show in the output console, there is an error message “Incorrect page title” as we have mentioned this message in the Assertion.


