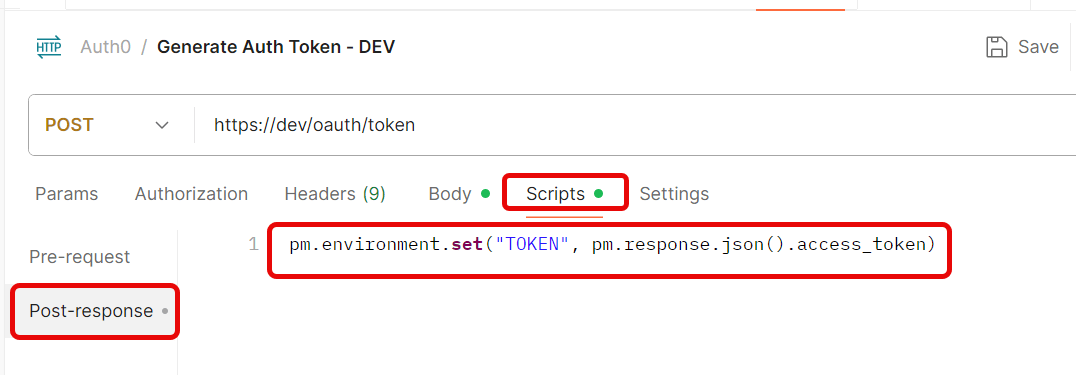
Create a new Environmentin Postman (top right → Environments → Add
Save the request.
Step 3: Use the Token in Another Request
Create a new request.
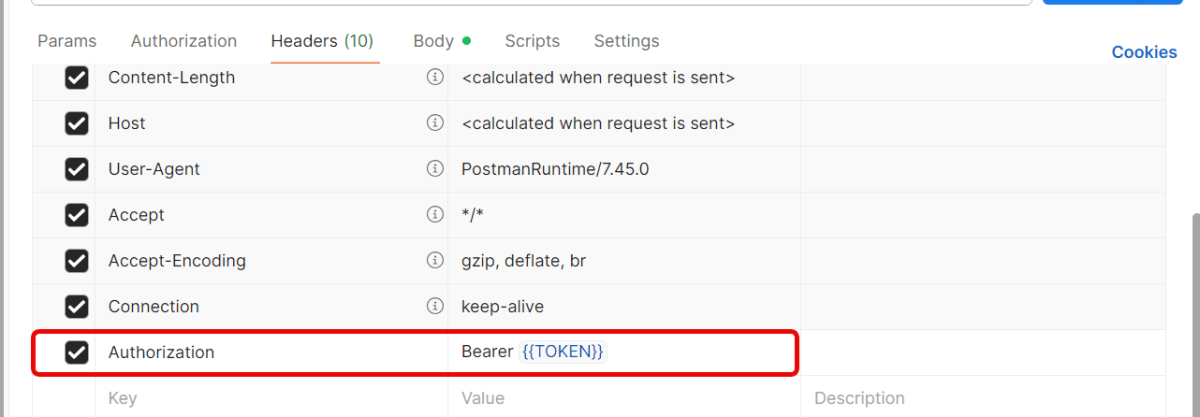
Go to the Headerstab.
Add this header:
Key: Authorization
Value: Bearer {{Token}}
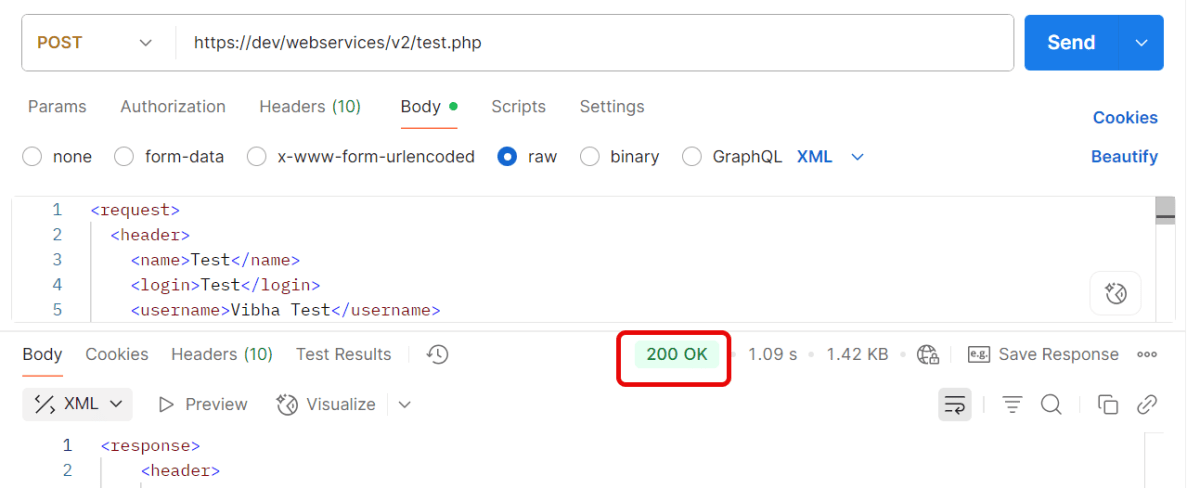
Send the request — Postman will automatically insert the token from the environment variable.
Quick Troubleshooting Checklist
1.Is the token saved correctly in environment variables? Token saved in one environment, but request uses another. Make sure you’ve selected the same environment (top-right dropdown in Postman).
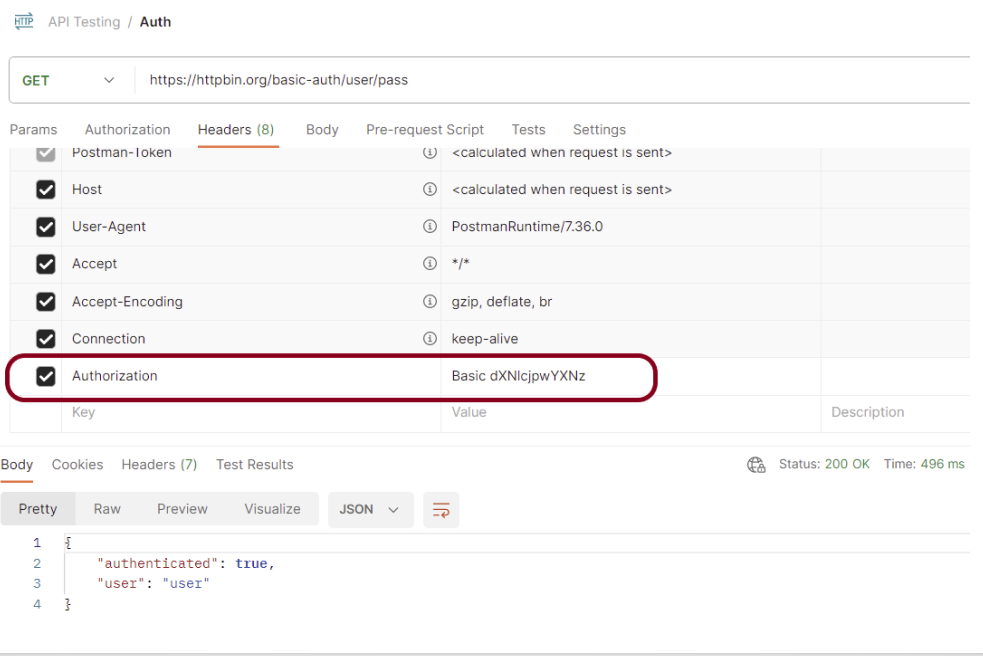
2. Is the Authorization: Bearer {{Token}} header present?
3. Does the account have the correct permissions/scopes? Token is valid, but the user doesn’t have permission for that endpoint. Verify that your account has the right role/permissions.
4. Correct Content-Type is sent. Set header → Content-Type: application/json.
Pytest is a versatile testing framework in Python. It can be used for various types of testing, like REST API testing. In this tutorial, we will test Rest API in PyTest Framework.
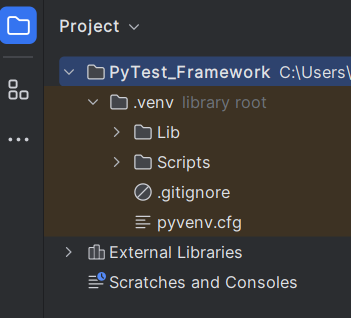
2.1 Create a new project folder and open it in PyCharm.
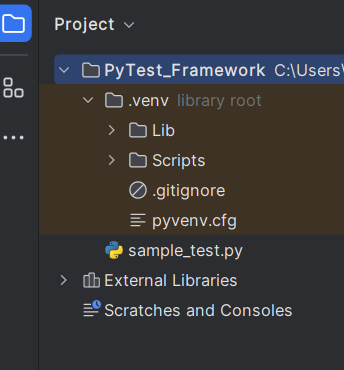
2.2 – Go to the project folder and create a new python file – test_restapi.py.
2.3 – Add requests package to the PyCharms
Go to File->Settings ->Project: PyTest_Framework->Python Interpreter.
Click on the “+” sign and enter allure-r in the search bar. It will show a list of packages. Select the “requests” package and click on the “Install Package”.
Once the package is installed, we will see the message that the package is installed successfully.
Many REST API endpoints require authentication to return the response. To authenticate the request, we will need to provide an authentication token with the required scopes or permissions. First, we need to generate an access token. Then, we pass it to the second request to get the desired response.
What is an Access Token?
An access token is a credential that is used to authenticate and authorize requests made to an API. It proves the user’s identity and permissions. This allows them to access protected resources or perform specific actions within the API.
Access tokens are usually represented as strings of characters (e.g., alphanumeric) that are generated by the server and provided to clients upon successful authentication. Access tokens often have an expiration time associated with them, after which they become invalid. This helps ensure security by limiting their lifespan.
Using access tokens helps ensure secure communication between clients and servers by preventing unauthorized access to protected resources. Without a valid access token, requests may be rejected or limited in their scope.
Access tokens enable stateless communication between client and server. This means that each request contains all necessary authentication and authorization information within itself. This eliminates the need for servers to store session-related data, improving scalability and reducing overhead.
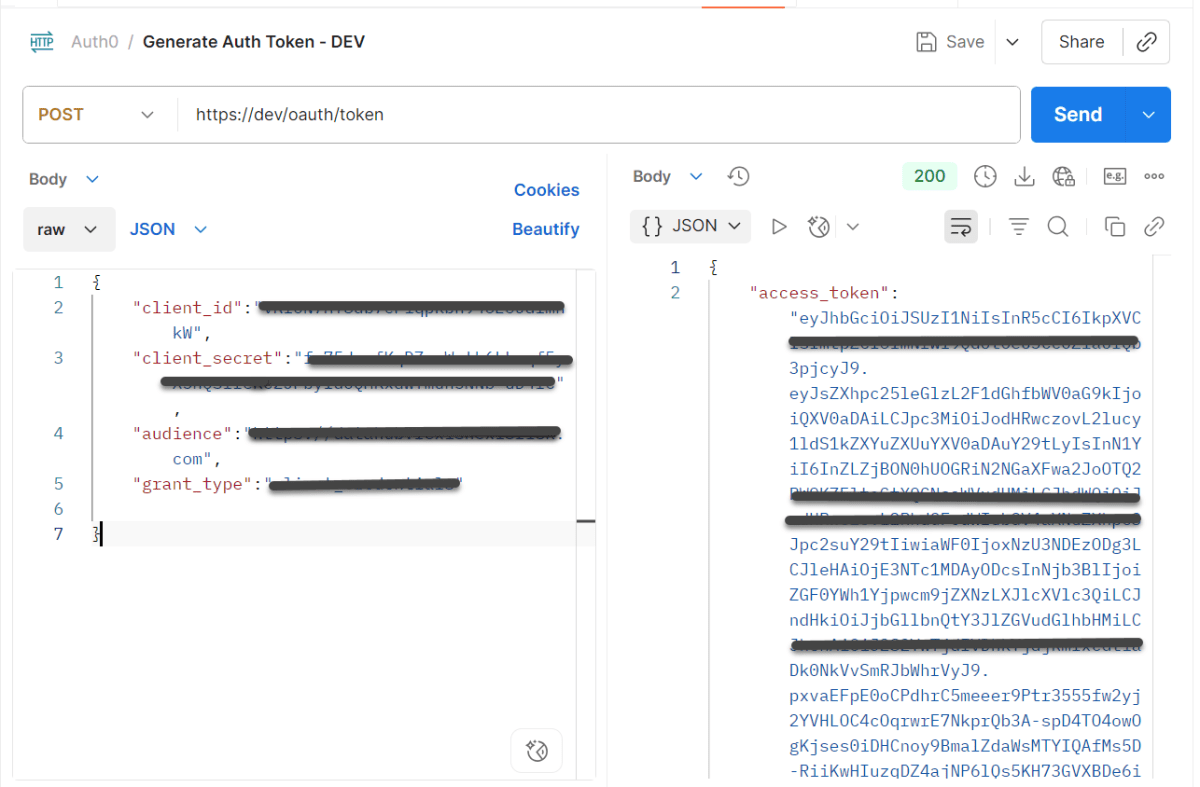
Let us create a class that will generate the access token.
In the above example, a token is generated as shown below.
It is a JSON Response. We need only the token part and not the {“access_token”} part. So we have used the below command to extract the token part only.
JsonPath jsonPath = new JsonPath(token);
accessToken = jsonPath.getString("access_token");
What is Oauth2()?
OAuth 2.0 (Open Authorization 2.0) is an industry-standard protocol for authorization and delegation of access to protected resources on the web. It allows users to securely grant limited access to their resources hosted on one website or application. This site is called the “resource server.” The access is given to another website or application, which is called the “client.”
Below is a test. We are passing the token generated in the previous request for authentication. This token is used in another request with oauth2().
AccessToken_Example
import java.io.IOException;

public class AccessToken_Example extends AbstractHelper {

    Response response;

   @Test
    public void testRequest() throws IOException {

        response = RestAssured.given()
                .auth().oauth2(generateToken())
                .when().get("https://localhost/8080/coreid").then()
                .extract()
                .response();

        System.out.println("Response :" + response.asString());
        int statusCode = response.getStatusCode();

        Assert.assertEquals(200,statusCode);
    }
}
The output of the above program is
Summary:
1. Access tokens are obtained through an authentication process. This may include logging in with a username and password or using a third-party authentication service like OAuth. 2. Once authenticated, the access token contains information about the user’s permissions and privileges within the system. Use this access token and pass it to another request to get the required response.
When you are doing API testing, sometimes the APIs or endpoints are protected. This means you need to be authenticated and authorized to perform certain actions. REST assured supports several authentication schemes, for example, OAuth, digest, certificate, form, and pre-emptive basic authentication.
In this post, we’ll look at how to pass the authorization token in the header in REST Assured.
What is an authorization token?
An authorization token, often referred to as an access token, is a piece of data or credential that is used to authenticate and authorize access to protected resources or operations in a system.
Add the below-mentioned dependencies to the Maven project.