In this tutorial, we will create a Page Object Model framework using PyTest(Python).
Table of Contents
Prerequisite:
- Python is installed on the machine
- PIP is installed on the machine
- PyCharm or other Python Editor is installed on the machine
If you need help in installing Python, please refer to this tutorial – How to Install Python on Windows 11.
If you need help in installing PyCharms, please refer to this tutorial – How to install PyCharms on Windows 11.
What is Page Object Model?
The Page Object Model (POM) is a design pattern used in test automation, particularly in web application testing. It aims to enhance the test automation framework’s maintainability, readability, and reusability by encapsulating the behavior of web pages or user interfaces into separate classes or modules called Page Objects.
In essence, the Page Object Model represents web pages or user interfaces as objects in the test automation code. Each page or UI element is associated with a Page Object, which contains all the actions that can be performed on that page and the elements present on it.
To implement the Page Object Model (POM) in PyTest, we will organize the test cases and page objects in a way that promotes reusability, readability, and maintainability.
- Create Page Objects: Define a separate class for each page of your web application. Each class should encapsulate the elements and actions of the corresponding page.
- Write Test Cases: Implement your test cases as pytest test functions or methods. These test functions should interact with the page objects to perform actions and assertions.
- Use Fixtures for Setup and Teardown: Utilize pytest fixtures for setup and teardown operations such as initializing the browser, navigating to URLs, and closing the browser.
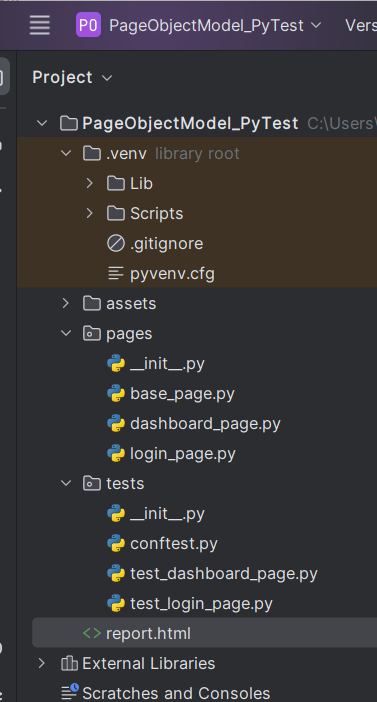
Project Structure
Implementation Steps
Step 1 – Install pytest
Use the below command to install PyTest on your machine.
pip install -U pytest
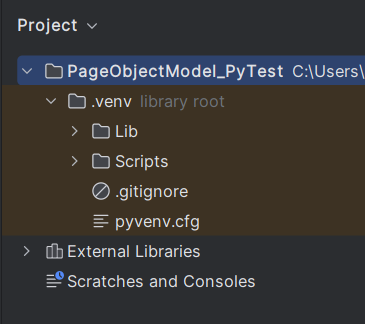
Step 2 – Create a new project in PyCharm
Create a new project folder and open it in PyCharm.
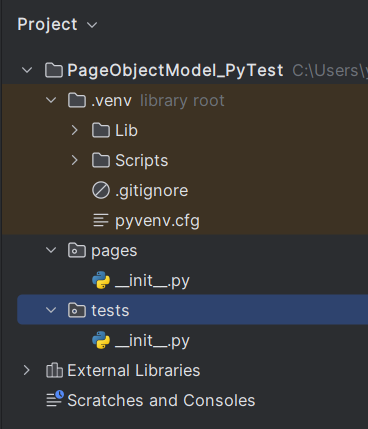
Step 3 – Create python directories
Go to the project folder and create 2 new python directories for pages and tests respectively.
Step 4 – Add pytest-selenium package to the PyCharms
Go to File->Settings ->Project: PageObjectModel_PyTest->Python Interpreter.
Click on the “+” sign and enter allure-r in the search bar. It will show a list of packages. Select the “pytest-selenium” package and click on the “Install Package”.
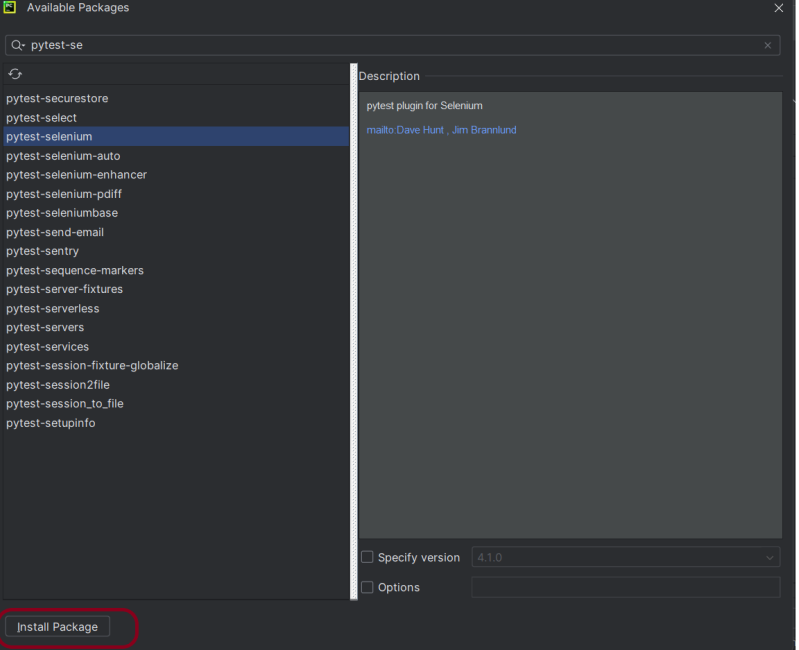
Once the package is installed, we will see the message that the package is installed successfully.

Step 5 – Create the test code and corresponding helper classes
First we will create BasePage class that contains all the generic methods that will be used throughout the framework, like driver method, locator method and soon.
from selenium.webdriver import ActionChains
from selenium.webdriver.support.wait import WebDriverWait
from selenium.webdriver.support import expected_conditions as ec


class BasePage:

    def __init__(self, driver):
        self._driver = driver
        self._wait = WebDriverWait(self._driver, 10)
        self._action = ActionChains(self._driver)

    def find(self, locator):
        return self._driver.find_element(*locator)
Now, we will create the page object class of each page.
LoginPage.py
from selenium.webdriver.common.by import By

from pages.base_page import BasePage


class LoginPage(BasePage):
    username = (By.NAME, "username")
    password = (By.NAME, "password")
    submit_button = (By.XPATH, "//*[@class='oxd-form']/div[3]/button")
    error_message = (By.XPATH, "//*[@class='orangehrm-login-error']/div[1]/div[1]/p")

    def execute_login(self, username: str, password: str):
        self.find(self.username).send_keys(username)
        self.find(self.password).send_keys(password)
        self.find(self.submit_button).click()

    def actual_error(self):
        return self.find(self.error_message).text
DashboardPage.py
from selenium.webdriver.common.by import By

from pages.base_page import BasePage


class DashboardPage(BasePage):
    heading = (By.XPATH, "//*[@class='oxd-topbar-header-breadcrumb']/h6")
    assign_leave_option = (By.XPATH, "//*[@title='Assign Leave']")
    time_at_work_option = (By.XPATH, "//*[@title='Time at Work']")

    def actual_heading(self):
        return self.find(self.heading).text

    def assign_leave_displayed(self):
        return self.find(self.assign_leave_option).is_displayed()

    def time_at_work_displayed(self):
        return self.find(self.assign_leave_option).is_displayed()
Now, we will create a conftest.py class that contains the initialization of the browser.
import pytest
from selenium import webdriver


@pytest.fixture(scope="class")
def driver():

    driver = webdriver.Chrome()
    driver.get("https://opensource-demo.orangehrmlive.com/")
    driver.maximize_window()
    driver.implicitly_wait(2)
    yield driver
    driver.close()
Below are the test classes for the Login Page and Dashboard page.
test_login_page.py
import pytest

from pages.dashboard_page import DashboardPage
from pages.login_page import LoginPage


def test_login_negative(driver, get_data):

    login_page = LoginPage(driver)
    login_page.execute_login(get_data["username"], get_data["password"])
    assert login_page.actual_error() == "Invalid credentials", "Error message does not match expected value"


def test_login_positive(driver):
    login_page = LoginPage(driver)
    login_page.execute_login("Admin", "admin123")
    dashboard_page = DashboardPage(driver)
    assert dashboard_page.actual_heading() == "Dashboard", "Heading is different"

@pytest.fixture(params=[{"username":"admin", "password":"admin$$"},
                        {"username":"Admin123", "password":"123"}])
def get_data(request):
    return request.param
test_dashboard_page.py
from pages.dashboard_page import DashboardPage
from pages.login_page import LoginPage


def test_successful_login(driver):

    login_page = LoginPage(driver)
    login_page.execute_login("Admin", "admin123")
    dashboard_page = DashboardPage(driver)
    assert dashboard_page.actual_heading() == "Dashboard"


def test_time_at_work(driver):
    login_page = LoginPage(driver)
    login_page.execute_login("Admin", "admin123")
    dashboard_page = DashboardPage(driver)
    assert dashboard_page.time_at_work_displayed()
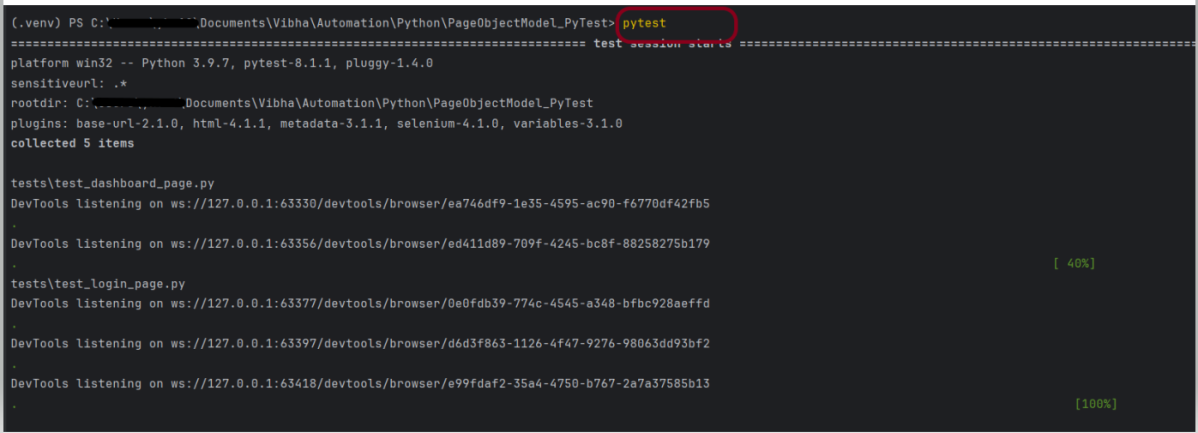
Step 6 – Execute the tests
To run this test, use the below command:
pytest
The output of the above execution is
Step 7 – Generate the HTML Report
To generate a HTML Report, please refer to this tutorial – How to generate HTML Report in PyTest Framework.
Generate a HTML Report using the below command:
pytest --html=report.html -s
The report.html report will be generated in the root directory.

Step 8 – View the HTML report
Right-click and open with Web Browser.

The complete code can be found in GitHub – vibssingh/PyTest_Framework.
That’s it! Congratulations on making it through this tutorial and hope you found it useful! Happy Learning!!
