For the successful execution of Agile testing requirements, a perfect test automation tool is required. And there are numerous factors to consider when creating a solid automation framework. One such component is reporting, which not only informs you of the success or failure of the project but also assists you in identifying potential bugs. JUnit is another useful framework that can add the ability to generate reports in Selenium. This tutorial explains the steps to generate the JUnit5 Report.
Table of Contents
Prerequisite:
- Java 8 or higher installed
- Maven is installed
- Eclipse or IntelliJ are installed
Dependency List:
- Java 11
- JUnit Jupiter API – 5.10.0
- Maven – 3.8.1
- Maven Site Plugin – 3.12.0
- Maven Surefire Report Plugin – 3.1.2
- Maven Compiler Plugin – 3.10.1
- Json – 20230618
- Rest Assured – 5.3.2
Project Structure

To create a Maven project in Eclipse, please refer to this tutorial – Maven – How to import Maven project in Eclipse
To create a Maven project in Eclipse, please refer to this tutorial – How to create Maven project in IntelliJ
Implementation Steps
Step 1 – Add the Maven Site Plugin and Maven Surefire Report plugin
Add the Maven Site Plugin and Maven Surefire Report plugin to the Maven project.
Maven Site Plugin
<plugin>
         <groupId>org.apache.maven.plugins</groupId>
          <artifactId>maven-site-plugin</artifactId>
          <version>${maven.site.plugin.version}</version>
</plugin>
Maven Surefire Report Plugin
<reporting>
      <plugins>
        <plugin>
          <groupId>org.apache.maven.plugins</groupId>
          <artifactId>maven-surefire-report-plugin</artifactId>
          <version>${maven.surefire.report.plugin.version}</version>
          <configuration>
            <outputName>JUnit5 Report</outputName>
          </configuration>
        </plugin>
      </plugins>
</reporting>
The complete POM.xml looks like
<project xmlns="http://maven.apache.org/POM/4.0.0" xmlns:xsi="http://www.w3.org/2001/XMLSchema-instance"
  xsi:schemaLocation="http://maven.apache.org/POM/4.0.0 http://maven.apache.org/xsd/maven-4.0.0.xsd">
  <modelVersion>4.0.0</modelVersion>

  <groupId>org.example</groupId>
  <artifactId>RestAssured_Junit5_Demo</artifactId>
  <version>1.0-SNAPSHOT</version>
  <packaging>jar</packaging>

  <name>RestAssured_Junit5_Demo</name>
  <url>http://maven.apache.org</url>

  <properties>
    <project.build.sourceEncoding>UTF-8</project.build.sourceEncoding>
    <rest-assurd.version>5.3.2</rest-assurd.version>
    <json.version>20220924</json.version>
    <hamcrest.version>1.3</hamcrest.version>
    <junit5.version>5.10.0</junit5.version>
    <maven.surefire.report.plugin.version>3.1.2</maven.surefire.report.plugin.version>
    <maven.compiler.plugin.version>3.10.1</maven.compiler.plugin.version>
    <maven.surefire.plugin.version>3.0.0-M7</maven.surefire.plugin.version>
    <maven.compiler.source.version>11</maven.compiler.source.version>
    <maven.compiler.target.version>11</maven.compiler.target.version>
    <maven.site.plugin.version>3.12.0</maven.site.plugin.version>
  </properties>

  <dependencies>

    <!-- Rest Assured Dependency -->
    <dependency>
      <groupId>io.rest-assured</groupId>
      <artifactId>rest-assured</artifactId>
      <version>${rest-assurd.version}</version>
      <scope>test</scope>
    </dependency>

    <!-- JUNIT Jupiter API Dependency-->
    <dependency>
      <groupId>org.junit.jupiter</groupId>
      <artifactId>junit-jupiter-api</artifactId>
      <version>${junit5.version}</version>
      <scope>test</scope>
    </dependency>

    <!-- JUNIT Jupiter Engine Dependency-->
    <dependency>
      <groupId>org.junit.jupiter</groupId>
      <artifactId>junit-jupiter-engine</artifactId>
      <version>${junit5.version}</version>
      <scope>test</scope>
    </dependency>

    <!-- JSON Dependency -->
    <dependency>
      <groupId>org.json</groupId>
      <artifactId>json</artifactId>
      <version>${json.version}</version>
    </dependency>

    <!-- Hamcrest Dependency -->
    <dependency>
      <groupId>org.hamcrest</groupId>
      <artifactId>hamcrest-all</artifactId>
      <version>${hamcrest.version}</version>
      <scope>test</scope>
    </dependency>

  </dependencies>

  <build>
    <plugins>
      <plugin>
        <groupId>org.apache.maven.plugins</groupId>
        <artifactId>maven-compiler-plugin</artifactId>
        <version>${maven.compiler.plugin.version}</version>
        <configuration>
          <source>${maven.compiler.source.version}</source>
          <target>${maven.compiler.target.version}</target>
        </configuration>
      </plugin>

      <plugin>
        <groupId>org.apache.maven.plugins</groupId>
        <artifactId>maven-surefire-plugin</artifactId>
        <version>${maven.surefire.plugin.version}</version>
        <configuration>
          <testFailureIgnore>true</testFailureIgnore>
        </configuration>
      </plugin>

      <plugin>
        <groupId>org.apache.maven.plugins</groupId>
        <artifactId>maven-site-plugin</artifactId>
        <version>${maven.site.plugin.version}</version>
      </plugin>
    </plugins>
  </build>

    <reporting>
      <plugins>
        <plugin>
          <groupId>org.apache.maven.plugins</groupId>
          <artifactId>maven-surefire-report-plugin</artifactId>
          <version>${maven.surefire.report.plugin.version}</version>
          <configuration>
            <outputName>JUnit5 Report</outputName>
          </configuration>
        </plugin>
      </plugins>
    </reporting>

</project>
Step 2 – Create sample tests
The tests should be written in src/test/java directory. To know how to create a JSON Request body using JSONObject, please refer to this tutorial.
import io.restassured.http.ContentType;
import org.json.JSONObject;
import org.junit.jupiter.api.Test;
import static io.restassured.RestAssured.given;
import static org.hamcrest.Matchers.equalTo;

public class APITests {

        String BaseURL = "https://reqres.in/api";

    @Test
    public void createUser() {

        JSONObject data = new JSONObject();

        data.put("name", "NewUser1");
        data.put("job", "Testing");

        // GIVEN
        given()
                .contentType(ContentType.JSON)
                .body(data.toString())

                // WHEN
                .when()
                .post(BaseURL + "/users")

                // THEN
                .then()
                .statusCode(201)
                .body("name", equalTo("NewUser1"))
                .body("job", equalTo("Testing"))

    }

    @Test
    public void getUser() {

        // GIVEN
        given()
                .contentType(ContentType.JSON)

                // WHEN
                .when()
                .get(BaseURL + "/users/2")

                // THEN
                .then()
                .statusCode(200)
                .body("data.first_name", equalTo("Janet1"))

    }

}
Step 3 – Run the tests from the Command Line
Use the below command to run the tests from the command line
mvn clean test site
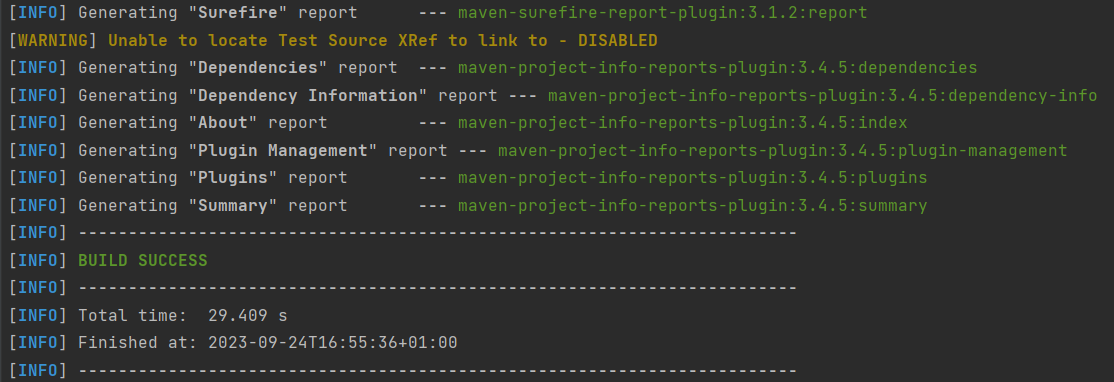
The output of the test execution is
Step 4 – JUnit5 Report generation
Maven Site Plugin creates a folder – site under the target directory.

The Maven Surefire Report plugin generates the JUnit5 Report in the site folder.

Right-click on the Junit5 Report.html and open it in the browser.

To know about the test failure, go to the Failure Details Section.

Congratulations on making it through this tutorial and hope you found it useful! Happy Learning!! Cheers!!
