In Automation, it is advisable to take screenshots of failed test cases for further analysis and proof of failure. Selenium provides the capability to take screenshot. But, before we see how to capture Screenshot in Selenium, we need to add below mentioned dependencies in the Maven project. In this tutorial, we will take screenshot of a specific element in the webpage.
Initialize the WebDriver. Here, it is FireFoxOptions. Open the desired web page.
FirefoxOptions options = new FirefoxOptions();
WebDriver driver = new FirefoxDriver(options);
driver.manage().window().maximize();
driver.get("https://www.selenium.dev/");
2. Locate the Element
Use Selenium methods to locate the element.
WebElement logo = driver.findElement(By.xpath("//div[@class='row']/div"));
3. Take the screenshot of the element
To capture a screenshot in Selenium, we can make use of an interface, called TakesScreenshot. This method indicates the driver, that it can capture a screenshot and store it in different ways
In order to capture screenshot and store it in a particular location, there is a method called “getScreenshotAs“, where OutputType defines the output type for a screenshot.
4. Specify the location to save the screenshot
File screenshotLocation = new File("src//test/resources//screenshot/specific_element_screenshot.png");
5. Save the screenshot to the specified location
We want to save the element in the screenshot folder present in src/test/resources directory. So, copy the screenshot in that folder.
FileUtils.copyFile(source, screenshotLocation);
5. Quit the browser
Make sure to quit the browser to free up all the resources.
driver.quit();
Let’s see the complete program
package com.example;

import org.openqa.selenium.*;
import org.openqa.selenium.firefox.FirefoxDriver;
import org.openqa.selenium.firefox.FirefoxOptions;
import org.apache.commons.io.FileUtils;
import java.io.File;

public class ScreenShot_Demo {

    public static void main(String[] args) {

        FirefoxOptions options = new FirefoxOptions();
        WebDriver driver = new FirefoxDriver(options);
        driver.manage().window().maximize();
        driver.get("https://www.selenium.dev/");

        // Locate the specific element
        WebElement logo = driver.findElement(By.xpath("//div[@class='row']/div"));

        // Take the screenshot of the element
        File source = logo.getScreenshotAs(OutputType.FILE);

        // Specify the location to save the screenshot
        File screenshotLocation = new File("src//test/resources//screenshot/element_screenshot.png");

        try {
            // Save the screenshot to the specified location
            FileUtils.copyFile(source, screenshotLocation);
            System.out.println("Screenshot saved to: " + screenshotLocation.getAbsolutePath());
        } catch (Exception e) {
            System.out.println(e.getMessage());
        }

        System.out.println("The Screenshot is taken and saved under Screenshots folder");
        driver.quit();
    }

}
The output of the above program is
A folder with name screenshot is created inside src/test/resources directory and the screenshot is placed in that folder as you can see the image below
The Screenshot looks like something below
That’s it! Congratulations on making it through this tutorial and hope you found it useful! Happy Learning!!
In this article we will see how we can write in a pdf file using selenium Java.
Writing in a PDF document in Selenium using Java requires some additional libraries because Selenium itself does not provide direct support for reading PDFs. The most commonly used library for reading PDFs in Java is Apache PDFBox.
Use Selenium WebDriver to navigate to the PDF URL and download it to a desired location.
// Download first PDF
WebElement downloadLink = driver.findElement(By.xpath("//*[@class='elementor-button-text']"));
downloadLink.click();
//Wait for PDF download to complete
File downloadedFile = new File(downloadFilepath + "/Free_Test_Data_100KB_PDF.pdf");
WebDriverWait wait = new WebDriverWait(driver, Duration.ofSeconds(30));
wait.until((ExpectedCondition<Boolean>) wd -> downloadedFile.exists());
System.out.println("PDF File is downloaded successfully.");
4. Create a content stream to write to the PDF
We are using the Apache PDFBox to write to the downloaded PDF file.
Step 1 – PDPageContentStream class is used to insert data in the document. In this class, we need to pass the document object and page object as its parameter to insert data.
PDPageContentStream contentStream = new PDPageContentStream(doc, page, PDPageContentStream.AppendMode.APPEND, true);
Step 2 – When we insert text in the PDF document, we can also provide the start position of the text. beginText() method of the PDPageContentStream class is used to start the text content.
contentStream.beginText();
Step 3 – We can set the font style and font size of the text by using setFont() method of the PDPageContentStream class.
//Setting the font to the Content stream
PDFont pdfFont= new PDType1Font(TIMES_BOLD_ITALIC);
contentStream.setFont(pdfFont, 20);
Step 4 – We can set the position of the text by using newLineAtOffset() method of the PDPageContentStream class which can be shown in the following code.
//Setting the position for the line
contentStream.newLineAtOffset(40, 450);
Step 5 – We can insert text content in the PDF document by using the showText() method of the PDPageContentStream class.
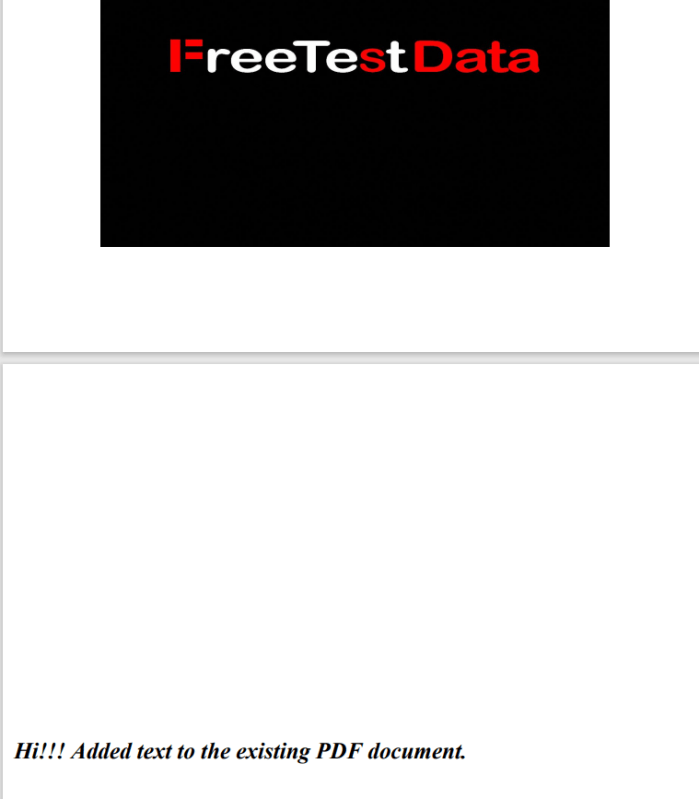
//Adding text in the form of string
String text = "Hi!!! Added text to the existing PDF document.";
contentStream.showText(text);
Step 6 – When we insert text in the PDF document, we have to provide the end point of the text. endText() method of the PDPageContentStream class is used to end the text content.
contentStream.endText();
Step 7 – We can close the PDPageContentStream class by using close() method.
//Closing the content stream
contentStream.close();
Step 8 – After adding the required document, we have to save it to our desired location. save() method is used to save the document.
//Saving the document
doc.save(new File("downloads/Updated_PDF.pdf"));
Step 9 – After completing the task, we need to close the PDDocument class object by using the close()method.
//Closing the document
doc.close();
The complete program can be seen below:
package com.example;
import org.apache.pdfbox.Loader;
import org.apache.pdfbox.pdmodel.PDDocument;
import org.apache.pdfbox.pdmodel.PDPage;
import org.apache.pdfbox.pdmodel.PDPageContentStream;
import org.apache.pdfbox.pdmodel.font.PDFont;
import org.apache.pdfbox.pdmodel.font.PDType1Font;
import org.openqa.selenium.By;
import org.openqa.selenium.WebDriver;
import org.openqa.selenium.WebElement;
import org.openqa.selenium.chrome.ChromeDriver;
import org.openqa.selenium.chrome.ChromeOptions;
import org.openqa.selenium.support.ui.ExpectedCondition;
import org.openqa.selenium.support.ui.WebDriverWait;
import java.io.File;
import java.io.IOException;
import java.time.Duration;
import java.util.HashMap;
import java.util.Map;
import static org.apache.pdfbox.pdmodel.font.Standard14Fonts.FontName.TIMES_BOLD_ITALIC;
public class WritePDF_Chrome_Demo {
public static void main(String[] args) throws InterruptedException, IOException {
String downloadFilepath = System.getProperty("user.dir") + File.separator + "downloads";

ChromeOptions options = new ChromeOptions();
Map<String, Object> prefs = new HashMap<>();
prefs.put("plugins.always_open_pdf_externally", true);
prefs.put("download.default_directory", downloadFilepath);
options.setExperimentalOption("prefs", prefs);

WebDriver driver = new ChromeDriver(options);
driver.manage().window().maximize();
driver.get("https://freetestdata.com/document-files/pdf/");
  // Download first PDF
   WebElement downloadLink = driver.findElement(By.xpath("//*[@class='elementor-button-text']"));
   downloadLink.click();

  //Wait for PDF download to complete
  File downloadedFile = new File(downloadFilepath + "/Free_Test_Data_100KB_PDF.pdf");
  WebDriverWait wait = new WebDriverWait(driver, Duration.ofSeconds(30));
  wait.until((ExpectedCondition<Boolean>) wd -> downloadedFile.exists());
  System.out.println("PDF File is downloaded successfully.");
driver.quit();
//Retrieving the pages of the document
PDDocument doc = Loader.loadPDF(downloadedFile);
PDPage page = doc.getPage(2);
PDPageContentStream contentStream = getPdPageContentStream(doc, page);
System.out.println("New Text Content is added in the PDF Document.");
//Closing the content stream
contentStream.close();
//Saving the document
doc.save(new File("downloads/Updated_PDF.pdf"));
//Closing the document
doc.close();
}
private static PDPageContentStream getPdPageContentStream(PDDocument doc, PDPage page) throws IOException {
PDPageContentStream contentStream = new PDPageContentStream(doc, page, PDPageContentStream.AppendMode.APPEND, true);
//Begin the Content stream
contentStream.beginText();
//Setting the font to the Content stream
PDFont pdfFont=  new PDType1Font(TIMES_BOLD_ITALIC);
contentStream.setFont(pdfFont, 20);
//Setting the position for the line
contentStream.newLineAtOffset(10, 450);
String text = "Hi!!! Added text to the existing PDF document.";
//Adding text in the form of string
contentStream.showText(text);
//Ending the content stream
contentStream.endText();
return contentStream;
}
}
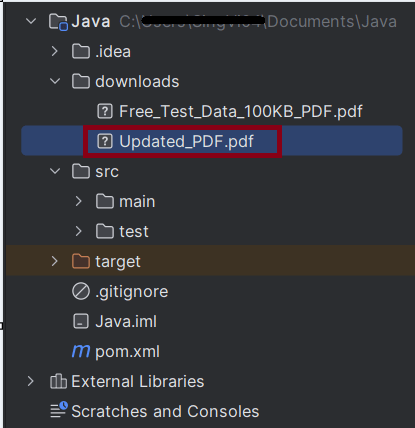
The output of the above program is
We can see that the updated pdf is placed in the documents folder.
We can see that the text content is added to the PDF document.
Summary:
Setup WebDriver: Configure the browser to handle automatic downloads.
Trigger Download: Navigate to the webpage and trigger the download.
Wait for Completion: Implement a waiting mechanism to ensure the download completes.
Write to PDF: Use PDPageContentStream to write the data to PDF.
That’s it! Congratulations on making it through this tutorial and hope you found it useful! Happy Learning!!
In this article we will see how we can read a pdf file using seleniumjava.
Organizations frequently generate various types of PDF reports, such as mobile bills, electricity bills, financial reports, and revenue reports. Quality Assurance (QA) teams are then tasked with verifying the information contained in these reports. Typically, this process involves manually downloading the reports and reading the data they contain. To automate this process, the test framework must be capable of automatically downloading PDF reports and extracting the data without any human intervention.
Reading a PDF document in Selenium using Java requires some additional libraries because Selenium itself does not provide direct support for reading PDFs. The most commonly used library for reading PDFs in Java is Apache PDFBox.
Add the Selenium, commons and pdfbox dependencies to the project. To download the latest version of these dependencies, refer to the official Maven site – https://mvnrepository.com/.
Use Selenium WebDriver to navigate to the PDF URL and download it to a desired location.
 String downloadFilepath = System.getProperty("user.dir") + File.separator + "downloads";

        ChromeOptions options = new ChromeOptions();
        Map<String, Object> prefs = new HashMap<>();
        prefs.put("plugins.always_open_pdf_externally", true);
        prefs.put("download.default_directory", downloadFilepath);
        options.setExperimentalOption("prefs", prefs);

        WebDriver driver = new ChromeDriver(options);
        driver.manage().window().maximize();
        driver.get("https://freetestdata.com/document-files/pdf/");

        // Locate and click the download link or button if necessary
        WebElement downloadLink = driver.findElement(By.xpath("//*[@class=\"elementor-button-text\"]"));
        downloadLink.click();

        //Wait for download to complete
        File downloadedFile = new File(downloadFilepath + "/Free_Test_Data_100KB_PDF.pdf");
        WebDriverWait wait = new WebDriverWait(driver, Duration.ofSeconds(30));
        wait.until((ExpectedCondition<Boolean>) wd -> downloadedFile.exists());

        // Check if the file exists
        if (downloadedFile.exists()) {
            System.out.println("File is downloaded!");
        } else {
            System.out.println("File is not downloaded.");
        }
We are using the Apache PDFBox to read the downloaded PDF file and extract text.
Step 1 – Load PDF Document
File file = new File("Path of Document");
PDDocument doc = Loader.loadPDF(file);
Step 2 – Retrieve the text
PDFTextStripper class is used to retrieve text from a PDF document. We can instantiate this class as following
PDFTextStripper pdfStripper = new PDFTextStripper();
getText() method is used to read the text contents from the PDF document. In this method, we need to pass the document objectas a parameter.
String text = pdfStripper.getText(doc);
The complete program can be seen below:
import org.apache.pdfbox.Loader;
import org.apache.pdfbox.pdmodel.PDDocument;
import org.apache.pdfbox.text.PDFTextStripper;
import org.openqa.selenium.By;
import org.openqa.selenium.WebDriver;
import org.openqa.selenium.WebElement;
import org.openqa.selenium.chrome.ChromeDriver;
import org.openqa.selenium.chrome.ChromeOptions;
import org.openqa.selenium.support.ui.ExpectedCondition;
import org.openqa.selenium.support.ui.WebDriverWait;

import java.io.File;
import java.io.IOException;
import java.time.Duration;
import java.util.HashMap;
import java.util.Map;

public class ReadPDF_Chrome_Demo {

    public static void main(String[] args) throws InterruptedException {

        String downloadFilepath = System.getProperty("user.dir") + File.separator + "chrome_downloads";

        ChromeOptions options = new ChromeOptions();
        Map<String, Object> prefs = new HashMap<>();
        prefs.put("plugins.always_open_pdf_externally", true);
        prefs.put("download.default_directory", downloadFilepath);
        options.setExperimentalOption("prefs", prefs);

        WebDriver driver = new ChromeDriver(options);
        driver.manage().window().maximize();
        driver.get("https://freetestdata.com/document-files/pdf/");

        // Locate the download link/button and click and wait for the download to complete
        WebElement downloadLink = driver.findElement(By.xpath("//*[@class='elementor-button-text']"));
        downloadLink.click();

        //Wait for download to complete
        File downloadedFile = new File(downloadFilepath + "/Free_Test_Data_100KB_PDF.pdf");
        WebDriverWait wait = new WebDriverWait(driver, Duration.ofSeconds(30));
        wait.until((ExpectedCondition<Boolean>) wd -> downloadedFile.exists());

        // Check if the file exists
        if (downloadedFile.exists()) {
            System.out.println("File is downloaded!");
        } else {
            System.out.println("File is not downloaded.");
        }

        driver.quit();

        // Read the downloaded PDF using PDFBox
        PDDocument document = null;
        try {
            document = Loader.loadPDF(downloadedFile);
            PDFTextStripper pdfStripper = new PDFTextStripper();
            String text = pdfStripper.getText(document);
            document.close();

            // Print the PDF text content
            System.out.println("Text in PDF: ");
            System.out.println(text);
        } catch (IOException e) {
            System.err.println("An error occurred while loading or reading the PDF file: " + e.getMessage());
            e.printStackTrace();
        }

    }

}
The output of the above program is
Summary:
### Summary
1. Setup WebDriver:Configure the browser to handle automatic downloads. 2. Trigger Download: Navigate to the webpage and trigger the download. 3. Wait for Completion: Implement a waiting mechanism to ensure the download completes. 4. Verify Content: Use a library like Apache PDFBox to read the content of the downloaded PDF.
That’s it! Congratulations on making it through this tutorial and hope you found it useful! Happy Learning!!
Selenium Quiz – You can test your knowledge with this Selenium Quiz. We have created this Selenium WebDriver Quiz Online Test to help you master Selenium.
In this article we will see how we can download a pdf file in chrome using selenium at a desired location in java.
When a PDF link on a website is clicked, the PDF file typically opens in Chrome’s default PDF viewer. While clicking on the PDF link itself is straightforward using Selenium, interacting with the PDF viewer afterward presents a challenge. This is because the PDF viewer is not part of the HTML DOM, and Selenium cannot interact with elements within it, such as the download button. As a result, we are unable to perform Selenium actions on controls within Chrome’s built-in PDF viewer.
To overcome this problem, we need to disable the default chrome pdf viewer plugin before launching the driver, and set the download directory where we need to download the file.
Implementation Steps
Step 1 – Download Path and Chrome Options Setup
Define the directory path where the PDF will be downloaded.
This line is setting a Chrome preference to always open PDF files using an external application (like Adobe Reader) instead of the Chrome PDF viewer. By setting this preference to true, Chrome will automatically download the PDF files rather than opening them in the built-in PDF viewer.
This line sets the default directory where downloaded files should be saved.
options.setExperimentalOption("prefs", prefs);
setExperimentalOptionis a method used to pass custom preferences to the ChromeDriver. This line applies the preferences you’ve set to the ChromeOptionsobject.
Step 3 – Initialize WebDriver and Open Webpage
WebDriver driver = new ChromeDriver(options);
driver.manage().window().maximize();
driver.get("https://freetestdata.com/document-files/pdf/");
Step 4 – Find and Click the Download Link
Locate the download link using XPath and click on it to start the download.
This is used to pause the execution for a specified amount of time (5 seconds here) to allow the file to download completely. It is not recommended to use Thread.sleep in production.
Thread.sleep(5000);
Step 6 – Verify the File Download
Check if the downloaded file exists in the specified download directory or not.
File downloadedFile = new File(downloadFilepath + "/Free_Test_Data_100KB_PDF.pdf");
if (downloadedFile.exists()) {
System.out.println("File is downloaded!");
} else {
System.out.println("File is not downloaded.");
}
Step 7 – Quit the WebDriver
driver.quit();
The complete program can be seen below:
import org.openqa.selenium.By;
import org.openqa.selenium.WebDriver;
import org.openqa.selenium.WebElement;
import org.openqa.selenium.chrome.ChromeDriver;
import org.openqa.selenium.chrome.ChromeOptions;
import java.io.File;
import java.util.HashMap;
import java.util.Map;
public class DownloadPDF_Chrome_Demo {
public static void main(String[] args) throws InterruptedException {
String downloadFilepath = System.getProperty("user.dir") + File.separator + "downloads";
ChromeOptions options = new ChromeOptions();
Map<String, Object> prefs = new HashMap<>();
prefs.put("plugins.always_open_pdf_externally", true);
prefs.put("download.default_directory", downloadFilepath);
options.setExperimentalOption("prefs", prefs);
WebDriver driver = new ChromeDriver(options);
driver.manage().window().maximize();
driver.get("https://freetestdata.com/document-files/pdf/");
// Locate and click the download link or button if necessary
WebElement downloadLink = driver.findElement(By.xpath("//*[@class=\"elementor-button-text\"]"));
downloadLink.click();
// Wait for the download to complete
Thread.sleep(5000);
// Check if the file exists
 File downloadedFile = new File(downloadFilepath + "/Free_Test_Data_100KB_PDF.pdf");
        if (downloadedFile.exists()) {
            System.out.println("File is downloaded!");
        } else {
            System.out.println("File is not downloaded.");
      }
driver.quit();
}
}
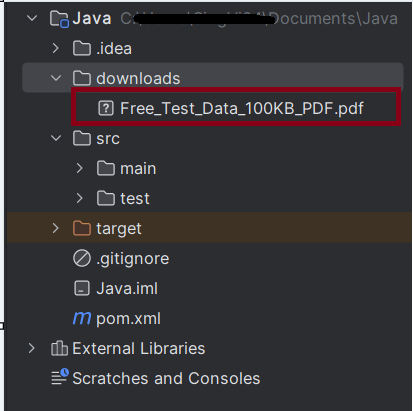
The output of the above program is
We can see that a downloads folder is created, and it has the downloaded pdf file – Free_Test_Data_100KB_PDF.pdf.
Summary:
Setup: Configures Chrome to automatically download PDFs and sets the download directory.
Download and Verify: Navigates to a specific URL, clicks the download link, waits for the download to complete, and verifies if the file exists in the specified directory.
Cleanup: Closes the browser session.
That’s it! Congratulations on making it through this tutorial and hope you found it useful! Happy Learning!!
Switching between frames in Selenium can be necessary when dealing with web pages that use iframes. The methods to switch between frames allow you to interact with elements within those frames
In this tutorial, we will learn handling iFrames using Selenium Webdriver. iFrame is a HTML document embedded inside an HTML document. iFrame is defined by an <iframe></iframe> tag in HTML. With this tag, you can identify an iFrame while inspecting the HTML tree as shown below:
Below is the page that contains Frames.
1) Switching by Name or ID
If the frame or iframe has an id or name attribute, we can switch the frames using name or ID. If the name or ID is not unique on the page, then the first one found will be switched to.
//switch To IFrame using name or id
driver.findElement(By.name("iframe1-name"));

//Switch to the frame
driver.switchTo().frame(iframe);
2) Switching by WebElement
We can find the frame using any selector and switch to it.
Switching between the frames can be done by Index also.
//switch To IFrame using index
driver.switchTo().frame(0);
4) Switching back to the default content:
To leave an iframe or frameset, switch back to the default content like:
//leave frame
driver.switchTo().defaultContent();
Let us explain frame switchching with an example:-
1) Launch new Browser and open https://demoqa.com/frames 2) Switch iFrame using any of locator strategy 3) Switch back to main content 4) Switch iFrame using index 5) Close the window
The program for the above scenario is shown below:
package com.example;

import org.openqa.selenium.By;
import org.openqa.selenium.WebDriver;
import org.openqa.selenium.WebElement;
import org.openqa.selenium.chrome.ChromeDriver;
import org.openqa.selenium.chrome.ChromeOptions;


public class iFrame_Demo {

    public static void main(String[] args) {

        ChromeOptions options = new ChromeOptions();
        WebDriver driver = new ChromeDriver(options);
        driver.manage().window().maximize();
        driver.get("https://demoqa.com/frames");

        //Switch iFrame using any of locator strategy
        WebElement iframeElement = driver.findElement(By.id("frame1"));
        driver.switchTo().frame(iframeElement);
        String Frame_1 = driver.findElement(By.id("sampleHeading")).getText();
        System.out.println("Switch by locator:" + Frame_1);

        //Switch back to the main window
        driver.switchTo().defaultContent();
        String mainPage = driver.findElement(By.xpath("//*[@id='framesWrapper']/h1")).getText();
        System.out.println("Back to Main page :" + mainPage);

        //Switch iFrame using index
         driver.switchTo().frame(1);
        String Frame_2 = driver.findElement(By.id("sampleHeading")).getText();
        System.out.println("Switch by Index :" + Frame_2);

        //quit the browser
        driver.quit();
    }
}
The output of the above program is
Note:-
1. Make sure to always switch back to the default content after performing actions within a frame. This is particularly important before interacting with elements that are outside of the frame.
2. If you want to switch between multiple frames, then switch to a frame and them switch back to main window and then switch to another frame.
Congratulations. We have learnt about window switching in Selenium. I hope you find this tutorial helpful. Happy Learning!!
Many organizations aim to execute automation tests across various browsers, such as Chrome, Firefox, Edge, and others, to ensure a consistent user experience. Serenity offers the capability to run tests on different browsers, supporting this need.
We can set up multiple driver configurations using the environments section, as demonstrated below.
Handling token expiration and automatically refreshing tokens in REST Assured involves a few steps to ensure your tests can obtain a fresh token when the current one expires.
Add the below-mentioned dependencies to the Maven project.
Obtain Initial Access Token:– Implement a method to obtain the initial access token from the authentication server.
Store Token and Expiration Time:- Use a structure to store the access token and its expiration time.
Check Token Validity:– Before making an API request, check if the token is still valid. If it’s expired or about to expire, refresh it.
Refresh the Token:- Implement a method to refresh the token.
Update Token Storage:– Store the new token and update the expiration time after refreshing.
import io.restassured.RestAssured;
import io.restassured.response.Response;

import java.time.Instant;

public class TokenGeneration {

    private static String accessToken;
    private static Instant tokenExpiryTime;
    Response response;
    int expiresIn;

    // Method to obtain initial token
    public static String getAccessToken() {
        if (accessToken == null || isTokenExpired()) {
            refreshAccessToken();
        }
        return accessToken;
    }

    // Method to check if the token is expired
    private static boolean isTokenExpired() {
        return tokenExpiryTime == null || Instant.now().isAfter(tokenExpiryTime);
    }

    // Method to refresh token
    private static void refreshAccessToken() {
            response = RestAssured.given()
            .contentType("application/x-www-form-urlencoded")
            .formParam("grant_type", "client_credentials")
            .formParam("client_id", "your-client-id")
            .formParam("client_secret", "your-client-secret")
            .post("https://your-auth-server.com/oauth/token");

        accessToken = response.jsonPath().getString("access_token");
        expiresIn = response.jsonPath().getInt("expires_in");
        tokenExpiryTime = Instant.now().plusSeconds(expiresIn);

        System.out.println("Access Token: " + accessToken);
        System.out.println("Token Expiry Time: " + tokenExpiryTime);
    }
}
Instant.now – The now() method of Instant returns the current time from the system clock. If the current time is “2023-10-01T12:00:00Z”, “Instant.now()“ would represent this moment in time.
isAfter(tokenExpiryTime) – checks if the current time is after the token’s expiration time.
plusSeconds(expiresIn)– This method adds a specified number of seconds to the Instant object. If expiresIn is “3600“ seconds (which is equivalent to 1 hour), it adds an hour to the current Instant.
Token Expiry Buffer:– Consider implementing a buffer time before the actual expiry to refresh the token. This prevents the edge cases where the token might expire during an API call.
Are you familiar with Rest API and want to test your understanding? This post contains 25 useful TestNG multiple-choice questions (quiz) to self-test your knowledge of TestNG .
1) 1) A testing framework for java inspired by JUnit
2) 2) Cédric Beust
3) 2) After
4) 2) Next Generation
5) 4) All of the above
TestNG offers extensive control over the execution of test cases, including setting dependencies, priorities, and parallel execution.
Prior to running test case X, run multiple test cases as a pre-request – TestNG allows us to set dependencies between test methods using dependsOnMethods or dependsOnGroups, so you can ensure that certain test cases run before others.
TestNG provides powerful features such as annotations, test grouping, sequencing, and parameterization, which resolve the limitations found in earlier frameworks like JUnit.
6) 4) None of the above
7) 4) All of the above
8) 2) Independently of
This means that each test case can be executed on its own without depending on the execution or results of other test cases. However, TestNG also allows us to create dependencies between test cases using the dependsOnMethods or dependsOnGroups attributes if needed.
9) 1) Java
10) 4) All of the above
11) 3) XML
In TestNG, an XML file (commonly named as testng.xml) is used to define and configure test suites, test groups, and the sequence of test execution.
12) 2) Testng.xml
Sample testng.xml
<!DOCTYPE suite SYSTEM "https://testng.org/testng-1.0.dtd" >
<suite name="SampleSuite">
    <test name="SampleTest">
        <classes>
            <class name="com.example.MyTestClass" />
        </classes>
    </test>
</suite>
13) 4) All of the above
14) 3) Both A and B
15) 4) All of the above
16) 1) BeforeSuite
17) 3) Before each and every test method in the class i.e., the method with @BeforeMethod annotation will execute for every test method in the class
18) 2) Once before the execution of test methods in the class begins
19) 1) AfterSuite
@AfterSuite: This method is executed after all the test methods in an entire suite have been completed.
20) 2) Annotation
21) 3) BeforeTest
@BeforeTest: This method is executed before any test methods in the <test> tag in the testng.xml file, which can include multiple classes and folders.
22) 2) AfterTest
@AfterTest: This method is executed after all the test methods in the <test> tag in the testng.xml file have been run, which can include multiple classes.
23) 2) BeforeClass
@BeforeClass: This method is invoked before the first test method in the current class is executed.
24) 3) AfterClass
The annotations have different scopes:
@AfterClass:This method is invoked after all the test methods in the current class have been executed.
@AfterMethod: Runs after each individual test method.
@AfterSuite: Runs once after all the tests in the entire suite have finished.
@AfterTest: Runs after all test methods in the <test> tag of the testng.xml file.
25) 1) BeforeMethod
Each of these annotations is executed before a test method, but at different levels:
@BeforeMethod: Runs before each individual test method in the current class.
@BeforeTest: Runs before any test methods in the <test> tag in the testng.xml file.
@BeforeClass: Runs before the first test method in the current class.
@BeforeSuite: Runs once before all tests in the entire suite defined in the testng.xml file.
Are you familiar with TestNG and want to test your understanding? This post contains 25 useful TestNG multiple-choice questions (quiz) to self-test your knowledge.