In the last tutorial, I explained the Setup of the REST Assured Maven Project In Eclipse IDE. In this tutorial, I will automate a GET Request. I will verify the status code, line of Status, and content of the Response.
RestAssured is a class that consists of many static fields and methods. It supports POST, GET, PUT, DELETE, HEAD, PATCH, and OPTIONS requests and verifies the response to these requests.
Add the below-mentioned dependencies to the pom.xml.
 <dependency>
      <groupId>junit</groupId>
      <artifactId>junit</artifactId>
      <version>4.13.2</version>
      <scope>test</scope>
</dependency>

<dependency>
      <groupId>io.rest-assured</groupId>
      <artifactId>rest-assured</artifactId>
      <version>5.5.5</version>
      <scope>test</scope>
</dependency>
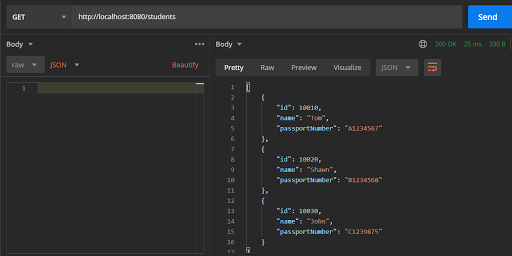
Below is an example of GET Request in Postman.

Below are the steps to test a GET Request using Rest Assured:
Step 1 – Specify the base URL to the RESTful web service using the RestAssured class.
RestAssured.baseURI = "http://dummy.restapiexample.com/api/v1/employees";
Step 2 – Every Request in the Rest-Assured library is represented by an interface called RequestSpecification. This interface allows modification of the request, like adding headers or adding authentication details.
requestSpecification = RestAssured.given();
RequestSpecification is imported from the package:
import io.restassured.specification.RequestSpecification;
Step 3 – Send the request to the server and receive the response to the request made by REST Assured. This response contains every detail returned by hitting request i.e. response body, response headers, status code, status lines, cookies, etc.
response = requestSpecification.get();
The response is imported from package:
import io.restassured.response.Response;
Step 4 – To validate a response like status code or value, we need to acquire a reference. This reference should be of type ValidatableResponse. ValidatableResponse is an interface. A validatable response to a request made by, REST Assured. ValidatableResponse is imported from the package:
import io.restassured.response.ValidatableResponse;
PrettyPrint() – It prints the response body if possible and returns it as a string. Pretty printing is possible for content-types JSON, XML, and HTML.
Below is an example of creating a test in Non-BDD format. I have used ValidatableResponse for the assertion of the status. It is also used for the status line of the Response.
import io.restassured.RestAssured;
import io.restassured.response.Response;
import io.restassured.response.ValidatableResponse;
import io.restassured.specification.RequestSpecification;
import org.junit.Test;

public class Get_NonBDDDemo {
    RequestSpecification requestSpecification;
    Response response;
    ValidatableResponse validatableResponse;

    @Test
    public void verifyStatusCode() {

        RestAssured.baseURI = "http://dummy.restapiexample.com/api/v1/employees";

        // Create a request specification
        requestSpecification = RestAssured.given();

        // Calling GET method
        response = requestSpecification.get();

        // Let's print response body.
        String resString = response.prettyPrint();
        System.out.println("Response Details : " + resString);

        /*
         * To perform validation on response, we need to get ValidatableResponse type of
         * response
         */
        validatableResponse = response.then();

        // Get status code
        validatableResponse.statusCode(200);

        // Check status line is as expected
        validatableResponse.statusLine("HTTP/1.1 200 OK");

    }
}
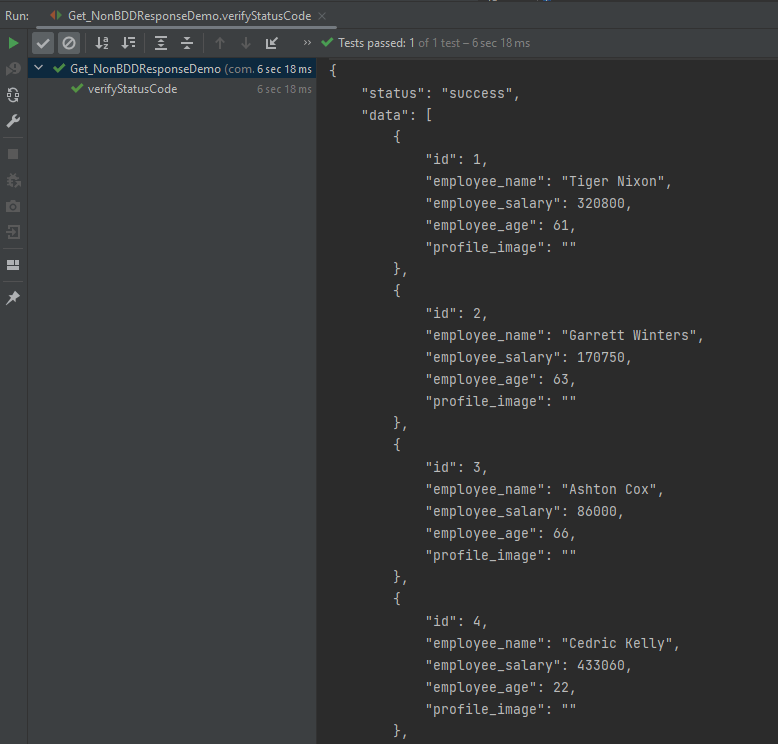
The output of the above program is

If you don’t want to use ValidatableResponse for the assertion, you can use Response from io.restassured .response to get the status code and status line, which are asserted using JUnit.Assert.
import io.restassured.RestAssured;
import io.restassured.response.Response;
import io.restassured.response.ValidatableResponse;
import io.restassured.specification.RequestSpecification;
import org.junit.Assert;
import org.junit.Test;

public class Get_NonBDDResponseDemo {
    RequestSpecification requestSpecification;
    Response response;

    @Test
    public void verifyStatusCode() {

        RestAssured.baseURI = "http://dummy.restapiexample.com/api/v1/employees";

        // Create a request specification
        requestSpecification = RestAssured.given();

        // Calling GET method
        response = requestSpecification.get();

        // Let's print response body.
        String resString = response.prettyPrint();
        System.out.println("Response Details : " + resString);

        // Get status line
        String statusLine = response.getStatusLine();
        Assert.assertEquals(statusLine, "HTTP/1.1 200 OK");

        // Get status code
        int statusCode = response.getStatusCode();
        Assert.assertEquals(statusCode, 200);

    }
}
The output of the above program is
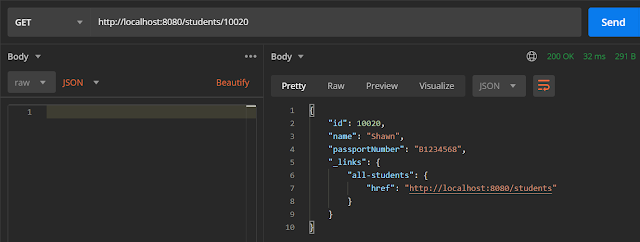
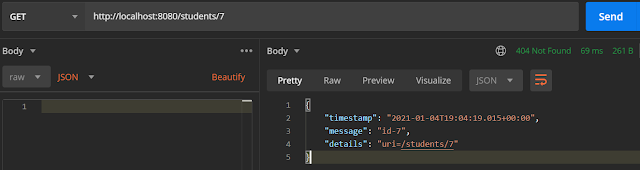
Below is an example of a specific user in GET Request in Postman.

Below is the test implemented in BDD Format. In this test, I am asserting the data of Employee of Id 2. I have validated the name of the employee as well as the response message.
1. equalTo is used for assertion, and is imported from a static hamcrest package:
import static org.hamcrest.Matchers.equalTo;
2. given is a static import from package:
import static io.restassured.RestAssured.given;
Let us see this with an example.
import org.junit.Test;
import static io.restassured.RestAssured.given;
import static org.hamcrest.CoreMatchers.equalTo;

public class Get_BDDDemo {

    @Test
    public void verifyUser() {

        // Given
        given()

                // When
                .when()
                .get("http://dummy.restapiexample.com/api/v1/employee/2")

                // Then
                .then()
                .statusCode(200).statusLine("HTTP/1.1 200 OK")

                // To verify booking id at index 3
                .body("data.employee_name", equalTo("Garrett Winters"))
                .body("message", equalTo("Successfully! Record has been fetched."));
    }

}
The output of the above program is

Explanation
1.This is the precondition block. It is used to specify headers, parameters, authentication, etc. In this example, it’s empty, meaning no special setup is needed for this GET request.
given
2. It performs a GET request to the given URL. It is trying to get the employee with id = 2.
.when()
.get("http://dummy.restapiexample.com/api/v1/employee/2")
3. It checks if HTTP status code is 200 and status line is "HTTP/1.1 200 OK".
.then()
.statusCode(200)
.statusLine("HTTP/1.1 200 OK")
4. It asserts that:
- The
employee_namein the JSON response is"Garrett Winters". - The
messagein the response is"Successfully! Record has been fetched.".
.body("data.employee_name", equalTo("Garrett Winters"))
.body("message", equalTo("Successfully! Record has been fetched."));
That’s it! Congratulations on making it through this tutorial and hope you found it useful! Happy Learning!! Cheers!!


