Execute Testng.xml using batch file

HOME

In the previous tutorial, we have seen executing testng.xml tests from command line. Now here we will look into executing testng.xml using batch file (.bat) file.

A batch file (.bat) is used in DOS and Windows, which is an unformatted text file that consists of a series of commands to be executed by the command line interpreter.

Prerequisite:

  1. Selenium
  2. TestNG
  3. Maven
  4. Java 11
  5. Maven Complier Plugin
  6. Maven Surefire Plugin
  7. Notepad

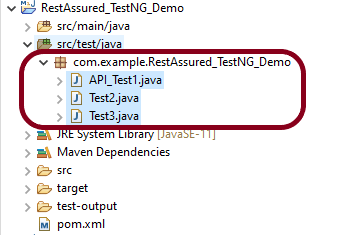
Let us first create some tests in a class.

import static org.testng.Assert.assertTrue;

import static org.hamcrest.Matchers.containsString;
import static org.hamcrest.MatcherAssert.assertThat;

import org.openqa.selenium.By;
import org.openqa.selenium.WebDriver;
import org.openqa.selenium.firefox.FirefoxDriver;
import org.testng.annotations.AfterTest;
import org.testng.annotations.BeforeTest;
import org.testng.annotations.Test;

public class TestNGRunFromCommandLine {
	
	 WebDriver driver;
	 
	    @BeforeTest
	    public void setUp() {
	        System.setProperty("webdriver.gecko.driver",
	                "C:\\Users\\Vibha\\Software\\geckodriver\\geckodriver.exe");
	 
	        driver = new FirefoxDriver();
	        driver.get("https://opensource-demo.orangehrmlive.com/"); 
	        driver.manage().window().maximize();
	    }
	 
	    @Test(description = "This test validates title of login functionality", priority = 0)
	    public void verifyLoginPage() {
	 
	        String expectedTitle = driver.findElement(By.xpath("//*[@id='logInPanelHeading']")).getText(); 
	        System.out.println("Title :" + expectedTitle);
	        assertTrue(expectedTitle.equalsIgnoreCase("LOGIN Panel12"));
	    }
	 
	    @Test(description = "This test validates  successful login to Home page", priority = 1)
	    public void verifyHomePage() throws InterruptedException {
	 
	        System.out.println("Username Entered");
	        driver.findElement(By.name("txtUsername")).sendKeys("Admin");
	 
	        System.out.println("Password Entered");
	        driver.findElement(By.name("txtPassword")).sendKeys("admin123");         
	        driver.findElement(By.id("btnLogin")).submit();
	        
	        Thread.sleep(2000);
	 
	        String newPageText = driver.findElement(By.xpath("//*[@id='content']/div/div[1]/h1")).getText();
	        System.out.println("newPageText :" + newPageText);
	        assertThat(newPageText, containsString("Dashboard"));
	    }
	 
	    @AfterTest
	    public void teardown() {
	 
	        driver.quit();
	    }
	 
	}

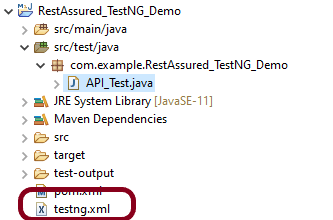
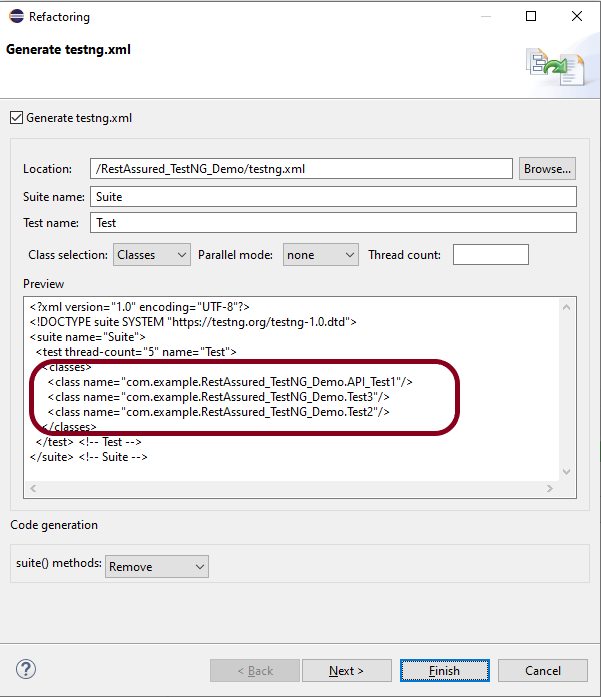
The below is the testng.xml file which has a class that we have created above and we will be invoking this xml file using batch file (.bat).

<?xml version="1.0" encoding="UTF-8"?>
<!DOCTYPE suite SYSTEM "https://testng.org/testng-1.0.dtd">
<suite name="Suite">
  <test name="Test">
    <classes>
      <class name="TestNG_Demo.TestNGRunFromCommandLine"/>
    </classes>
  </test> 
</suite> 

 How to create a batch file?

Step 1: Open notepad
Step 2: Paste the below lines of code – You may need to add your project location. In the example, project location is set as C:\Users\Vibha\Projects\Vibha_Personal\ParallelTestsTestNG
Step 3: Save the file as ‘TestNGProject.bat’ in location that you want to save.

cd C:\Users\Vibha\Projects\Vibha_Personal\ParallelTestsTestNG
mvn compile test

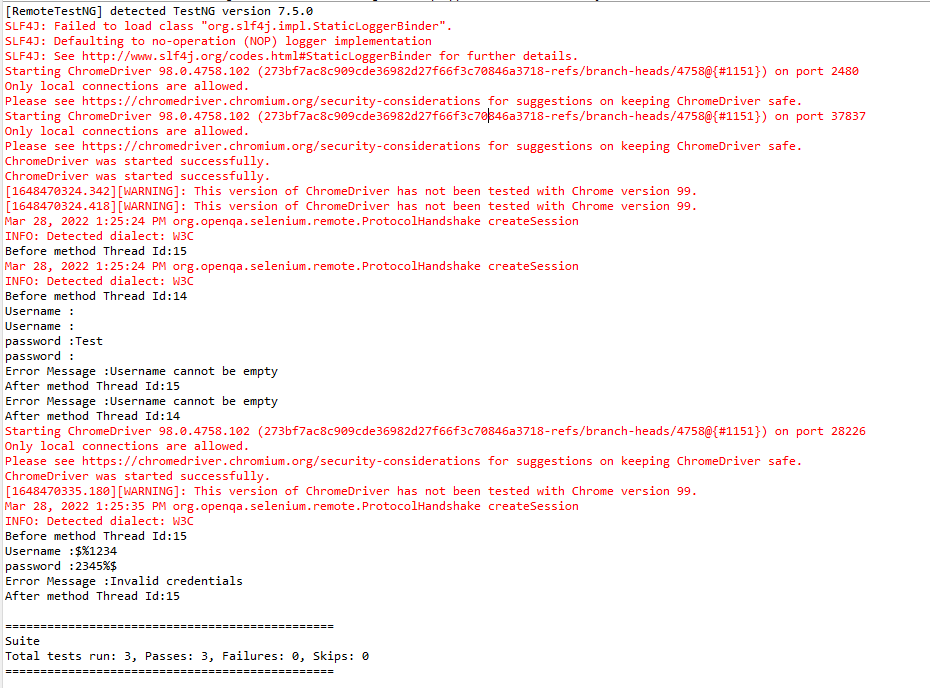
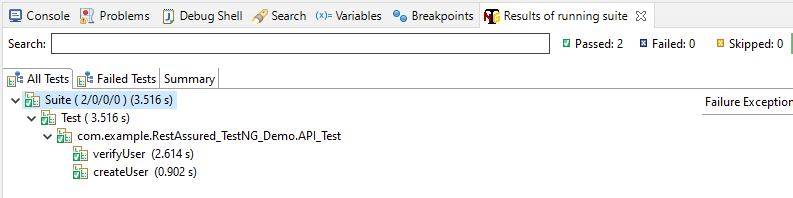
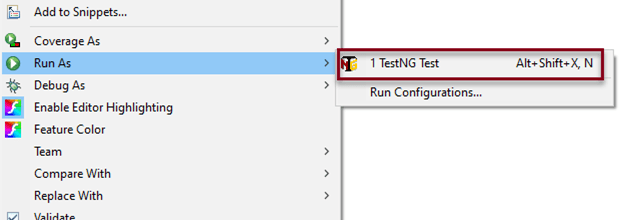
Now, to run the tests, double-click on the TestNGProject.bat file and all the commands mentioned in the file will be executed one by one.

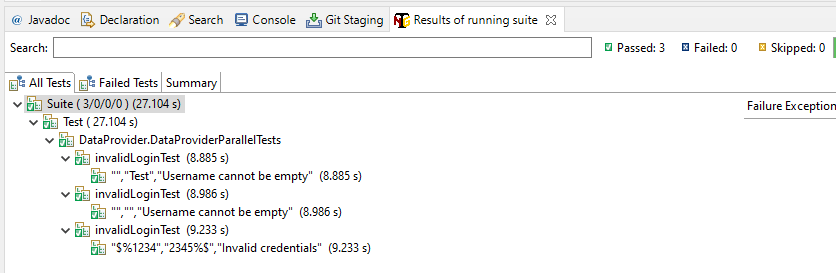
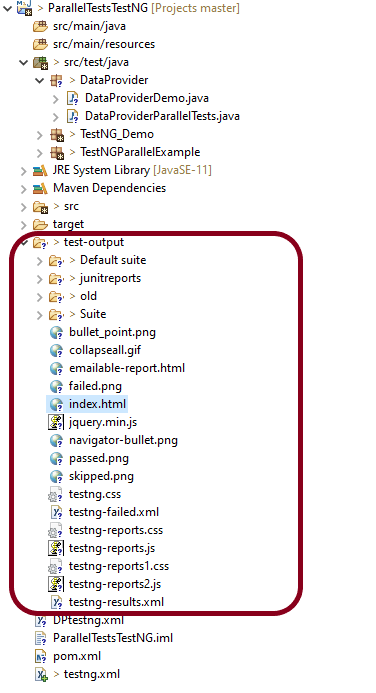
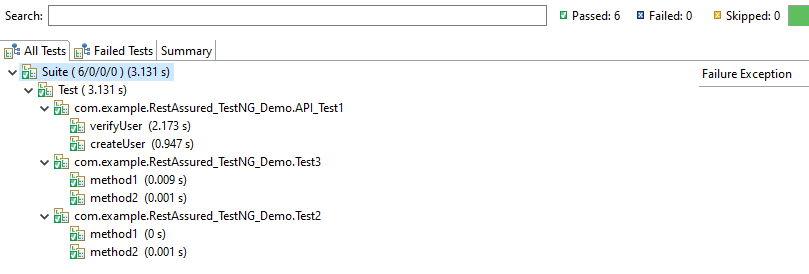
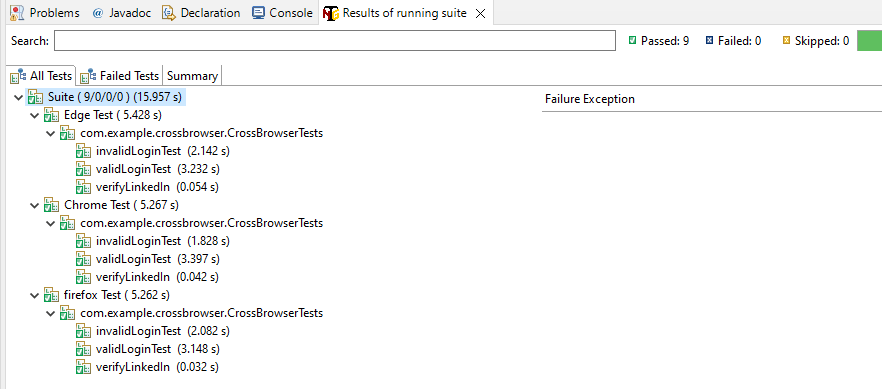
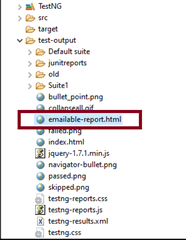
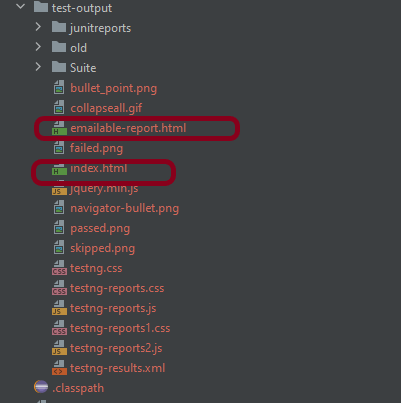
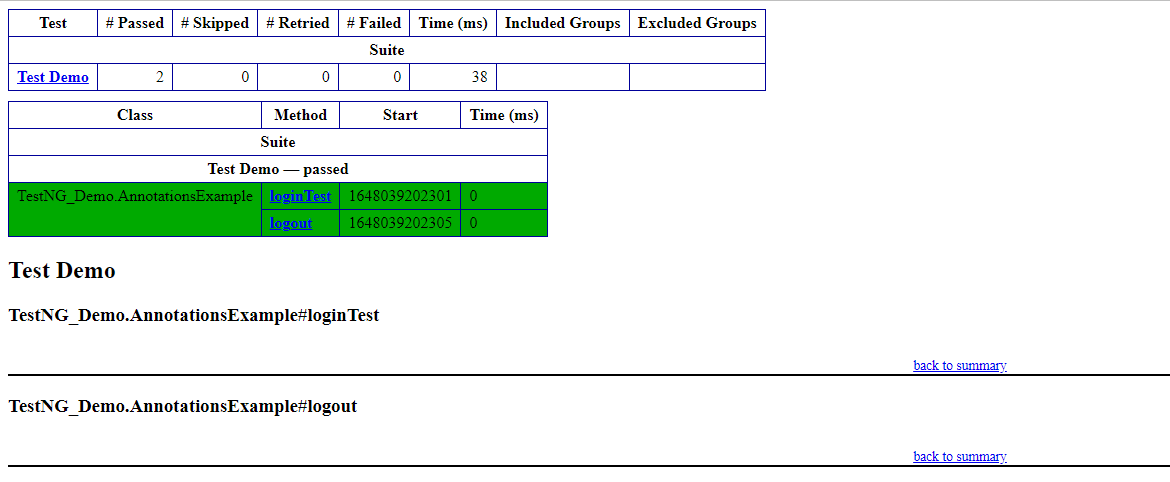
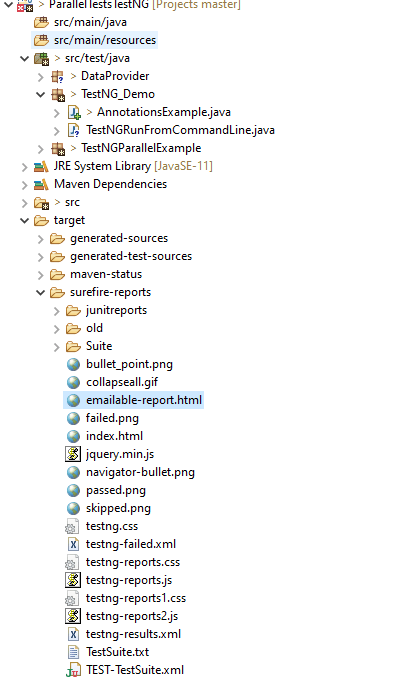
As we know, TestNG generates a lot of Reports automatically. We are going to look into 2 reports – emailable-report.html and index.html. The reports are generated under surefire-reports folder within the target directory.

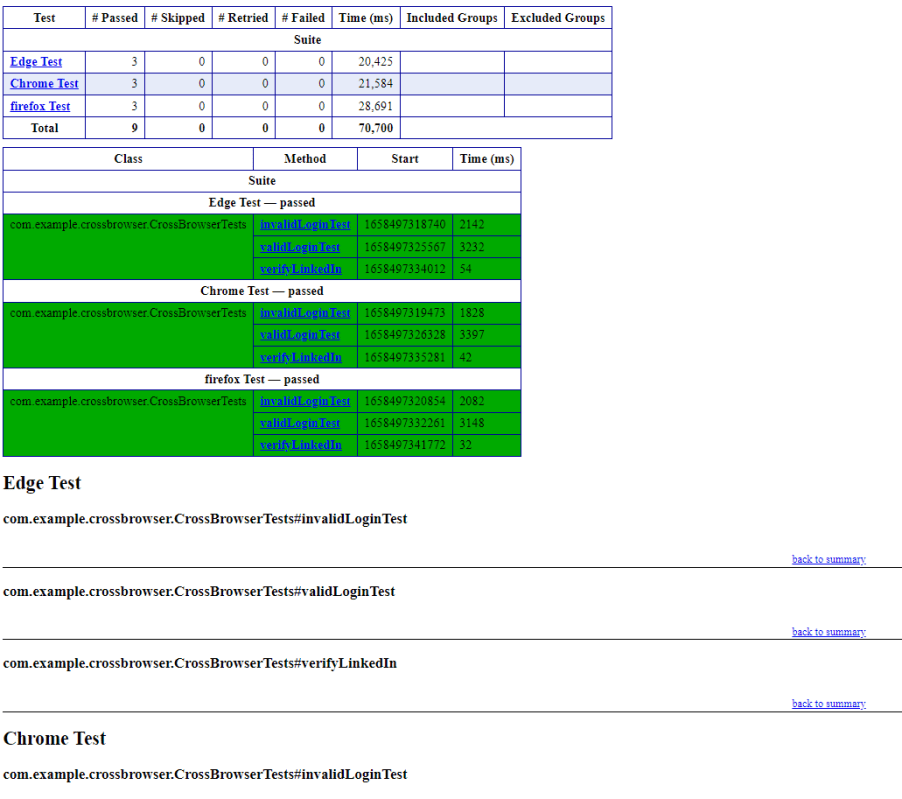
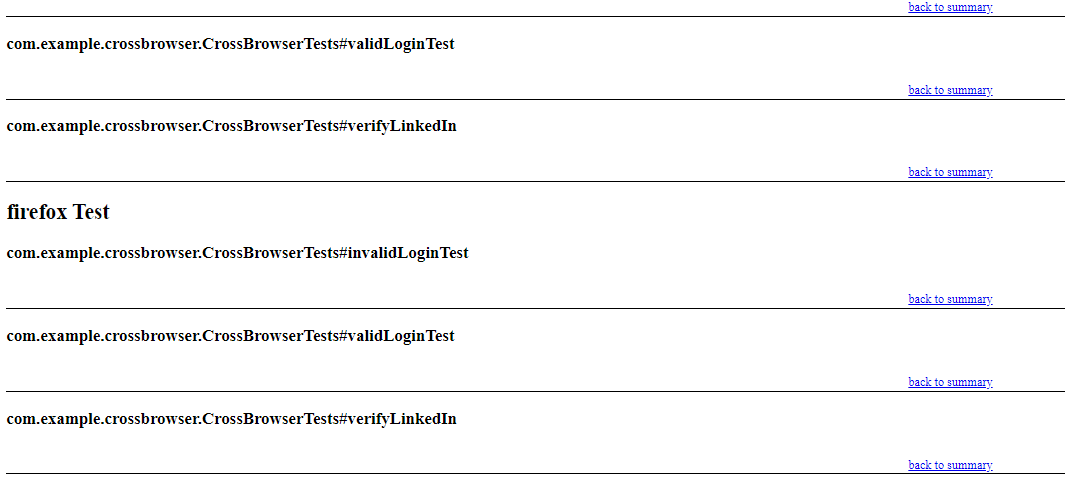
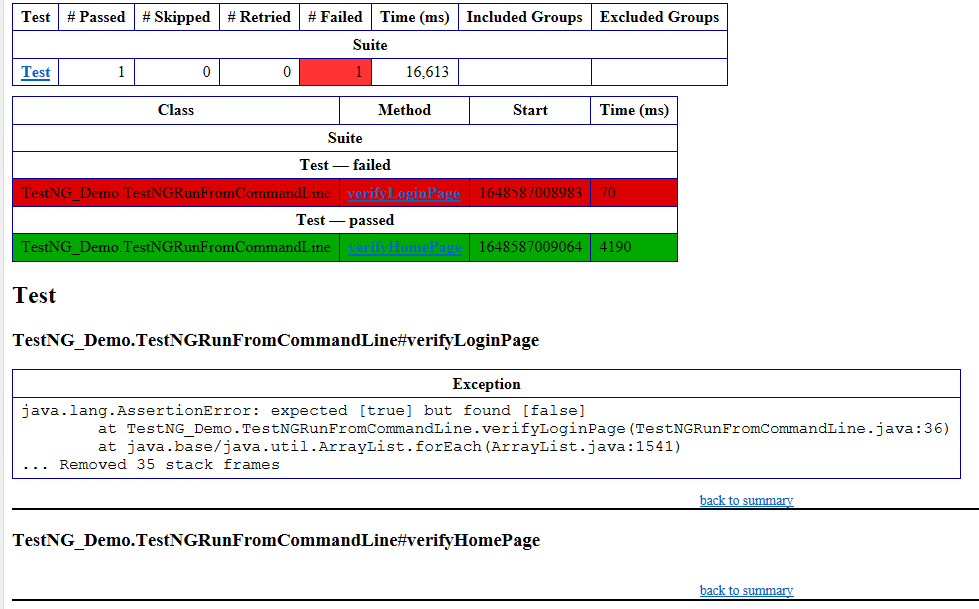
Emailable-Report.html
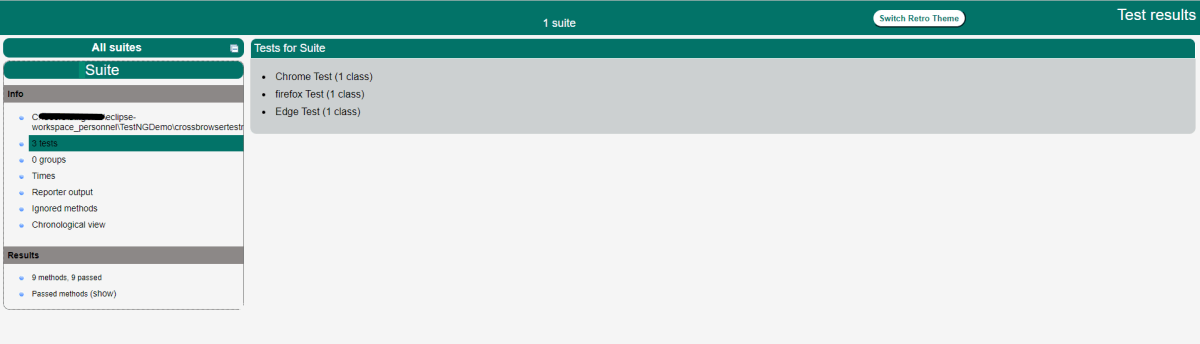
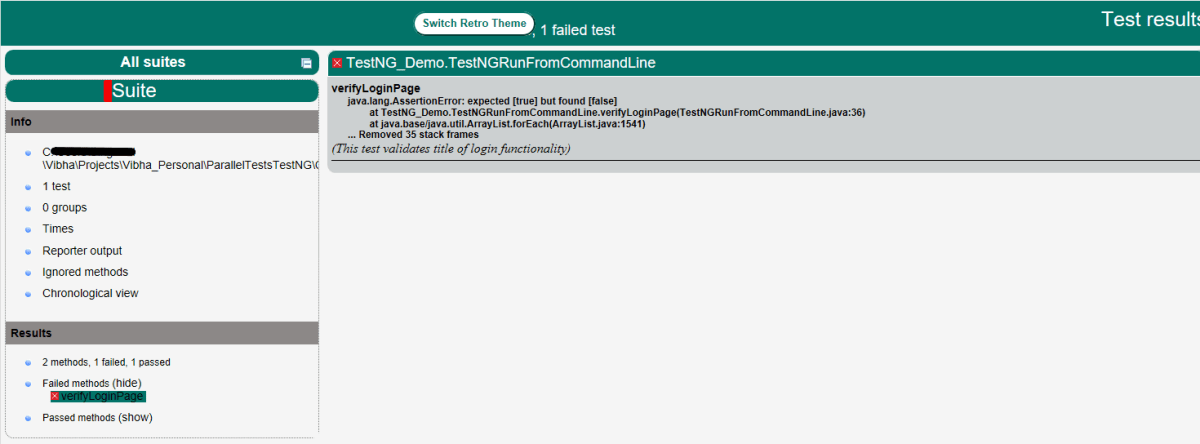
Index.html

Hope this article helps you to invoke your tests using .bat file. 

Parallel testing of DataProviders in TestNG

HOME

The previous tutorial has explained the DataProviders in TestNG. The DataProvider in TestNG is a way to pass the parameters in the test functions. Using DataProvider in TestNG, we can easily inject multiple values into the same test case. It comes inbuilt into TestNG and is popularly used in data-driven frameworks.

 It is an option for the parallel execution of tests in TestNG. 

It is advisable to create 2 classes – one class contains the Test cases and another class defines TestNG parameters – DataProviders.

Let us create a class for the DataProvider method with all the Test Data as shown below:

import org.testng.annotations.DataProvider;

public class DataProviderDemo {	
	
	 @DataProvider(name = "testData", parallel=true)
	 public Object[][] dataProvFunc() {
	       return new Object[][] {           
	    	   {"","","Username cannot be empty"},    	  
	    	   {"","Test","Username cannot be empty"},
	    	   {"$%1234","2345%$","Invalid credentials"}          
	    	 };
	    }
	}

An extra parameter “parallel” is required to initiate parallel execution in TestNG using the data provider.

Below is the test which uses the parameter from the data provider and runs the tests parallelly.

A new ThreadLocal is instantiated for each test class, since it’s in the BeforeClass annotation.

private static final ThreadLocal<WebDriver> WEB_DRIVER_THREAD_LOCAL = new ThreadLocal<WebDriver>();

Below is the complete test code:

import org.openqa.selenium.By;
import org.openqa.selenium.WebDriver;
import org.openqa.selenium.chrome.ChromeDriver;
import org.testng.Assert;
import org.testng.annotations.AfterMethod;
import org.testng.annotations.BeforeMethod;
import org.testng.annotations.Test;

public class DataProviderParallelTests {
	
	public WebDriver driver;
	private static final ThreadLocal<WebDriver> WEBDRIVER_THREADLOCAL = new ThreadLocal<WebDriver>();
	
	 @BeforeMethod
    public void setUp(){

        System.setProperty("webdriver.chrome.driver",
                "C:\\Users\\Vibha\\Software\\chromedriver\\chromedriver.exe");
        driver = new ChromeDriver();
        WEBDRIVER_THREADLOCAL.set(driver);
        System.out.println("Before method Thread Id:" + Thread.currentThread().getId());
        
    }
	
	@Test(dataProvider = "testData", dataProviderClass = DataProviderDemo.class)
    public void invalidLoginTest(String username, String password, String errorMessage) throws InterruptedException {
		     
	    driver = WEBDRIVER_THREADLOCAL.get();
	    driver.manage().window().maximize();
        driver.get("https://opensource-demo.orangehrmlive.com/");
     
        Thread.sleep(2000);
        driver.findElement(By.name("txtUsername")).sendKeys(username);
        System.out.println("Username :" + username);
        
        Thread.sleep(2000);
        driver.findElement(By.name("txtPassword")).sendKeys(password);
        System.out.println("password :" + password);
        
        Thread.sleep(2000);
        String expectedError = driver.findElement(By.id("spanMessage")).getText();
        System.out.println("Error Message :" + expectedError);
        Assert.assertTrue(expectedError.contains(errorMessage));

    }
		 
	@AfterMethod
	public void tear_down() {
		 
		 WebDriver driver = WEBDRIVER_THREADLOCAL.get();
		 System.out.println("After method Thread Id:" + Thread.currentThread().getId());
	        if (driver != null) {
	            driver.quit();
	     }
    }	
}

testng.xml

<?xml version="1.0" encoding="UTF-8"?>
<!DOCTYPE suite SYSTEM "https://testng.org/testng-1.0.dtd">
<suite name="Suite" thread-count="2" data-provider-thread-count="2">
  <test name="Test">
    <classes>
      <class name="DataProvider.DataProviderParallelTests"/>
    </classes>
  </test> <!-- Test -->
</suite> <!-- Suite -->

In this file, the data-provider-thread-count is set to 2, then two browsers will be opened, and the first two tests will run from the list. 

Run the test script from testng.xml, Right-Click on the XML, and select Run As ->TestNG Suite.

The execution status shown below shows that 2 threads are active at a time, which execute 2 sets of data provider parameters – Thread 14 and Thread 15. Once the tests are finished for Thread 14 and Thread 15, they are closed and a new Thread 15 is again initiated to start the test execution of the 3rd parameter.

TestNG generates multiple test reports under the folder test-output. We are mainly concerned about 2 reports – emailable-report.html and index.html.

Emailable-report.html

Emailable reports are a type of summary report that one can transfer to other people in the team through any medium. 

Index.html

Index report contains the index-like structure of different parts of the report, such as failed tests, test files, passed tests, etc. We can divide this report into two parts. The left part contains the index, and this is the reason it is called an index report, while the right part contains the explored content of that index.

We are done! Congratulations on making it through this tutorial and hope you found it useful! Happy Learning!!

DataProvider in TestNG using Excel

HOME

In the previous tutorial, I explained the DataProvider in TestNG without using Excel. In this tutorial, I will explain the use of Excel in DataProvider for TestNG.

I have created an Excel – SearchInBing.xlsx and placed it on the Desktop. You can create a Test Data folder in your project and place the Excel file within it. So, my datasheet looks like the below:

Next, we will create a DataProvider method that will use another method to read the Excel file & create a 2D object from the row & column values of the Excel and return the same value, so that our test script can use it. The code for it would look like the below:

import org.apache.poi.ss.usermodel.Cell;
import org.testng.annotations.DataProvider;

import java.io.FileInputStream;
import java.io.IOException;

import org.apache.poi.xssf.usermodel.XSSFRow;
import org.apache.poi.xssf.usermodel.XSSFSheet;
import org.apache.poi.xssf.usermodel.XSSFWorkbook;

public class ExcelDataProvider {

    @DataProvider(name = "excelData")
    public Object[][] excelDataProvider() throws IOException {

        // We are creating an object from the excel sheet data by calling a method that
        // reads data from the excel stored locally in our system
        Object[][] arrObj = getExcelData(
                C:\\Users\\Vibha\\Desktop\\SearchInBing.xlsx","Details");
        return arrObj;
}

    // This method handles the excel - opens it and reads the data from the
    // respective cells using a for-loop & returns it in the form of a string array
    public String[][] getExcelData(String fileName, String sheetName) throws IOException {
        String[][] data = null;
        try {

            FileInputStream fis = new FileInputStream(fileName);
            XSSFWorkbook workbook = new XSSFWorkbook(fis);
            XSSFSheet sheet = workbook.getSheet(sheetName);
            XSSFRow row = sheet.getRow(0);
            int noOfRows = sheet.getPhysicalNumberOfRows();
            int noOfCols = row.getLastCellNum();
            Cell cell;
            data = new String[noOfRows - 1][noOfCols];

            for (int i = 1; i < noOfRows; i++) {
                for (int j = 0; j < noOfCols; j++) {
                    row = sheet.getRow(i);
                    cell = row.getCell(j);
                    data[i - 1][j] = cell.getStringCellValue();
                }
            }
        } catch (Exception e) {
            System.out.println("The exception is: " + e.getMessage());
        }
        return data;
    }
}

Now, create a class that contains the test code. By default, the data provider will be looked for in the current test class or one of its base classes. If you want to put your data provider in a different class, it needs to be a static method or a class with a no-arg constructor, and you specify the class where it can be found in the data provider class attribute.

import io.github.bonigarcia.wdm.WebDriverManager;
import org.openqa.selenium.By;
import org.openqa.selenium.Keys;
import org.openqa.selenium.WebDriver;
import org.openqa.selenium.WebElement;
import org.openqa.selenium.chrome.ChromeDriver;
import org.testng.Assert;
import org.testng.annotations.AfterMethod;
import org.testng.annotations.BeforeMethod;
import org.testng.annotations.Test;

public class DataProviderWithExcelDemo {
    
  WebDriver driver;

   @BeforeMethod
    public void setUp() {
        System.out.println("Start test");
        WebDriverManager.chromedriver().setup();
        driver = new ChromeDriver();
        driver.get("https://www.bing.com");
        driver.manage().window().maximize();

    }

    @Test(dataProvider = "excelData", dataProviderClass = ExcelDataProvider.class)
    public void search(String keyWord1, String keyWord2) {

        WebElement txtBox = driver.findElement(By.id("sb_form_q"));
        txtBox.sendKeys(keyWord1, " ", keyWord2);
        System.out.println("Keyword entered is : " + keyWord1 + " " + keyWord2);
        txtBox.sendKeys(Keys.ENTER);
        System.out.println("Search results are displayed.");
        System.out.println("RESULT: "+ driver.getTitle());
        Assert.assertTrue(driver.getPageSource().contains(keyWord1));
    }

    @AfterMethod
    public void burnDown() {
        driver.quit();
    }

}

To run the code, right-click and Select – TestNG Test.

The Execution status will look like this, as shown below:

This test execution generates reports under the test-output folder.

We are concerned about two reports – index.html and emailable-report.html.

Below is the image of emailable-report.html.

Below is the image of index.html.

See how easy it is to read data from Excel and use it in the Test Code using DataProvider.

I hope you have enjoyed this tutorial. Happy Learning!!

How to create and run TestNG.xml of a TestNG class

HOME

There are 2 ways to run TestNG tests – using Run As TestNG tests and from testng.xml.

In this tutorial, I’m explaining how to create and run tests using TestNG.xml.

Step 1 – In the below project, there is no testng.xml present.

Step 2 – Right click on class name “API_Test.java” and navigate TestNG–>Convert to TestNG“.

Step 3 – Now a new window for testng.xml will be generated as shown below. Click the Finish Button.

<?xml version="1.0" encoding="UTF-8"?>
<!DOCTYPE suite SYSTEM "https://testng.org/testng-1.0.dtd">
<suite name="Suite">
  <test thread-count="5" name="Test">
    <classes>
      <class name="com.example.RestAssured_TestNG_Demo.API_Test"/>
    </classes>
  </test> <!-- Test -->
</suite> <!-- Suite -->

Step 4 – A xml file named testng.xml will be generated in project hierarchy.

Step 5 – Right click on this testng.xml and select Run As–> Testng Suite. 

Step 6 – You will view the result in two different tabs: Console and “Results of running suite”. Below is the image of Rest of running suite tab.

Multiple Classes

Let us imagine a scenario where there are 3 classes and we want to run them all together, you can done that by creating a testng.xml and mention all 3 classes in that testng.xml.

Select all 3 classes and right click and navigate TestNG–>Convert to TestNG“.

This is how the testng.xml will look like for multiple classes.

<?xml version="1.0" encoding="UTF-8"?>
<!DOCTYPE suite SYSTEM "https://testng.org/testng-1.0.dtd">
<suite name="Suite">
  <test thread-count="5" name="Test">
    <classes>
      <class name="com.example.RestAssured_TestNG_Demo.API_Test1"/>
      <class name="com.example.RestAssured_TestNG_Demo.Test3"/>
      <class name="com.example.RestAssured_TestNG_Demo.Test2"/>
    </classes>
  </test> <!-- Test -->
</suite> <!-- Suite -->

Right click on this testng.xml and select Run As–> Testng Suite.  You will get the result in two tabs: Console and Results of running suite. This shows that all the tests present within the three classes are executed.

Congratulations on making it through this tutorial and hope you found it useful! Happy Learning!! Cheers!!

TestNG Listeners in Selenium

 HOME

The listener is defined as an interface that modifies the default TestNG’s behaviour. There are several interfaces that allow you to modify TestNG’s behaviour that are called “TestNG Listeners”.  It allows customizing TestNG reports or logs. There are many types of TestNG listeners available. Here are a few listeners:

  • IAnnotationTransformer 
  • IAnnotationTransformer2 
  • IHookable 
  • IInvokedMethodListener 
  • IMethodInterceptor 
  • IReporter 
  • ISuiteListener 
  • ITestListener 

When you implement one of these interfaces, you can let TestNG know about it in either of the following ways:

  • Using in your testng.xml file.
  • Using the @Listeners annotation on any of your test classes.

ITestListener has the following methods

  • OnStart   Invoked before running all the test methods belonging to the classes inside the tag and calling all their Configuration methods.
  • onTestSuccess  onTestSuccess method is called on the success of any Test.
  • onTestFailure  onTestFailure method is called on the failure of any Test.
  • onTestSkipped – onTestSkipped method is called on skipped of any Test.
  • onTestFailedButWithinSuccessPercentage– method is called each time Test fails but is within success percentage. Invoked each time a method fails but has been annotated with successPercentage and this failure still keeps it within the success percentage requested.
  • onFinish – Invoked after all the test methods belonging to the classes inside the tag have run and all their Configuration methods have been called.
  • onTestStart Invoked each time before a test will be invoked. The ITestResult is only partially filled with the references to class, method, start millis, and status.

Here, I explain the use of listener – ITestListener  in a program mentioned below

Step 1) Create a class “ListenerDemo” that implements ‘ITestListener’. Add methods like onTestFailure, onTestSkipped, onTestStart, onTestSuccess to this class

Step 2) Create another class “ListenerTestCases” for the login process automation. Selenium will execute these ‘TestCases’ to login automatically.

Step 3) Next, implement this listener in our regular project class i.e. “ListenerTestCases “. There are two different ways to connect to the class and interface.

The first way is to use Listeners annotation (@Listeners) as shown below:

@Listeners(com.selenium.testng.TestNGDemo.ListenerDemo.class)

Step 4): Execute the “ListenerTestCases” class. Methods in class “TestPass ” are called automatically according to the behaviour of methods annotated as @Test.

Step 5): Verify the Output that logs display at the console.

import org.testng.ITestContext;
import org.testng.ITestListener;
import org.testng.ITestResult;
 
public class ListenerDemo implements ITestListener {
 
            // When Test case get failed, this method is called.
            public void onTestFailure(ITestResult Result) {
                        System.out.println("The name of the testcase failed is :" + Result.getName());
            }
 
            // When Test case get Skipped, this method is called.
            public void onTestSkipped(ITestResult Result) {
                        System.out.println("The name of the testcase Skipped is :" + Result.getName());
            }
 
            // When Test case get Started, this method is called.
            public void onTestStart(ITestResult Result) {
                        System.out.println(Result.getName() + " test case started");
            }
 
            // When Test case get passed, this method is called.
            public void onTestSuccess(ITestResult Result) {
                        System.out.println("The name of the testcase passed is :" + Result.getName());
            } 
}

In the below test, there are 2 test cases. One Test passes and another fails. When we are executing ListenerTestCases, it will call the ListenersDemo internally.

import org.openqa.selenium.By;
import org.openqa.selenium.WebDriver;
importorg.openqa.selenium.chrome.ChromeDriver;
import org.testng.Assert;
import org.testng.annotations.Listeners;
import org.testng.annotations.Test;
 
@Listeners(com.selenium.testng.TestNGDemo.ListenerDemo.class)
public class ListenerTestCases {
 
            static WebDriver driver;
 
            @Test
            public void TestPass() {
                        System.setProperty("webdriver.chrome.driver",
                                    "C:\\Users\\Vibha\\Desktop\\SeleniumKT\\chromedriver_win32\\chromedriver.exe");
                        driver= new ChromeDriver();
                        driver.get("https://opensource-demo.orangehrmlive.com/");
                        driver.findElement(By.name("txtUsername")).sendKeys("Admin");
                        driver.findElement(By.name("txtPassword")).sendKeys("admin123");
                        driver.findElement(By.id("btnLogin")).submit();
                        String dashboardTitle = driver.findElement(By.id("welcome")).getText();
                        Assert.assertTrue(dashboardTitle.contains("Welcome"));
            }
 
            @Test
            public void TestFail() {
                        System.setProperty("webdriver.chrome.driver",
                                    "C:\\Users\\Vibha\\Desktop\\SeleniumKT\\chromedriver_win32\\chromedriver.exe");
                        driver= new ChromeDriver();
                        driver.get("https://opensource-demo.orangehrmlive.com/");
                        driver.findElement(By.name("txtUsername")).sendKeys("Admin");
                        driver.findElement(By.name("txtPassword")).sendKeys("admin123");
                        driver.findElement(By.id("btnLogin")).submit();
                        String dashboardTitle = driver.findElement(By.id("welcome")).getText();
                        Assert.assertTrue(dashboardTitle.contains("Hello"));
            }
}

Output
TestFail test case started
The name of the testcase failed is :TestFail
TestPass test case started
The name of the testcase passed is :TestPass
PASSED: TestPass
FAILED: TestFail
java.lang.AssertionError: did not expect to find [true] but found [false]

The output of the above program is

To execute this program, we need to Right-click and select Run as – TestNG.

There is another way to execute the Listener class, which is using testng.xml. There is a Listener class named “ListenerDemo” where the implementation of various methods of the listener is present. If we want to run the tests using testng.xml, then there is no need of mentioning Listeners in the ListenerTestCases class.

<?xml version = "1.0"encoding = "UTF-8"?>
<!DOCTYPE suite SYSTEM "http://testng.org/testng-1.0.dtd">
<suite name = "TestSuite">
<listeners>
<listener class-name ="com.selenium.testng.TestNGDemo.ListenerDemo"/>
</listeners>
 
<test name ="Test">
<classes>
<class name="com.selenium.testng.TestNGDemo.ListenerTestCases"/>
</classes>
</test>
</suite>

The test execution result will look like something shown below.

TestNG generates various types of reports under the test-output folder. Open “emailable-report.html”, as this is an HTML report open it with the browser. It will look like something below.

TestNG also produces an “index.html” report, and it resides under the test-output folder.

There is another example of Listener –ITestResult.

We are done! Congratulations on making it through this tutorial and hope you found it useful! Happy Learning!!

Cross Browser Testing using Selenium and TestNG

 HOME

What is Cross Browser Testing?

Cross Browser is a technique in which a web application tests on different browsers and operating systems.  Cross Browser testing, make sure that the site rendered the same in every browser.

Suppose, we have to execute 25 tests cases to test a web application on Google Chrome Browser and it takes around 4 hrs to execute these tests. However, we do not know if a user is going to access the web application on which browser. Therefore, now the same set of test cases need to executes on Firefox, Edge, Internet Explorer, Safari and Opera.

Therefore, now we need to execute 25*6=150 test cases and test execution hour changes from 4 to 24 hrs to check that the web application is working as expected. What is the best approach to handle this situation is to automate these tests and perform cross browser testing

Why do we need to perform cross browser testing?

Each website is built by anyone or combination of these technologies – HTML, CSS and Javascript. Each browser uses different rendering engines to compute these technologies. Chrome uses Blink, WebKit on iOS, V8 JavaScript engine, Firefox uses Gecko, Edge uses Chromium-based with Blink and V8 engines, Safari uses Webkit rendering engine, IE uses Trident and so on.

1) Font size, image orientation and alignment mismatch in different browsers

2) Different browser is compatible with different operating systems

3) CSS,HTML validation difference can be there

Lets see an example of Cross Browser testing using Selenium and TestNG.

Step 1 – Add the below dependencies to the POM.xml, in case of Maven project.

<dependencies>
  
      <dependency>
          <groupId>org.seleniumhq.selenium</groupId>
          <artifactId>selenium-java</artifactId>
          <version>3.141.59</version>
      </dependency>
      
      <dependency>
          <groupId>io.github.bonigarcia</groupId>
          <artifactId>webdrivermanager</artifactId>
          <version>5.2.1</version>
       </dependency>

      <dependency>
           <groupId>org.testng</groupId>
           <artifactId>testng</artifactId>
           <version>7.5</version>
           <scope>test</scope>
      </dependency>

  </dependencies>

Step 2 – We have used Selenium WebDriver with TestNG to automate the test cases to run on 3 different browsers – Chrome, Firefox and Edge

Step 3 – The test are running on all 3 browsers in parallel as we have used  parallel=“tests”

Step 4 – thread-count=”3″ means that 3 threads will start and each browser will use a thread

Step 5 –  @Parameters(“browser”) – parameter will be passed from testng.xml. To know more about @Parameters in TestNG, please refer to this tutorial.

Let us create a helper class which contains the methods to initialize the browser and close the browser.

import java.util.concurrent.TimeUnit;
import org.openqa.selenium.WebDriver;
import org.testng.annotations.AfterMethod;
import org.testng.annotations.BeforeMethod;
import org.testng.annotations.Parameters;

import io.github.bonigarcia.wdm.WebDriverManager;

public class BaseClass {
	
	WebDriver driver;
	  
    @BeforeMethod
    @Parameters("browser")
    public void setup(String browser) throws Exception {

       if (browser.equalsIgnoreCase("firefox")) {
          
    	    driver = WebDriverManager.firefoxdriver().create();
            System.out.println("Browser Started:" + browser);
       
       } else if (browser.equalsIgnoreCase("chrome")) {
        	
        	 driver = WebDriverManager.chromedriver().create();
             System.out.println("Browser Started:" + browser);
       } else if (browser.equalsIgnoreCase("edge")) {
            
             driver = WebDriverManager.edgedriver().create();
             System.out.println("Browser Started:" + browser);
       } else {               
                 throw new Exception("Browser is not correct");
        }
       
       driver.get("https://opensource-demo.orangehrmlive.com/");
       driver.manage().timeouts().implicitlyWait(10, TimeUnit.SECONDS);
       driver.manage().window().maximize();
    }
	

	    @AfterMethod
	    public  void closeBrowser() {
	    	
	    	driver.quit();
	    	
			  
	    }
	}

CrossBrowserTests

import static org.testng.Assert.assertTrue;
import org.openqa.selenium.By;
import org.testng.Assert;
import org.testng.annotations.Test;

public class CrossBrowserTests extends BaseClass{
	
    @Test
    public void invalidLoginTest() throws InterruptedException {
    	
    	System.out.println("Test Case1");
               
        driver.get("https://opensource-demo.orangehrmlive.com/");
        driver.manage().window().maximize();      
        driver.findElement(By.name("txtUsername")).sendKeys("admin123123");
        driver.findElement(By.name("txtPassword")).sendKeys("adm");
        driver.findElement(By.id("btnLogin")).click();
        String expectedError = driver.findElement(By.id("spanMessage")).getText();
        Assert.assertTrue(expectedError.contains("Invalid credentials"));

    }

    @Test
    public void verifyLinkedIn() {

    	System.out.println("Test Case2");
    	
        driver.manage().window().maximize();
        Boolean linkedInIcon = driver.findElement(By.xpath("//*[@id='social-icons']/a[1]/img")).isEnabled();
        assertTrue(linkedInIcon);
    }

    
    @Test
    public void validLoginTest() throws InterruptedException {
    	
    	System.out.println("Test Case3");

        driver.findElement(By.name("txtUsername")).sendKeys("Admin");
        driver.findElement(By.name("txtPassword")).sendKeys("admin123");
        driver.findElement(By.id("btnLogin")).click();
        String expectedTitle = driver.findElement(By.xpath("//*[@id='content']/div/div[1]/h1")).getText();
        Assert.assertTrue(expectedTitle.contains("Dashboard"));
    }

}

We need to specify the values of browser in the TestNG XML file that will pass to the test case file.

<?xml version="1.0" encoding="UTF-8"?>
<!DOCTYPE suite SYSTEM "https://testng.org/testng-1.0.dtd">
<suite name="Suite" parallel="tests" thread-count="3">
  <test name="Chrome Test">
   <parameter name="browser" value="chrome" />
    <classes>
      <class name="com.example.crossbrowser.CrossBrowserTests"/>
    </classes>
  </test> <!-- Test -->
  
    <test name="firefox Test">
   <parameter name="browser" value="firefox" />
    <classes>
      <class name="com.example.crossbrowser.CrossBrowserTests"/>
    </classes>
  </test> <!-- Test -->
  
    <test name="Edge Test">
   <parameter name="browser" value="edge" />
    <classes>
      <class name="com.example.crossbrowser.CrossBrowserTests"/>
    </classes>
  </test> <!-- Test -->
</suite> <!-- Suite -->


To execute this program, we need to Right click on the program and select Run as – TestNG Test

The test execution result looks like as shown below. It shows the test execution status of all the tests. As, in this program, 3 tests are executed and all 3 of them passes. The same result can be depicted from below image.

TestNG Report Generation

TestNG generates various type of reports under test-output folder like emailable-report.html, index.html, testng-results.xml

We are interested in ’emailable-report.html’ report. Open ’emailable-report.html’, as this is a html report open it with browser. Below image shows emailable-report.html.

TestNG also produce “index.html” report and it resides under test-output folder. Below image shows index.html report.

We are done! Congratulations on making it through this tutorial and hope you found it useful! Happy Learning!!

Assertions in TestNG

HOME

package com.example;
import org.testng.Assert;
import org.testng.annotations.Test;

public class testAssertions {

    @Test
    public void testAssertions() {

        // test data
        String str1 = new String("TestNG");
        String str2 = new String("TestNG");
        String str3 = null;
        String str4 = "TestNG";
        String str5 = "TestNG";
        String str6 = new String("Not_TestNG");

        int val1 = 5;
        int val2 = 6;

        // Check that two objects are equal
        Assert.assertEquals(str1, str2);
        System.out.println("Equals Assertion is successful");

        // Check that two objects are not equal
        Assert.assertNotEquals(str1, str6);
        System.out.println("NotEquals Assertion is successful");

        // Check that a condition is true
        Assert.assertTrue(val1 < val2);
        System.out.println("True Assertion is successful");

        // Check that a condition is false
        Assert.assertFalse(val1 > val2);
        System.out.println("False Assertion is successful");

        // Check that an object isn't null
        Assert.assertNotNull(str1);
        System.out.println("Not Null Assertion is successful");

        // Check that an object is null
        Assert.assertNull(str3);

        // Check if two object references point to the same object
        Assert.assertSame(str4, str5);
        System.out.println("Same Assertion is successful");

        // Check if two object references not point to the same object
        Assert.assertNotSame(str1, str3);
        System.out.println("Not Same Assertion is successful");
    }
}

Lets see if an assertion fails, how the output looks shown below. In the below example, we are verifying the pageTitle of Gmail. If the test fails, we should see the message provided in the assertion also.

import org.openqa.selenium.WebDriver;
import org.openqa.selenium.firefox.FirefoxDriver;
import org.openqa.selenium.firefox.FirefoxOptions;
import org.testng.Assert;
import org.testng.annotations.Test;

public class TestNGAssertionFailureDemo {

    @Test
    public void AssertionFailure() throws InterruptedException {

        FirefoxOptions options = new FirefoxOptions();
        WebDriver driver = new FirefoxDriver(options);
        // Test Condition 1: If Page title matches with actualTitle then it finds email
        // title and enters the value which we pass
        driver.get("https://www.gmail.com");
        String actualTitle = "Google";
        String expectedTitle = driver.getTitle();
        Assert.assertEquals(expectedTitle, actualTitle, "Incorrect page title");
    }
}

You can show in the output console, there is an error message “Incorrect page title” as we have mentioned this message in the Assertion.

TestNG Annotations

 HOME

In the previous tutorial, we have discussed How to Download and Install TestNG in Eclipse. In the this tutorial, we are going to discuss about the various annotations available in TestNG. Below is the list of annotations:-

  • @Test – This marks a class or a method as a part of the test.
  • @BeforeSuite – The @BeforeSuite method in TestNG runs before the execution of all other test methods. It will run only once before all tests in the suite have to run.
  • @AfterSuite – The @AfterSuite method in TestNG runs after the execution of all other test methods. It will run only once after all tests in the suite have run.
  • @BeforeTest – The @BeforeTest method in TestNG runs before the execution of first @Test method. It runs only once per class.
  • @AfterTest – The @AfterTest method in TestNG executes after the execution of all the test methods that are inside that folder.
  • @BeforeClass – The @BeforeClass method in TestNG will run before the first method invokes of the current class.
  • @AfterClass – The @AfterClass method in TestNG will execute after all the test methods of the current class execute.
  • @BeforeMethod – The @BeforeMethod method in TestNG will execute before each test method. 
  • @AfterMethod – The @AfterMethod method in TestNG will run after each test method is executed.
  • @BeforeGroups – The @BeforeGroups method in TestNG run before the test cases of that group execute. It executes just once.
  • @AfterGroups – The @AfterGroups method in TestNG run after the test cases of that group execute. It executes only once. 
  • @ParametersThis annotation is used to pass parameters to test methods.
  • @DataProvider – If we use @DataProvider annotation for any method that means you are using that method as a data supplier. The configuration of @DataProvider annotated method must be like it always return Object[][] which we can use in @Test annotated method. The @Test method that wants to receive data from this DataProvider needs to use a dataProvider name equals to the name of this annotation.
  • @Factory – Marks a method as a factory that returns objects that will be used by TestNG as Test classes. The method must return Object[ ].
  • @Listeners– This annotation is used with test class. It helps in writing logs and results.

Lets see a program to understand the sequence in which these annotations run in the program.

import org.testng.annotations.*;

public class AnnotationsExample {

    @BeforeTest
    public void init(){
        System.out.println("---------------- Before Test ------------- ");
        //open the browser
    }

    @AfterTest
    public void quit(){
        System.out.println("---------------- After Test ------------- ");
        //close the browser
    }

    @BeforeMethod
    public void beforeMethod() {
        System.out.println("############# Before Method ############# ");
        //Initialize the Report
    }

    @AfterMethod
    public void afterMethod() {
        System.out.println("############ After Method ##############");
        //Finalize the Report
    }

    @BeforeClass
    public void beforeClass() {
        System.out.println("************* Before Class *************");
    }

    @AfterClass
    public void afterClass() {
        System.out.println("************* After Class ***************");
    }

    @BeforeSuite
    public void beforeSuite() {
        System.out.println("This will execute Before Suite");
    }

    @AfterSuite
    public void afterSuite() {
        System.out.println("This will execute After Suite");
    }

    @Test
    public void loginTest(){
        System.out.println("Login the application ");

    }

    @Test
    public void logout(){
        System.out.println("Logout the application ");

    }

}

Execution process is as follows:

  1. First of all, beforeSuite() method is executed only once.

2. Lastly, the afterSuite() method executes only once.

3. @BeforeMethod and @AfterMethod are executed twice, one for Test Case 1 and again for Test Case 2.

4. Methods beforeTest(), beforeClass(), afterClass(), and afterTest() methods are executed only once.

5. To execute this program, we need to Right click and select Run as -> TestNG or Run testng.xml.


The test execution result will look like something shown below

TestNG generates various type of reports under test-output folder.

Open ‘emailable-report.html‘, as this is a html report open it with browser. It will look like something below.

TestNG also produce “index.html” report and it resides under test-output folder.

Congratulations. We are done. Happy Learning!!

Screenshot of Failed Test Cases in Selenium WebDriver

HOME

In the previous tutorials, I have explained how we can take screenshots in Selenium using FileUtils or FileHandler. In this tutorial, I will explain how to capture screenshots of Failed Test Cases in Selenium.

We are going to use TestNG to capture screenshot of failed test cases.

We will be using below mentioned features of TestNG

1) ITestResult – This  Interface will provide us the result of test case execution. @AfterMethod method can declare a parameter of type ITestResult, which will reflect the result of the test method that was just run.

2) @AfterMethod – The annotated method will be run after each test method. Any @AfterMethod can declare a parameter of type java.lang.reflect.Method. This parameter will receive the test method that will be called once this after the method as run.

3) result.getName() – will return name of test case so that screenshot name will be same as test case name

4) @BeforeTest – The annotated method will be run before any test method belonging to the classes inside the tag is run.

5) @AfterTest – The annotated method will be run after all the test methods belonging to the classes inside the tag have run.

We are executing 2 test cases. One of the Test Case will pass and another will fail. This program will only capture the screenshot of failed test case, not the passed one as we have used condition

if (ITestResult.FAILURE == result.getStatus())

Let see this as a program. 

import java.io.File;
import org.apache.commons.io.FileUtils;
import org.openqa.selenium.By;
import org.openqa.selenium.OutputType;
import org.openqa.selenium.TakesScreenshot;
import org.openqa.selenium.WebDriver;
import org.openqa.selenium.firefox.FirefoxDriver;
import org.testng.Assert;
import org.testng.ITestResult;
import org.testng.annotations.AfterMethod;
import org.testng.annotations.AfterTest;
import org.testng.annotations.BeforeTest;
import org.testng.annotations.Test;
 
public class ScreenshotFailedCases {
    static WebDriver driver;
 
    @BeforeTest
    public static void init() {
        System.setProperty("webdriver.gecko.driver", "src\\test\\resources\\webdrivers\\window\\geckodriver.exe");
 
        // Initiate Firefox browser
        driver = new FirefoxDriver();
 
        // Maximize the browser
        driver.manage().window().maximize();
 
        // Pass application url
        driver.get("https://duckduckgo.com/");
        System.out.println("BeforeTest");
    }
 
    @Test
    public void captureCorrectScreenMethod() throws Exception {
        String Text = driver.findElement(By.xpath("//*[@id='logo_homepage_link']")).getText();
        // Verify the text on the landing page
        Assert.assertTrue(Text.contains("About DuckDuckGo"));
    }
 
    @Test
    public void captureIncorrectScreenMethod() throws Exception {
                        
		// Fail test by using incorrect XPath to find the search box
        driver.findElement(By.xpath("//*[@name='qe']")).sendKeys("agile");
    }
 
    @AfterTest
    public static void exit() {
                        
		// Close the WebPage
        driver.quit();
    }
 
    // AfterMethod annotation - This method executes after every test execution
    @AfterMethod
    public void screenShot(ITestResult result) {
 
        // ITestResult.FAILURE is equals to result.getStatus then it enter into
        // if condition
                        
	if (ITestResult.FAILURE == result.getStatus()) {
            try {
                    
		         // To create reference of TakesScreenshot
                 TakesScreenshot screenshot = (TakesScreenshot) driver;
 
                 // Call method to capture screenshot
                 File src = screenshot.getScreenshotAs(OutputType.FILE);
 
                 // Copy files to specific location result.getName() will 
                 // return  name of test case so that screenshot name will be same as test case name
                    
		   FileUtils.copyFile(src, new File("./Screenshots/" + result.getName() + System.currentTimeMillis() + ".png"));
                    System.out.println("Successfully captured a screenshot");
                } catch (Exception e) {
                    System.out.println("Exception while taking screenshot " + e.getMessage());
           }
        }
    }
}

A folder with name Screenshots is created and the screenshot is placed in that folder as you can see the image below

Execution Status as shown below

TestNG Report – Go to test-output folder and open emailable-report.html

TestNG – How to group Tests in Selenium using TestNG

HOME

<?xml version = "1.0"encoding = "UTF-8"?>
<!DOCTYPE suite SYSTEM "http://testng.org/testng-1.0.dtd">
<suite name = "Suite1">
  <test name = "Test Demo">
      <groups>
         <run>
              <include name = "e2etest"/>
          </run>
        </groups>
    <classes>
          <class name = "TestNGGroupDemo"/>
     </classes>  
   </test>
</suite>

In below example, we have shown the syntax of how to use groups in the XML file. @Test(groups = { “e2etest”, “integerationtest” }) .

Below is the sample code.

import org.testng.annotations.Test;

public class TestNGGroupDemo {

	@Test(alwaysRun = true, groups = { "e2etest", "integerationtest" })
	public void testPrintMessage() {
		System.out.println("This method is run by both e2e and integeration test");
	}

	@Test(alwaysRun = true, groups = { "e2etest" })
	public void testE2EMessage() {
		System.out.println("This method is run by e2e test");
	}

	@Test(alwaysRun = true, groups = { "integerationtest" })
	public void testingIntegrationMessage() {
		System.out.println("This method is run by integeration test");
	}

	@Test(alwaysRun = true, groups = { "acceptancetest" })
	public void testingAcceptanceMessage() {
		System.out.println("This method is run by Acceptance test");
	}

	@Test(alwaysRun = true, groups = { "e2etest", "acceptancetest" })
	public void testE2EAndAcceptanceMessage() {
		System.out.println("This method is run by both e2e and acceptance test");
	}

	@Test(alwaysRun = true, groups = { "e2etest", "integerationtest", "acceptancetest" })
	public void testE2EAndAcceptanceAndIntegrationMessage() {
		System.out.println("This method is run by e2e, integration and acceptance test");
	}

}

Output
[RemoteTestNG] detected TestNG version 7.4.0
This method is run by e2e, integration and acceptance test
This method is run by both e2e and acceptance test
This method is run by e2e test
This method is run by both e2e and integeration test

===============================================
Suite
Total tests run: 4, Passes: 4, Failures: 0, Skips: 0
===============================================

The output of the above program is

The result will look like something shown below. Here, we can see that Test Case Passed is 4, Failed 0 and Skipped 0.

To view the report, go to the Eclipse folder and you can see a folder with name test-output inside the Project where we have created TestNG class. Here, it is  C:\Users\vibha\eclipse-workspace\Demo\test-output

Groups of Groups

Groups can also include other groups. These groups are called “MetaGroups”. TestNG provides the flexibility of providing groups inside another group and running them according to your needs.
Let’s create a group inside a group in our XML file.

Here, I have created a created a new group with the name ‘SuperGroup‘ and included our group “acceptancetest” into it. Then we called the newly created group (SuperGroup) for execution by including it in the run tag. The output will be like this:

<?xml version="1.0" encoding="UTF-8"?>
<!DOCTYPE suite SYSTEM "https://testng.org/testng-1.0.dtd">
<suite name="Suite">
   <test name = "Test Demo">
       <groups>
        	<define name = "SuperGroup">
   			   <include name = "acceptancetest"></include>
   		</define>
          <run>
              <include name = "SuperGroup"/>
          </run>
        </groups>
    <classes>
      <class name="TestNGGroupDemo"/>
    </classes>
  </test> <!-- Test -->
</suite> <!-- Suite -->

Lets, add another group “e2etest” to SuperGroup. In this case, we will see all the tests marked with “e2etest” and “acceptancetest“.

<?xml version="1.0" encoding="UTF-8"?>
<!DOCTYPE suite SYSTEM "https://testng.org/testng-1.0.dtd">
<suite name="Suite">
   <test name = "Test Demo">
       <groups>
        	<define name = "SuperGroup">
   			   <include name = "acceptancetest"></include>
   			    <include name = "e2etest"></include>
   		</define>
          <run>
              <include name = "SuperGroup"/>
          </run>
        </groups>
    <classes>
      <class name="TestNGGroupDemo"/>
    </classes>
  </test> <!-- Test -->
</suite> <!-- Suite -->

We are done! Congratulations on making it through this tutorial and hope you found it useful! Happy Learning!!