In this tutorial, we will discuss the Docker, Docker Desktop and how to install Docker Desktop on the Windows 11.
Table of Contents
- What is Docker?
- What is Docker Desktop?
- How to verify WSL is installed?
- Install Docker Desktop
- Start Docker Desktop
- How to verify successful docker installation
What is Docker?
Docker is an open platform for developing, shipping, and running applications using the containers. Docker enables us to separate the applications from the infrastructure so we can deliver software quickly. With Docker, we can manage your infrastructure in the same ways you manage your applications.
Containers are lightweight, portable, and self-sufficient units that package an application and its dependencies, ensuring consistency across different environments.

What is Docker Desktop?
Docker Desktop is a one-click-install application for your Mac, Linux, or Windows environment that lets you build, share, and run containerized applications and microservices.
It provides a straightforward GUI (Graphical User Interface) that lets you manage your containers, applications, and images directly from your machine.
Before installing Docker on Windows 10 or 11, ensure your system meets the following requirements:
- Windows 10 64-bit: Build 18362 or higher
- Windows 11 64-bit
- Hardware Virtualization Technology (VT-x) enabled in BIOS
- Microsoft Hyper-V and Containers features enabled
How to verify WSL is installed?
Windows Subsystem for Linux (WSL) 2 is a prerequisite for Docker Desktop on Windows. It provides a lightweight Linux kernel for compatibility and performance improvements.
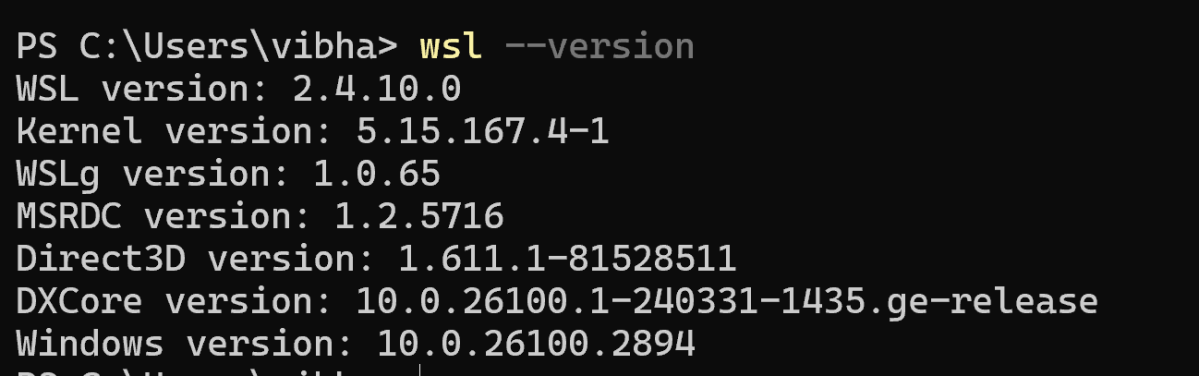
wsl --version
The output of the above command should display the version of wsl installed on the machine.
Open PowerShell as Administrator and run:
wsl --install
Restart the computer if prompted.
Install Docker Desktop
On the Docker download page, select “Windows” as your operating system.
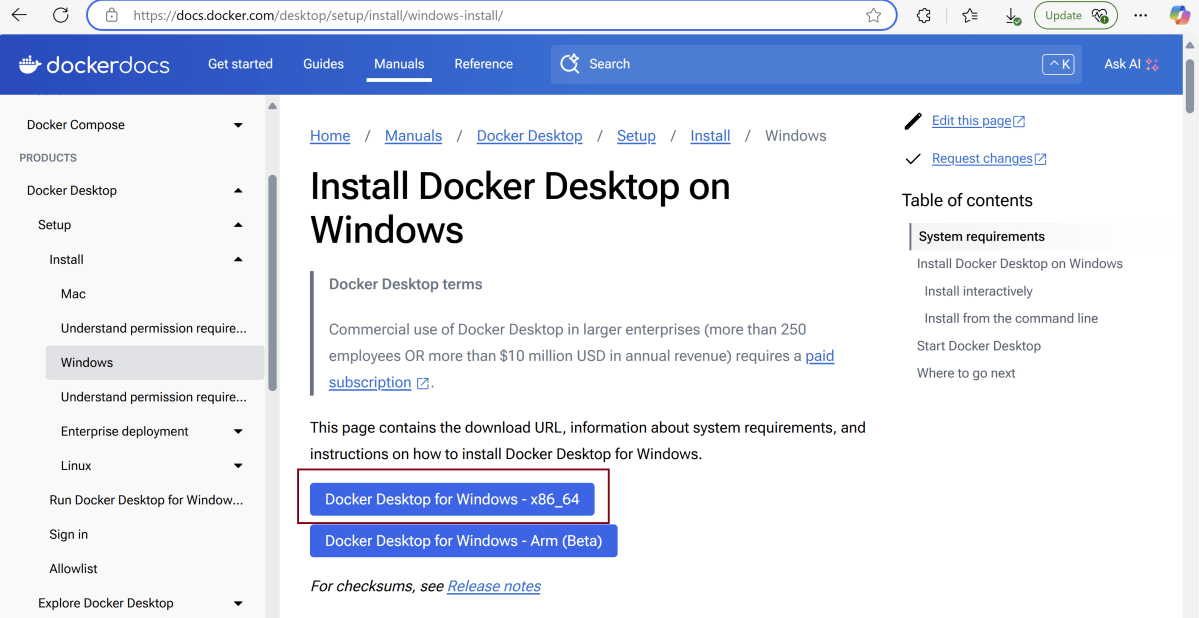
The download will begin automatically. The duration will depend on your internet speed.

After installation, open Docker Desktop.

After clicking “OK,” the installation will start.

After installation completes, it will show a confirmation screen.

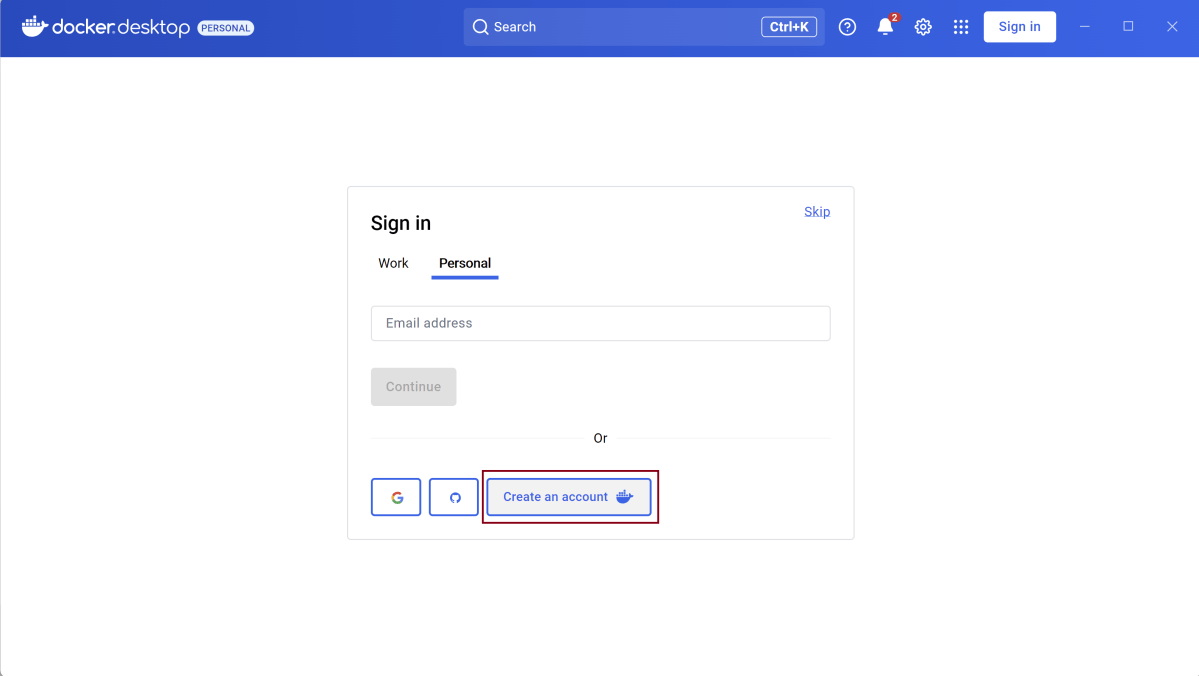
Create an account for Docker Desktop.
Once we will create the account, we will login and see that the Docker Engine is stopped.

Go to the settings and select “Start Docker Desktop when sign in to your computer.”. This is optional.

Go to the bottom tray and right click on the Desktop option.

It will show below mentioned options. Select “Quit Docker Desktop”.

Start Docker Desktop
Docker Desktop does not start automatically after installation. To start Docker Desktop:
Search for Docker, and select Docker Desktop in the search results.
The Docker menu displays the Docker Subscription Service Agreement. Select Accept to continue. Docker Desktop starts after you accept the terms.
Note that Docker Desktop won’t run if you do not agree to the terms. You can choose to accept the terms at a later date by opening Docker Desktop.

How to verify successful docker installation
Open a command prompt or PowerShell window.
Using the following command check the docker version for verifying the installation.
docker --version

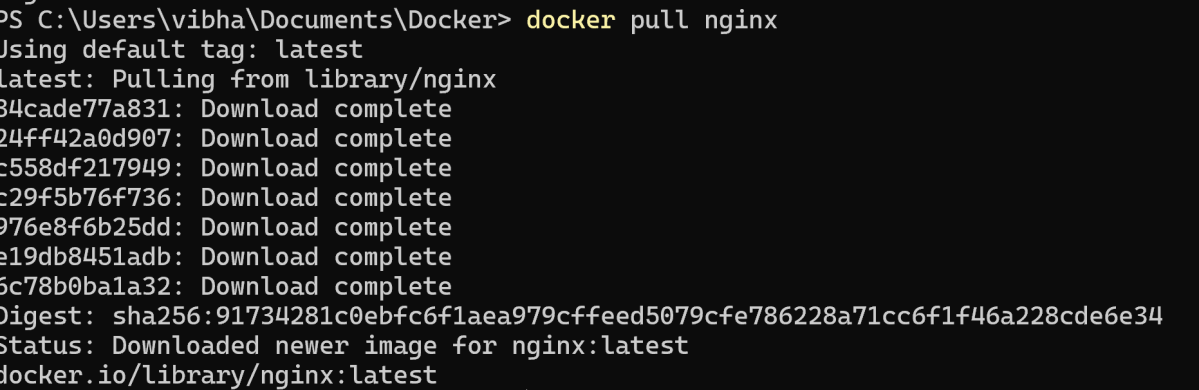
Pull a sample image, such as Nginx, using the following command:
docker pull nginx
If the image pulls successfully, Docker Desktop has been installed correctly
TroubleShooting
The error you’re seeing indicates that Docker is unable to authenticate when trying to pull the NGINX image from Docker Hub

Use the below command to login to docker
docker login -u my-user-name (using real username)

We are done! Congratulations on making it through this tutorial and hope you found it useful! Happy Learning!!