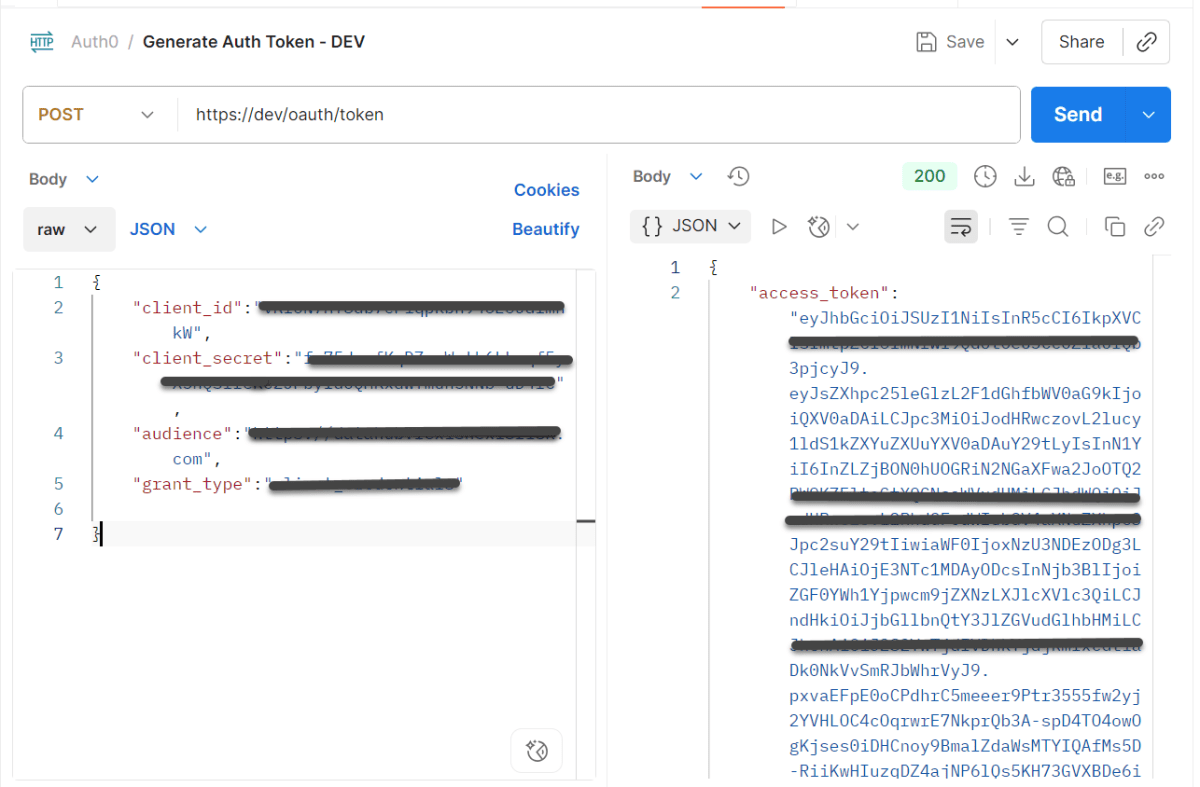
Create a new Environmentin Postman (top right → Environments → Add
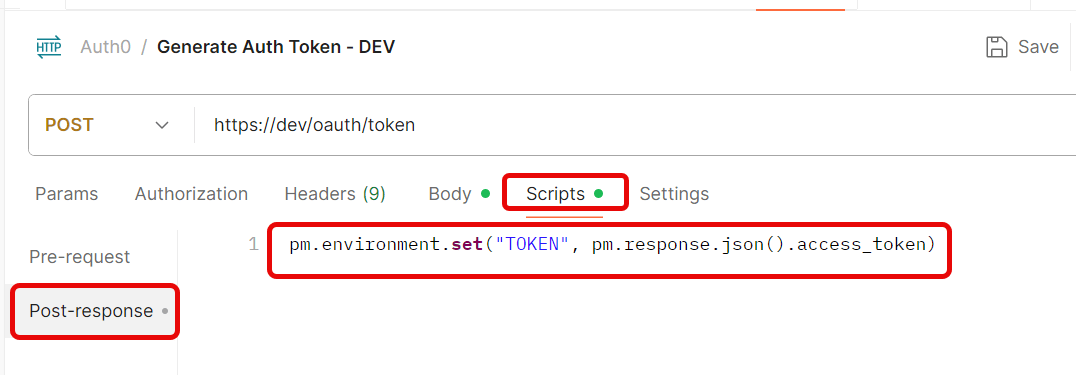
Save the request.
Step 3: Use the Token in Another Request
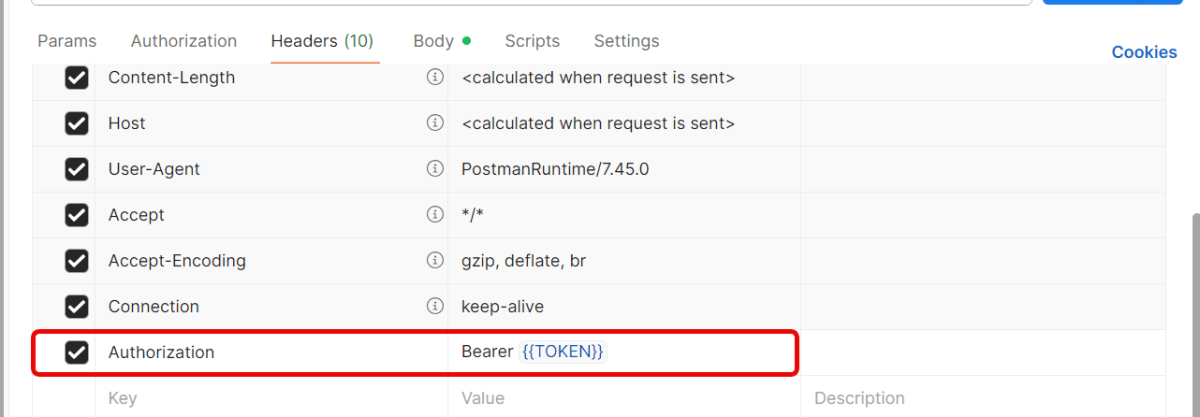
Create a new request.
Go to the Headerstab.
Add this header:
Key: Authorization
Value: Bearer {{Token}}
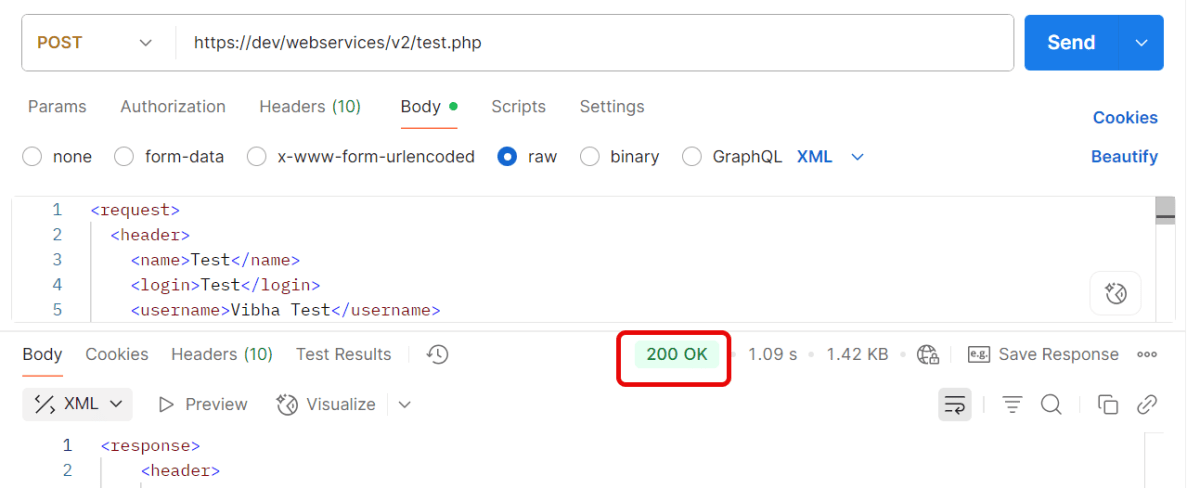
Send the request — Postman will automatically insert the token from the environment variable.
Quick Troubleshooting Checklist
1.Is the token saved correctly in environment variables? Token saved in one environment, but request uses another. Make sure you’ve selected the same environment (top-right dropdown in Postman).
2. Is the Authorization: Bearer {{Token}} header present?
3. Does the account have the correct permissions/scopes? Token is valid, but the user doesn’t have permission for that endpoint. Verify that your account has the right role/permissions.
4. Correct Content-Type is sent. Set header → Content-Type: application/json.
When you’re working with APIs, one of the most important things to understand is the Content-Type header. This header informs the API about the data type you’re sending. This is JSON, XML, or form data. It also specifies what type of response you expect back. If the Content-Type is set incorrectly, your request may fail or the server may not understand the data you’re sending.
Postman is a popular tool for testing APIs. It makes it really easy to add, update, or change headers. This includes Content-Type.
The Content-Type header in HTTP requests and responses indicates the data format. It informs the server or client about the format of the data being sent or received. Common content types include:
application/json: For JSON-formatted data.
application/xml: For XML-formatted data.
application/x-www-form-urlencoded: For URL-encoded form data.
multipart/form-data: For file uploads.
text/plain: For plain text.
text/html: Used for sending HTML data
Step by Step Implementation
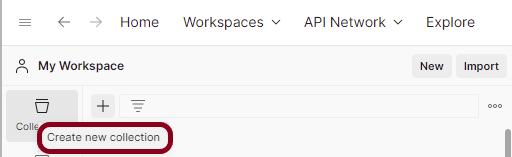
Create a Collection
Step 1: Create a Collection, click on Collections, and then click on the “+” plus button.
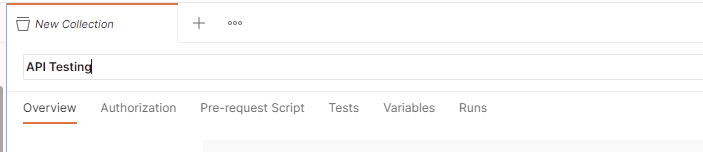
Step 2: Provide a name to the collection – “API Testing”.
Add a request to the Collection
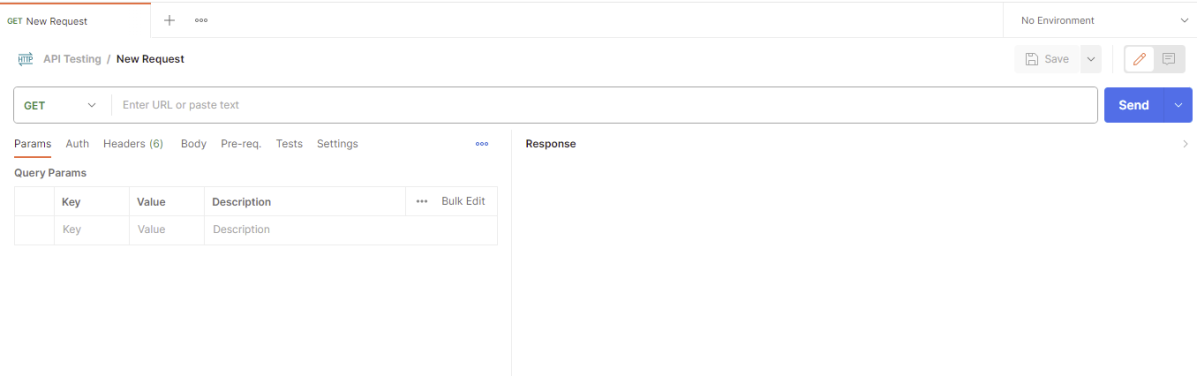
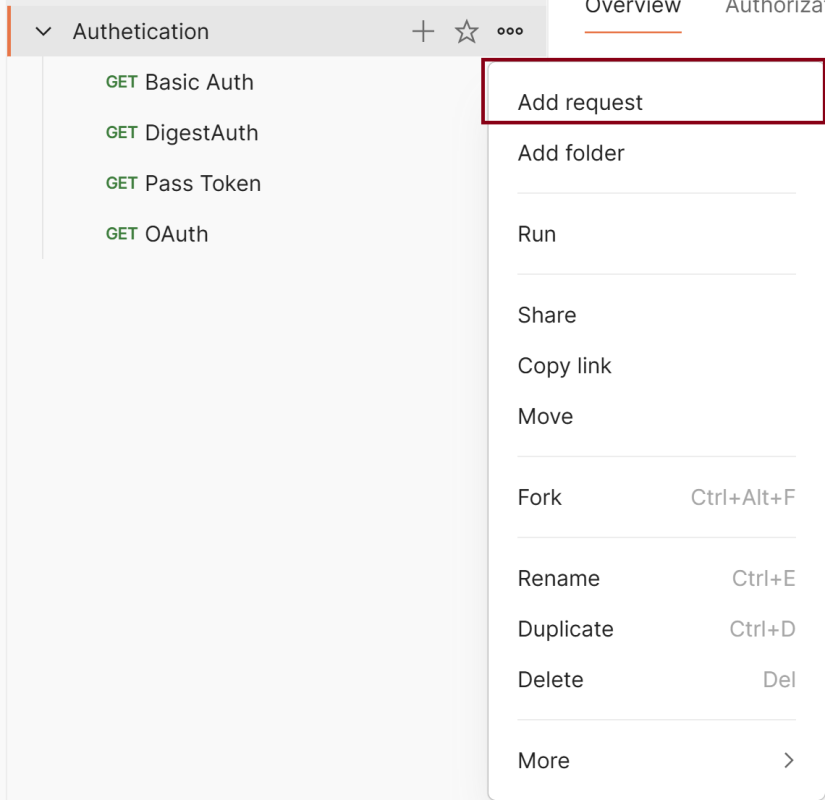
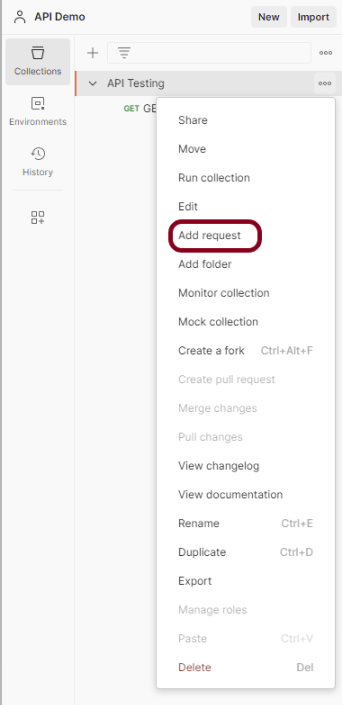
Step 3: To create a new request, click on “Add a request”, if it is a new Collection. Otherwise, click on the 3 dots and select “Add request”.
Step 4: Once you create a new request, then you will get the following window:
Enter the details of request
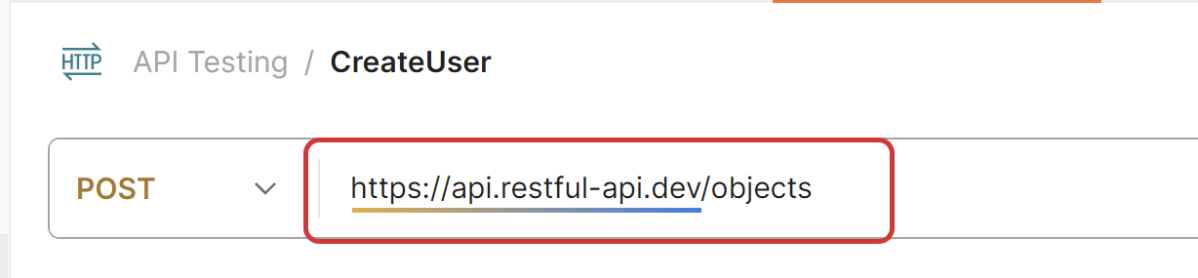
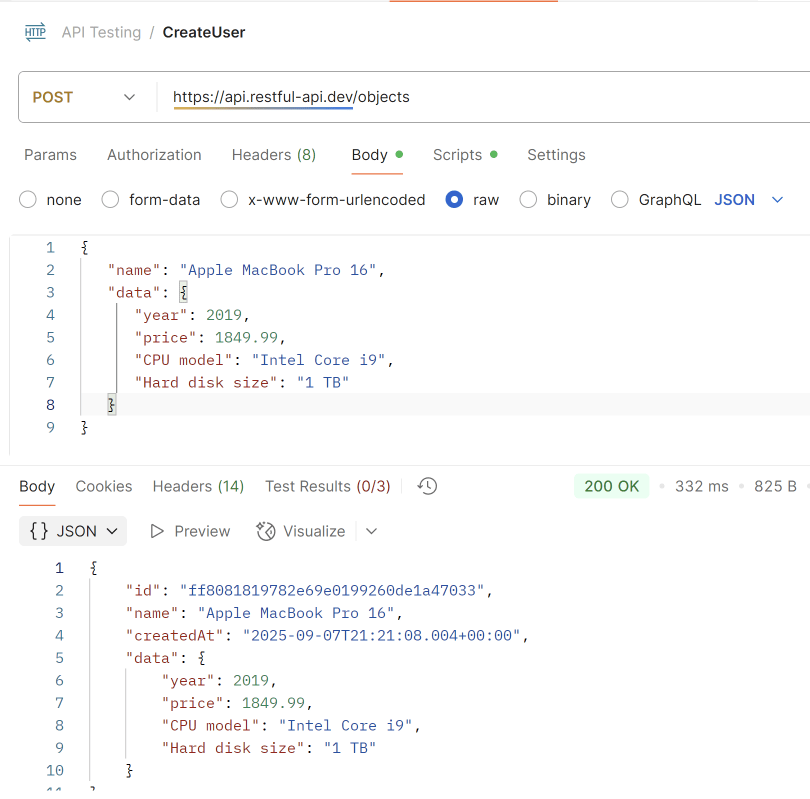
Step 5: Enter the “name” in the request. Here, the name is “Create User”.
Step 6:Enter the “URL” in the address bar.
https://api.restful-api.dev/objects
Add Headers to the request
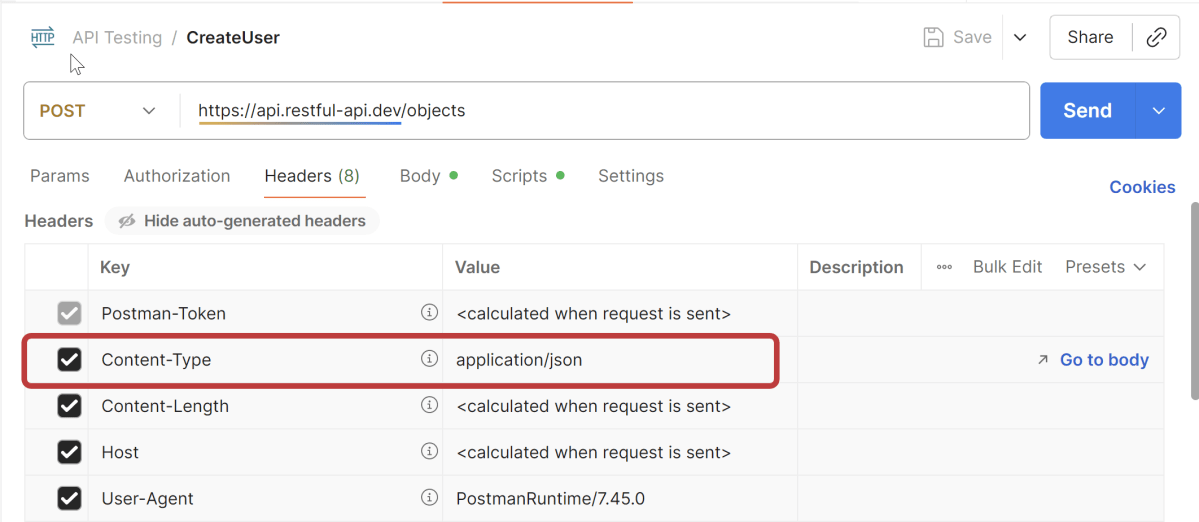
Step 7:Enter the “Headers” in the Header tab.
In your Postman request window, navigate to the Headerstab. This tab contains all the HTTP headers that are included in your request.
Scroll through the list of headers to find the Content-Type header. If it is not listed, you can add it manually. Click on the “Key” field and type Content-Type in the field. Then, move to the “Value” field to specify the appropriate Content-Type for your request.
Step 9: Once you press the send button, you will get the response from the server. Make sure you have a proper internet connection; otherwise, you will not get a response.
You can check the status code. Here, we got the status code 200, which means we got a successful response to the request.
We are done! Congratulations on making it through this tutorial and hope you found it useful! Happy Learning!!
An authorization token, often referred to as an access token, is a piece of data or credential that is used to authenticate and authorize access to protected resources or operations in a system. It is a Base64-encoded string of username:password. We can send it in the Authorization header like this:
Authorization: Basic YWRtaW46cGFzc3dvcmQ=
Where YWRtaW46cGFzc3dvcmQ= = Base64 of admin:password
We will use the following URL for this Postman tutorial.
https://postman-echo.com/basic-auth
Implementation Steps
Below are the steps to use Basic Auth in Postman:
Create a Collection
Step 1: Create a Collection, click on Collections, and then click on the “+” plus button.
Step 2: Provide a name to the collection – “Authentication”.
Add a request to the Collection
Step 3: To create a new request, click on “Add a request”, if it is a new Collection. Otherwise, click on the 3 dots and select “Add request”.
Enter the details – URL, Method, Authorization
Step 4: Enter the “name” in the request. Here, the name is “Token”.
Step 5:Enter the “URL” in the address bar.
https://httpbin.org/basic-auth/user/pass
Step 6:Now, select the “GET” request from the list of request methods.
Step 7:Now, go to the “Headers “ Tab.
Step 8: We need to add a new key-value pair
Step 9: Now, click on the Send button in Postman. The server will respond with the protected resource response message.
Verify the Response
Step 10: Once you press the send button, you will get the response from the server. Make sure you have a proper internet connection; otherwise, you will not get a response.
Status
You can check the status code. Here, we got the status code 200, which means we got a successful response to the request.
Body
In the Body tab of the response box, we have multiple options to see the response in a different format.
Important Notes
Credentials are delivered in plain text and encoded using Base64, which leaves them open to interception if not properly secured. Using Basic Authentication over unencrypted channels is not advised due to this vulnerability.
Always encrypt the entire communication channel, including credentials, using HTTPS to guard against man-in-the-middle attacks and eavesdropping.
We are done! Congratulations on making it through this tutorial and hope you found it useful! Happy Learning!!
Digest Authentication is an advanced authentication method as compared to Basic Authentication. It is used in HTTP to secure the communication between the client and server. This authentication uses the hash of the password and other details rather than passing the actual password over the network. Using this Authentication method, we can make the communication more secure.
We will use the following URL for this Postman tutorial.
https://postman-echo.com/basic-auth
Implementation Steps
Below are the steps to use Basic Auth in Postman:
1. Create a Collection
Step 1: Create a Collection, click on Collections, and then click on the “+” plus button.
Step 2: Provide a name to the collection – “Authentication”.
2. Add a request to the Collection
Step 3: To create a new request, click on “Add a request”, if it is a new Collection. Otherwise, click on the 3 dots and select “Add request”.
3. Enter the details – URL, Method, Authorization
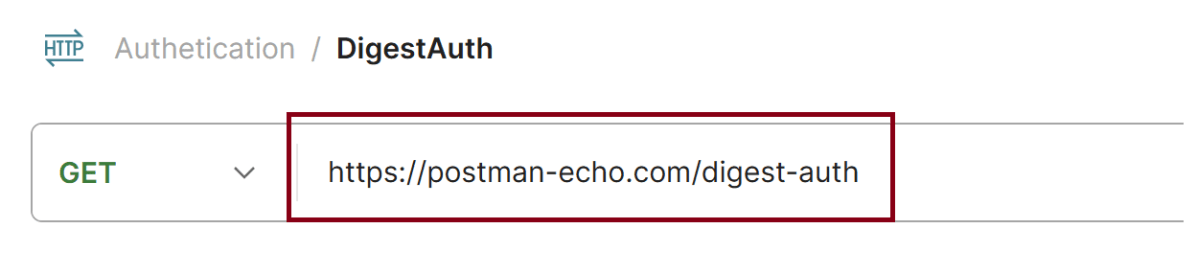
Step 4: Enter the “name” in the request. Here, the name is “Digest Auth”.
Step 5:Enter the “URL” in the address bar.
https://postman-echo.com/digest-auth
Step 6:Now, select the “GET” request from the list of request methods.
Step 7:Now, go to the “Authorization“ Tab.
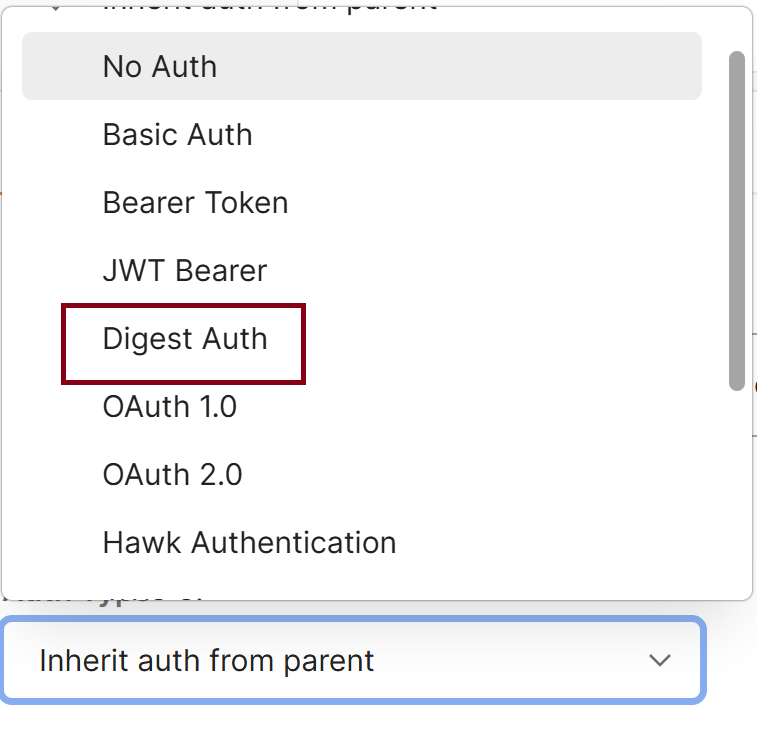
Step 8: We need to select “Digest Auth” from the Dropdown List.
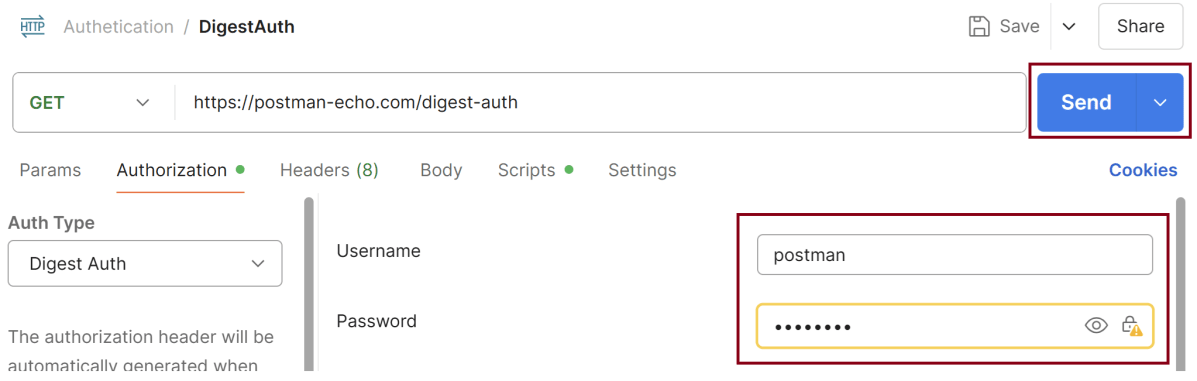
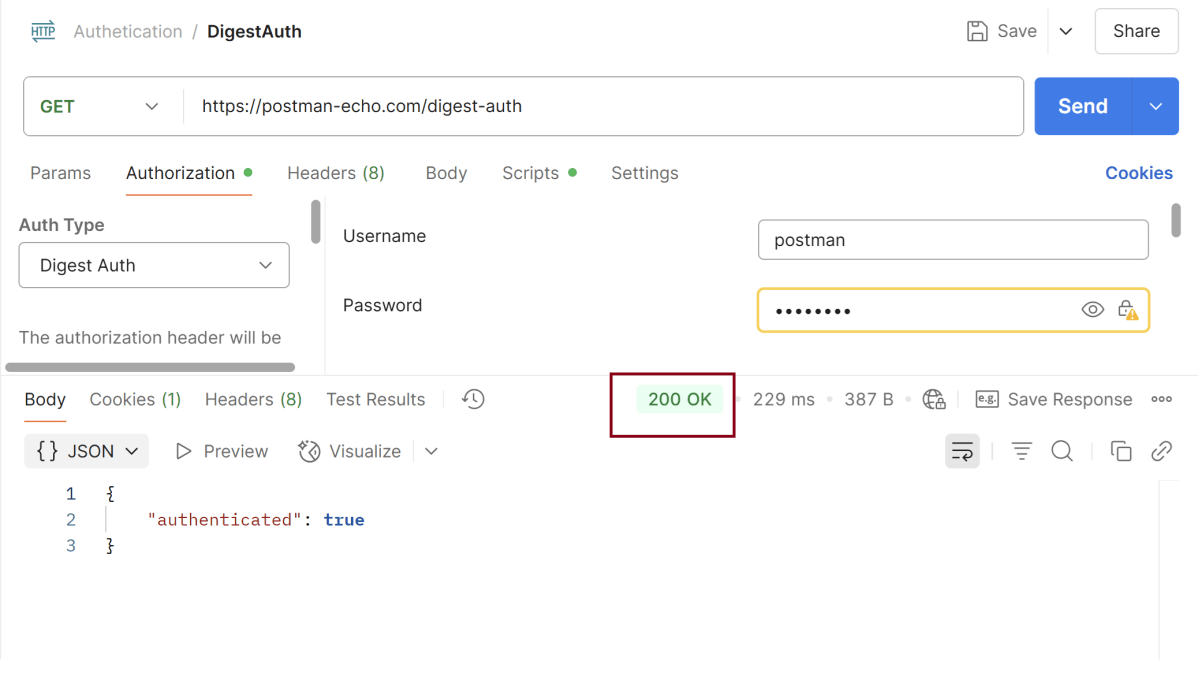
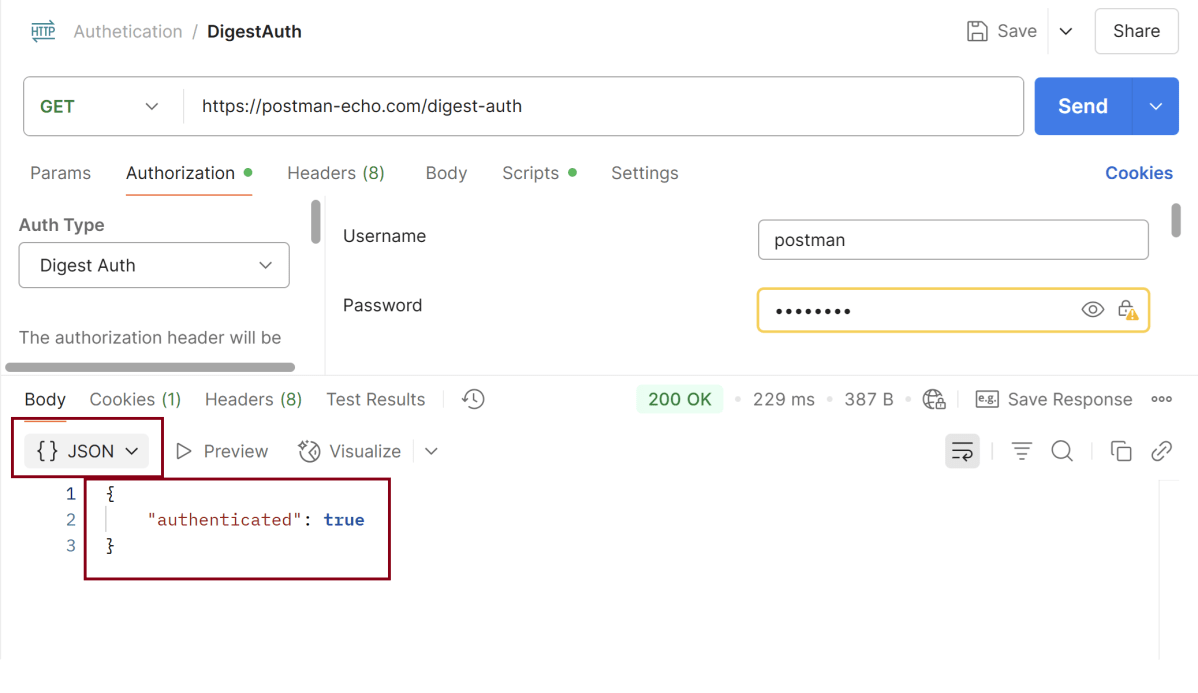
Step 9: We need to enter the username and password. We have set username – postman, password – password. Now, click on the Send button in Postman. The server will respond with the protected resource response message.
4. Verify the Response
Step 10: Once you press the send button, you will get the response from the server. Make sure you have a proper internet connection; otherwise, you will not get a response.
4.1 Status
You can check the status code. Here, we got the status code 200, which means we got a successful response to the request.
4.2 Body
In the Body tab of the response box, we have multiple options to see the response in a different format.
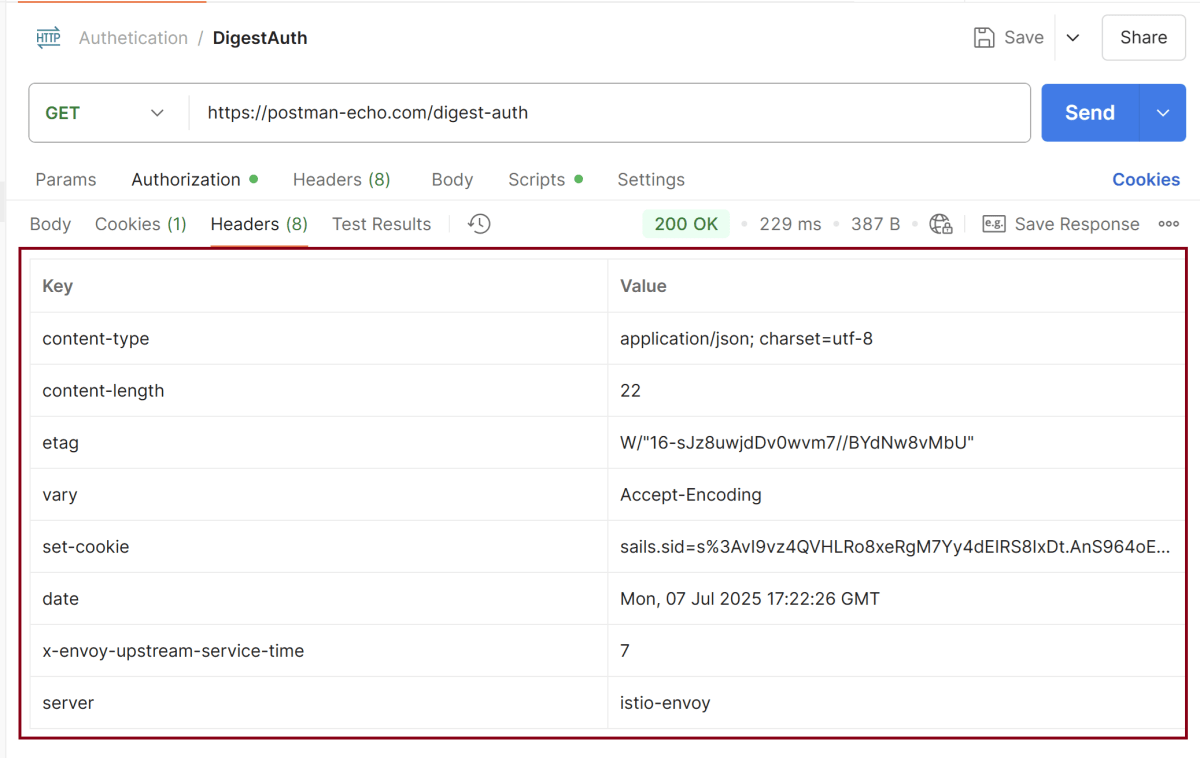
4.3 Headers
Headers are the extra information that is transferred to the server or the client. In Postman, headers will show like key-value pairs under the headers tab. Click on the Headers link as shown in the below image:
Important Notes
Digest Auth is less common in modern APIs compared to OAuth2, API keys, or JWT.
It still requires HTTPSto be fully secure, especially against man-in-the-middle (MITM) attacks.
If the server does not support Digest, you’ll get a 401 or error even if credentials are correct.
We are done! Congratulations on making it through this tutorial and hope you found it useful! Happy Learning!!
Basic Authentication is a simple authentication scheme built into the HTTP protocol. The client sends the username and password encoded in Base64 in the Authorization header.
We will use the following URL for this Postman tutorial.
https://postman-echo.com/basic-auth
Implementation Steps
Below are the steps to use Basic Auth in Postman:
Create a Collection
Step 1: Create a Collection, click on Collections, and then click on the “+” plus button.
Step 2: Provide a name to the collection – “Authentication”.
Add a request to the Collection
Step 3: To create a new request, click on “Add a request”, if it is a new Collection. Otherwise, click on the 3 dots and select “Add request”.
Enter the details – URL, Method, Authorization
Step 4: Enter the “name” in the request. Here, the name is “Basic Auth”.
Step 5:Enter the “URL” in the address bar.
https://postman-echo.com/basic-auth
Step 6:Now, select the “GET” request from the list of request methods.
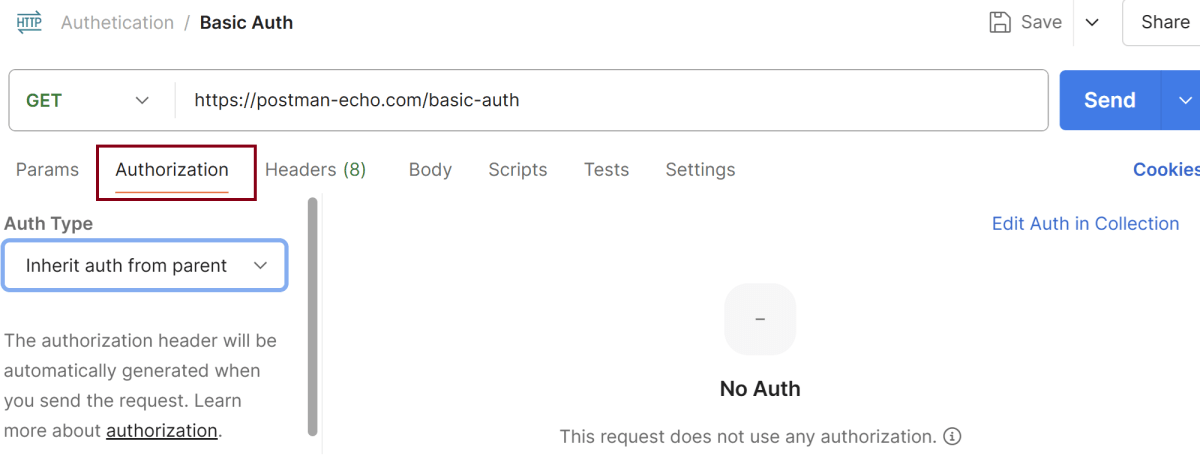
Step 7:Now, go to the “Authorization“ Tab.
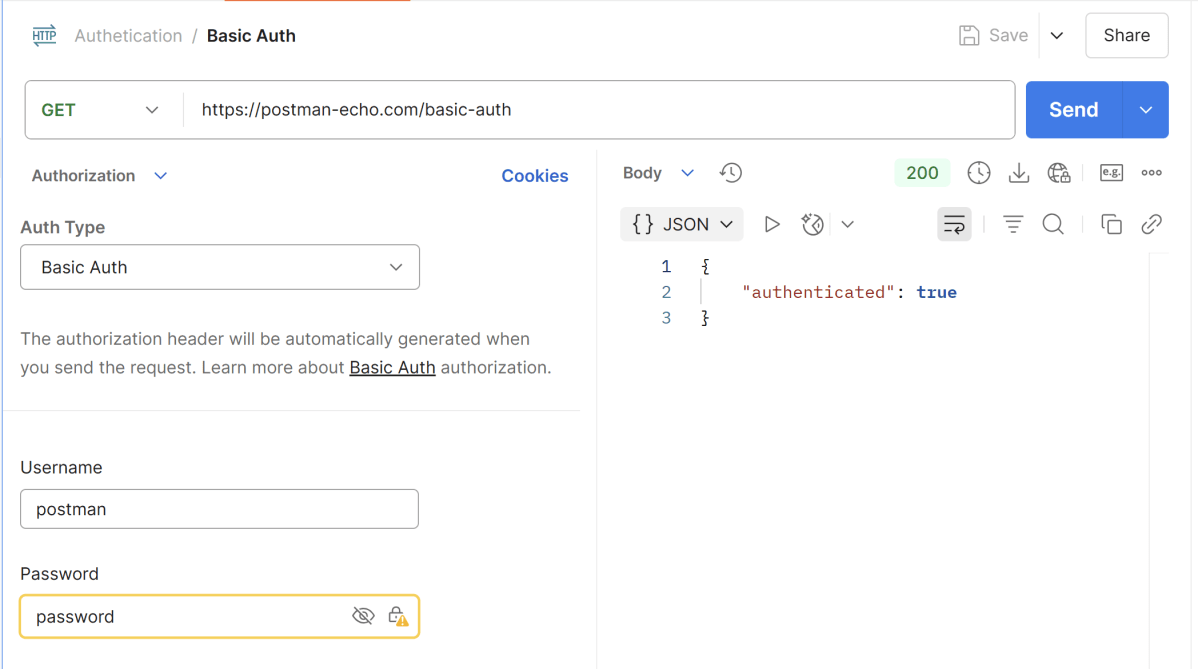
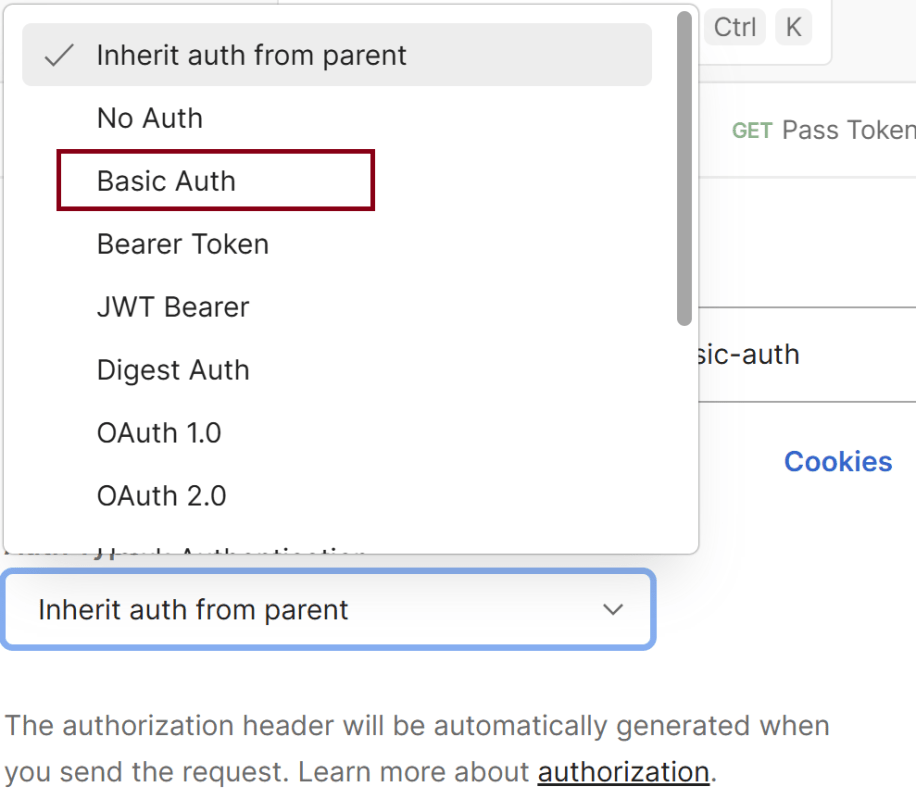
Step 8: We need to select “Basic Auth“ from the Dropdown List.
Step 9: We need to enter the username and password. We have set username – postman, password – password.
Step 10: Now, click on the Send button in Postman. The server will respond with the protected resource response message.
Verify the Response
Step 11: Once you press the send button, you will get the response from the server. Make sure you have a proper internet connection; otherwise, you will not get a response.
Status
You can check the status code. Here, we got the status code 200, which means we got a successful response to the request.
Body
In the Body tab of the response box, we have multiple options to see the response in a different format.
Headers
Headers are the extra information that is transferred to the server or the client. In Postman, headers will show like key-value pairs under the headers tab. Click on the Headers link as shown in the below image:
Important Notes
Basic Auth is not secure over HTTP – always use HTTPS to encrypt the credentials.
Avoid using Basic Auth in production unless it’s over SSL and with additional protections.
Postman automatically handles the encoding — you don’t need to Base64 the credentials yourself.
We are done! Congratulations on making it through this tutorial and hope you found it useful! Happy Learning!!
The PATCH method is used to partially modify an existing resource. This operation updates an existing resource but does not require sending the entire body with the request. PUT modifies a record’s information and creates a new record if one is not available, and PATCH updates a resource without sending the entire body of the request. Unlike PUT Request, PATCH does partial update e.g. Fields that need to be updated by the client, only that field is updated without modifying the other field.
We will use the following URL for this Postman tutorial.
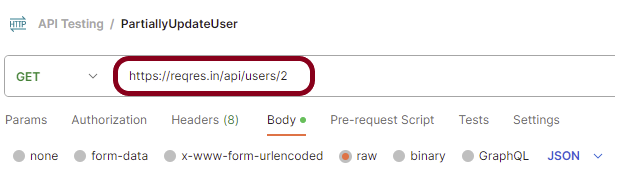
https://reqres.in/api/users/2
Sample Request Body
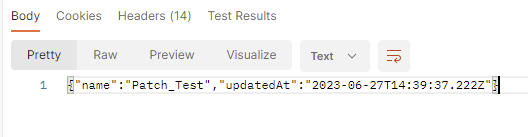
{
    "name": "Patch_Test"
}
Implementation Steps:
To create the first PATCH request in Postman, follow the following steps:
Create a Collection
Step 1: Create a Collection, click on Collections, and then click on the “+” plus button.
Step 2: Provide a name to the collection – “API Testing”.
Add a request to the Collection
Step 3: To create a new request, click on “Add a request” if it is a new Collection. Otherwise, click on the 3 dots and select “Add request”.
Step 4: Once you create a new request, then you will get the following window:
Enter the details of request
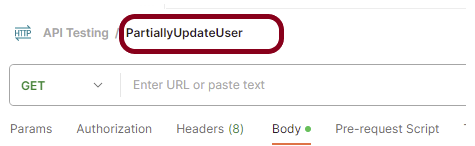
Step 5: Enter the “name” in the request. Here, the name is “PartiallyUpdateUser”.
Step 6:Enter the “URL” in the address bar.
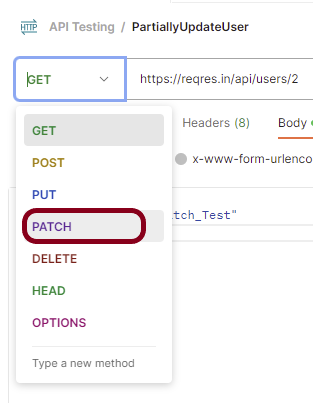
Step 7:Now, select the “PATCH” request from the list of request methods.
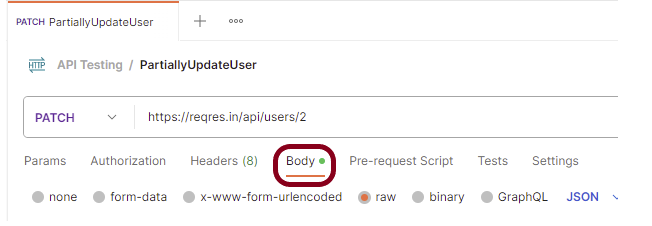
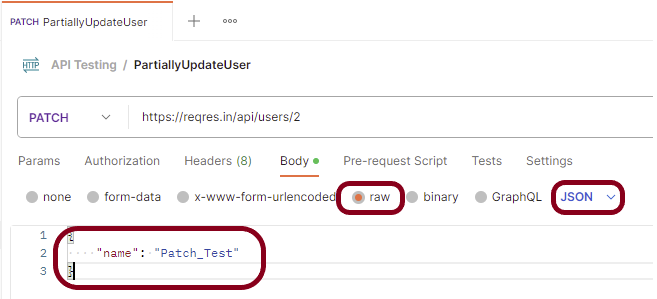
Step 8: Add a Request body to the Post request
For this, select the Body tab.
Now in the Body tab, select raw and select JSON as the format type from the drop-down menu, as shown in the image below. This is done because we need to send the request in the appropriate format that the server expects. Copy and paste the request body example mentioned at the beginning of the tutorial to the postman request Body.
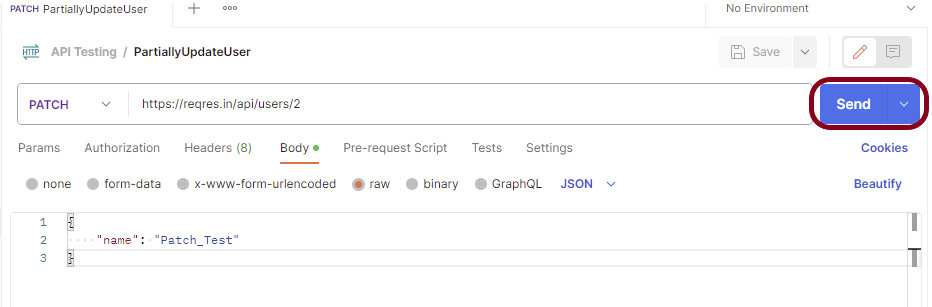
Step 9: Press the “Send” button.
Verify the Response
Step 10: Once you press the send button, you will get the response from the server. Make sure you have a proper internet connection; otherwise, you will not get a response.
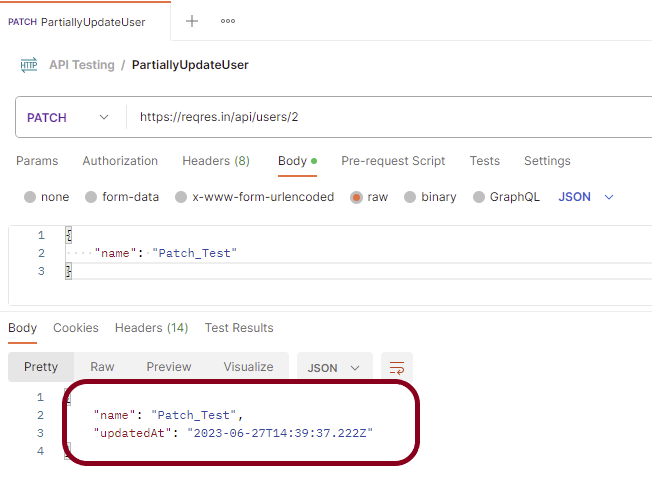
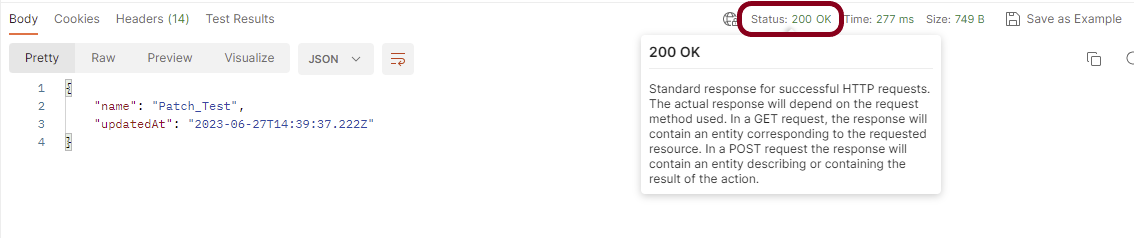
Status
You can check the status code. Here, we got the status code 200, which means we got a successful response to the request. In the case of new resource creation, the status code should be 201. But as this is a dummy API, we are getting a status code of 200.
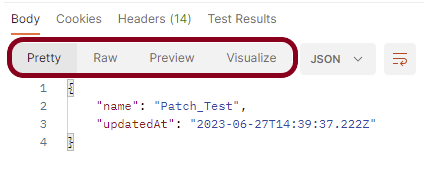
Body
In the Body tab of the response box, we have multiple options to see the response in a different format.
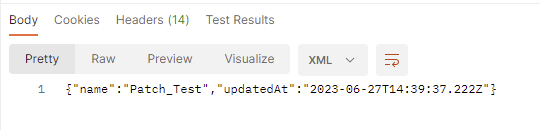
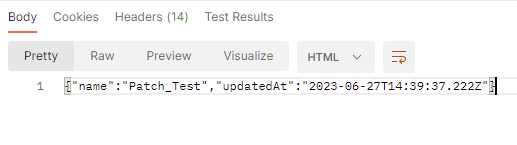
Format Type
Each request has a defined response to it as defined by the Content-Type header. That response can be in any format. Such as in the above example, we have JSON code file.
Below are the various format type present in Postman.
XML
HTML
Text
Headers
Headers are the extra information that is transferred to the server or the client. In Postman, headers will show like key-value pairs under the headers tab. Click on the Headers link as shown in the below image:
We are done! Congratulations on making it through this tutorial and hope you found it useful! Happy Learning!!
Postman can make HTTP calls using Simple Object Access Protocol (SOAP), a platform-independent messaging protocol specification.
POST requests are used to send data to the API server to create or update a resource. The data sent to the server is stored in the request body of the HTTP request. HTTP POST request provides additional data from the client to the server message body.
We will use the following URL for this Postman tutorial.
To create the a SOAP request in Postman, follow the following steps:
Create a Collection
Step 1: Create a Collection, click on Collections, and then click on the “+” plus button.
Step 2: Provide a name to the collection – “API Testing”.
Add a request to the Collection
Step 3: To create a new request, click on “Add a request” if it is a new Collection. Otherwise, click on the 3 dots and select “Add request”.
Step 4: Once you create a new request, then you will get the following window:
Enter the details of request
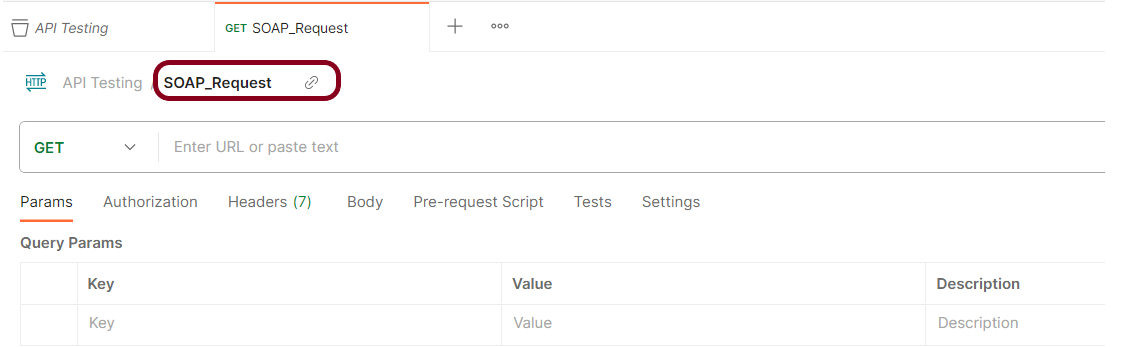
Step 5: Enter the “name” in the request. Here, the name is “SOAP_Request”.
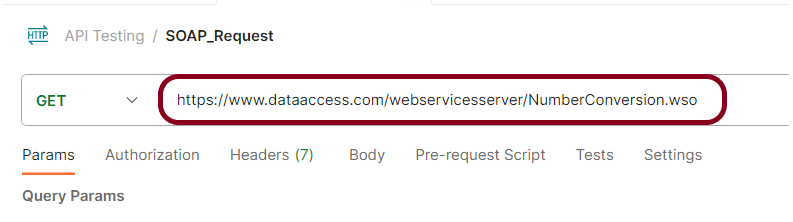
Step 6:Enter the “URL” in the address bar.
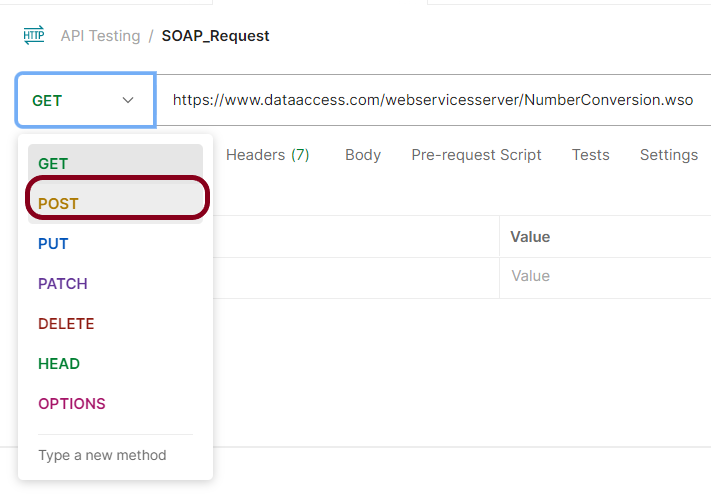
Step 7:Now, select the “POST” request from the list of request methods.
Step 8 – Add a Request body to the Post request
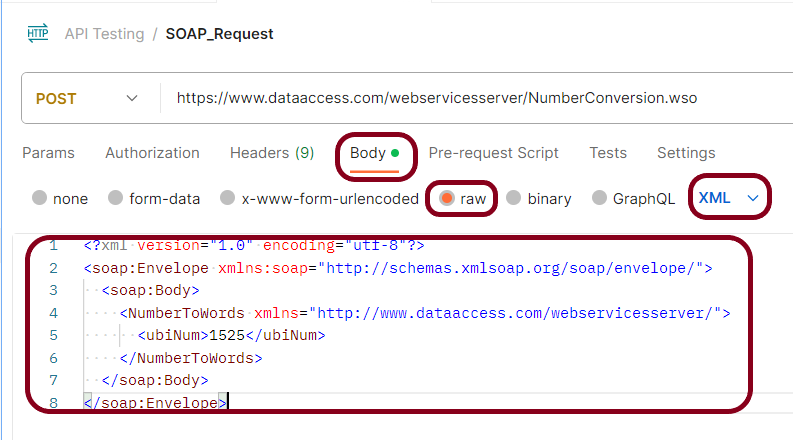
For this, select the Body tab.
Now in the Body tab, select raw and select XML as the format type from the drop-down menu, as shown in the image below. This is done because we need to send the request in the appropriate format that the server expects. Copy and paste the request body example mentioned at the beginning of the tutorial to the postman request Body.
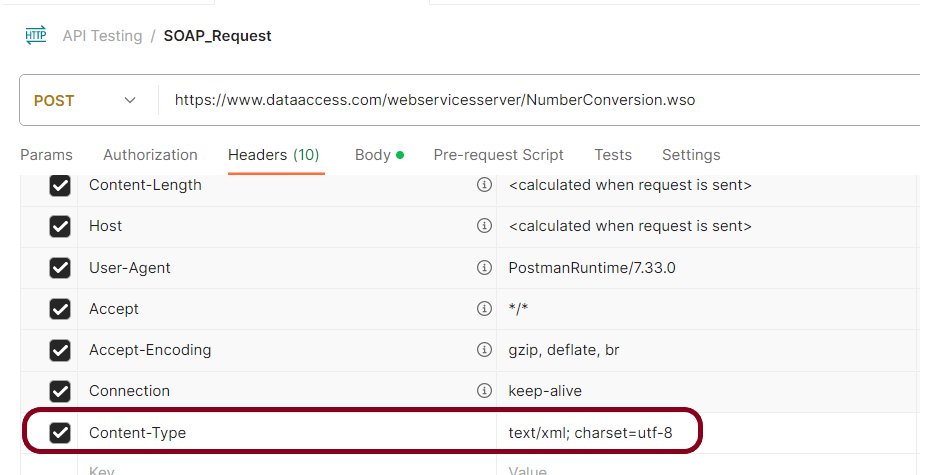
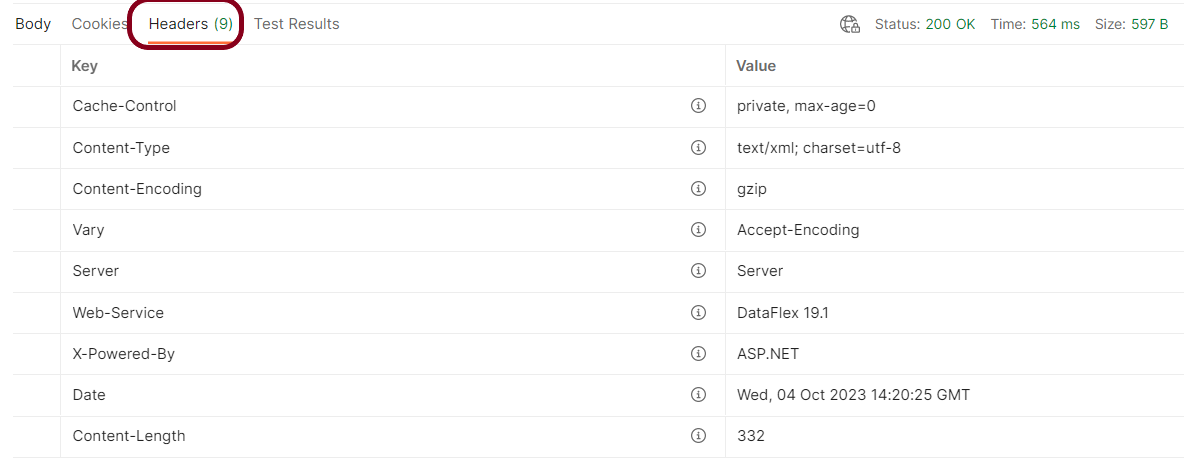
Step 9: Add “Content-Type” to the Header.
Here, Content-Type is text/xml; charset=utf-8.
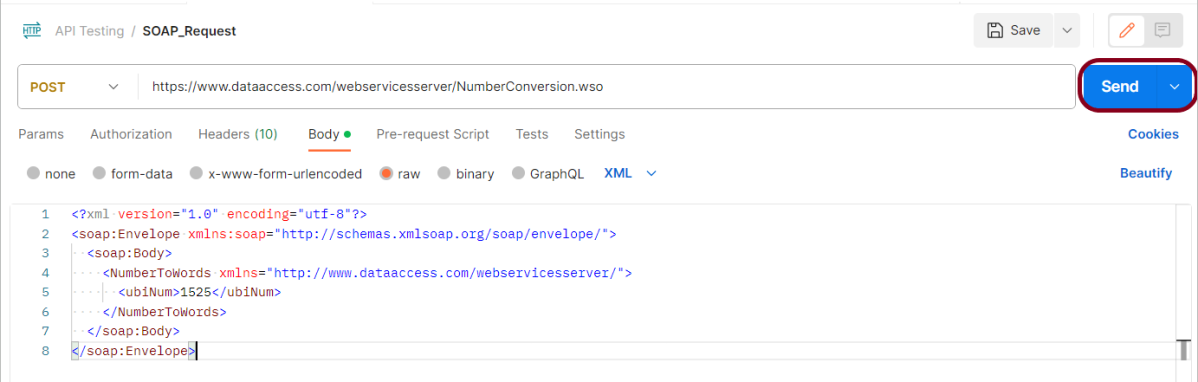
Step 10: Press the “Send” button.
Verify the Response
Step 11: Once you press the send button, you will get the response from the server. Make sure you have a proper internet connection; otherwise, you will not get a response.
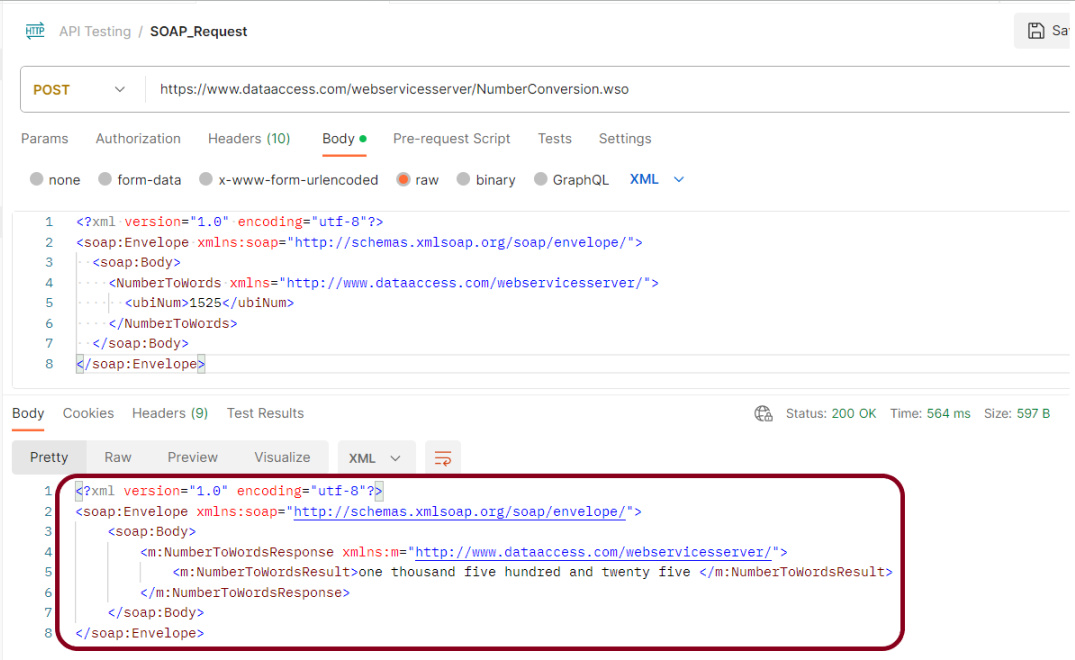
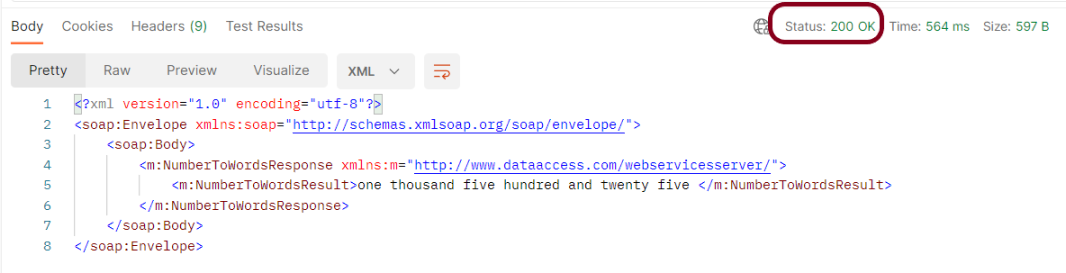
Status
You can check the status code. Here, we got the status code 200, which means we got a successful response to the request. In the case of new resource creation, the status code should be 201. But as this is a dummy API, we are getting a status code of 200.
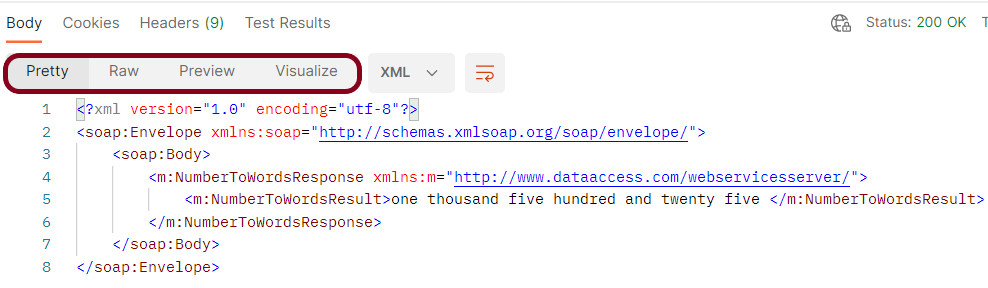
Body
In the Body tab of the response box, we have multiple options to see the response in a different format.
Format Type
Each request has a defined response to it as defined by the Content-Type header. That response can be in any format. Such as in the above example, we have XML code file.
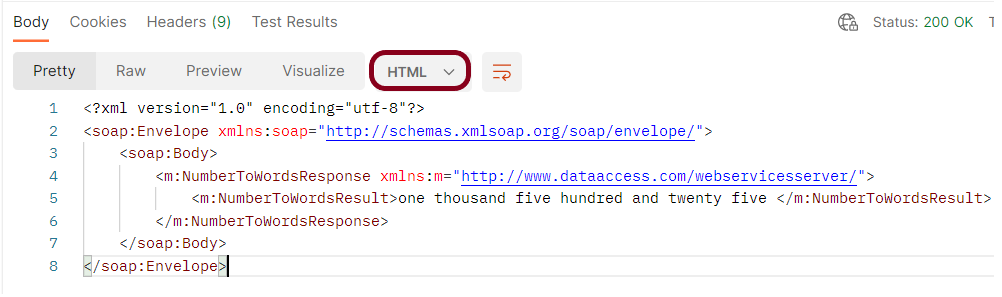
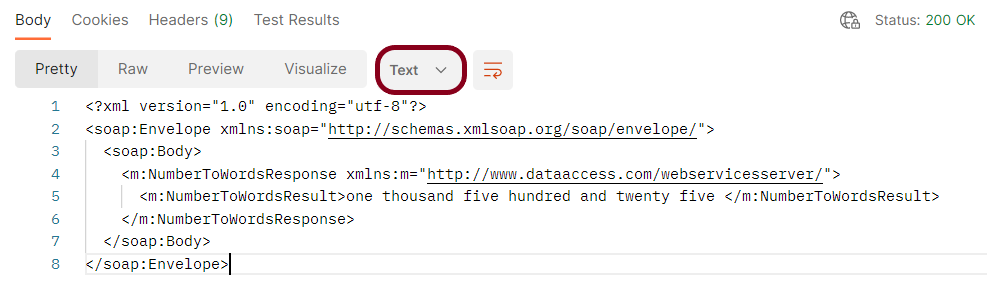
Below are the various format type present in Postman.
JSON
HTML
Text
Headers
Headers are the extra information that is transferred to the server or the client. In Postman, headers will show like key-value pairs under the headers tab. Click on the Headers link as shown in the below image:
We are done! Congratulations on making it through this tutorial and hope you found it useful! Happy Learning!!
The API chaining method is to create a sequence of API calls where the output of one API request is used as the input for the next. The technique is an automated and efficient way of executing a Multistep Process.
We will learn to get a response from one API and pass it as a request parameter in another API.
How to create a Collection?
Step 1: Create a Collection, click on Collections, and then click on the “+” plus button.
Step 2: Provide a name to the collection – “APIChainingDemo”.
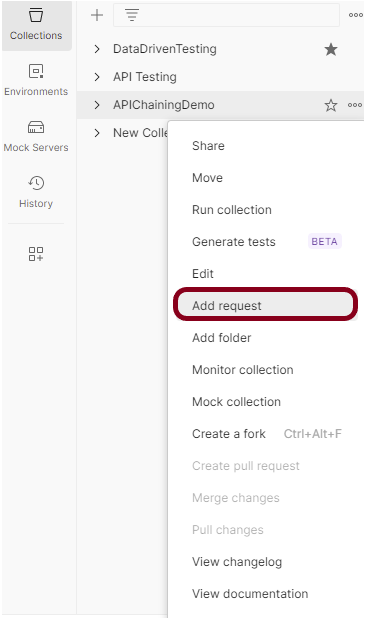
Add 2 requests in the Postman
Step 1: To add new requests to the collection, click on Collection and click Add requests (please note it’s also possible to create a request first and then add it to the collection, as well as move-in requests from one collection to another).
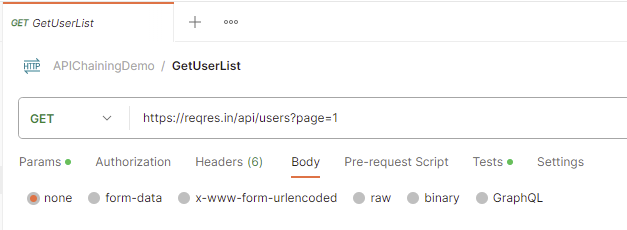
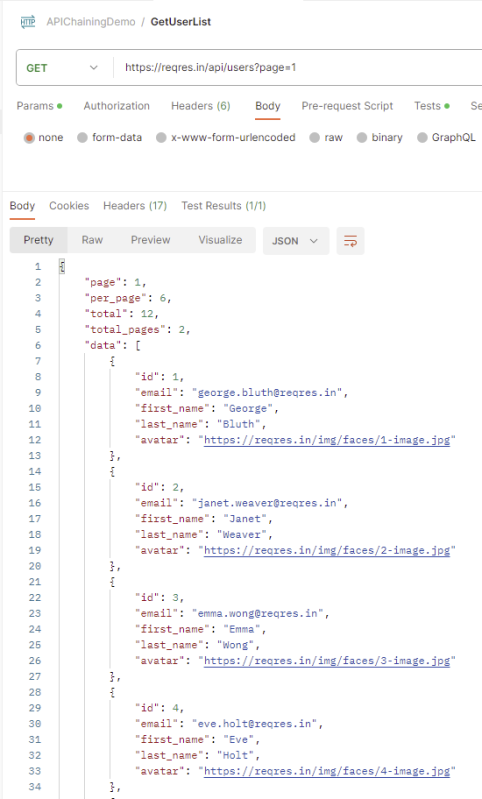
Request 1
https://reqres.in/api/users?page=1
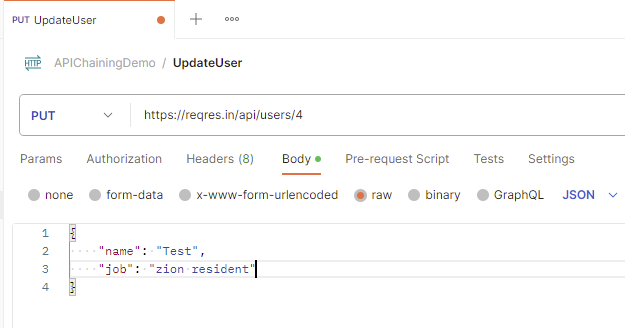
Request 2
https://reqres.in/api/users/4
Request Body
{
    "name": "Test",
    "job": "zion resident"
}
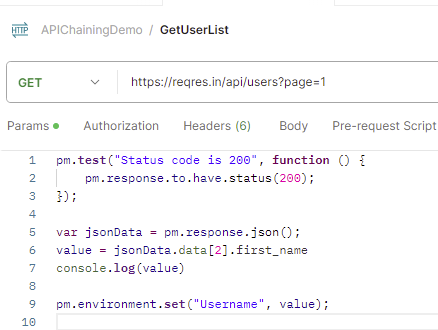
Below is the image of the first request in the collection.
The output of the first response is
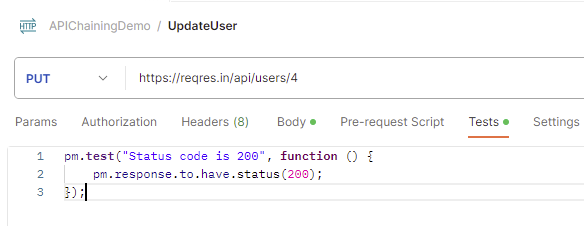
Below is the image of the second request in the collection.
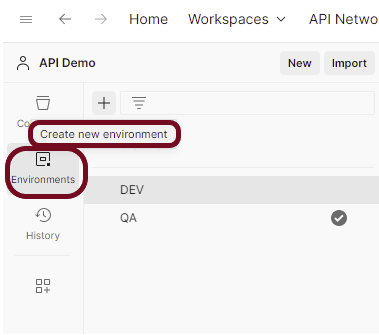
Use Environment variables to parameterize the value to be referred
Select Environmentson the left and select +.
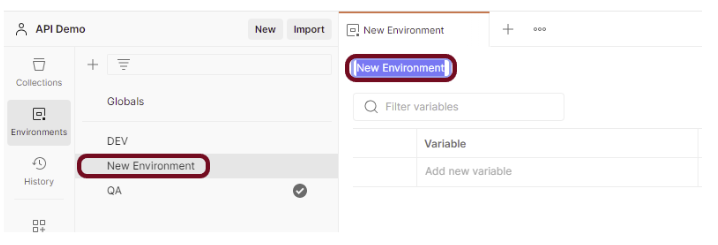
Enter a name for your environment, and initialize it with any variables you need. You can also specify variables for the environment later.
In the Keyfield, enter the name of the environment variable that will be used in the Postman Collection. In the Valuefield, enter the value that will replace the variable when the call is made. For example:
Add scripts to fetch the value from the response of the first API.
Go to the Test tab of the first request and add the script to get the value of first_name.
The first test will check if the status code for the first response is 200.
The second test will fetch the value of the 3rd first_name from the response.
The third test will assign the value fetched in the previous script to the “Username” variable.
pm.test("Status code is 200", function () {
    pm.response.to.have.status(200);
});

var jsonData = pm.response.json();
value = jsonData.data[2].first_name
console.log(value)

pm.environment.set("Username", value);
Go to the Test tab of the second request and add the script to verify the status code.
pm.test("Status code is 200", function () {
    pm.response.to.have.status(200);
});
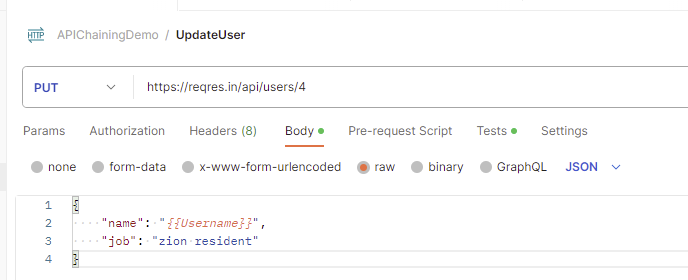
Update the fetched values in the env variables
Go to the new request and select the environment created just now. In this case, I have selected “APIChainingEnv” environment. Replace the hard code value of first_name with {{Username}}.
Run the second request
The first request will fetch the first_name value and pass it to the name in the second request. We can see that “Emma” name is fetched from the first request and passed to the second request.
Congratulations. This tutorial has explained the steps to perform API Chaining in the Postman. Happy Learning!!
Postman contains a full-featured testing sandbox that enables you to write and execute JavaScript-based tests for your API. You can then integrate Postman with your CI/CD build system using Newman, the command-line collection runner for Postman. In this tutorial, we are going to learn how we can create a Newman Report in Jenkins.
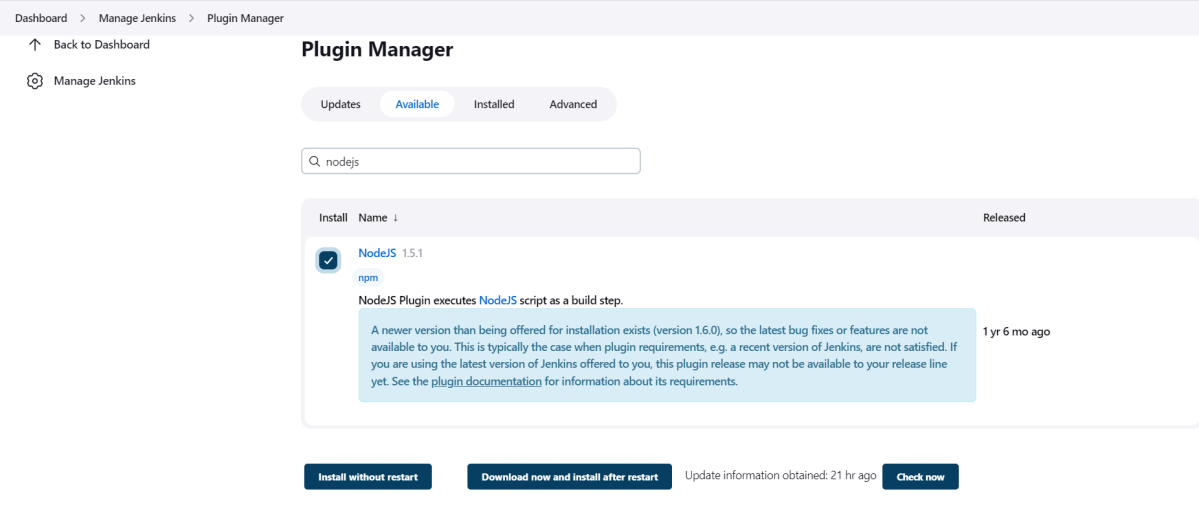
To generate a Performance Report in Jenkins, we need to download NodeJS Plugin. Please refer to this tutorial to install the plugin – How to install Plugins in Jenkins.
Go to Manage Jenkins > Manage Plugins and install the NodeJS plugin.
Step 2: Global Tool Configuration for NodeJS
Go to Manage Jenkins > Global Tool Configuration and under NodeJS, select Add NodeJS.
Enter a name for the Node.js installation.
Select the version of NodeJS installed on your machine from the Version dropbox.
In Global npm packages to install, enter newman.
Click on the Apply and Save buttons.
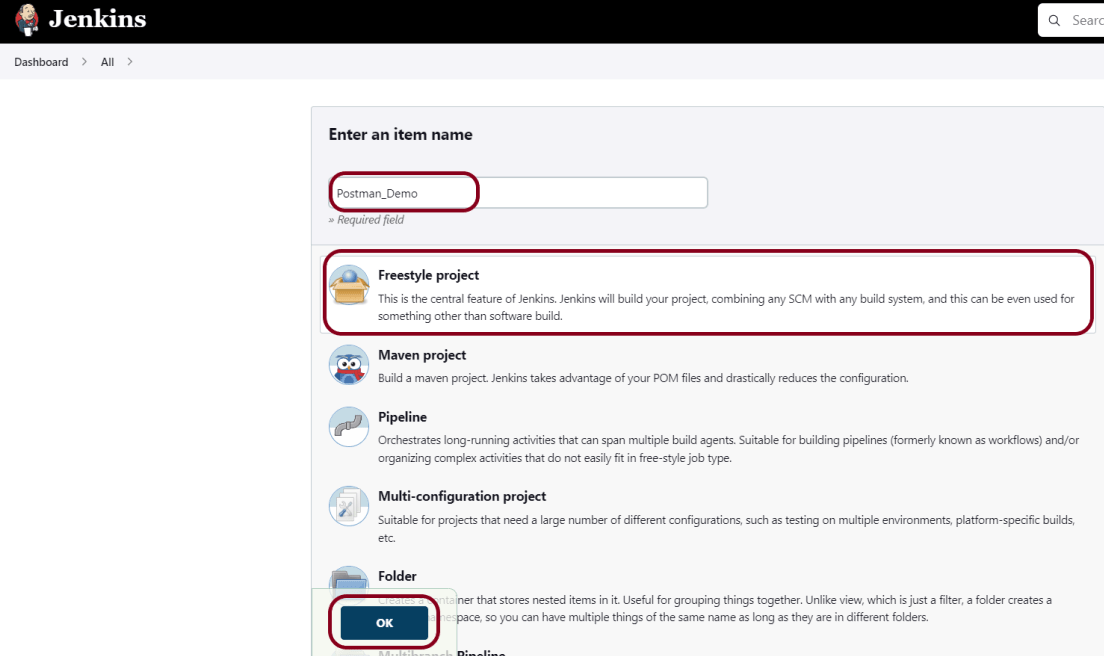
Step 3: Create a new FreeStyle project
Give the Name of the project – Postman_Demo
Click on the FreeStyle project.
Click on the OK button.
In the General section, enter the project description in the Description box.
Step 4: Source Code Management
Select Source Code Management as None if the project is locally present on the machine.
Step 5: Build Environment
Select the “Provide Node & npm bin/folder to PATH” option.
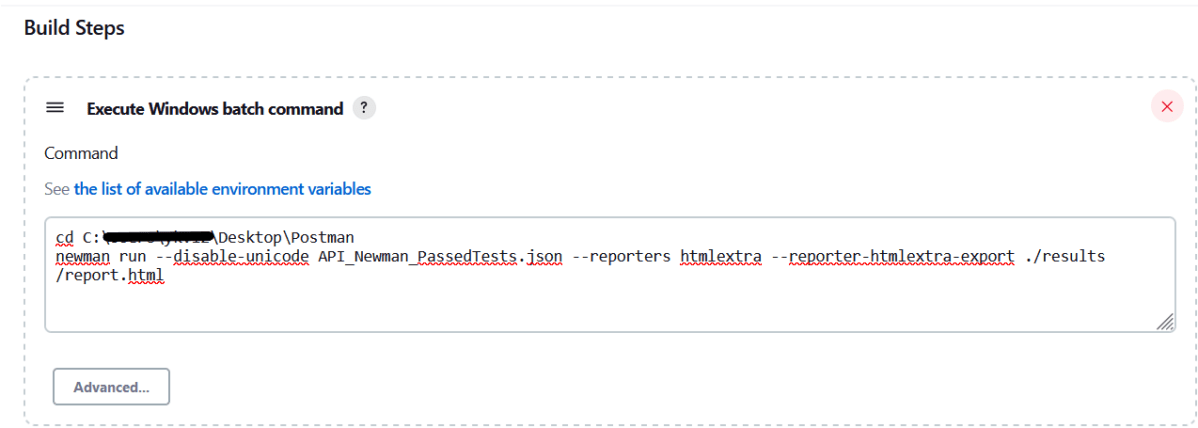
Step 6: Select Execute Windows batch command
In the Build Steps section, select Execute Windows batch command.
Use the below command to go to the path where the JMeter is placed in your system.
cd C:\Users\Vibha\Desktop\Postman
newman run --disable-unicode API_Newman_PassedTests.json --reporters htmlextra --reporter-htmlextra-export ./results/report.html
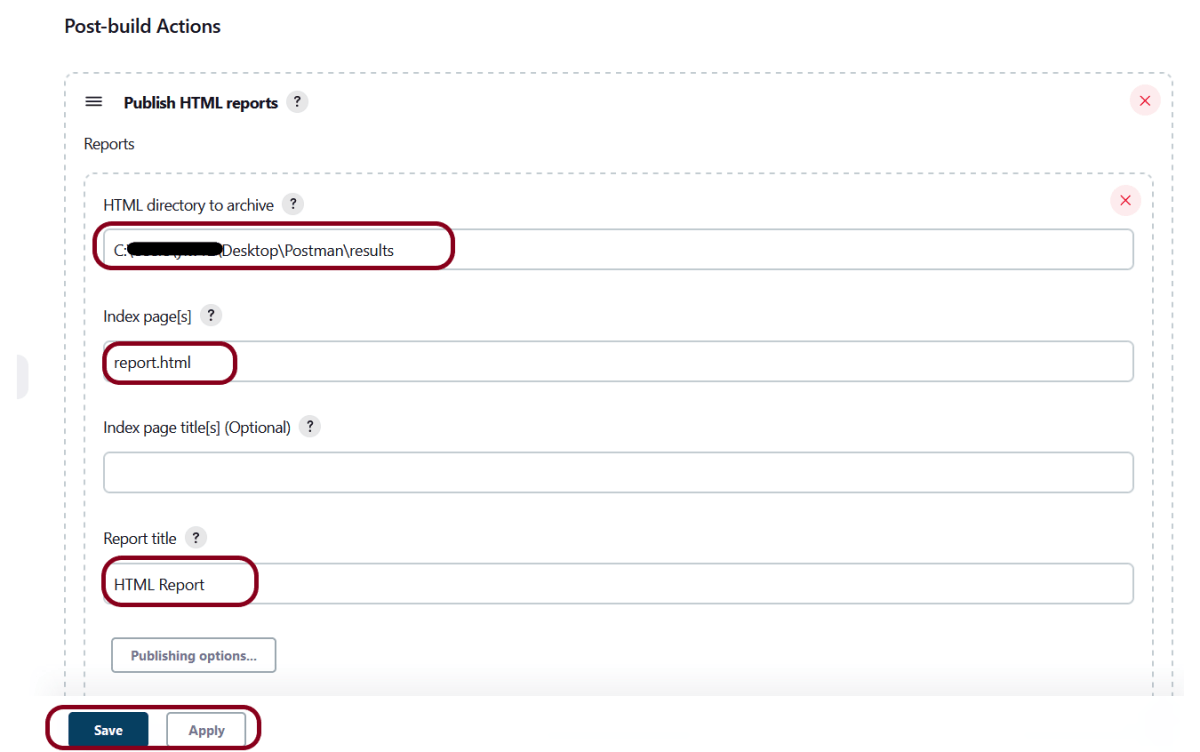
Step 7: Select “Publish HTML reports” from “Post Build Actions”
Scroll down to “Post Build Actions” and click on the “Add Post Build Actions” drop-down list. Select “Publish HTML reports“.
Enter the HTML directory to archive – ..\Postman\results, Index page[s] – report.html and Report title – HTML Report.
Click on the Apply and Save buttons.
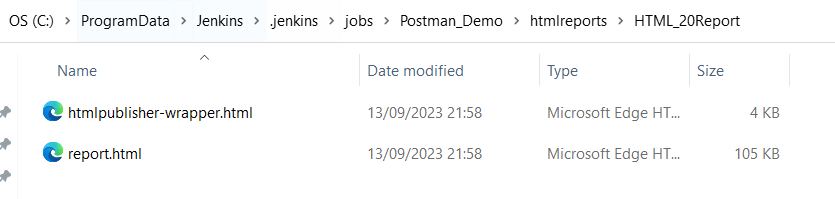
If you want to see where the report is saved on desktop, go to – C:\ProgramData\Jenkins.jenkins\jobs\Postman_Demo\htmlreports\HTML_20Report.
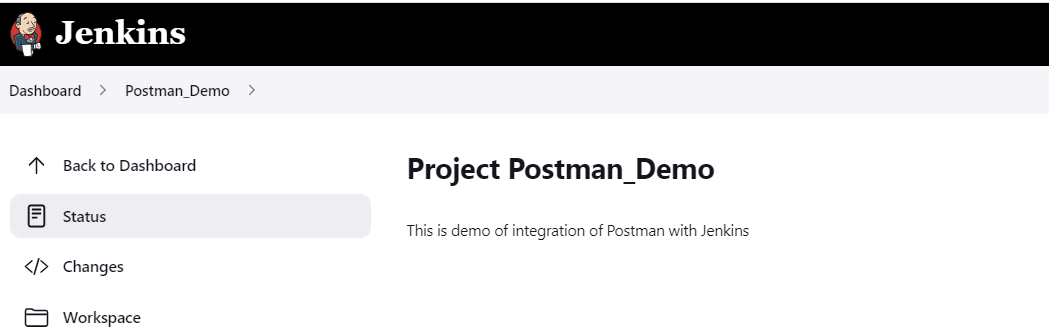
We have created a new project “Postman_Demo” with the configuration to run the Postman scripts.
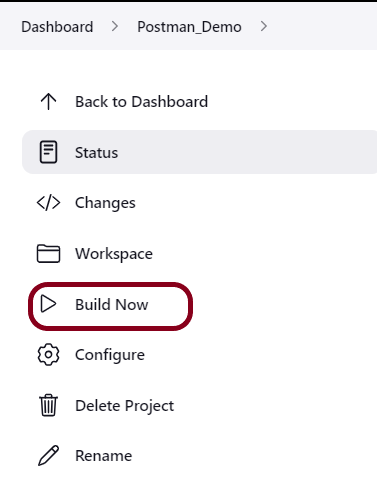
Step 8: Execute the tests
Let’s execute it now by clicking on the “Build Now” button.
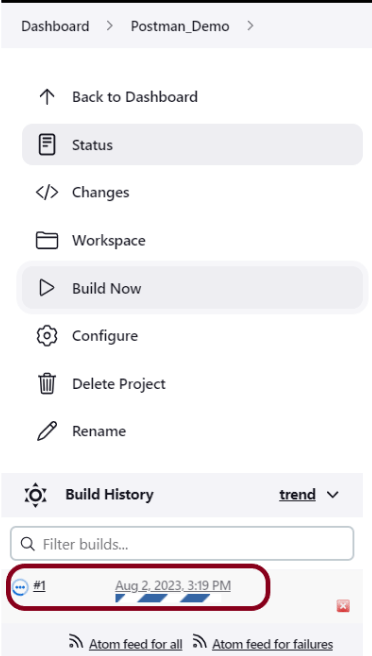
Right-click on Build Number (here in my case it is #1).
Click on Console Output to see the result.
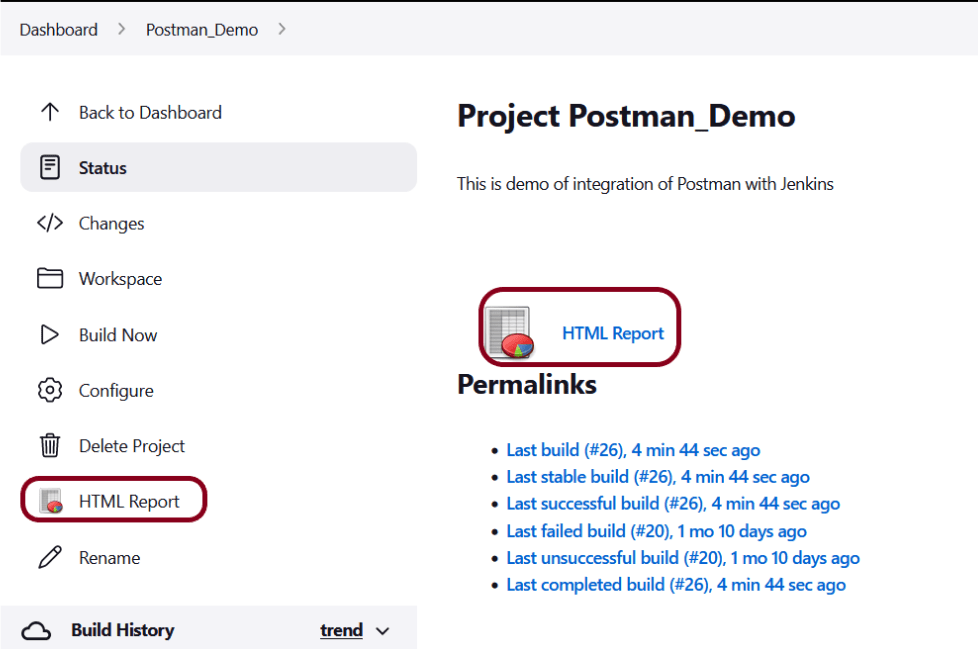
Step 9: View the HTML Report
Once the execution is completed, click on go “Back to Project“, and we could see a link to view the “HTML Report“.
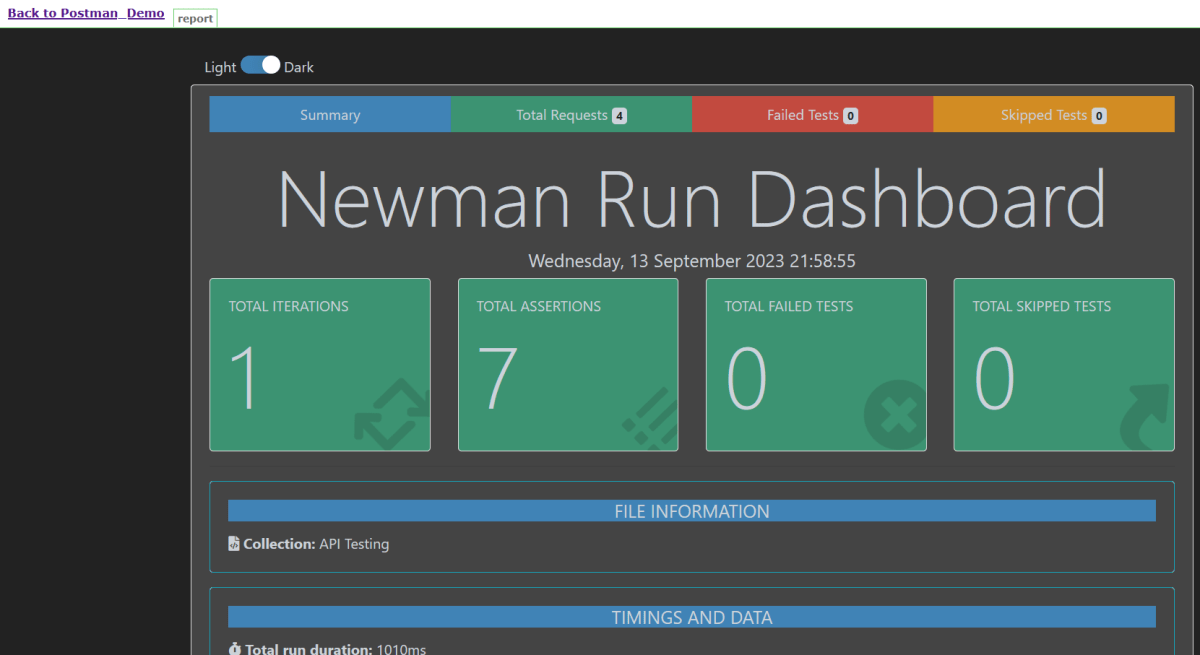
Below is the HTML Report generated in Jenkins.
In the case, we see that HTML Report does not look very pretty. The reason is that CSS is stripped out because of the Content Security Policy in Jenkins.
Go to Manage Jenkins -> Manage Nodes and Clouds. Click on the Script Console option. Type in the following command and Press Run. If you see the output as ‘Result:’ then the protection is disabled. Re-Run your build and you can see that the new HTML files archived will have the CSS enabled.
You can share your collections, collection folders, APIs, and environments with collaborators. There are several different ways to share an element. Here, we are using API to share the Postman Collection.
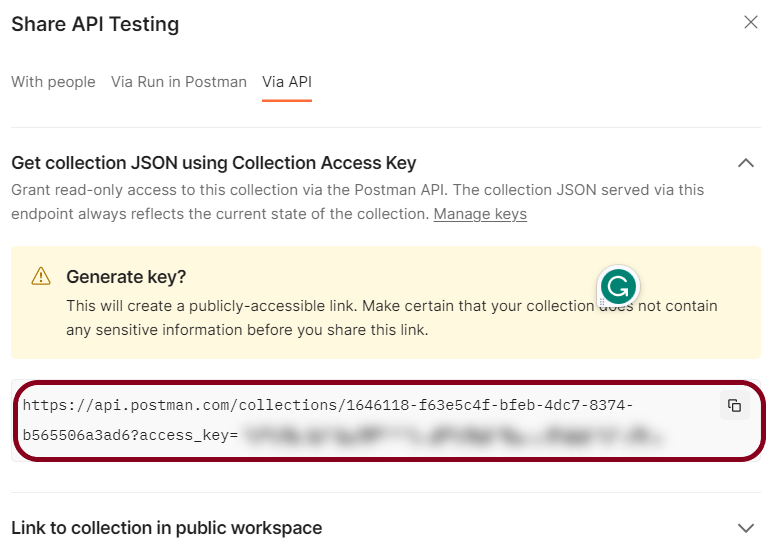
To share a collection’s JSON using the Postman API, do the following:
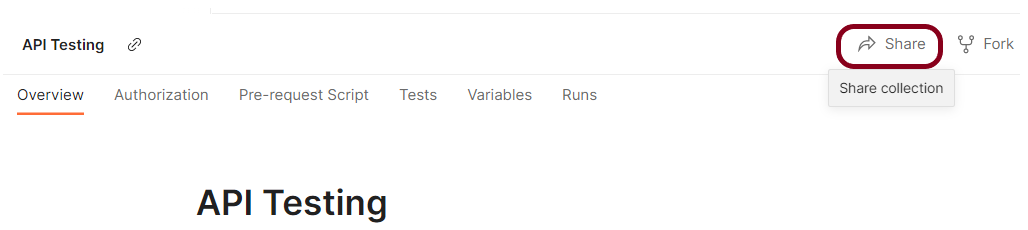
Step 1 – Go to your collection – Click the arrow – Click on the Share button.
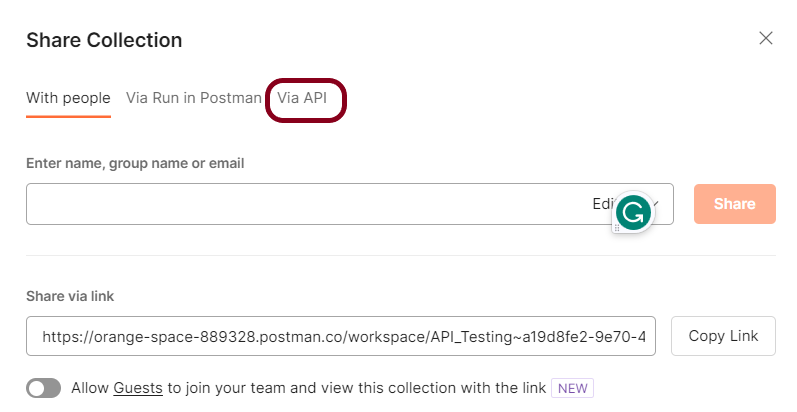
Step 2 – Select “Via API”.
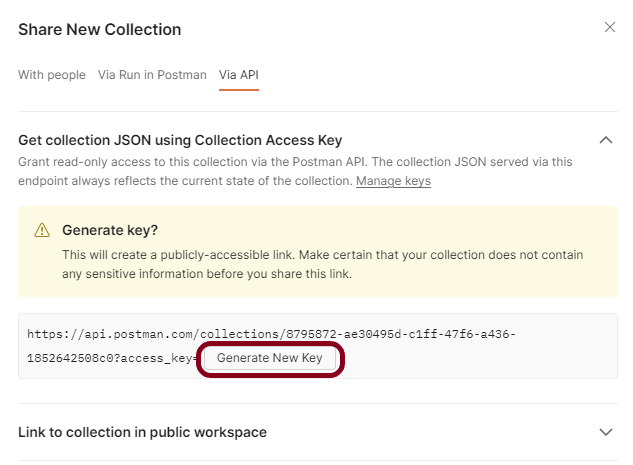
Step 3 – Select Get collection JSON using Collection Access Key
Step 4 – Select Generate New Key to create a read-only collection access key. This key expires after 60 days of inactivity.
Step 5 – Copy the link and go to the Command line. Here we can run the collection using the collection URL using our Newman tool. Newman is the command-line runner for the postman.
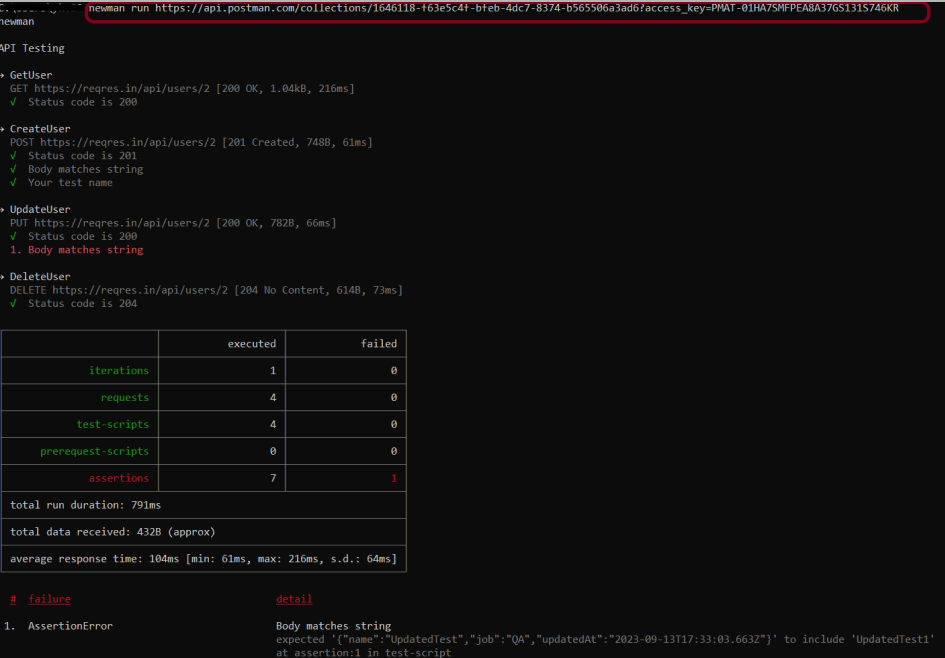
Run the collection through URL by running the command:
newman run <copied URL>
Note: If Newman is not installed, please refer to this tutorial.
It starts running the Collection and displays the result. The same command is used to run the collection in the Remote system, even if that system has no Postman app installed.