How to run PyTest Framework in GitHub Actions

Last Updated On

HOME

This tutorial explains the steps to create a GitHub Action for the PyTest Framework and execute the tests in that workflow.

Table of Contents

Why GitHub?

GitHub serves as a collaborative platform that supports version control, code collaboration, automated testing, and issue tracking, all of which are crucial elements in the software testing process. It promotes transparency, collaboration, and efficiency in the development and testing workflows.

CI/CD pipelines have contributed to the success of the DevOps cycle in all software development projects. This is a holistic process that bridges development and operations. Continuous integration helps development teams deploy code efficiently, and continuous delivery automates code deployment.

Implementation Steps

Step 1 – Create GitHub Actions and Workflows

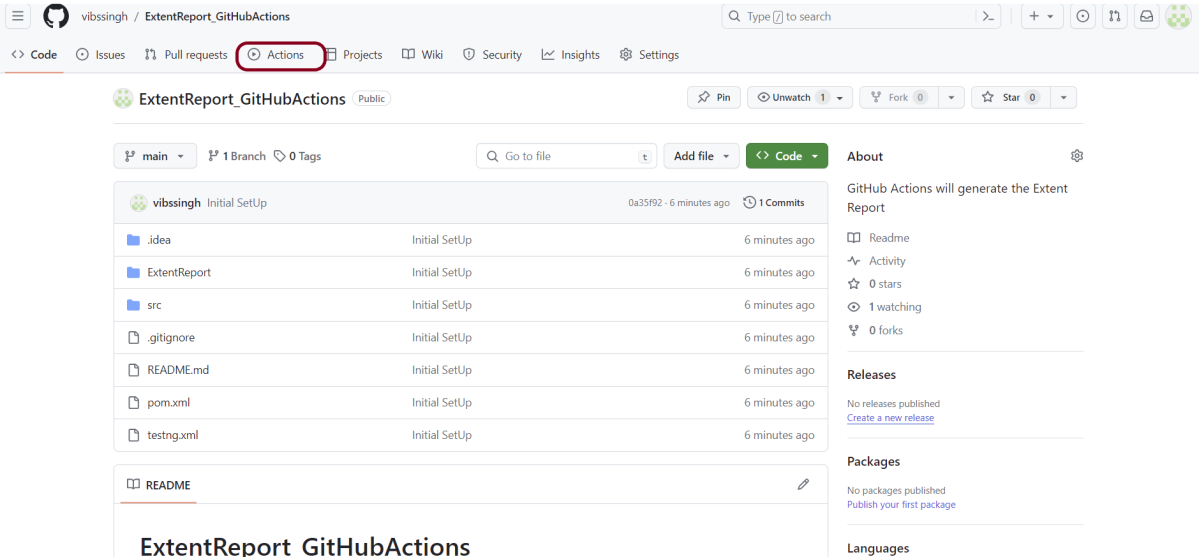
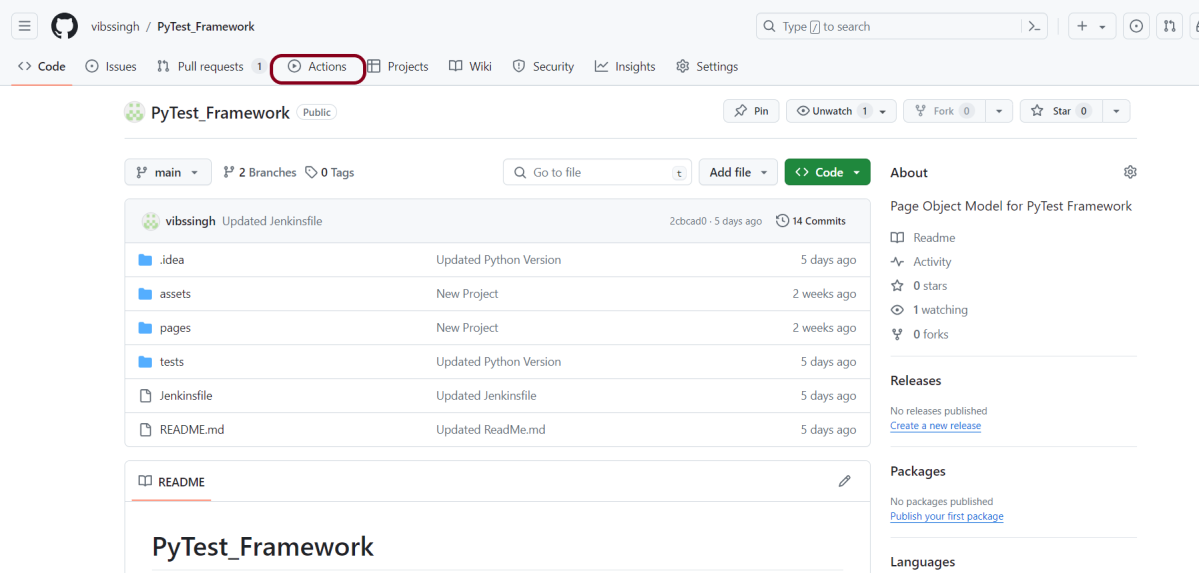
I have a repository available in GitHub – “PyTest_Framework” as shown in the below image. Go to the “Actions” tab.  Click on the “Actions” tab.
Step 2 – Select the type of Actions

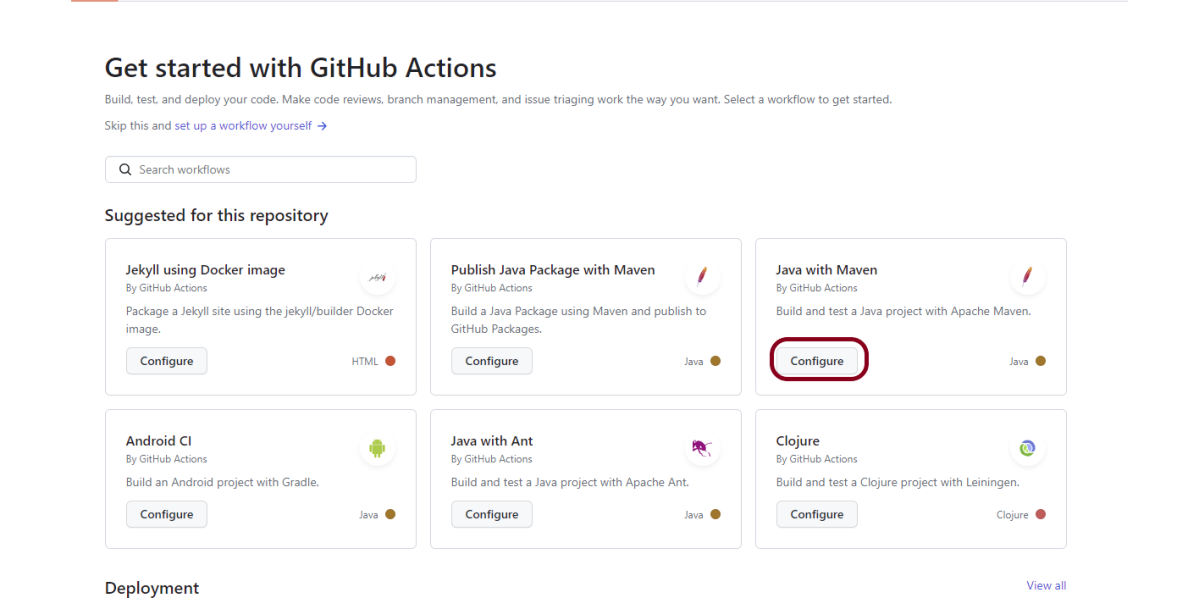
You will see that GitHub recommends Actions depending on the project. In our case, it is recommending actions suitable for a Java project. I have selected the “Python application” option as my project is built in Maven.

Step 3 – Generation of Sample pipeline

If you choose an existing option, it will automatically generate a .yaml for the project as shown below.

We will replace the current workflow with the following yml file as shown below:

name: PyTest Framework - Python
on:
  push:
    branches: [ "main" ]
  pull_request:
    branches: [ "main" ]

permissions:
  contents: read

jobs:
  test:
    runs-on: ubuntu-latest

    steps:
      - uses: actions/checkout@v4
      - name: Set up Python 3.12.1
        uses: actions/setup-python@v4
        with:
          python-version: 3.12.1

      - name: Install dependencies
        run: |
          python -m pip install --upgrade pip
          pip install pytest
          pip install pytest-selenium
   
      - name: Test with PyTest
        run: pytest --html=tests/Reports/Report.html  

      - name: Test Report Generation
        uses: actions/upload-artifact@v4
        if: success() || failure()
        with:
          name: Pytest Report           # Name of the folder
          path: tests/Reports           # Path to test results

python -m pip install --upgrade pip

pip install pytest
pip install pytest-selenium

  - name: Test with PyTest
    run: pytest --html=tests/Reports/Report.html  

Step 4 – Commit the changes

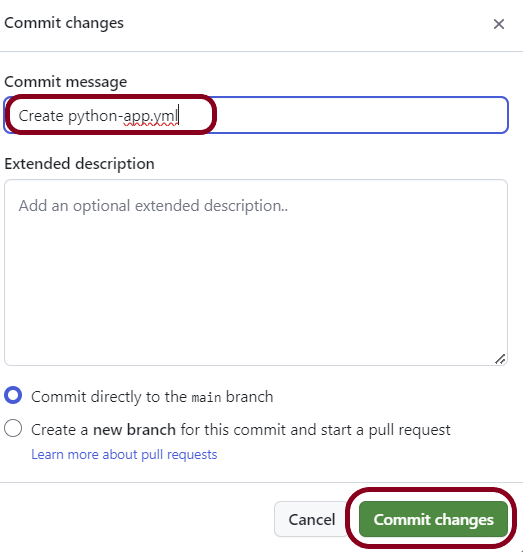
After the changes, hit the “Start Commit” button.

This will give the option to add a description for the commit. It will also enable the user to commit either to the main branch or commit to any other branch that exists in the project. My personal prefernece is to create a new branch like shown below and then commit the changes in that new branch.
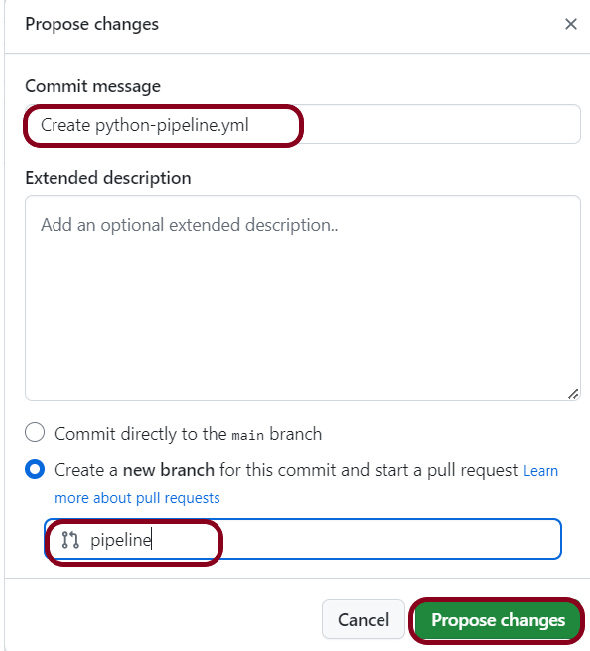
Step 5 – Verify that the workflow is running

Next, head over to the “Actions” tab, and you will see your YAML workflow file present under the tab. The yellow sign represents that the job is in the queue.

In Progress – When the job starts building and running, you will see the status change from “Queued” to “In progress”.

Passed – If the build is successful, you will see a green tick mark. 

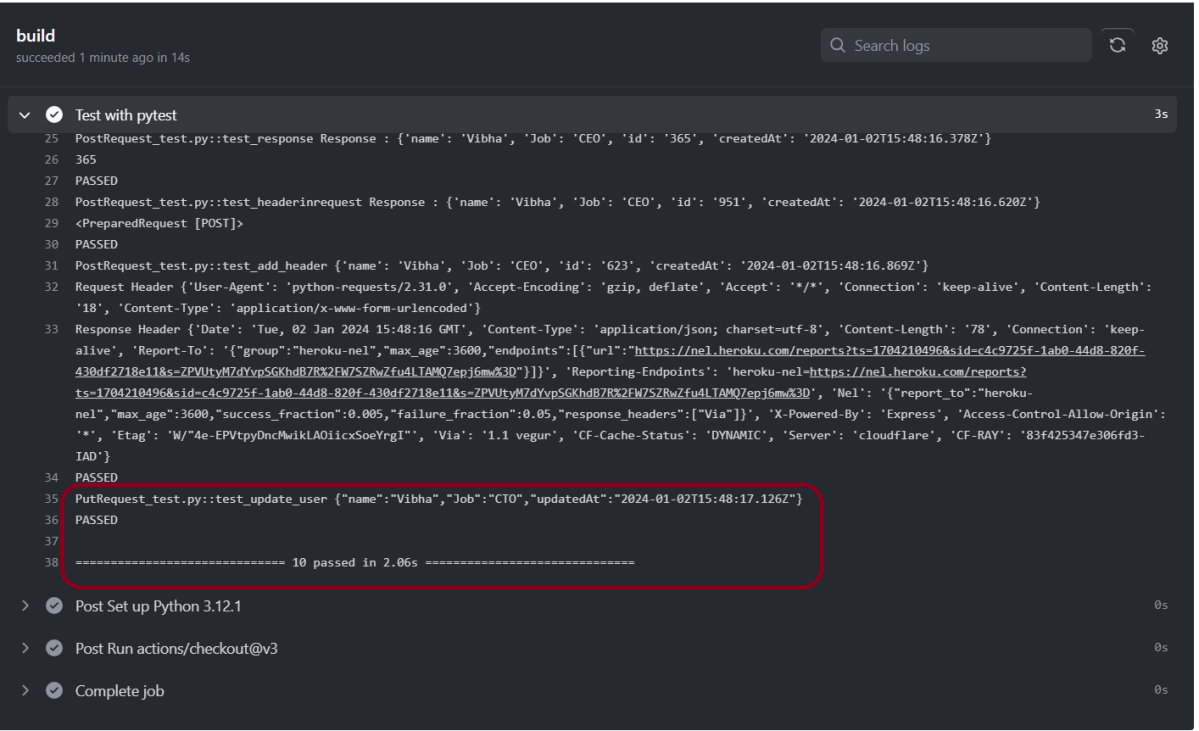
Click on the workflow and the below screen is displayed. It shows the status of the run of the workflow, the total time taken to run the workflow, and the name of the .yml file.

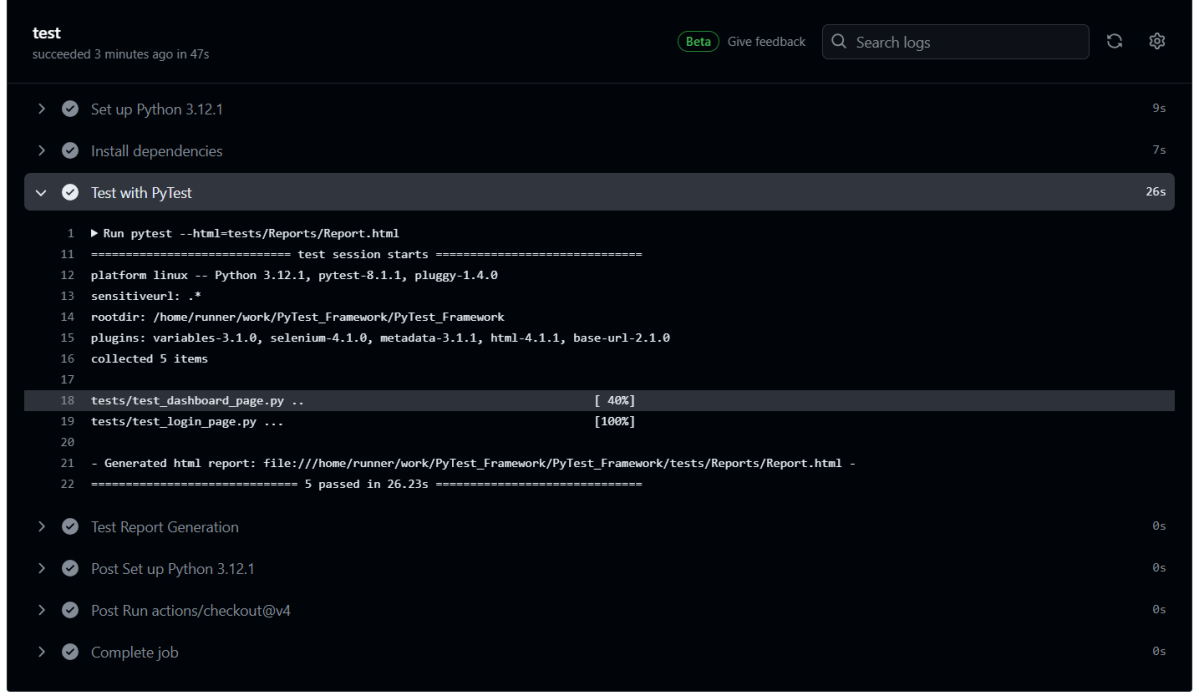
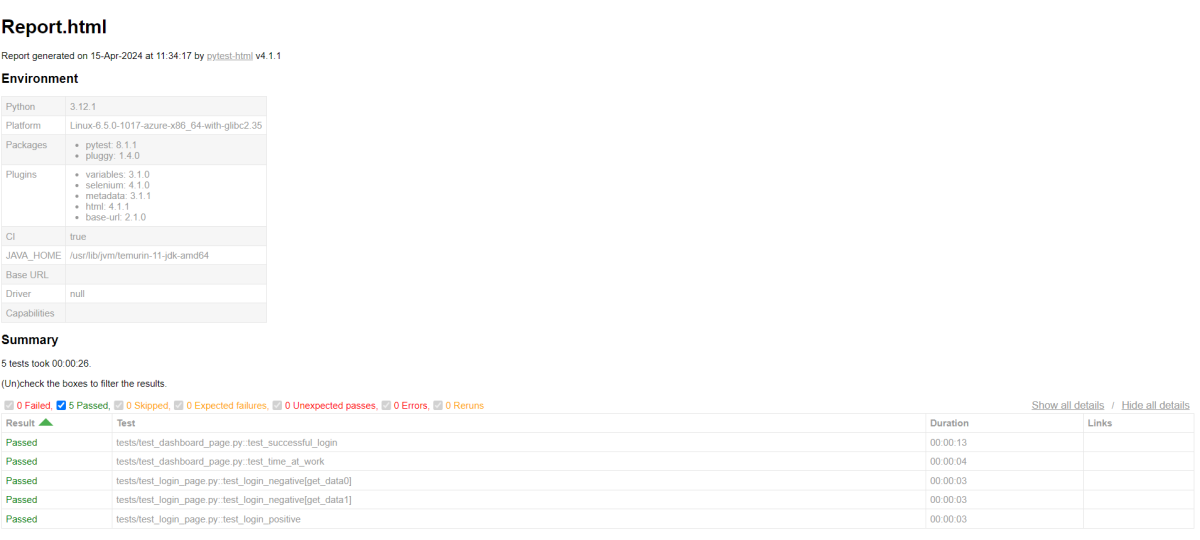
Below shows all the steps of the workflow.

The complete code can be found here on GitHub – vibssingh/PyTest_Framework.

Congratulations! We just created our CI workflow for running our Python Robot Framework.

How to run Python Rest API tests with GitHub Actions

Last Updated On

HOME

This tutorial explains the steps to create a GitHub Action for the Rest API tests built in Python and execute the tests in that workflow.

Table of Contents

Why GitHub?

Implementation Steps

Step 1 – Create GitHub Actions and Workflows

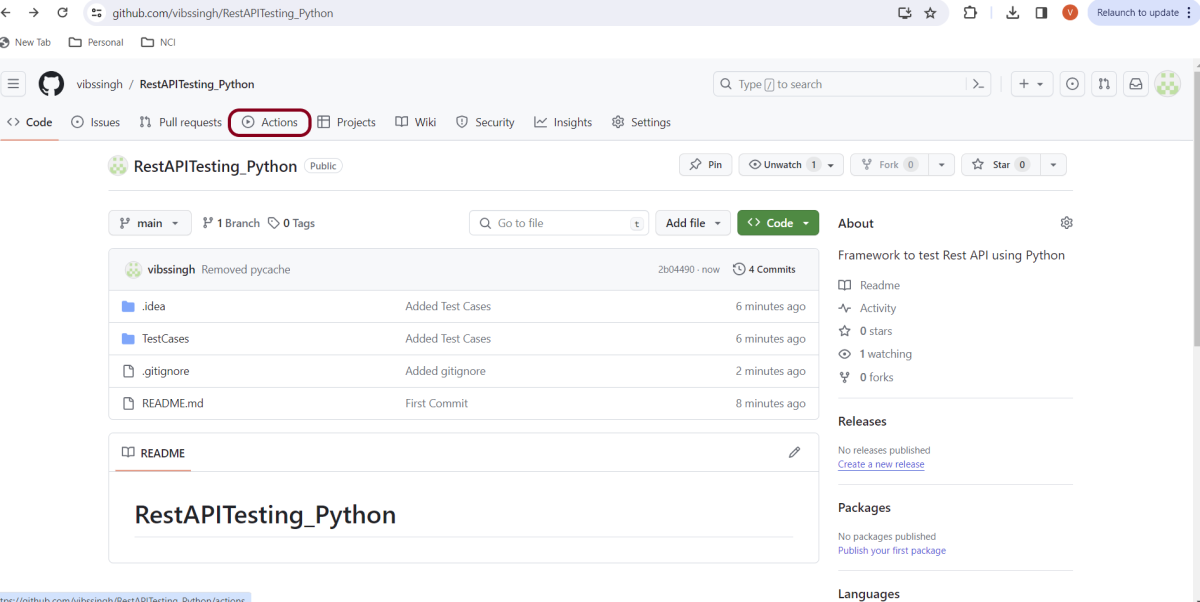
I have a repository available in GitHub – RestAPITesting_Python as shown in the below image. Go to the “Actions” tab.  Click on the “Actions” tab.

Step 2 – Select the type of Actions

You will see that GitHub recommends Actions depending on the project. In our case, it is recommending actions suitable for a Python project. I have selected the “Python application” option.

Step 3 – Generation of Sample pipeline

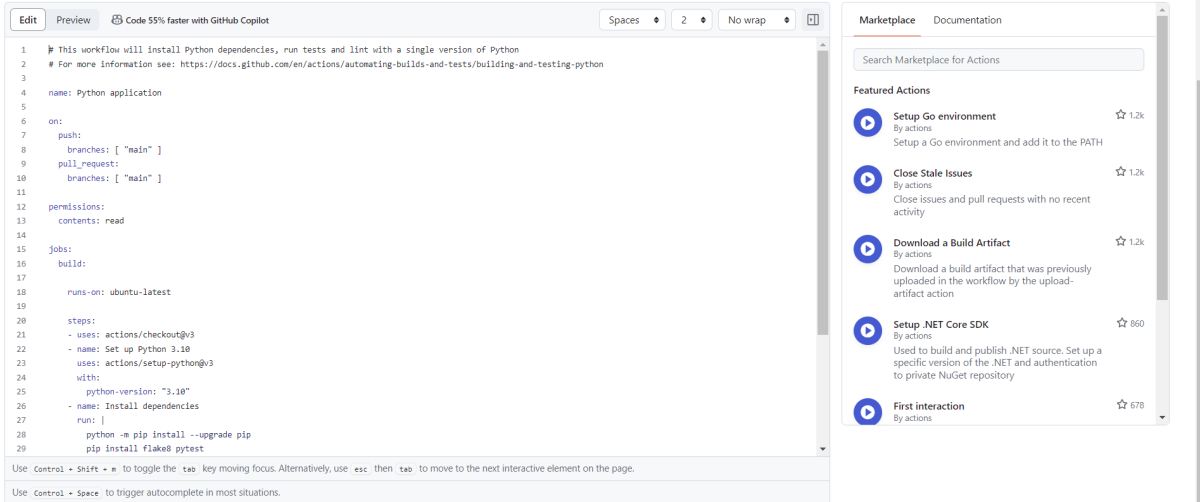
If you choose an existing option, it will automatically generate a .yaml for the project as shown below.

We will replace the current workflow with the following yml file as shown below:

# This workflow will install Python dependencies, run tests and lint with a single version of Python
# For more information see: https://docs.github.com/en/actions/automating-builds-and-tests/building-and-testing-python

name: Python application

on:
  push:
    branches: [ "main" ]
  pull_request:
    branches: [ "main" ]

permissions:
  contents: read

jobs:
  build:

    runs-on: ubuntu-latest

    steps:
    - uses: actions/checkout@v3
    - name: Set up Python 3.12.1
      uses: actions/setup-python@v3
      with:
        python-version: "3.12.1"
   
    - name: Install dependencies
      run: |
        python -m pip install --upgrade pip
        pip install pytest
        pip install requests
       
    - name: Test with pytest
      run: |
        cd TestCases
        pytest  --verbose --capture=no

Step 4 – Commit the changes

After the changes, hit the “Start Commit” button.

This will give the option to add a description for the commit. It will also enable the user to commit either to the main branch or commit to any other branch that exists in the project. Click on the “Commit new file” button to set up the workflow file.

Step 5 – Verify that the workflow is running

Next, head over to the “Actions” tab, and you will see your YAML workflow file present under the tab. The yellow sign represents that the job is in the queue.

In Progress – When the job starts building and running, you will see the status change from “Queued” to “in progress”.

Passed – If the build is successful, you will see a green tick mark. 

Click on the workflow and the below screen is displayed. It shows the status of the run of the workflow, the total time taken to run the workflow, and the name of the .yml file.

Below shows all the steps of the workflow.

The complete code can be found here on GitHub – vibssingh/RestAPITesting_Python.

Congratulations! We just created our CI workflow for running our Rest API test cases for Python.

How to host Extent Report on GitHub Pages with Github Actions

Last Updated On

HOME

This tutorial explains the steps to host Extent Reports on GitHub Pages with GitHub Actions.

Table of Contents

What is GitHub Action?

Important points

1. The Web Application tests need to run in the headless mode in GitHub Workflow.

          ChromeOptions options = new ChromeOptions();
          options.addArguments("--no-sandbox");
          options.addArguments("--disable-dev-shm-usage");
          options.addArguments("--headless");
	      driver = new ChromeDriver(options);

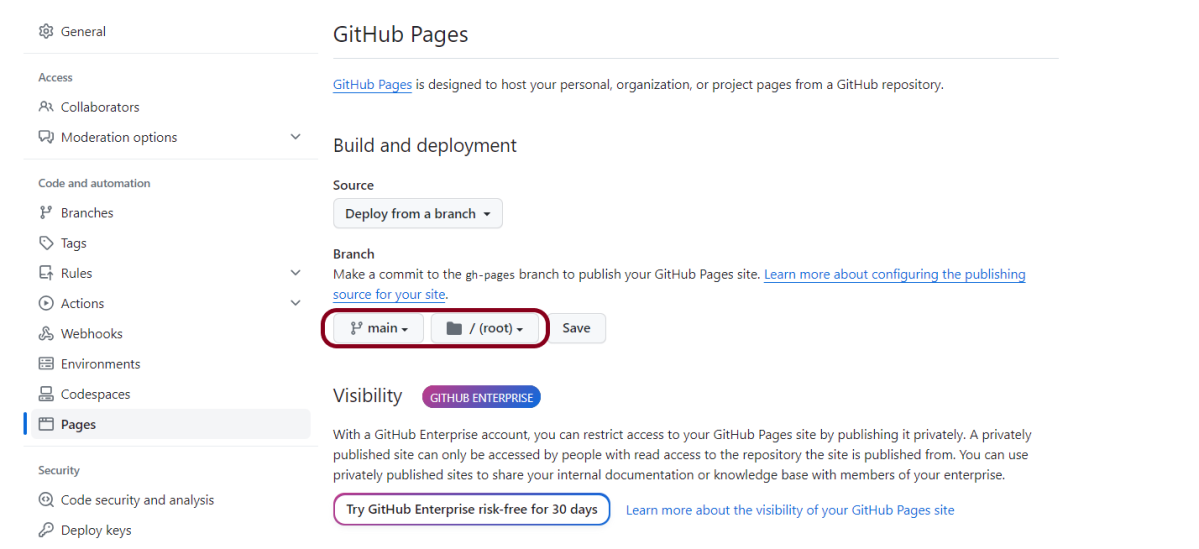
2. Use the below code to use gh-pages branch to host the Extent Report:

    - name: Deploy pages
      uses: JamesIves/github-pages-deploy-action@v4.5.0
      with:
        branch: gh-pages
        folder: ./ExtentReport/Reports

Implementation Steps

Step 1 – Create GitHub Actions and Workflows

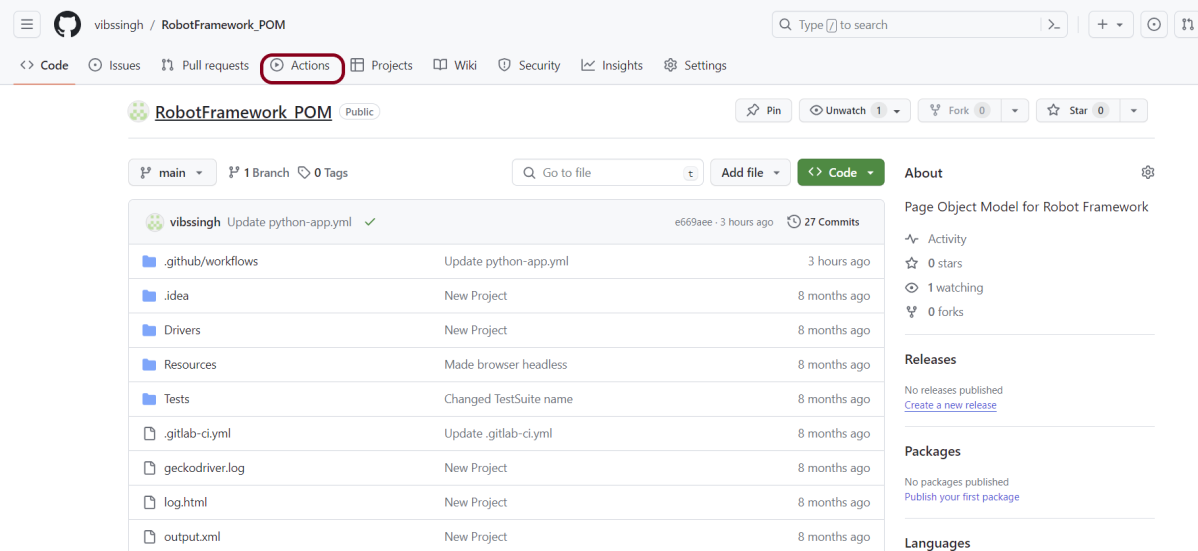
I have a repository available in GitHub – ExtentReport_GitHubActions as shown in the below image. Go to the “Actions” tab.  Click on the “Actions” tab.

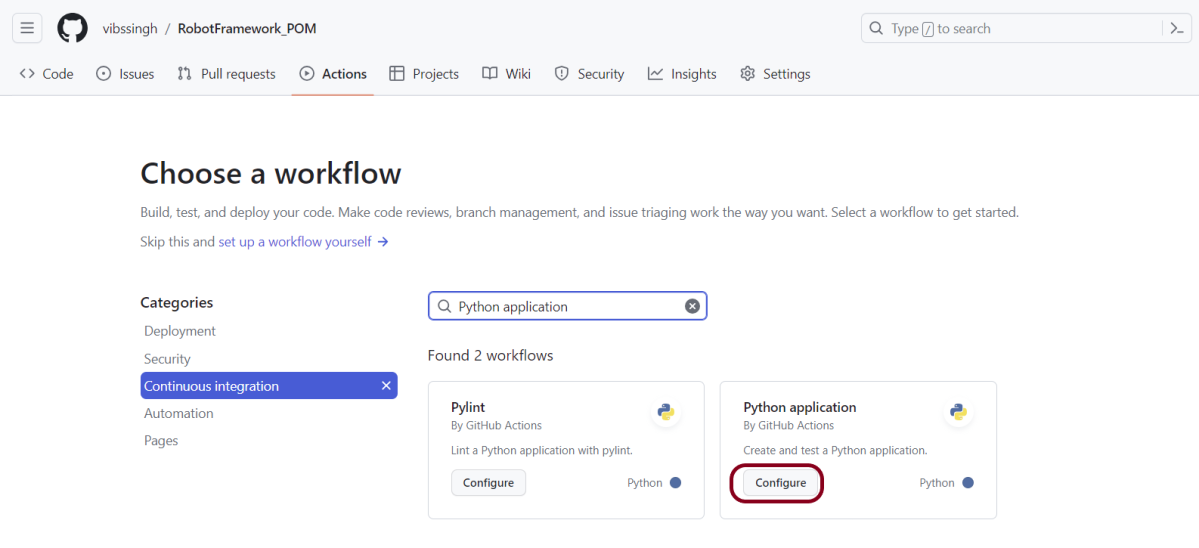
Step 2 – Select the type of Actions

You will see that GitHub recommends Actions depending on the project. In our case, it is recommending actions suitable for a Java project. I have selected the “Java with Maven” option as my project is built in Maven.

Step 3 – Generation of Sample pipeline

If you choose an existing option, it will automatically generate a .yaml for the project as shown below.

We will replace the current workflow with the following yml file that will generate the ExtentReport in the GitHub as shown below:

name: ExtentReport

on:
  push:
    branches: [ "main" ]
  pull_request:
    branches: [ "main" ]

jobs:
  build:

    runs-on: ubuntu-latest

    steps:
    - uses: actions/checkout@v3
    - name: Set up JDK 17
      uses: actions/setup-java@v3
      with:
        java-version: '17'
        distribution: 'temurin'
        cache: maven
    - name: Build with Maven
      run: mvn clean test

    - name: Deploy pages
      uses: JamesIves/github-pages-deploy-action@v4.5.0
      with:
        branch: gh-pages
        folder: ./ExtentReport/Reports

Step 4 – Commit the changes

After the changes, hit the “Start Commit” button.

This will give the option to add a description for the commit. It will also enable the user to commit either to the main branch or commit to any other branch that exists in the project. Click on the “Commit new file” button to set up the workflow file.

Step 5 – Verify that the workflow is running

Next, head over to the “Actions” tab, and you will see your YAML workflow file present under the tab. The yellow sign represents that the job is in the queue. The pipeline will fail. It is because gh-pages is not configured yet now.

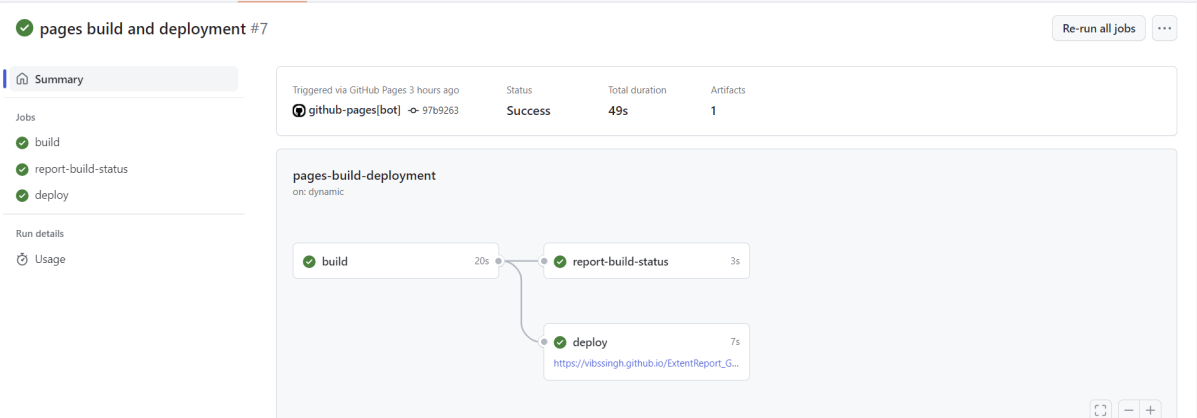
Click on the workflow and the below screen is displayed. It shows the status of the run of the workflow, the total time taken to run the workflow, and the name of the .yml file.

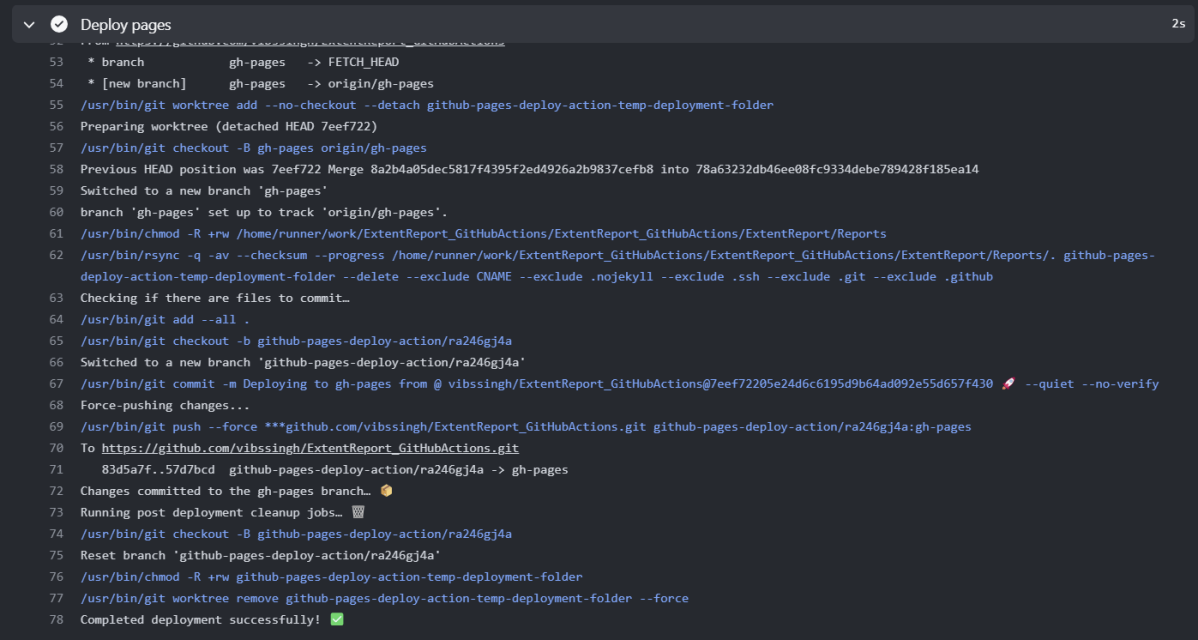
Below are all the steps of the workflow.

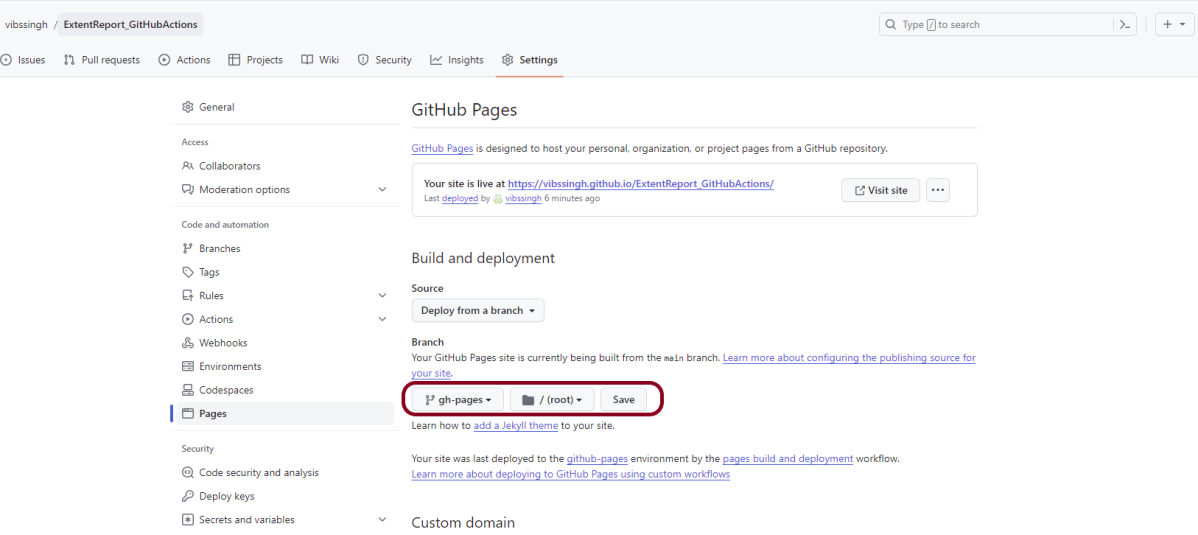
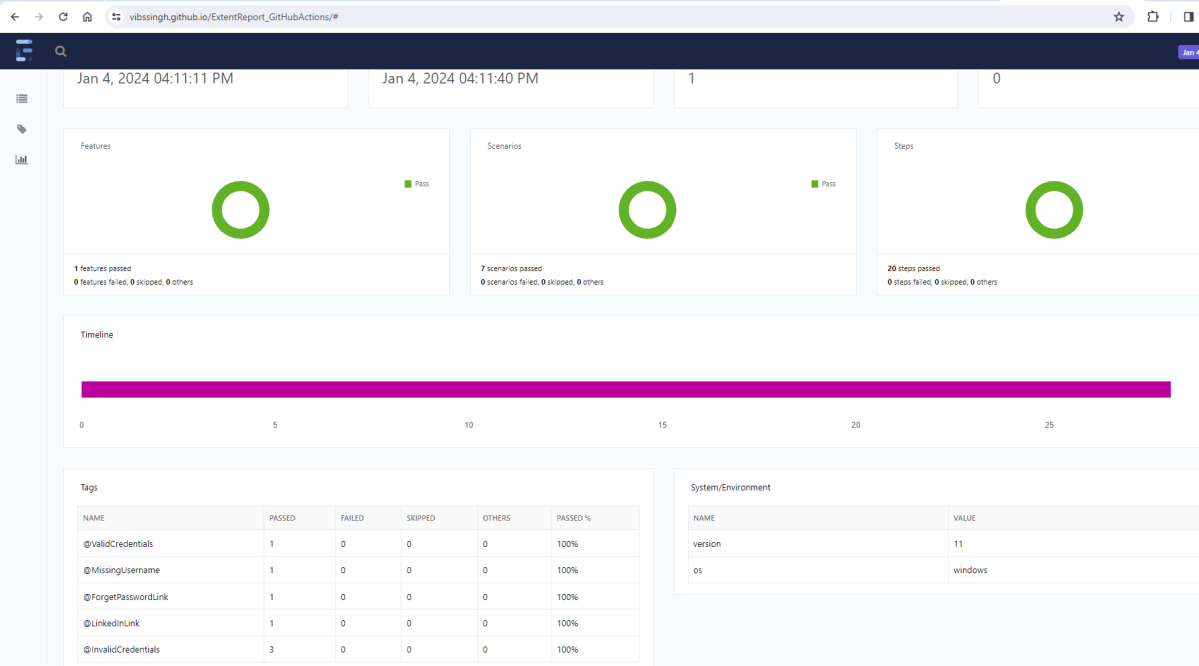
https://vibssingh.github.io/ExtentReport_GitHubActions/

The complete code can be found here on GitHub - vibssingh/ExtentReport_GitHubActions.

Congratulations! We just created our CI workflow for running the ExtentReport in GitHub.

How to run Robot Framework in GitHub Actions

Last Updated On

HOME

This tutorial explains the steps to create a GitHub Action for the Robot Framework in Python and execute the tests in that workflow.

Table of Contents

Why GitHub?

GitHub serves as a collaborative platform that supports version control, code collaboration, automated testing, and issue tracking, all of which are crucial elements in the software testing process. It promotes transparency, collaboration, and efficiency in the development and testing workflows.

CI/CD pipelines have contributed to the success of the DevOps cycle in all software development projects. This is a holistic process that bridges development and operations. Continuous integration helps development teams deploy code efficiently, and continuous delivery automates code deployment.

Implementation Steps

Step 1 – Create GitHub Actions and Workflows

I have a repository available in GitHub – RobotFramework_POM as shown in the below image. Go to the “Actions” tab.  Click on the “Actions” tab.

Step 2 – Select the type of Actions

You will see that GitHub recommends Actions depending on the project. In our case, it is recommending actions suitable for a Java project. I have selected the “Python application” option as my project is built in Maven.

Step 3 – Generation of Sample pipeline

If you choose an existing option, it will automatically generate a .yaml for the project as shown below.

We will replace the current workflow with the following yml file as shown below:

name: Robot Framework - Python
on:
  push:
    branches: [ "main" ]
  pull_request:
    branches: [ "main" ]

permissions:
  contents: read

jobs:
  test:
    runs-on: ubuntu-latest
    
    steps:
      - uses: actions/checkout@v3
      - name: Set up Python 3.12.1
        uses: actions/setup-python@v3
        with:
          python-version: 3.12.1
  
      - name: Install dependencies
        run: |
          python -m pip install --upgrade pip
          pip install robotframework
          pip install robotframework-seleniumlibrary
  
      - name: Test with RobotFramework
        run: robot .  
        
      - name: Test Report Generation
        uses: actions/upload-artifact@v4
        if: success() || failure()
        with:
          name: Report                # Name of the folder
          path: report.html           # Path to test results

python -m pip install --upgrade pip

pip install robotframework
pip install robotframework-seleniumlibrary

Step 4 – Commit the changes

After the changes, hit the “Start Commit” button.

This will give the option to add a description for the commit. It will also enable the user to commit either to the main branch or commit to any other branch that exists in the project. Click on the “Commit new file” button to set up the workflow file.

Step 5 – Verify that the workflow is running

Next, head over to the “Actions” tab, and you will see your YAML workflow file present under the tab. The yellow sign represents that the job is in the queue.

In Progress – When the job starts building and running, you will see the status change from “Queued” to “In progress”.

Passed – If the build is successful, you will see a green tick mark. 

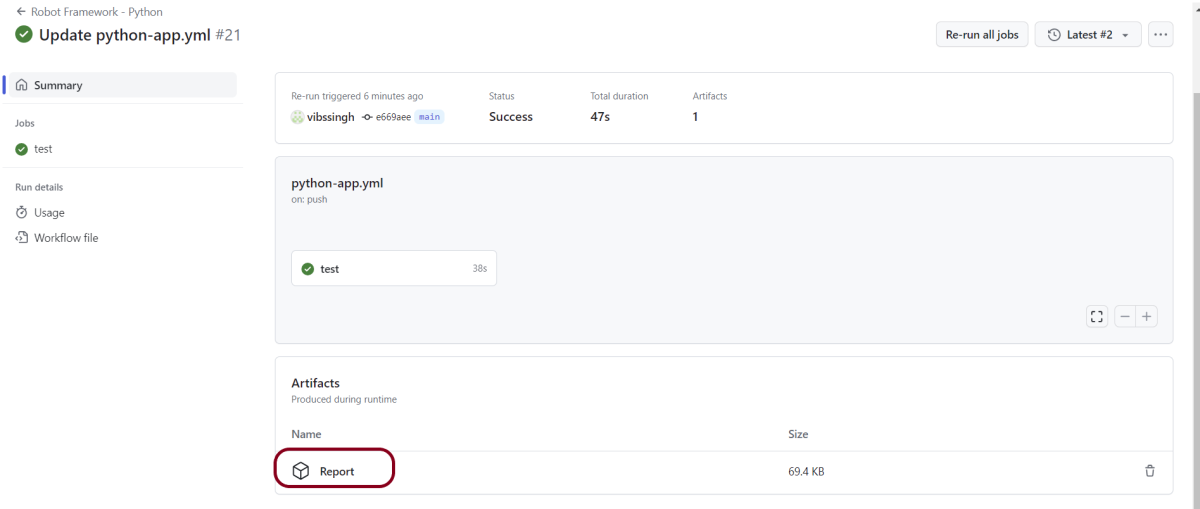
Click on the workflow and the below screen is displayed. It shows the status of the run of the workflow, the total time taken to run the workflow, and the name of the .yml file.

Below shows all the steps of the workflow.

The complete code can be found here on GitHub – vibssingh/RobotFramework_POM.

Congratulations! We just created our CI workflow for running our Python Robot Framework.

How to run Rest API tests with GitHub Actions

Last Updated On

HOME

This tutorial explains the steps to create a GitHub Action for the Java Rest API tests and execute the tests in that workflow.

Table of Contents

Why GitHub?

GitHub serves as a collaborative platform that supports version control, code collaboration, automated testing, and issue tracking, all of which are crucial elements in the software testing process. It promotes transparency, collaboration, and efficiency in the development and testing workflows.

CI/CD pipelines have contributed to the success of the DevOps cycle in all software development projects. This is a holistic process that bridges development and operations. Continuous integration helps development teams deploy code efficiently, and continuous delivery automates code deployment.

Implementation Steps

Step 1 – Create GitHub Actions and Workflows

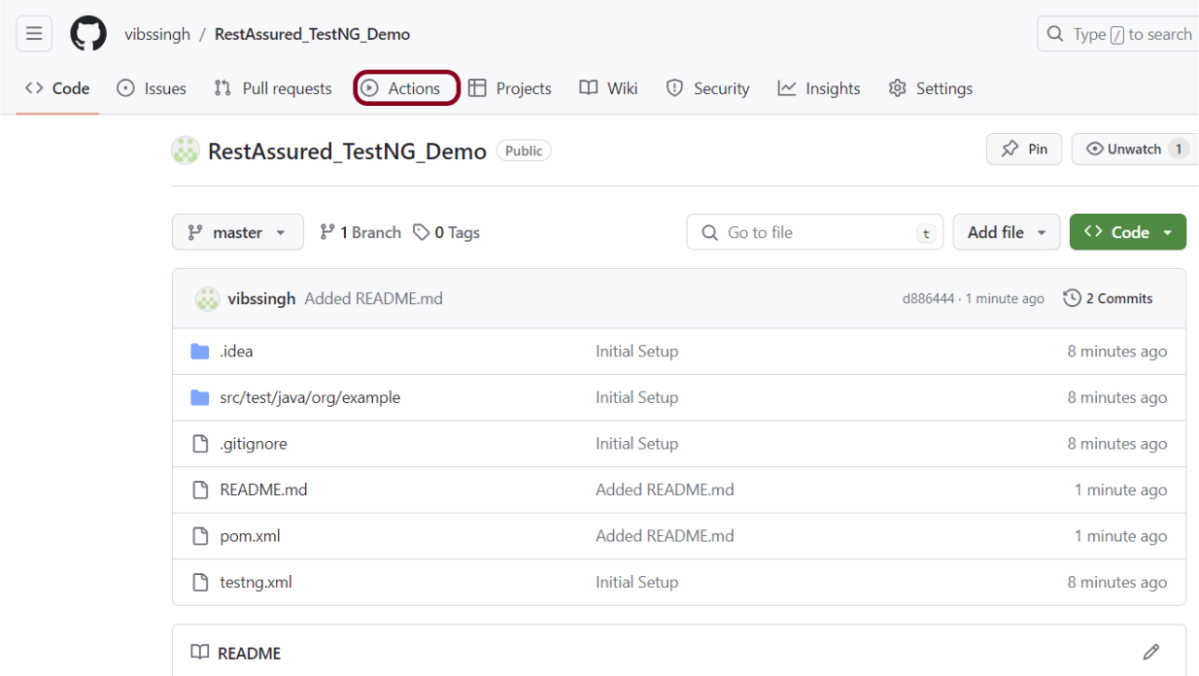
I have a repository available in GitHub – RestAssured_TestNG_Demo as shown in the below image. Go to the “Actions” tab.  Click on the “Actions” tab.

Step 2 – Select the type of Actions

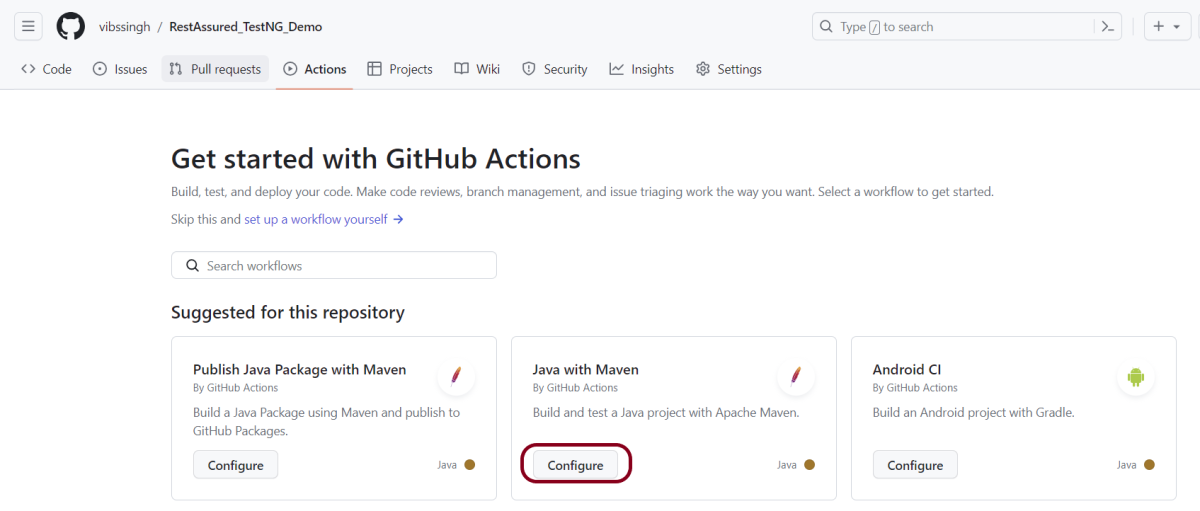
You will see that GitHub recommends Actions depending on the project. In our case, it is recommending actions suitable for a Java project. I have selected the “Java with Maven” option as my project is built in Maven.

Step 3 – Generation of Sample pipeline

If you choose an existing option, it will automatically generate a .yaml for the project as shown below.

We will replace the current workflow with the following yml file as shown below:

name: Rest API Tests using Rest Assured with TestNG
 
on:
  push:
    branches: [ "main" ]
  pull_request:
    branches: [ "main" ]
 
jobs:
  build:
 
    runs-on: ubuntu-latest
 
    steps:
    - uses: actions/checkout@v4
    - name: Set up JDK 17
      uses: actions/setup-java@v4
      with:
        java-version: '17'
        distribution: 'temurin'
        cache: maven
     
    - name: Test Execution
      run: mvn clean test
       
    - name: Test Report Generation
      uses: actions/upload-artifact@v4
      if: success() || failure()
      with:
          name: TestNG Report                 # Name of the folder
          path: target/surefire-reports/      # Path to test results

Step 4 – Commit the changes

After the changes, hit the “Start Commit” button.

This will give the option to add a description for the commit. It will also enable the user to commit either to the main branch or commit to any other branch that exists in the project. Click on the “Commit new file” button to set up the workflow file.

Step 5 – Verify that the workflow is running

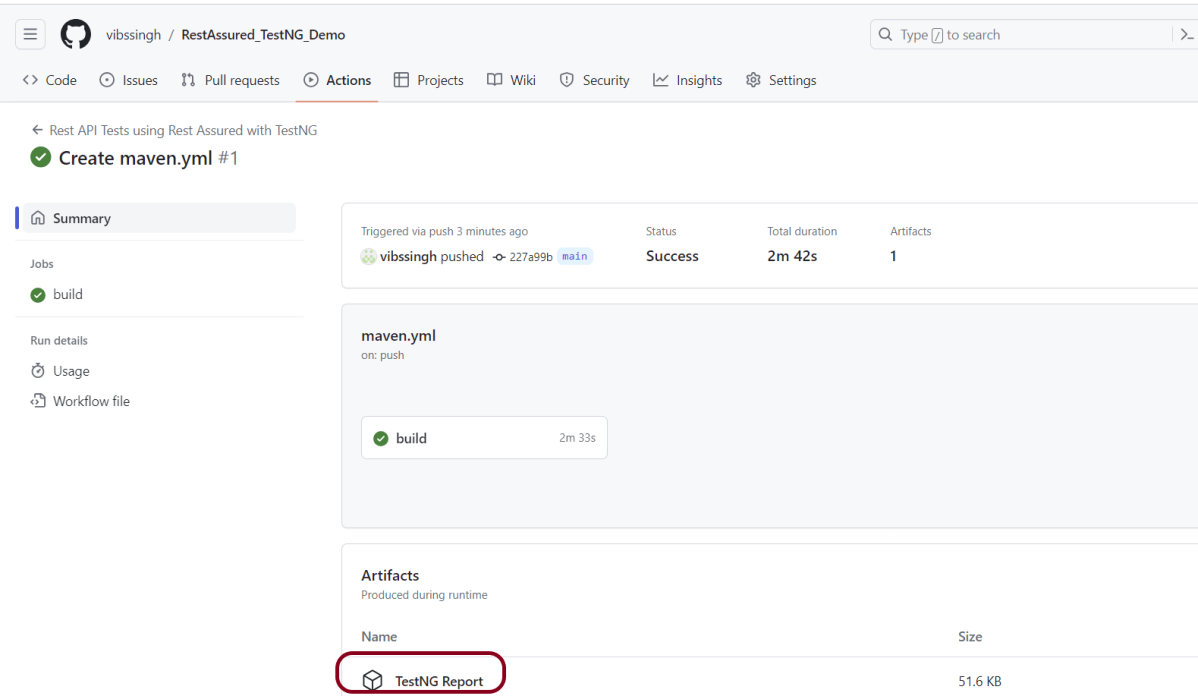
Next, head over to the “Actions” tab, and you will see your YAML workflow file present under the tab. The yellow sign represents that the job is in the queue.

In Progress – When the job starts building and running, you will see the status change from “Queued” to “in progress”.

Passed – If the build is successful, you will see a green tick mark. 

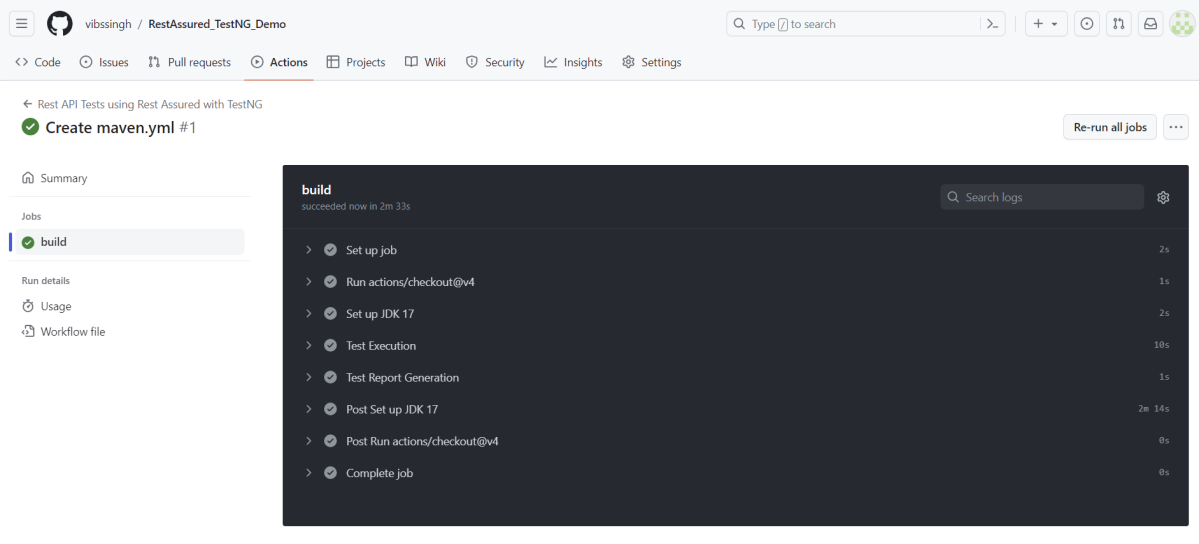
Click on the workflow and the below screen is displayed. It shows the status of the run of the workflow, the total time taken to run the workflow, and the name of the .yml file.

Below shows all the steps of the workflow.

The complete code can be found here on GitHub – vibssingh/RestAssured_TestNG_Demo.

Congratulations! We just created our CI workflow for running our Rest API test cases.

How to run Serenity tests with GitHub Actions

Last Updated On

HOME

This tutorial explains the steps to create a GitHub Action for the Serenity tests and execute the tests in that workflow.

Table of Contents

Why GitHub?

The flexible aspects of Selenium WebDrivers and GitHub Actions enable users to create powerful, fast, and efficient automated testing workflows in CI/CD environments.

CI/CD pipelines have contributed to the success of the DevOps cycle in all software development projects. This is a holistic process that bridges development and operations. Continuous integration helps development teams deploy code efficiently, and continuous delivery automates code deployment.

Important points

1. The Serenity Web tests need to run in the headless mode. As we are using Chrome browser, use the below code in the serenity.config:

          headless.mode = true

2. Install Chrome browser in ubuntu. Use the below code:

    - uses: browser-actions/setup-chrome@latest
    - run: chrome --version

Implementation Steps

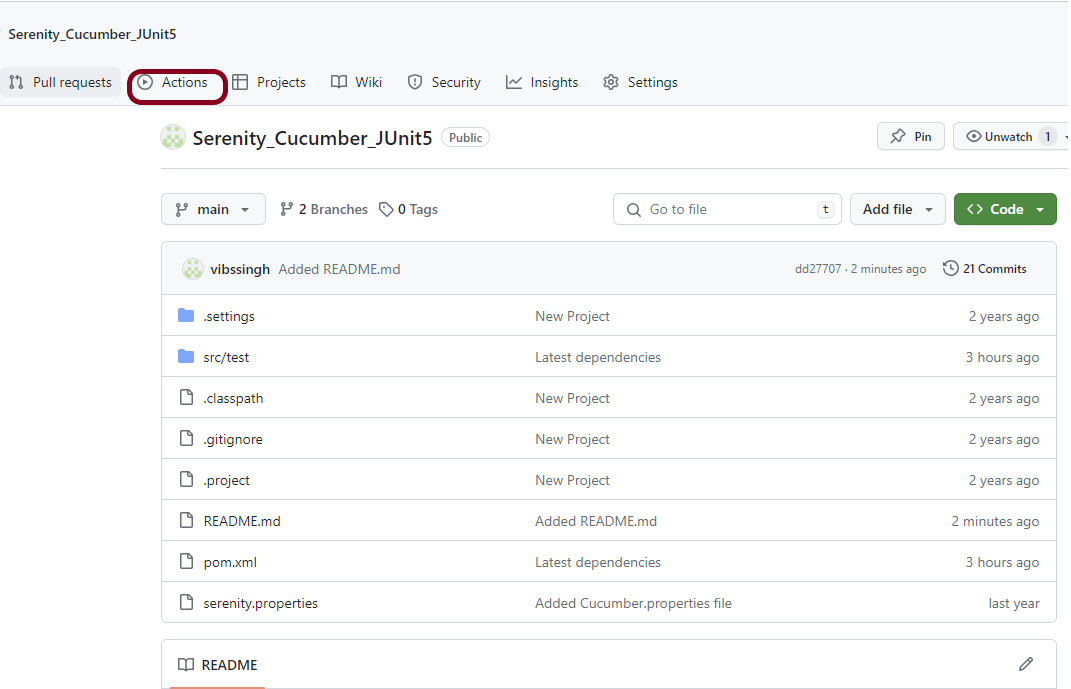
Step 1 – Create GitHub Actions and Workflows

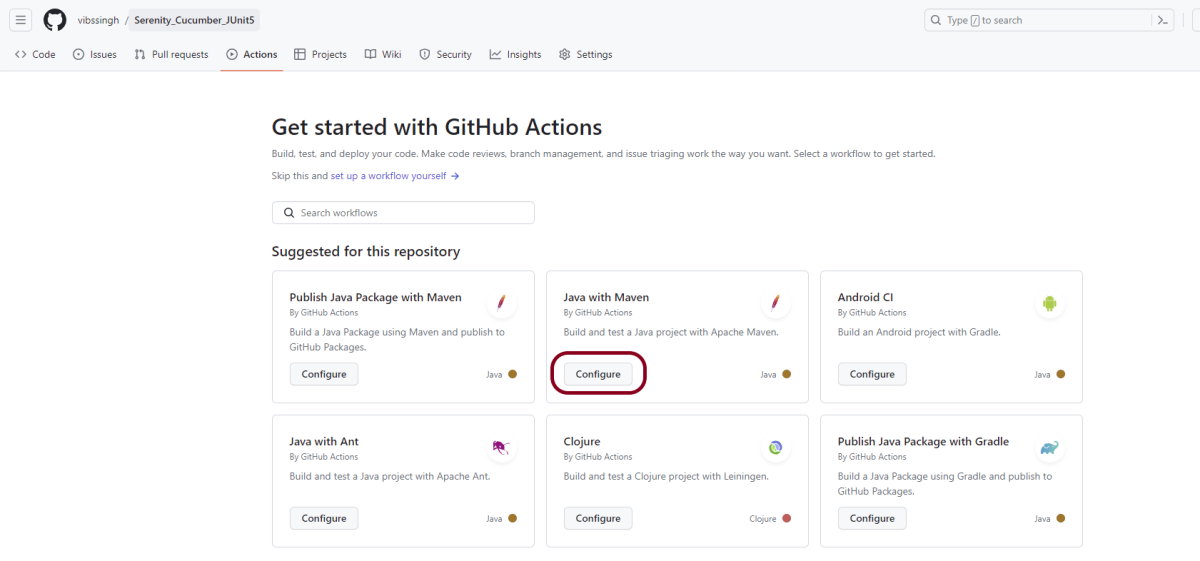
I have a repository available in GitHub – Serenity_Cucumber-JUnit5 as shown in the below image. Go to the “Actions” tab.  Click on the “Actions” tab.

Step 2 – Select the type of Actions

You will see that GitHub recommends Actions depending on the project. In our case, it is recommending actions suitable for a Java project. I have selected the “Java with Maven” option as my project is built in Maven.

Step 3 – Generation of Sample pipeline

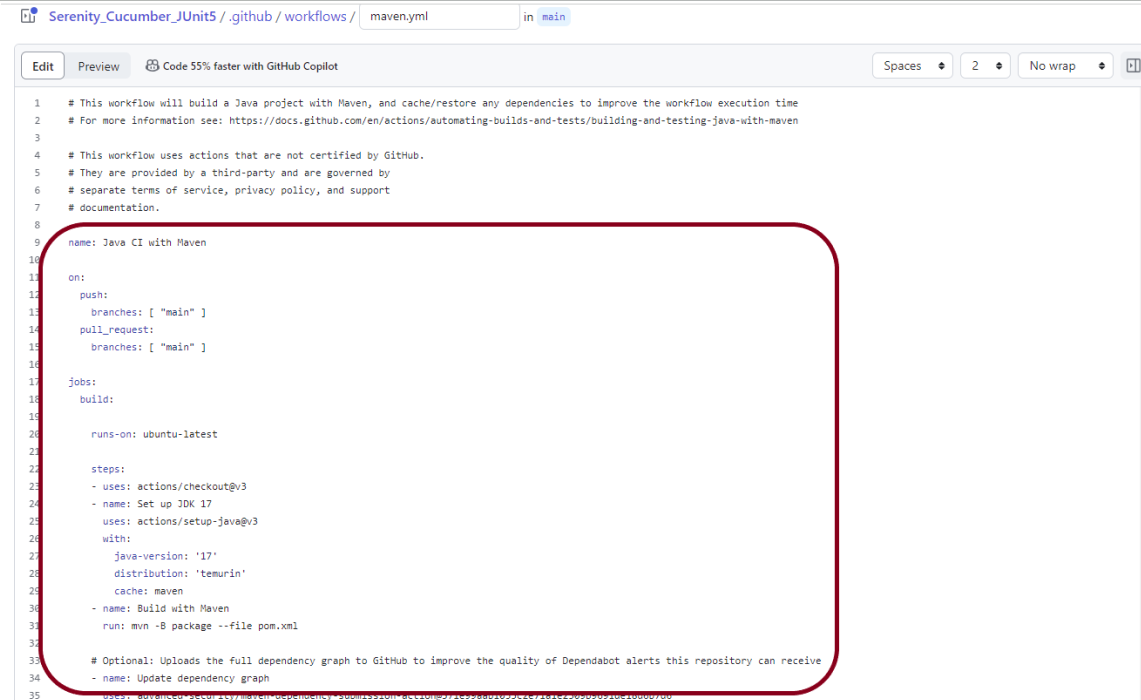
If you choose an existing option, it will automatically generate a .yaml for the project as shown below.

We will replace the current workflow with the following yml file as shown below:

name: Serenity Tests in GitHub
 
on:
  push:
    branches: [ "main" ]
  pull_request:
    branches: [ "main" ]
 
jobs:
  build:
 
    runs-on: ubuntu-latest
 
    steps:
    - uses: actions/checkout@v4
    - name: Set up JDK 17
      uses: actions/setup-java@v4
      with:
        java-version: '17'
        distribution: 'temurin'
        cache: maven

    - uses: browser-actions/setup-chrome@latest
    - run: chrome --version
    
    - name: Build with Maven
      run: mvn clean verify
       
    - name: Test Report Generation
      uses: actions/upload-artifact@v4
      if: success() || failure()
      with:
          name: Serenity Report                 # Name of the folder
          path: target/site/serenity/           # Path to test results

Step 4 – Commit the changes

After the changes, hit the “Start Commit” button.

This will give the option to add a description for the commit. It will also enable the user to commit either to the main branch or commit to any other branch that exists in the project. Click on the “Commit new file” button to set up the workflow file.

Step 5 – Verify that the workflow is running

Next, head over to the “Actions” tab, and you will see your YAML workflow file present under the tab. The yellow sign represents that the job is in the queue.

In Progress – When the job starts building and running, you will see the status change from “Queued” to “in progress”.

Passed – If the build is successful, you will see a green tick mark. 

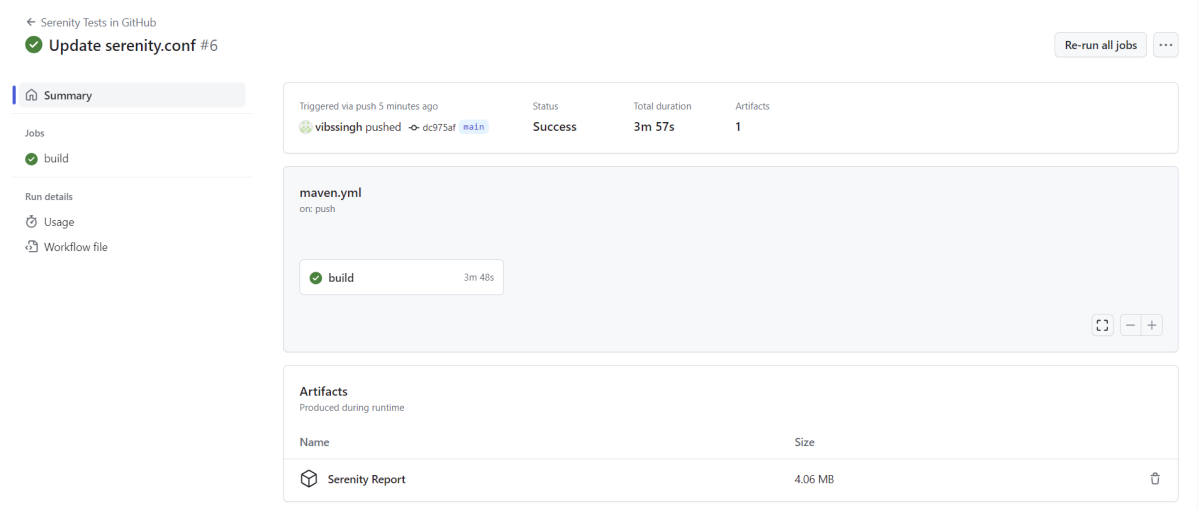
Click on the workflow and the below screen is displayed. It shows the status of the run of the workflow, the total time taken to run the workflow, and the name of the .yml file.

Below shows all the steps of the workflow.

To know more about Chrome installation, please refer to this tutorial – browser-actions/setup-chrome.

The complete code can be found here on GitHub – vibssingh/Serenity_Cucumber_JUnit5.

Congratulations! We just created our CI workflow for running our Serenity test cases.

How to push Postman Collection scripts in GitHub

HOME

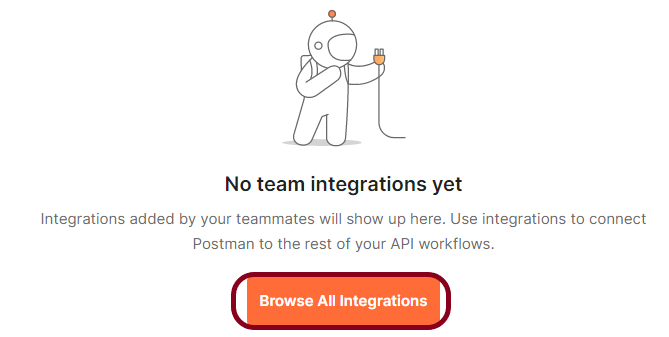
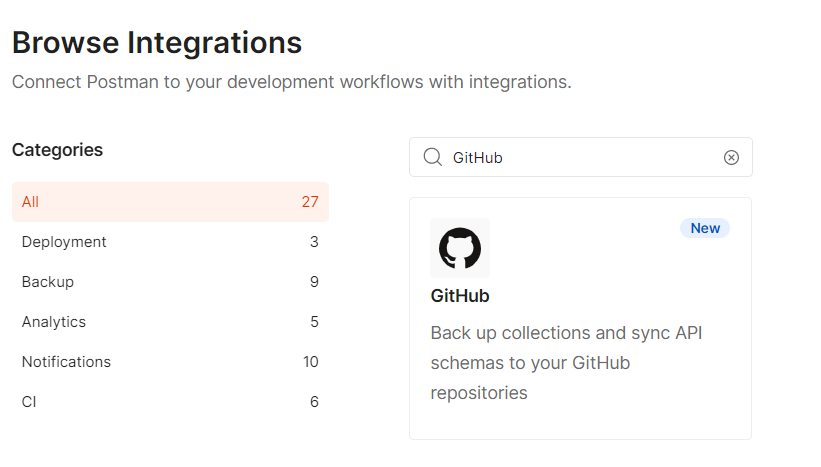
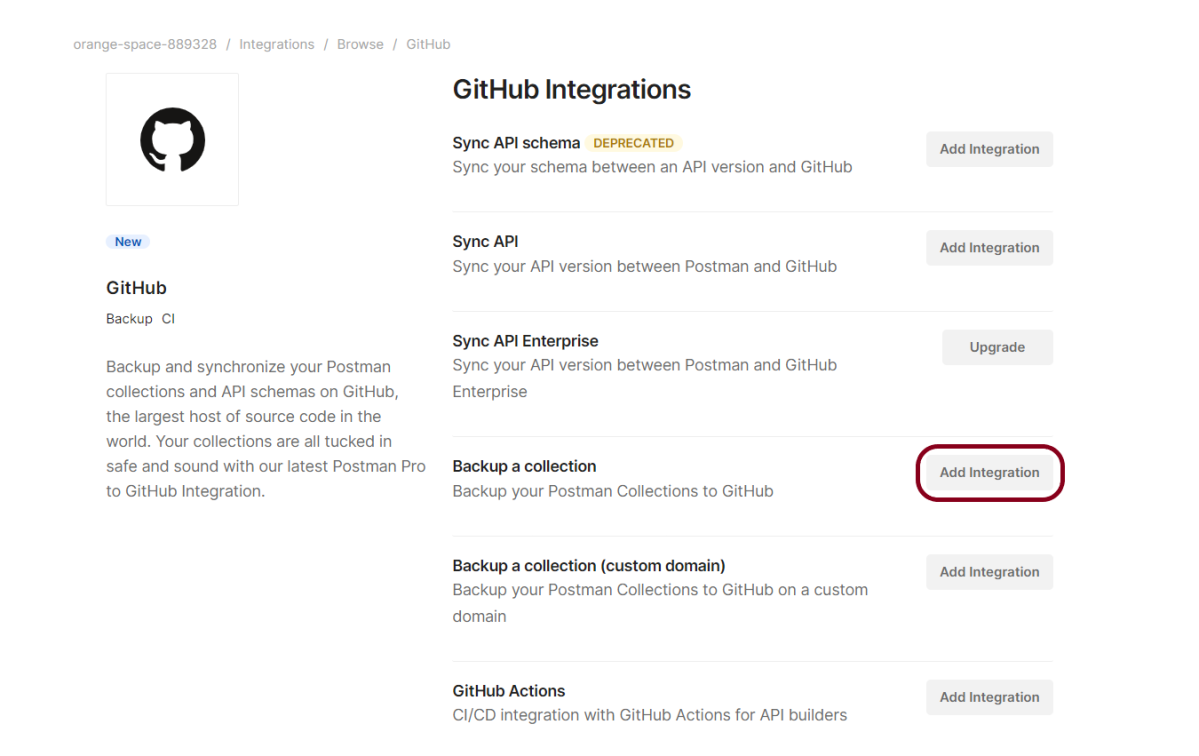
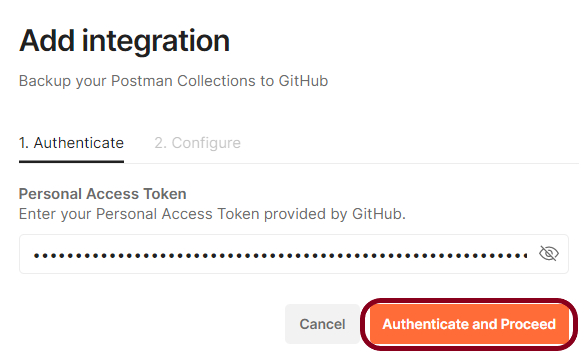
In this tutorial, I will explain how we can push Postman Collection scripts in GitHub.

  1. Create an empty GitHub Repository
  2. Push Postman Collections to GitHub

Step 1 – Login to GitHub using your username and password.

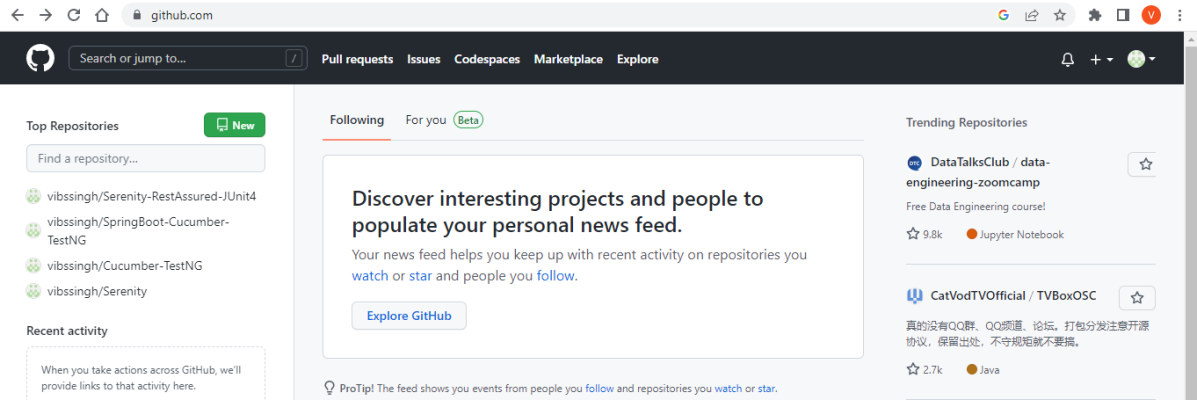
Step 2 – In the upper-right corner of any page, use the drop-down menu, and select “New repository” or left side of the page, there is a green button “New“.

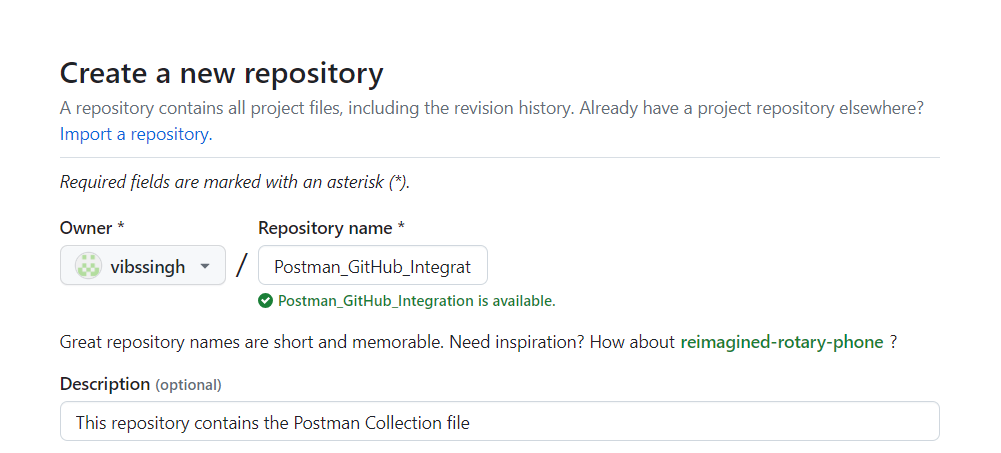
Step 3 – Type a name for your repository, and an optional description. Here, I have provided below-mentioned information:

  1. Owner – vibssingh
  2. Repository name – Postman_GitHub_Integration
  3. Description – This repository contains the Postman Collection file (optional)

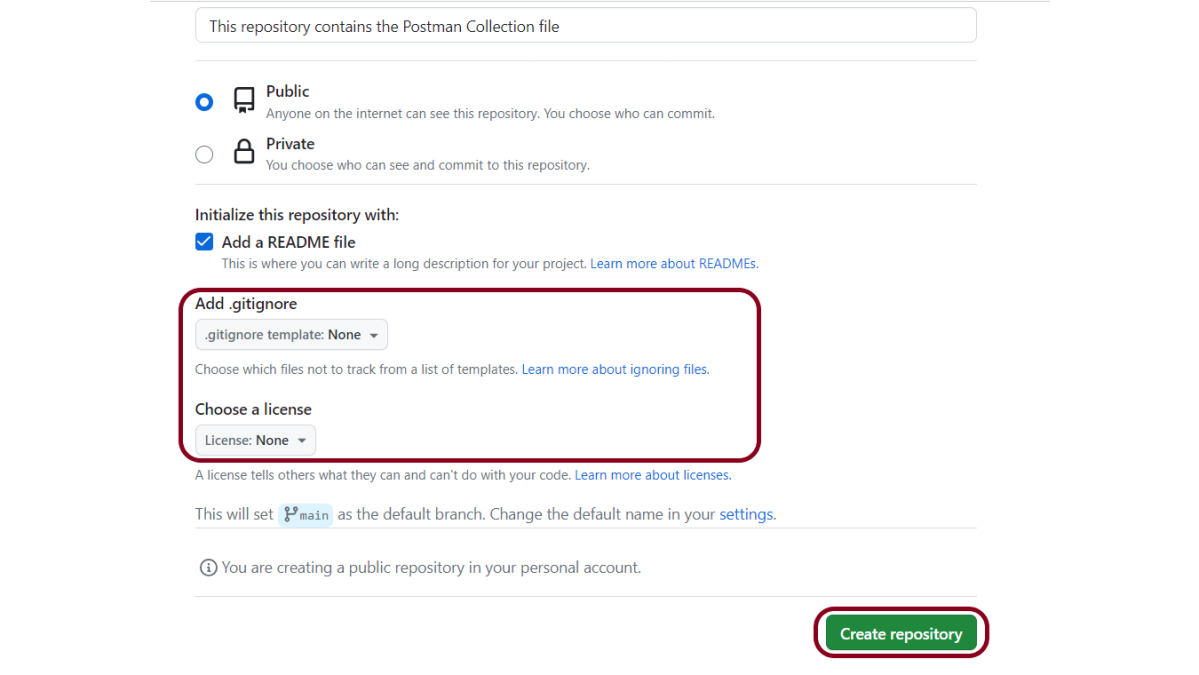
Step 4 – Choose repository visibility

I’m selecting the “Public” option as it is a free account. You can select the Private option for a paid account (mostly organizations). For more information, see About repositories.”

Step 5 You can create a “README“, which is a document describing your project. For more information, see About READMEs.”

  • You can create a .gitignore file, which is a set of ignore rules. For more information, see “Ignoring files.
  • You can choose to add a software license for your project. For more information, see “Licensing a repository.”

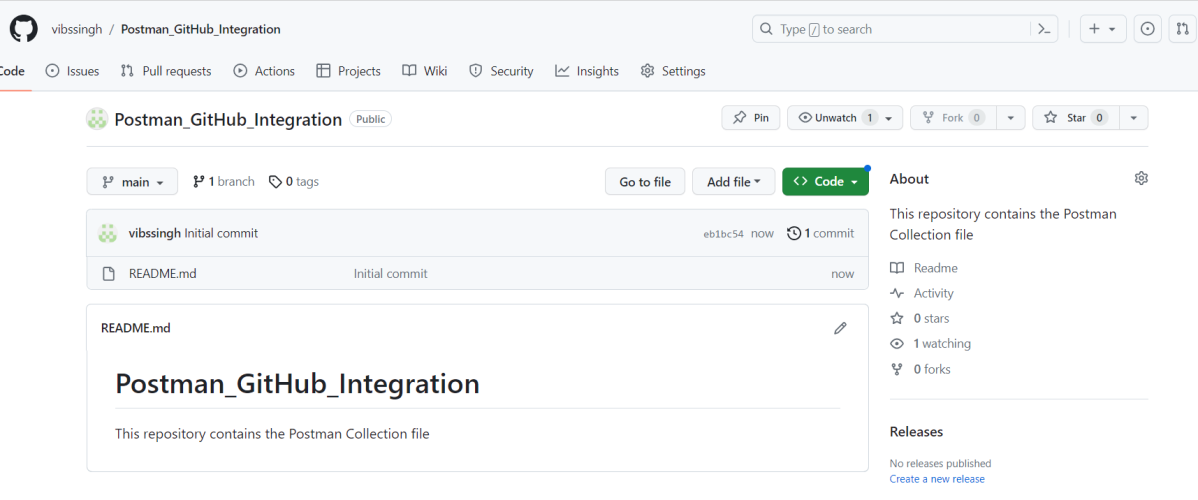
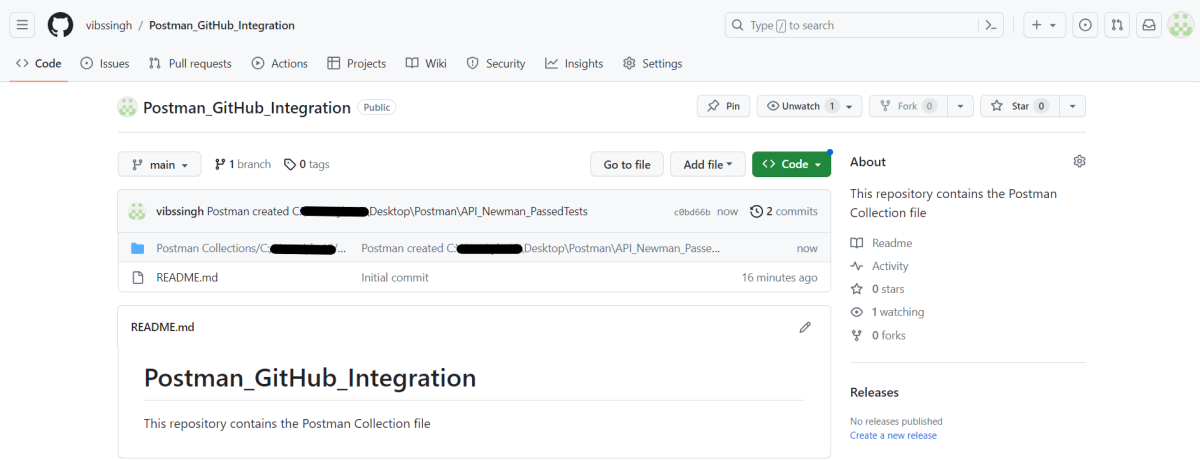
Below is the screenshot of the new repository in GitHub.

Congratulations!!. We have just pushed Postman collection script in GitHub. Now you can clone this project and start working on it.

How to run SpringBoot tests with GitHub Actions

Last Modified Date

HOME

GitHub Actions is a powerful tool that can be used to automate your software development workflows. In this blog post, we will show you how to get started with GitHub Actions for Java Spring Boot.

Why GitHub?

The flexible aspects of GitHub Actions enable users to create powerful, fast, and efficient automated testing workflows in CI/CD environments.

CI/CD pipelines have contributed to the success of the DevOps cycle in all software development projects. This is a holistic process that bridges development and operations. Continuous integration helps development teams deploy code efficiently, and continuous delivery automates code deployment.

Implementation Steps

Step 1 – Create GitHub Actions and Workflows

I have a repository available on GitHub – SpringBoot_Serenity_Cucumber_JUnit4_Demo as shown in the below image. Go to the “Actions” tab.  Click on the “Actions” tab.

Step 2 – Select the type of Actions

You will see that GitHub recommends Actions depending on the project. In our case, it is recommending actions suitable for a Java project. I have selected the “Java with Maven” option as my project is built in Maven.

Step 3 – Generation of Sample pipeline

If you choose an existing option, it will automatically generate a .yaml for the project as shown below.

We will replace the current workflow with the following yml file as shown below:

name: Build and Test Java Spring Boot Application 

on:
  push:
    branches: [ "main" ]
  pull_request:
    branches: [ "main" ]

jobs:
  build:

    runs-on: ubuntu-latest

    steps:
    - uses: actions/checkout@v3
    - name: Set up JDK 17
      uses: actions/setup-java@v3
      with:
        java-version: '17'
        distribution: 'temurin'
        cache: maven
   
    - name: Build with Maven
      run: mvn clean verify

    - name: Test Report
      uses: actions/upload-artifact@v3
      if: success() || failure()
      with:
          name: SpringBoot Report               # Name of the folder
          path: target/site/serenity/           # Path to test results

Step 4 – Commit the changes

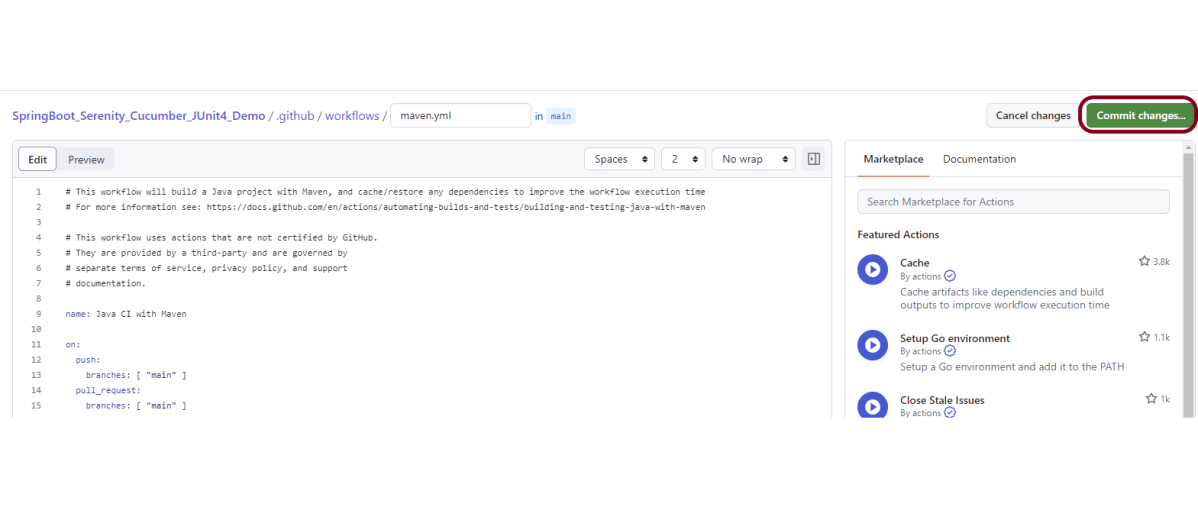
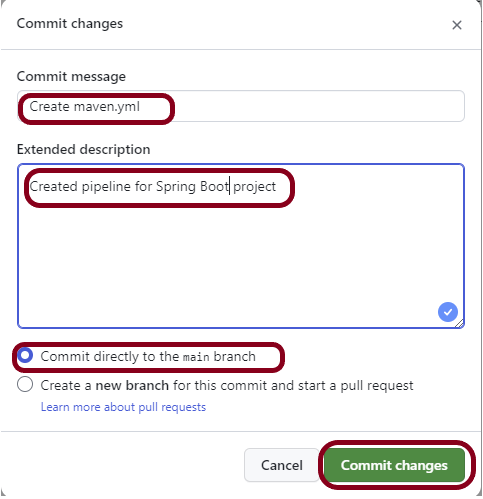
After the changes, hit the “Commit changes” button.

This will give the option to add a description for the commit. It will also enable the user to commit either to the main branch or commit to any other branch that exists in the project. Click on the “Commit changes” button to set up the workflow file.

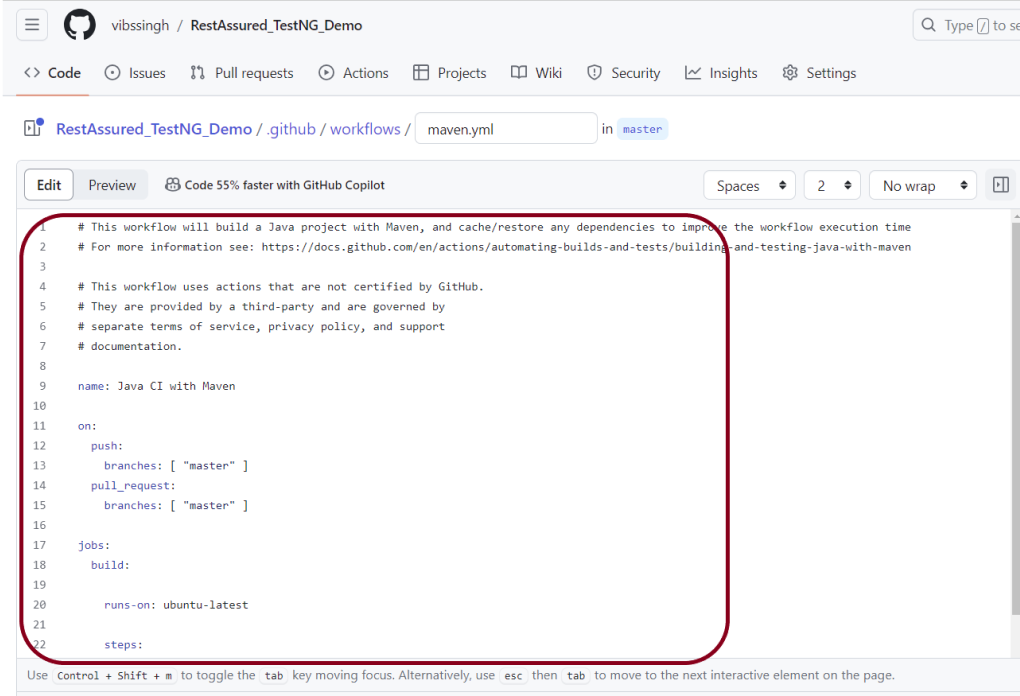
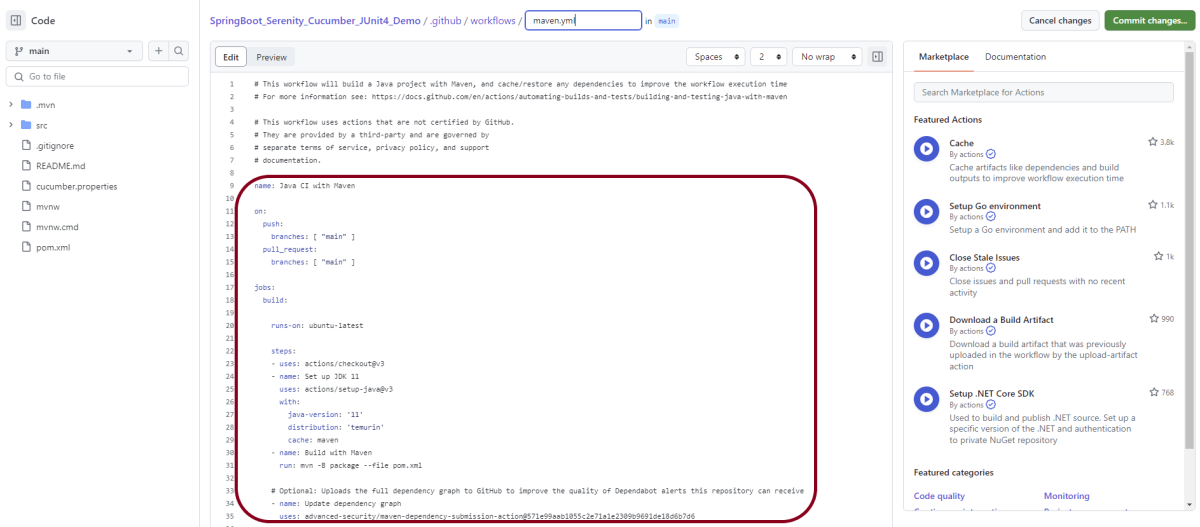
Below is the image of the newly created maven.yml file.

Step 5 – Verify that the workflow is running

Next, head over to the “Actions” tab, and you will see your YAML workflow file present under the tab. The yellow sign represents that the job is in the queue.

In Progress – When the job starts building and running, you will see the status change from “Queued” to “in progress”.

Passed – If the build is successful, you will see a green tick mark. 

Failed – In case the build has failed, then there will be a red cross mark.

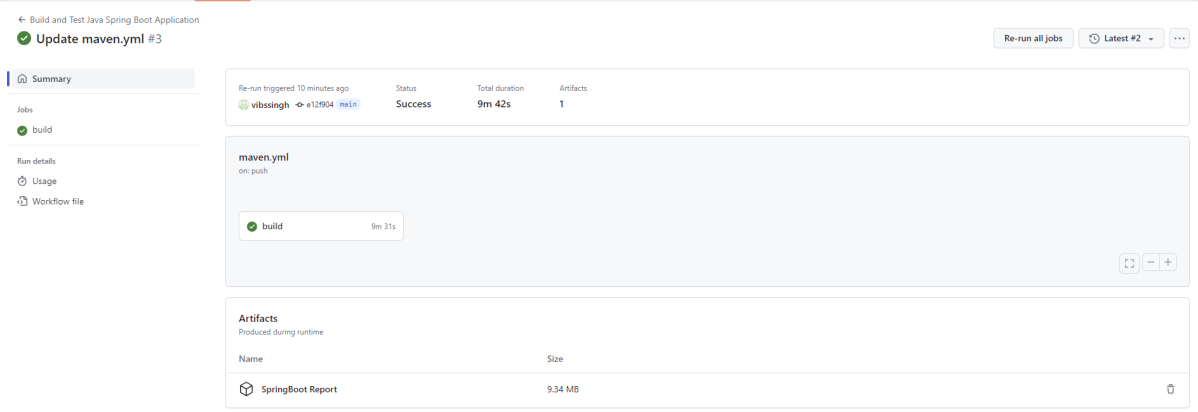
Click on the workflow and the below screen is displayed. It shows the status of the run of the workflow, the total time taken to run the workflow, and the name of the .yml file.

Below shows all the steps of the workflow.

Step 6 – Published artifacts on GitHub

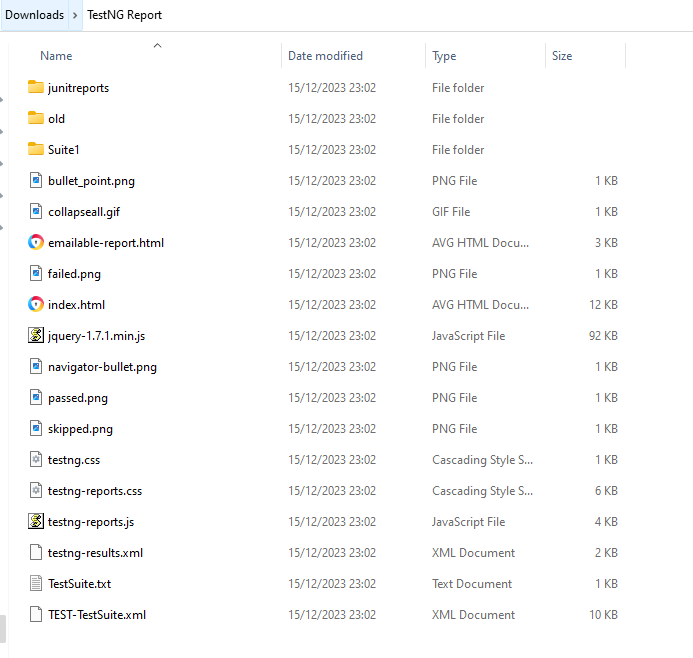
Once the pipeline run, a SpringBoot Report folder will be generated as shown in the below image:
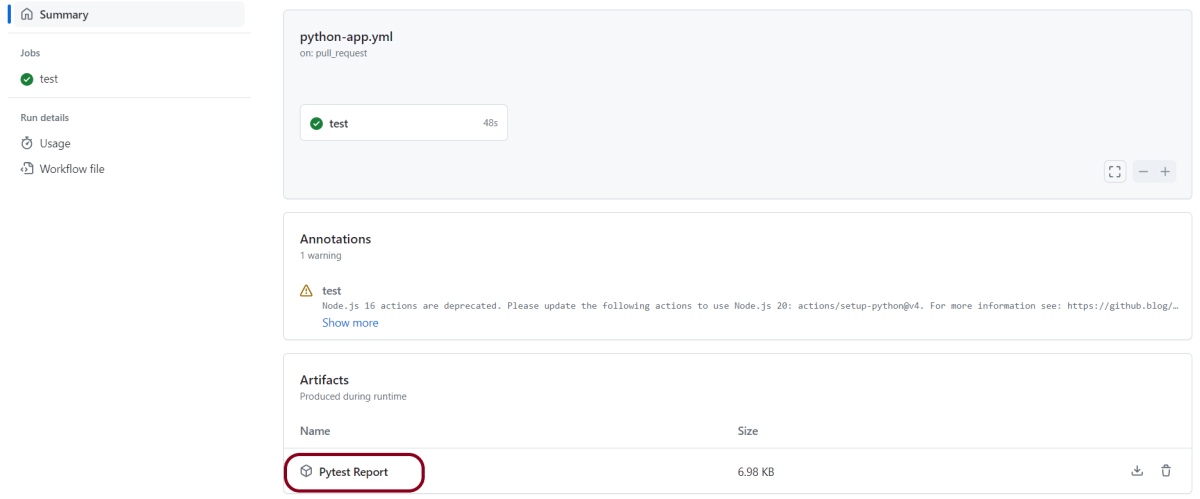
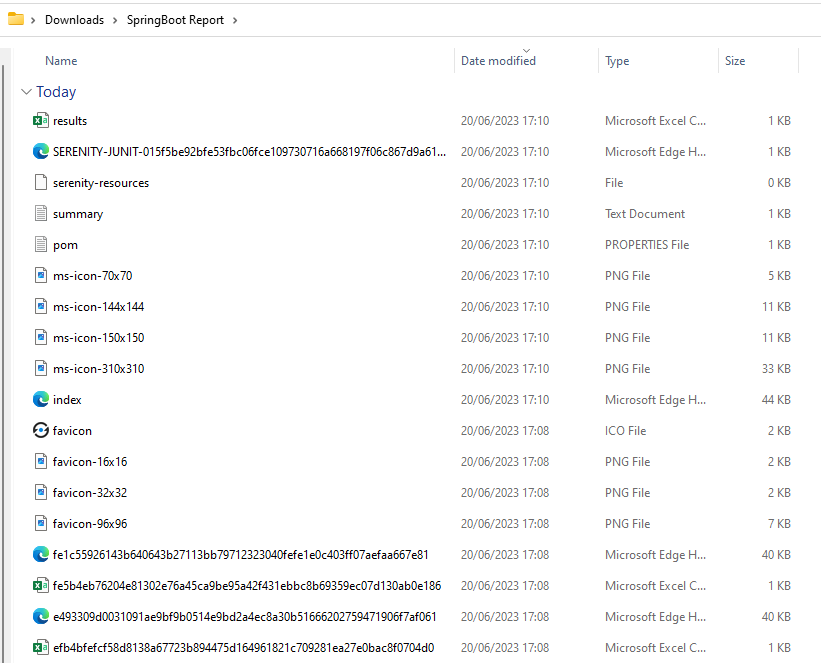
When we click on the folder SpringBoot Report, a zipped file will be downloaded, and we can extract it to see all the files contained within it.

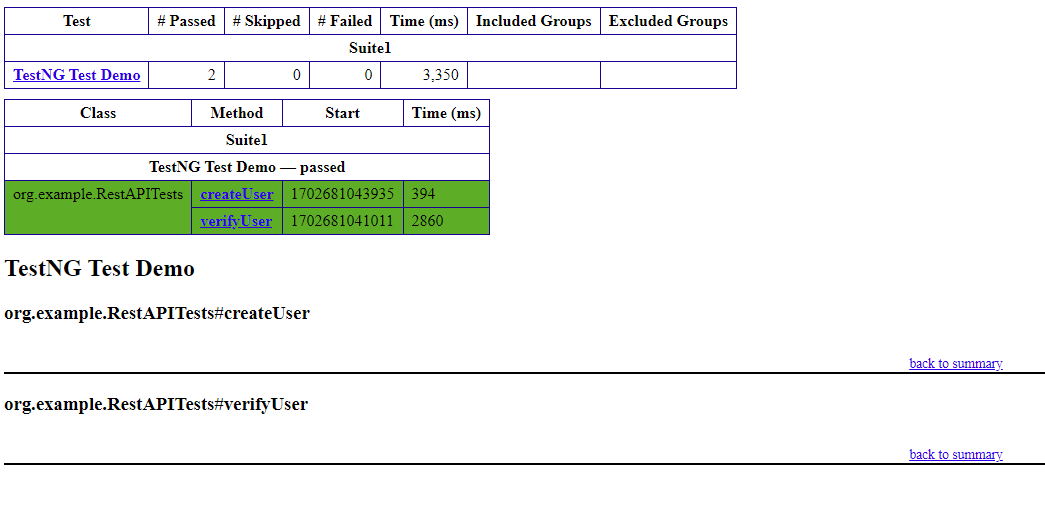
The image of the report is shown below:

The complete code can be found here on GitHub – SpringBoot_Serenity_Cucumber_JUnit4_Demo.

Congratulations! We just created our CI workflow for running our SpringBoot test cases.

How to run Gradle tests in the GitHub pipeline

HOME

The previous tutorial explained the steps to run the Selenium tests in the GitHub pipeline (Maven project). This tutorial explains the steps to run the Gradle project in the GitHub pipeline.

Important points to keep in mind:

1. We don’t need to think about the Chromedriver.exe we are using WebDriver Manager to handle that instead of adding it to our project like the following:

WebDriverManager.chromedriver().setup();

2. The Selenium tests need to run in the headless mode. As we are using Chrome browser, use the below code:

ChromeOptions options = new ChromeOptions();
options.addArguments("--no-sandbox");
options.addArguments("--disable-dev-shm-usage");
options.addArguments("--headless");
driver = new ChromeDriver(options);

3. Install Chrome browser in ubuntu. Use the below code:

- uses: browser-actions/setup-chrome@latest
- run: chrome --version

To know more about Chrome installation, please refer to this tutorial – browser-actions/setup-chrome.

Implementation Steps

Step 1 – Create GitHub Actions and Workflows

I have a repository available on GitHub – Gradle_Selenium_TestNG_Demo as shown in the below image. Go to the Actions tab.  Click on the “Actions” tab.

Step 2 – Select the type of Actions

You will see that GitHub recommends Actions depending on the project. In our case, it is recommending actions suitable for a Java project. I have selected the “Publish Java Package with Gradle” option.

Step 3 – Generation of Sample pipeline

If you choose an existing option, it will automatically generate a .yaml for the project as shown below.

We will replace the current workflow with the following yml file as shown below:

name: Gradle Project - Selenium with TestNG

on:
  push:
    branches: [ "main" ]
  pull_request:
    branches: [ "main" ]

jobs:
  build:

    runs-on: ubuntu-latest
    permissions:
      contents: read
      packages: write

    steps:
    - uses: actions/checkout@v3
    - name: Set up JDK 11
      uses: actions/setup-java@v3
      with:
        java-version: '11'
        distribution: 'temurin'
        
    - uses: browser-actions/setup-chrome@latest
    - run: chrome --version     

    - name: Build with Gradle
      run: gradle clean test
      
    - name: Archive Rest Results
      uses: actions/upload-artifact@v3
      if: success() || failure()
      with:
        name: test-results
        path: GradleReports/emailable-report.html

Step 4 – Commit the changes

After the changes, hit the “Start Commit” button.

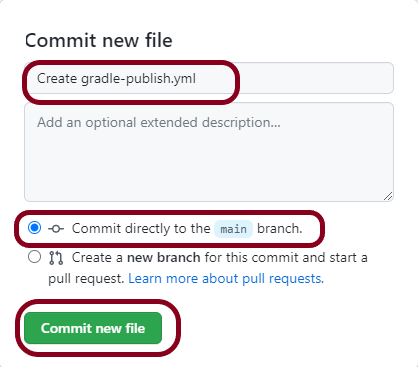
This will give the option to add a description for the commit. It will also enable the user to commit either to the main branch or commit to any other branch that exists in the project. Click on the “Commit new file” button to set up the workflow file.

A folder with the name .github/workflows will be created that will contain a gradle-publish.yml file as shown below:

Step 5 – Verify that the workflow is running

Next, head over to the “Actions” tab, and you will see your YAML workflow file present under the tab. The yellow sign represents that the job is in the queue.

In Progress – When the job starts building and running, you will see the status change from “Queued” to “in progress”.

Passed –If the build is successful, you will see a green tick mark. 
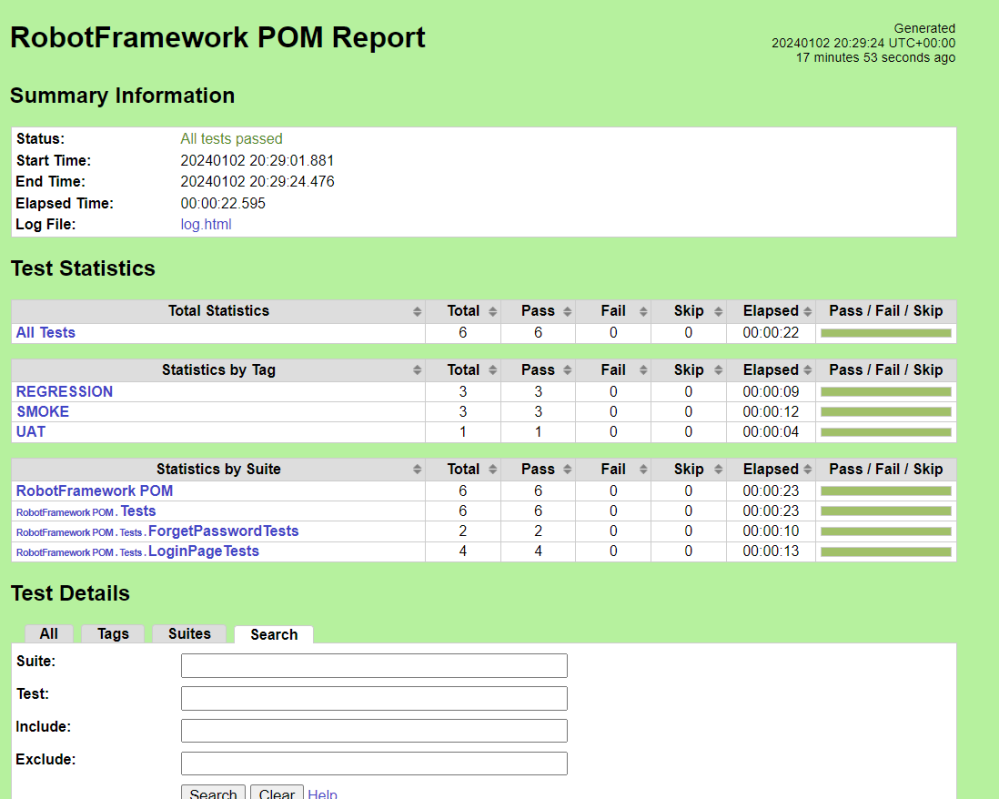
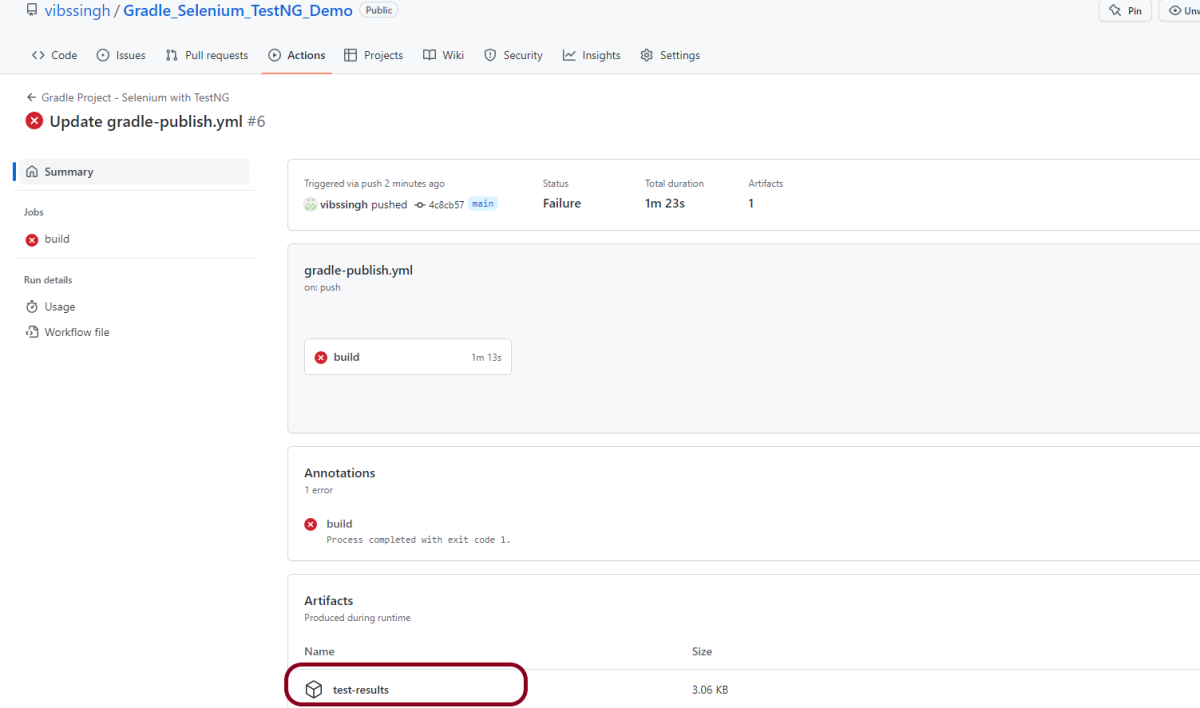
Click on the workflow and the below screen is displayed. It shows the status of the run of the workflow, the total time taken to run the workflow, and the name of the .yml file.

Failed – In case the build has failed which in this case any of the tests is failed, then there will be a red cross mark.
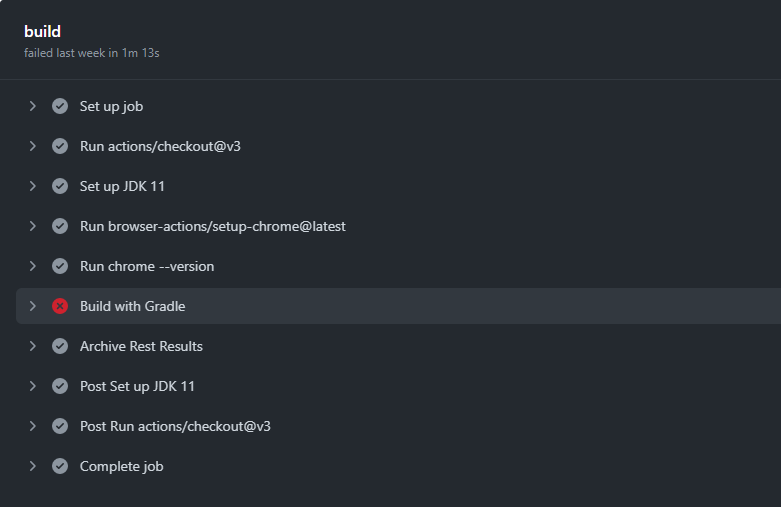
Below shows all the steps of the workflow.
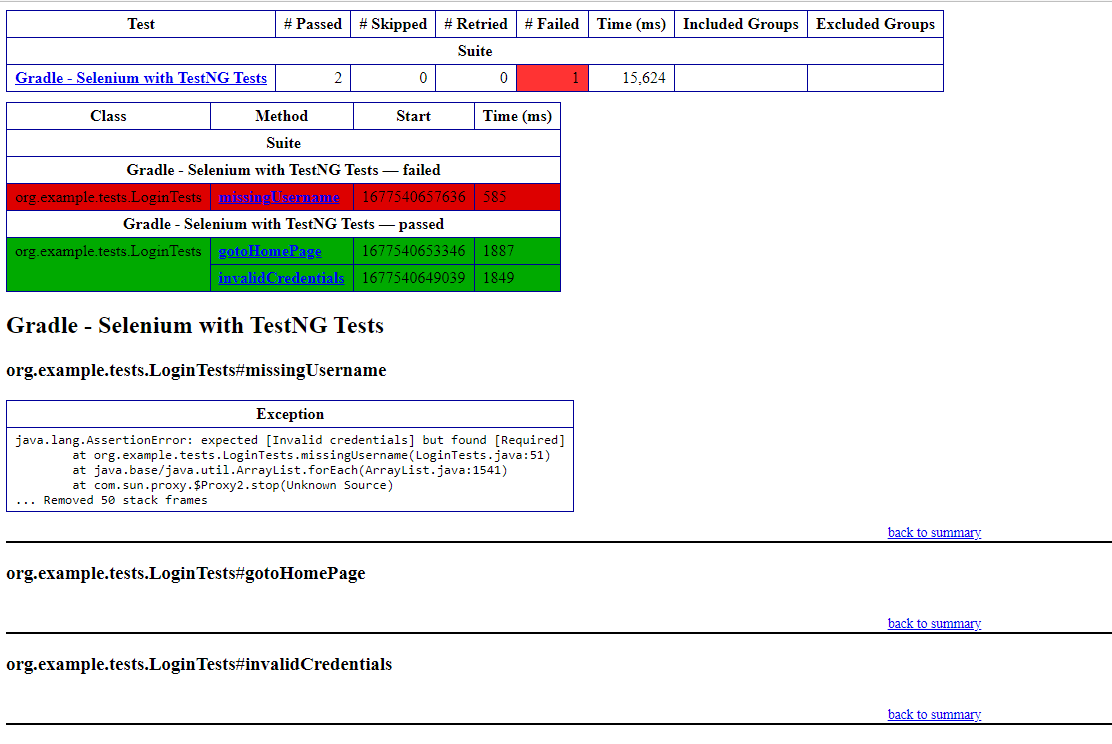
Build with Gradle steps failed because out of 2 tests, one of the tests failed. So, it appears in red colour. I personally love this feature because it gives an idea about the test execution status immediately if all the tests are passed or anything is failed.

Published artifacts on GitHub

Once the pipeline run, a test-results folder will be generated as shown in the below image:

When we click on the folder test-results, a zipped file will be downloaded, and we can extract it to see all the files contained within it.

The image of the report is shown below:

The complete code can be found here in GitHub.

How to upload artifacts in GitHub?

HOME

When a GitHub Actions workflow completes a build successfully, artifacts such as zip files, compiled code, Java JAR files, and other assembled components are created. Once the workflow is completed, the Docker container on which the GitHub Actions artifacts are created vanishes. However, it is not difficult for a developer to request that GitHub archive those artifacts and make them available as a downloadable link.

Steps to Publish GitHub Action Artifact

  1. Complete the GitHub Actions build steps. Add a stage for the Artifact – Test Report upload.

2. Enter the path to the files that must be uploaded. I’m copying all the files generated by Serenity that are in the target/site/serenity folder.

3. Use GitHub’s upload-artifact action to download all the files in the serenity folder and compress them into a zip file called Serenity Report.zip.

4. Run the GitHub Actions workflow and look for the published artifacts on the build page of the workflow.

How to create a GitHub Action?

Please refer to this tutorial to understand the steps to create a GitHub Action – How to run Selenium tests with GitHub Actions.

GitHub Action Artifact YAML Example

If the previous step is failed, and we still want to proceed to the next step, then use the below status syntax:

if: success() || failure()

To read more about the status check function, you can refer to this.

name: Serenity Rest Assured with JUnit4

on:
  push:
    branches: [ "main" ]
  pull_request:
    branches: [ "main" ]

jobs:
  build:

    runs-on: ubuntu-latest

    steps:
    - uses: actions/checkout@v3
    - name: Set up JDK 11
      uses: actions/setup-java@v3
      with:
        java-version: '11'
        distribution: 'temurin'
        cache: maven
    
    - name: Build with Maven
      run: mvn clean verify
      
    - name: Test Report
      uses: actions/upload-artifact@v3
      if: success() || failure()
      with:
          name: Serenity Report               # Name of the folder
          path: target/site/serenity/           # Path to test results


Published artifacts on GitHub

From the logs of the Workflow, you can see that the Test Report step was executed successfully.

Once the pipeline run, a Serenity Report folder will be generated as shown in the below image:

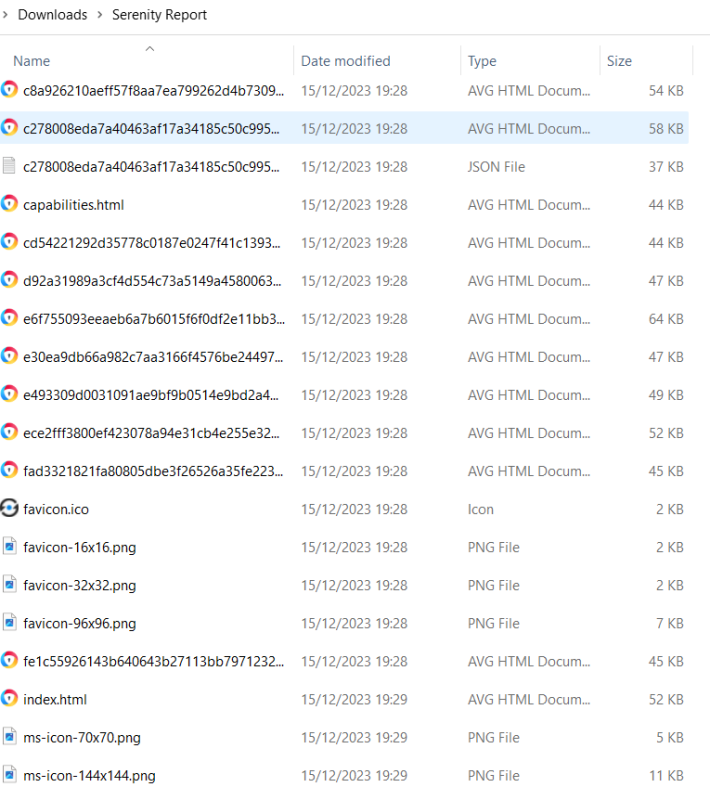
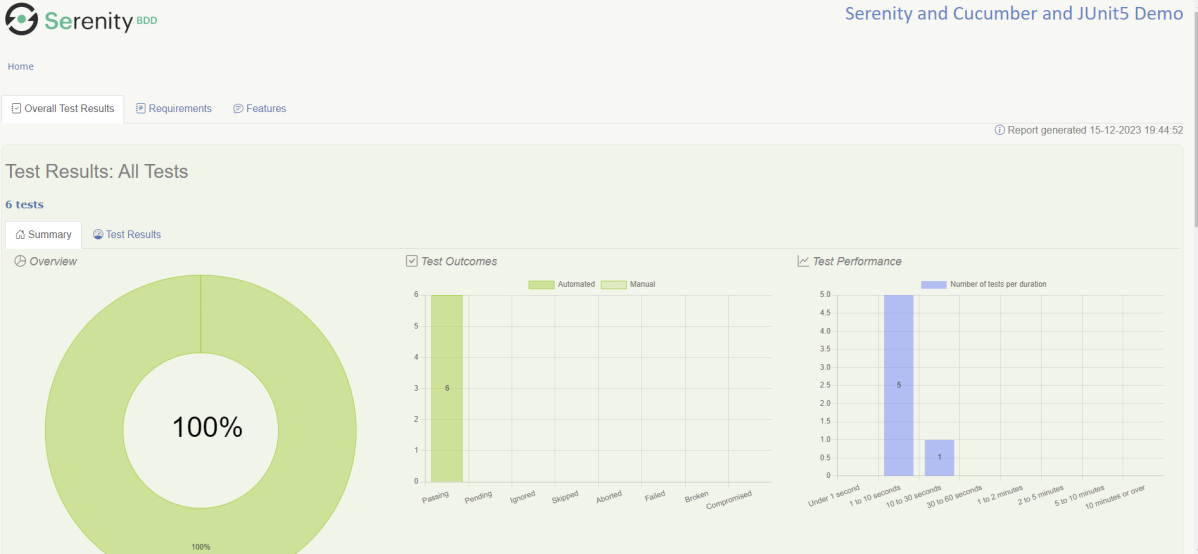
When we click on the folder Serenity Report, a zipped file will be downloaded, and we can extract it to see all the files contained within it.

You can see the GitHub pipeline here – GitHub Artifact Upload.