In this tutorial, we will configure Selenium with Python and create Selenium tests in Python.
Prerequisite:
- Python is installed on the machine
- PIP is installed on the machine
- PyCharm or another Python Editor is installed on the machine
Installation of Python Requests Module
Step 1 – Install Python
If you need help in installing Python, please refer to this tutorial – How to Install Python on Windows 11.
Step 2 – Install PyCharm
PyCharm is an Integrated Development Environment (IDE) specifically designed for the Python programming language. It is developed by JetBrains.
If you need help in installing PyCharms, please refer to this tutorial – How to install PyCharms on Windows 11.
Step 3 – Install the Selenium library
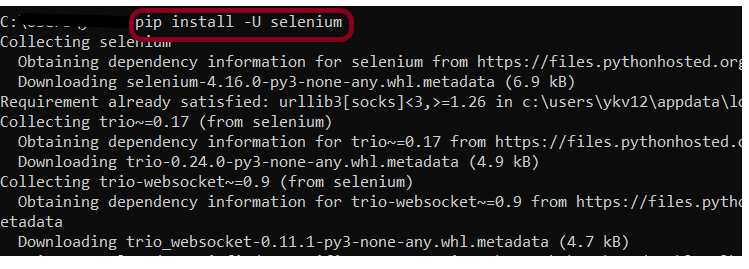
Execute the below command using pip.
pip install -U selenium
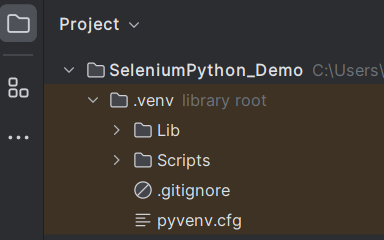
Step 4 – Create a new project
Create a new project and open it in PyCharm – SeleniumPython_Demo.
Step 5 – Create a new directory
Create a new directory – TestCases that will contain all the tests.

Step 6 – Create a test file
Create a new Python file, naming it “LoginTest.py”.

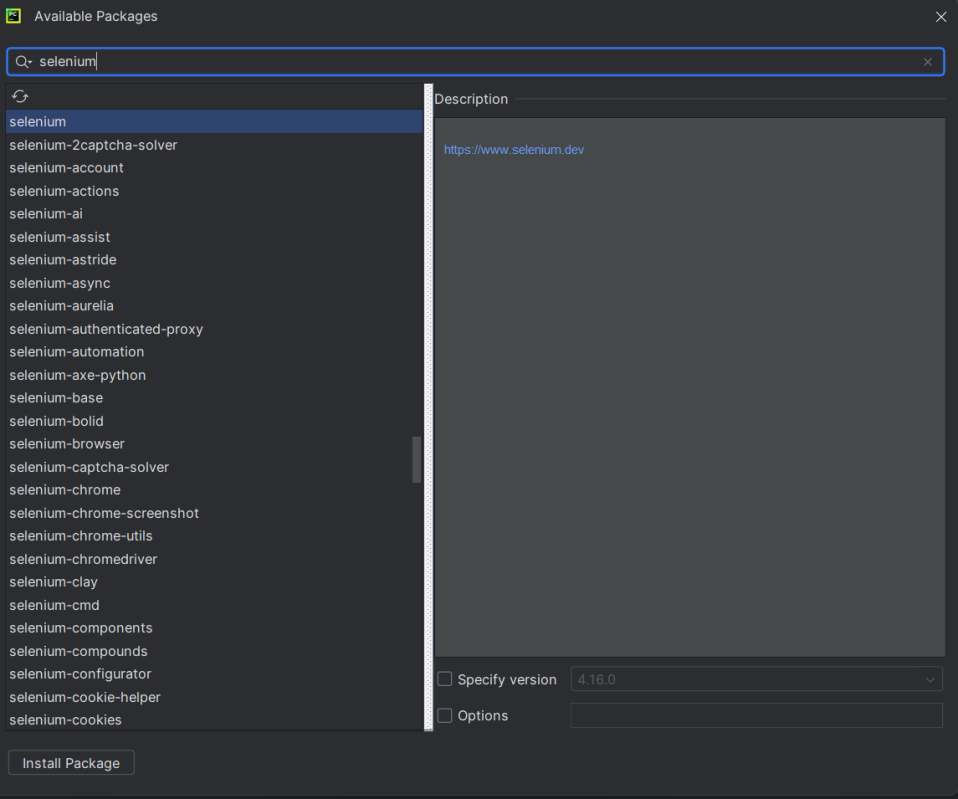
Step 7 – Add the Selenium package to the PyCharm
Go to File->Settings ->Project:SeleniumPython_Demo ->Python Interpreter.
Click on the “+” sign and enter selenium in the search bar. It will show a list of packages. Select the “selenium” package and click on the “Install Package”.
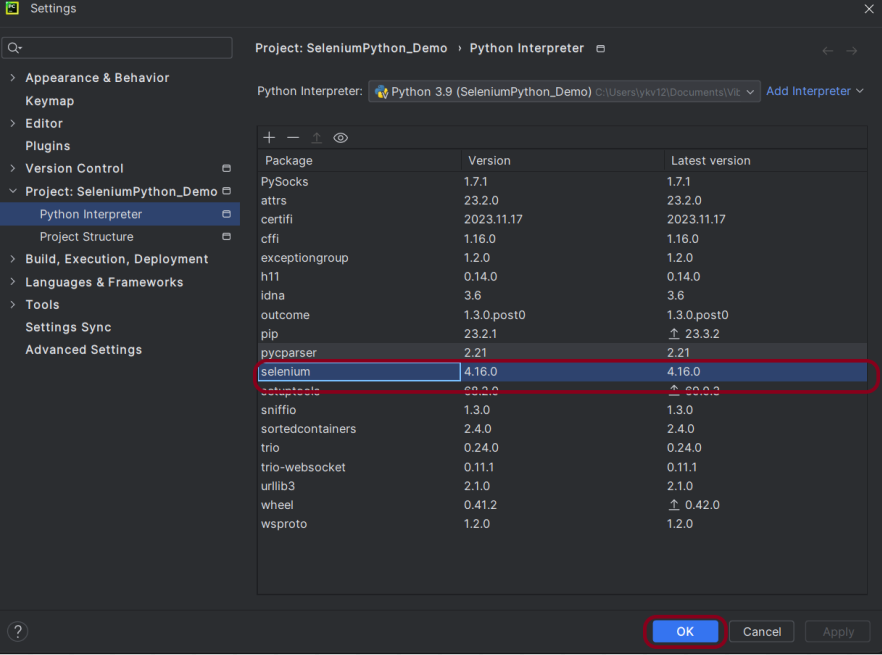
Once the package is installed, it can be seen under the package list as shown below:
Step 8 – Create the test
from selenium import webdriver
from selenium.webdriver.common.by import By

driver = webdriver.Chrome()
driver.maximize_window()
driver.implicitly_wait(2)
driver.get("https://opensource-demo.orangehrmlive.com/")

driver.find_element(By.NAME, "username").send_keys("Admin")
driver.find_element(By.NAME, "password").send_keys("admin123")
driver.find_element(By.XPATH, "//*[@class='oxd-form']/div[3]/button").click()

homePageTitle = driver.find_element(By.XPATH,"//*[@class='oxd-topbar-header-breadcrumb']/h6").text
print("Heading of DashBoard Page: ", homePageTitle)
driver.quit()
Importing necessary modules:
from selenium import webdriver
from selenium.webdriver.common.by import By
webdriver is used to automate the web browser. By is imported to specify the mechanism used to locate elements on a web page.
Setting up the web driver:
driver = webdriver.Chrome()
This line creates an instance of the Chrome WebDriver, which will be used to automate the Chrome browser.
Maximizing the browser window:
driver.maximize_window()
This line maximizes the browser window.
Implicitly waiting for elements:
driver.implicitly_wait(2)
This sets an implicit wait, meaning the WebDriver will wait up to 2 seconds for elements to be located before throwing an exception.
Navigating to a URL:
driver.get("https://opensource-demo.orangehrmlive.com/")
The script navigates the browser to the specified URL, which is the login page of an HR management system.
Enter the Credentials
driver.find_element(By.NAME, "username").send_keys("Admin")
driver.find_element(By.NAME, "password").send_keys("admin123")
driver.find_element(By.XPATH, "//*[@class='oxd-form']/div[3]/button").click()
In the method mentioned above, we can inspect and find the HTML element with which you want to interact. The script locates the username and password input fields on the page by their names and enters the credentials. The script locates the login button using an XPath expression and clicks it.
Fetching and printing the heading of the dashboard page:
homePageTitle = driver.find_element(By.XPATH,"//*[@class='oxd-topbar-header-breadcrumb']/h6").text
print("Heading of DashBoard Page: ", homePageTitle)
The script locates an element on the dashboard page (specifically an h6 element within a breadcrumb) and prints its text, which is assumed to be the heading of the dashboard page.
Quitting the browser:
driver.quit()
Finally, the script closes the browser window and ends the WebDriver session.
Step 9 – Execute the Tests
We need to move to the folder where the Python Tests are placed. In this case, we need to go to the TestCases folder.
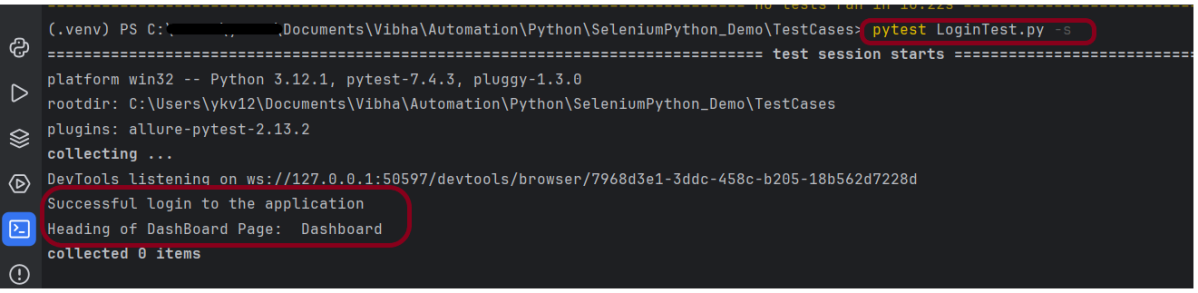
To run the tests, use the below command:
pytest LoginTest.py -s
The output of the above program is
We are done! Congratulations on making it through this tutorial and hope you found it useful! Happy Learning!!
