TestNG Framework – How to download and install TestNG in Eclipse

HOME

In the previous tutorial, we discussed what is TestNG and why it is important. This tutorial will discuss how can we download and install TestNG in Eclipse and how to use it.

Pre-Requisite 

1) Eclipse should be installed and configured. Please refer to Install and Configure to set up Eclipse on your system.

Install/Setup TestNG

1) Launch Eclipse and go to the “Help” option present at the top and select –“Install New Software”.

2) A dialog box will appear, click the Add button.

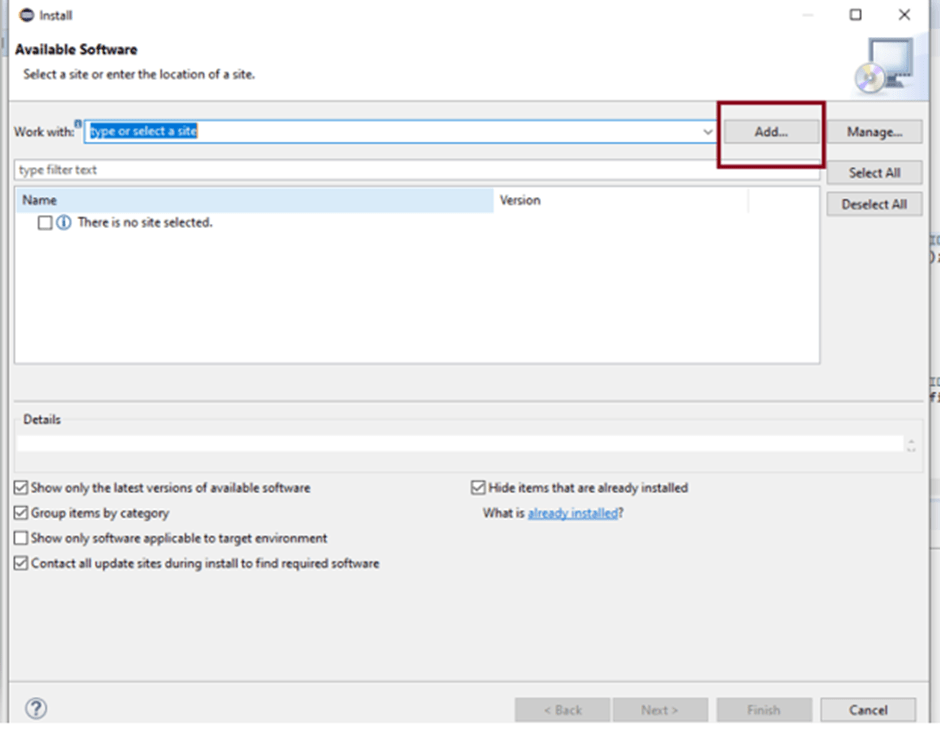
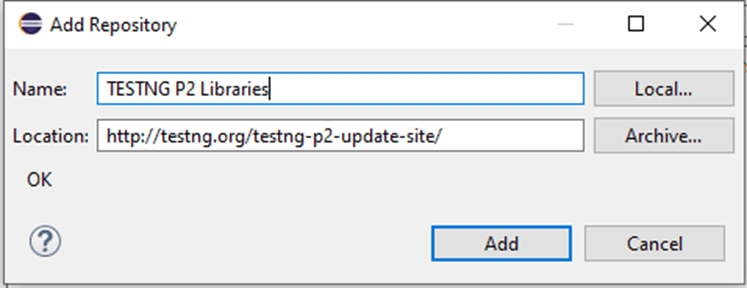
3) A new dialog box will appear. Mention the Name as TestNG and the location asTestNG P2 – https://testng.org/testng-p2-update-site” and click the Add button.

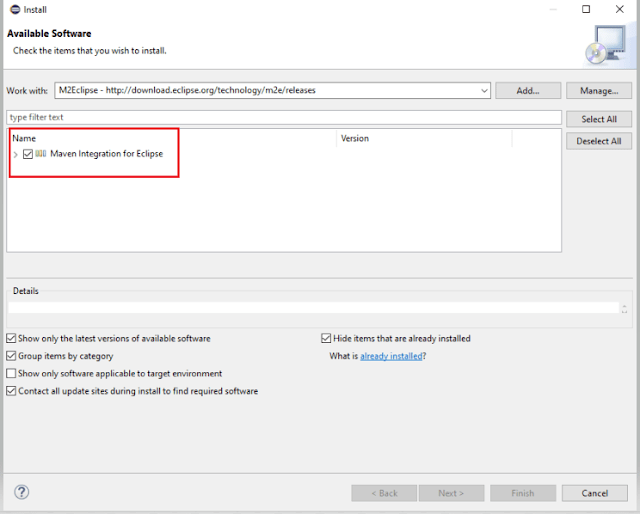
4) This time we will see TestNG is added to Install dialog box.

5) Accept the terms and conditions and then click the Finish button.

6) Once the installation is completed, you will get a message to Restart the Eclipse. Select Restart the Eclipse

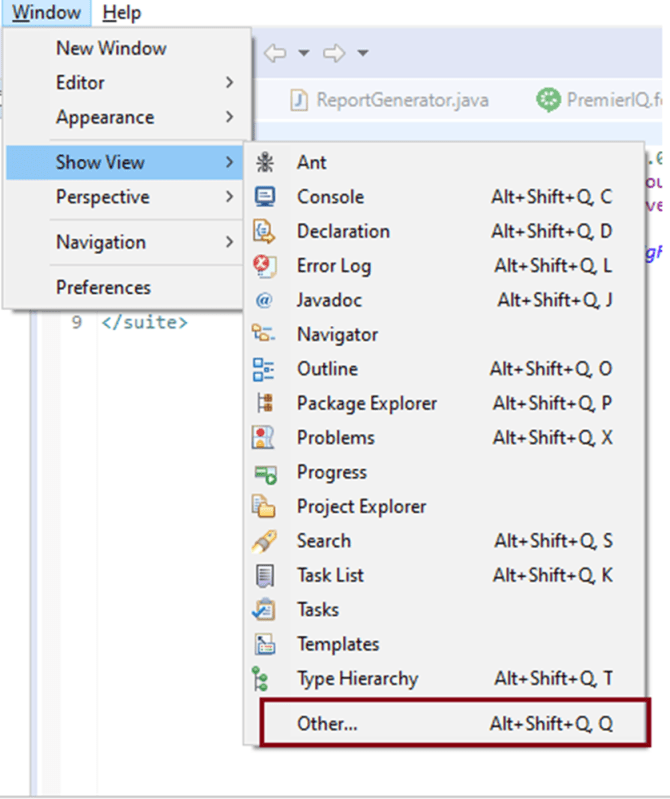
7) To verify if TestNG is installed successfully or not, go to Window, select Show View, and then Other.

8) Select Java and see, within the Java folder, you will see TestNG. This shows that TestNG is successfully installed on the machine.

Steps to follow to create a TestNG class

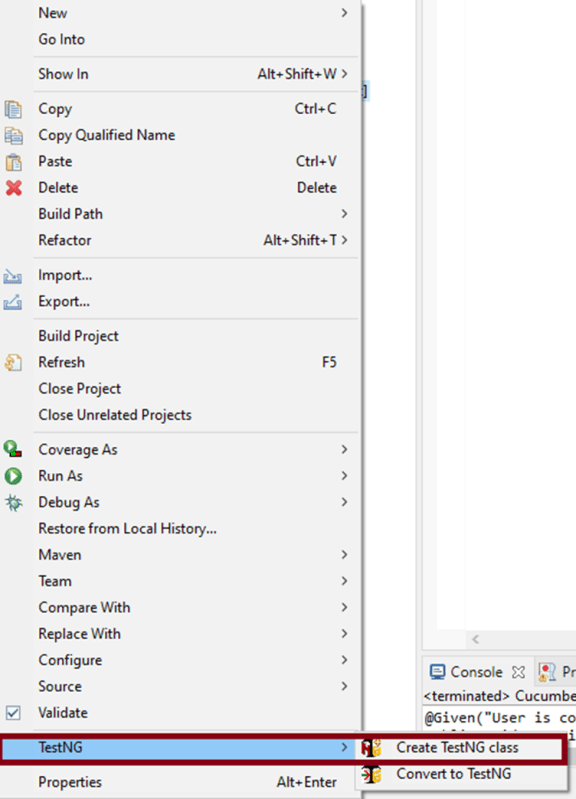
1) Create a new TestNG class. Right-click on the Folder where you want to create the TestNG class. Select TestNG and then Create the TestNG class as shown in the below image.

2) In the below image, we can see that the Source folder is the name of the folder we want to create the class, and we can mention the name of the class in the Class name. Under annotations, I have checked @BeforeTest and @AfterTest and click the Finish button.

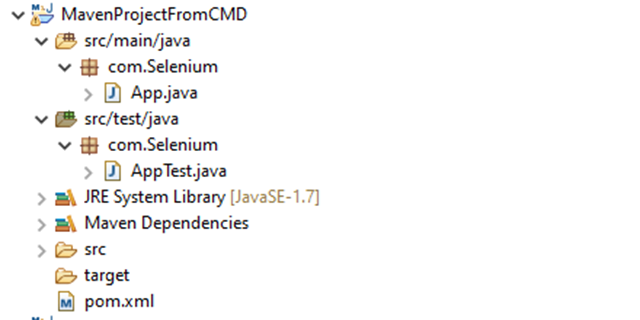
3) We can see that the structure of the new TestNG class looks like as shown below.

4) In the below example, we want to navigate to an Amazon page and search for Hard Drive.

@BeforeTest : Launch Firefox and direct it to the Base URL

@Test : Search for HardDrive

@AfterTest : Close Firefox browser

import org.testng.annotations.Test;
import org.testng.annotations.BeforeTest;
import java.util.concurrent.TimeUnit;
import org.openqa.selenium.By;
import org.openqa.selenium.WebDriver;
import org.openqa.selenium.firefox.FirefoxDriver;
import org.testng.annotations.AfterTest;

public class TestNG_Demo {

   public WebDriver driver;

   @BeforeTest
    public void beforeTest() {
      
     System.setProperty("webdriver.gecko.driver","C:\\Users\\vibha\\Downloads\\geckodriver-v0.26.0-win64\\geckodriver.exe");
    driver = new FirefoxDriver();
    driver.manage().timeouts().implicitlyWait(60, TimeUnit.SECONDS);
    driver.manage().window().maximize();
    driver.get("https://www.amazon.com//");
 }

@Test
public void Validation() {
    driver.findElement(By.xpath("//*[@id='twotabsearchtextbox']")).sendKeys("hard drive");
    //XPath for search button
      driver.findElement(By.xpath("//*[@class='nav-input']")).click();
   }

@AfterTest
public void afterTest() {
    driver.quit();
  } 
}

5) To execute this program, we need to Right-click and select Run as – TestNG Test.

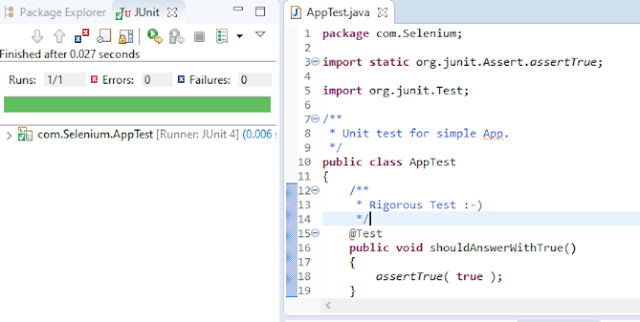
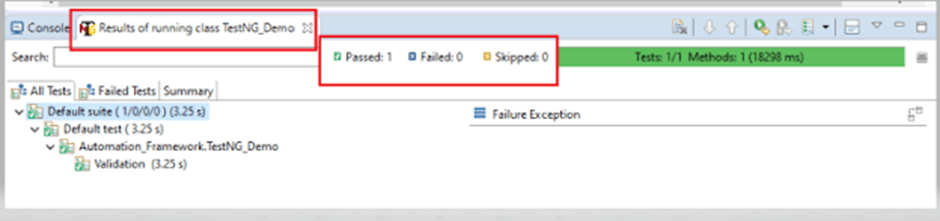
6) The result will look like something shown below. Here, we can see that Test Case Passed is 1, Failed 0, and Skipped 0.

7) As we know that TestNG also produce HTML Reports. To access the report, go to the Eclipse folder, and you can see a folder with name test-output inside the Project where we have created TestNG class. Here, it is  C:\Users\vibha\Downloads\eclipse-workspace\Demo

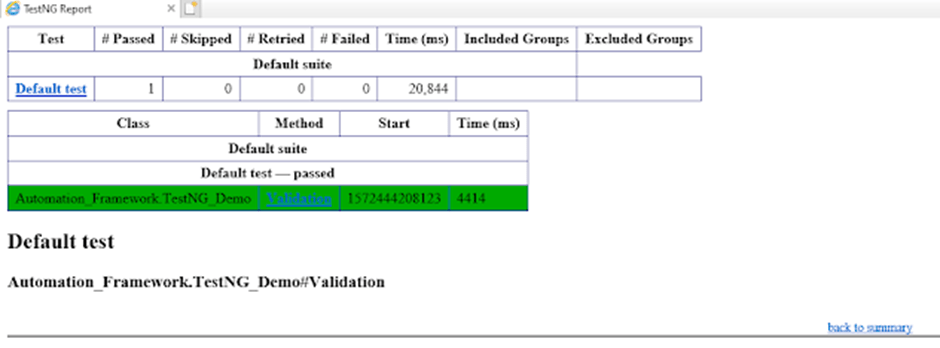
We are done! Congratulations on making it through this tutorial and hope you found it useful! Happy Learning!!

TestNG Framework – Introduction to TestNG

HOME

Maven – How to import Maven Project into Eclipse


In the previous tutorial, we have seen how we can create a Java project from Command Line. In this tutorial, will see how we can import this project in Eclipse.

  1. We need to make sure if Eclipse Maven Integration(m2e) is present . Latest Eclipse IDE has bundled the m2e plugin.

2. If you are using older version of Eclipse. Then below are the steps to follow

2.1 Open Eclipse IDE and select Help ->Install New Software

2.2 Click on Add button to add a new Repository

2.3 Fill the below mentioned information in the dialog box:-

Name – M2Eclipse

Location – http://download.eclipse.org/technology/m2e/releases

2.4. After the Pending finish, select all the Plugins and press Next.

2.5. Accept the terms of the license agreement and click Finish

2.6. At the end of the installation, you will be ask to restart your Eclipse. Click Yes to perform the restart.

2.7 To check if the installation is successful, go to Help ->About Eclipse

3. In Eclipse IDE, select File ->Import ->Maven ->Existing Maven Project. 

4. The m2e plugin will analyze the pom.xml and will configure the project and generate the Eclipse files automatically.

5. Below is the code of App.java. Run this code

package com.Selenium;
 
/**
 * Hello world!
 *
 */
public class App 
{
    public static void main( String[] args )
    {
        System.out.println( "Hello World!" );
    }
}

6. Below is the code of AppTest.java. Run this code

package com.Selenium;
 
import static org.junit.Assert.assertTrue;
import org.junit.Test;
 
/**
 * Unit test for simple App.
 */
public class AppTest 
{
    /**
     * Rigorous Test 🙂
     */
    @Test
    public void shouldAnswerWithTrue()
    {
        assertTrue( true );
    }
}

Note:- Apache Maven Eclipse Plugins like eclipse:eclipse, eclipse:clean, etc are retired. To know more about it, please refer the link

7. Structure of POM.xml

<?xml version="1.0"encoding="UTF-8"?>
 
<project xmlns="http://maven.apache.org/POM/4.0.0"xmlns:xsi="http://www.w3.org/2001/XMLSchema-instance"
  xsi:schemaLocation="http://maven.apache.org/POM/4.0.0 http://maven.apache.org/xsd/maven-4.0.0.xsd">
  <modelVersion>4.0.0</modelVersion>
 
  <groupId>com.Selenium</groupId>
  <artifactId>MavenProjectFromCMD</artifactId>
  <version>1.0-SNAPSHOT</version>
 
  <name>MavenProjectFromCMD</name>
  <!-- FIXME change it to the project's website -->
  <url>http://www.example.com</url>
 
  <properties>
    <project.build.sourceEncoding>UTF-8</project.build.sourceEncoding>
    <maven.compiler.source>1.7</maven.compiler.source>
    <maven.compiler.target>1.7</maven.compiler.target>
  </properties>
 
  <dependencies>
    <dependency>
      <groupId>junit</groupId>
      <artifactId>junit</artifactId>
      <version>4.11</version>
      <scope>test</scope>
    </dependency>
  </dependencies>
 
  <build>
    <pluginManagement><!-- lock down plugins versions to avoid using Mavendefaults (may be moved to parent pom) -->
      <plugins>
        <!-- clean lifecycle, see https://maven.apache.org/ref/current/maven-core/lifecycles.html#clean_Lifecycle -->
        <plugin>
          <artifactId>maven-clean-plugin</artifactId>
          <version>3.1.0</version>
        </plugin>

        <!-- default lifecycle, jar packaging: see https://maven.apache.org/ref/current/maven-core/default-bindings.html#Plugin_bindings_for_jar_packaging -->
        <plugin>
          <artifactId>maven-resources-plugin</artifactId>
          <version>3.0.2</version>
        </plugin>

        <plugin>
          <artifactId>maven-compiler-plugin</artifactId>
          <version>3.8.0</version>
        </plugin>

        <plugin>
          <artifactId>maven-surefire-plugin</artifactId>
          <version>2.22.1</version>
        </plugin>

        <plugin>
          <artifactId>maven-jar-plugin</artifactId>
          <version>3.0.2</version>
        </plugin>

        <plugin>
          <artifactId>maven-install-plugin</artifactId>
          <version>2.5.2</version>
        </plugin>

        <plugin>
          <artifactId>maven-deploy-plugin</artifactId>
          <version>2.8.2</version>
        </plugin>

        <!-- site lifecycle, see https://maven.apache.org/ref/current/maven-core/lifecycles.html#site_Lifecycle -->
        <plugin>
          <artifactId>maven-site-plugin</artifactId>
          <version>3.7.1</version>
        </plugin>

        <plugin>
          <artifactId>maven-project-info-reports-plugin</artifactId>
          <version>3.0.0</version>
        </plugin>
      </plugins>
    </pluginManagement>
  </build>
</project>