In the previous tutorial, we got an introduction to Log4j 2. In this tutorial, we will create a Selenium project and implement logging using Log4j2 XML configuration.
Table of Contents
Prerequisite
- Java installed
- Maven installed
- TestNG installed
Dependency List
- Java -17
- Selenium – 4.15.0
- TestNG – 7.8.0
- Maven – 3.8.1
- Log4j – 3.0.0-alpha1
Implementation Steps
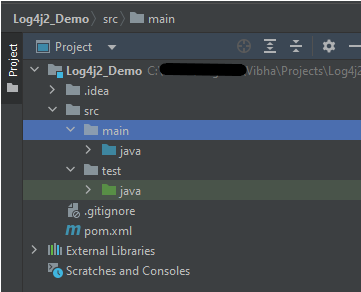
Step 1 – Create a new Maven Project
You can use any IDE or text editor that supports Java.
Step 2- Add the dependencies to the POM.xml
Add the log4j library to your project.
<project xmlns="http://maven.apache.org/POM/4.0.0" xmlns:xsi="http://www.w3.org/2001/XMLSchema-instance"
  xsi:schemaLocation="http://maven.apache.org/POM/4.0.0 http://maven.apache.org/xsd/maven-4.0.0.xsd">
  <modelVersion>4.0.0</modelVersion>

  <groupId>com.example</groupId>
  <artifactId>Log4j2_Demo</artifactId>
  <version>1.0-SNAPSHOT</version>
  <packaging>jar</packaging>

  <name>Log4j2_Demo</name>
  <url>http://maven.apache.org</url>

  <properties>
    <selenium.version>4.15.0</selenium.version>
    <testng.version>7.8.0</testng.version>
    <log4j.version>3.0.0-alpha1</log4j.version>
    <maven.compiler.version>3.11.0</maven.compiler.version>
    <project.build.sourceEncoding>UTF-8</project.build.sourceEncoding>
    <maven.surefire.failsafe.version>3.1.2</maven.surefire.failsafe.version>
    <maven.compiler.source>17</maven.compiler.source>
    <maven.compiler.target>17</maven.compiler.target>
  </properties>

  <dependencies>

    <!-- TestNG Dependency -->
    <dependency>
      <groupId>org.testng</groupId>
      <artifactId>testng</artifactId>
      <version>${testng.version}</version>
      <scope>test</scope>
    </dependency>


    <!-- Log4j Dependency -->
    <dependency>
      <groupId>org.apache.logging.log4j</groupId>
      <artifactId>log4j-core</artifactId>
      <version>${log4j.version}</version>
    </dependency>

    <!-- Selenium Dependency -->
    <dependency>
      <groupId>org.seleniumhq.selenium</groupId>
      <artifactId>selenium-java</artifactId>
      <version>${selenium.version}</version>
    </dependency>

  </dependencies>

  <build>

    <plugins>
      <plugin>
        <groupId>org.apache.maven.plugins</groupId>
        <artifactId>maven-surefire-plugin</artifactId>
        <version>${maven.surefire.failsafe.version}</version>
        <configuration>
          <skipTests>false</skipTests>
          <skip>false</skip>
          <testFailureIgnore>true</testFailureIgnore>
        </configuration>
      </plugin>

      <plugin>
        <groupId>org.apache.maven.plugins</groupId>
        <artifactId>maven-compiler-plugin</artifactId>
        <version>${maven.compiler.version}</version>
        <configuration>
          <source>${maven.compiler.source}</source>
          <target>${maven.compiler.target}</target>
          <fork>true</fork>
        </configuration>
      </plugin>
    </plugins>

  </build>

</project>
Step 3- Create the log4j2.xml configuration file
Create the log4j2.xml configuration file in src/java/resources. Create a resource folder in src/java.

Now, create a file -log4j2.xml under src/test/resources directory.

The log4j configuration file specifies how log4j should log information. Here is an example of a simple log4j configuration file:
<?xml version="1.0" encoding="UTF-8"?>
<Configuration status="WARN">
    <Appenders>
        <Console name="LogToConsole" target="SYSTEM_OUT">
            <PatternLayout pattern="%d{HH:mm:ss.SSS} [%t] %-5level %logger{36} - %msg%n"/>
        </Console>
        <File name="LogToFile" fileName="logs/app.log">
            <PatternLayout>
                <Pattern>%d %p %c{1.} [%t] %m%n</Pattern>
            </PatternLayout>
        </File>
    </Appenders>
    <Loggers>
        <Logger name="com.example" level="debug" additivity="false">
            <AppenderRef ref="LogToFile"/>
            <AppenderRef ref="LogToConsole"/>
        </Logger>
        <Root level="error">
            <AppenderRef ref="LogToFile"/>
            <AppenderRef ref="LogToConsole"/>
        </Root>
    </Loggers>
</Configuration>
Below is a very basic XML configuration to print logs in the log file.
<Pattern>%d %p %c{1.} [%t] %m%n</Pattern>
We have used a console appender “LogToConsole” – Console tag inside the Appender tag, so the logs will be printed on the console as well as a file appender “LogToFile” – Console tag inside the Appender tag, so the logs will be saved in a file.
We can change the status to “trace”, “debug”, “info”, “warn”, “error” and “fatal” to enable the internal Log4j events, it will display many useful logs for the Log4j components.
<Configuration status="WARN">
Step 4 – Import log4j in the Selenium script
We need to import the log4j library in the Selenium script so that we can use it in your code. Here is an example of how to import log4j in the Selenium script:
import org.apache.logging.log4j.LogManager;
import org.apache.logging.log4j.Logger;
Step 5 – Create a Logger instance
We need to create a Logger instance in the Selenium script so that we can use it to log information. Here is an example of how to create a Logger instance:
private static Logger logger = LogManager.getLogger();
Step 6 – Create the Test Code with Log4j
Here is a complete code example that demonstrates how to use log4j in Selenium:
import io.github.bonigarcia.wdm.WebDriverManager;
import org.apache.logging.log4j.LogManager;
import org.apache.logging.log4j.Logger;
import org.openqa.selenium.By;
import org.openqa.selenium.WebDriver;
import org.openqa.selenium.chrome.ChromeDriver;
import org.openqa.selenium.chrome.ChromeOptions;
import org.testng.Assert;
import org.testng.annotations.AfterMethod;
import org.testng.annotations.BeforeMethod;
import org.testng.annotations.Test;
import java.util.concurrent.TimeUnit;

public class Log4j_XML_Example {

    WebDriver driver;

    By userName = By.name("username");
    By passWord = By.name("password");
    By loginBtn = By.xpath("//*[@id='app']/div[1]/div/div[1]/div/div[2]/div[2]/form/div[3]/button");
    By loginTitle = By.xpath("//*[@id='app']/div[1]/div/div[1]/div/div[2]/h5");
    By dashboardPage = By.xpath("//*[@id='app']/div[1]/div[1]/header/div[1]/div[1]/span/h6");

    // Creating a logger
    private static Logger logger = LogManager.getLogger();

    @BeforeMethod
    public void setUp() {

        logger.info("Open a Chrome Web Browser");
        ChromeOptions options=new ChromeOptions();
        options.addArguments("--start-maximized");
        driver=new ChromeDriver(options);
        driver.manage().timeouts().implicitlyWait(10, TimeUnit.SECONDS);
        driver.get("https://opensource-demo.orangehrmlive.com/");
        logger.info("Open the application");
    }

    @Test(description = "This test validates title of login functionality", priority = 0)
    public void verifyLoginPageTitle() {

        logger.info("Verify the Login page title");
        String expectedTitle = driver.findElement(loginTitle).getText();

        logger.info("Actual Title :" + expectedTitle);
        Assert.assertTrue(expectedTitle.equalsIgnoreCase("Login"));
    }

    @Test(description = "This test validates  successful login to Home page", priority = 1)
    public void verifyloginPage() {

        logger.info("Enter Username");
        driver.findElement(userName).sendKeys("Admin");

        logger.info("Enter Password");
        driver.findElement(passWord).sendKeys("admin123");

        driver.findElement(loginBtn).submit();

        logger.info("New page - Dashboard is opened");
        String newPageText = driver.findElement(dashboardPage).getText();

        logger.info("Heading of new page :" + newPageText);
        Assert.assertTrue(newPageText.contains("Dashboard"));

    }

    @AfterMethod
    public void teardown() {

        logger.info("Close the webpage");
        driver.quit();
    }

}
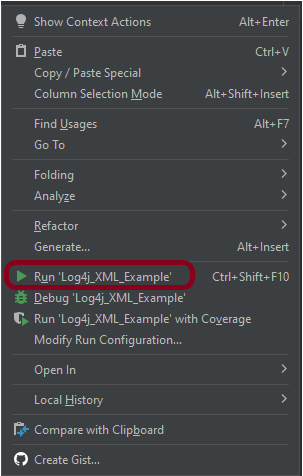
Step 7 – Execute the test
Right-click on the test and select “Run Log4j_XML_Example”.
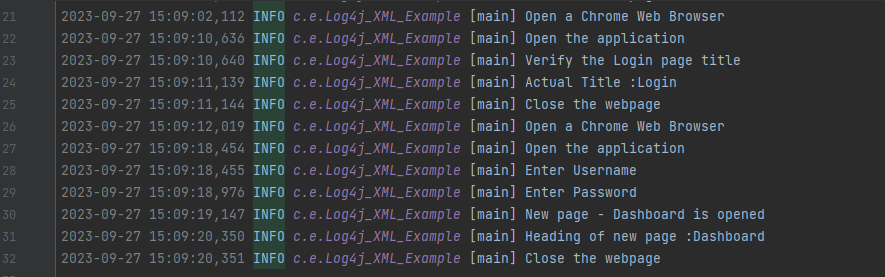
The output of the above program is

The log is printed as specified in the xml file. The timestamp is specified in PatternLayout. The log type is INFO. The file name is com.example.log4j_XML_Example specified in Logger name.
The output log file is created under folder logs that are created at the root level of the project. The file name is app.log.

The app.log file will look like the image shown below.
Congratulations on making it through this tutorial and hope you found it useful! Happy Learning!! Cheers!!
