In the previous tutorial, we discussed How to disable Test Cases using TestNG. In this tutorial, we will see how we can create a dependency between Selenium Test Cases using TestNG.
Imagine there is a situation in which a test case can only be executed if a particular test case executes successfully. This can be achieved in TestNG by dependsOnMethod().
Below is an example.
To Run the TestNG program, right-click on the Java Program – here it is TestNGMethodDependencyDemo, select Run As TestNG Test(Eclipse).

Below is an example of dependsOnMethod() method.
import org.testng.annotations.Test;

public class TestNGMethodDependencyDemo {

    @Test
    public static void FirstTest() {
        System.out.println("This is Test Case 1");
    }

    @Test(dependsOnMethods = "FirstTest")
    public static void SecondTest() {
        System.out.println("This is Test Case 2 and will be executed after Test Case 1 successfully executed");
    }

    @Test
    public static void ThirdTest() {
        System.out.println("This is Test Case 3");
    }

    @Test
    public static void FourthTest() {
        System.out.println("This is Test Case 4");
    }
}
The output of the above program is

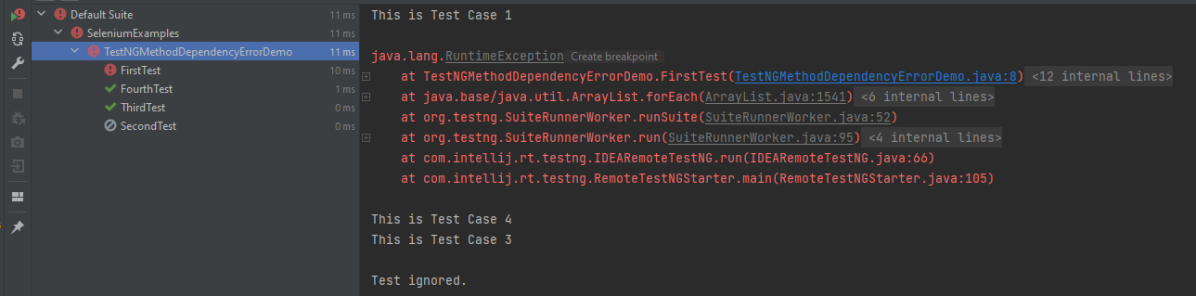
In the below scenario, Test Case 2 is dependent on Test CASE 1. If Test Case 1 fails, then Test Case 2 will skip.
package TestNGDemo;

import org.testng.annotations.Test;
public class TestNGMethodDependencyErrorDemo {

      @Test
      public static void FirstTest() {
            System.out.println("This is Test Case 1");
            throw new RuntimeException();
      }

      @Test(dependsOnMethods = "FirstTest")
      public static void SecondTest() {
          System.out.println("This is Test Case 2 and will be executed after Test Case 1 sucessfully executed");
     }

     @Test
     public static void ThirdTest() {
          System.out.println("This is Test Case 3");
     }

      @Test
      public static void FourthTest() {
            System.out.println("This is Test Case 4");
    }
}
The output of the above program is
We are done. Congratulations on making it through this tutorial and hope you found it useful!
