This tutorial explains the steps to create a GitHub Action for the PyTest Framework. It also guides you on how to execute the tests in that workflow.
Table of Contents
Why GitHub?
GitHub is a collaborative platform. It supports version control and code collaboration. Automated testing and issue tracking are also supported. These are crucial elements in the software testing process. It promotes transparency, collaboration, and efficiency in the development and testing workflows.
CI/CD pipelines have contributed to the success of the DevOps cycle in all software development projects. This is a holistic process that bridges development and operations. Continuous integration helps development teams deploy code efficiently, and continuous delivery automates code deployment.
Implementation Steps
Step 1 – Create GitHub Actions and Workflows
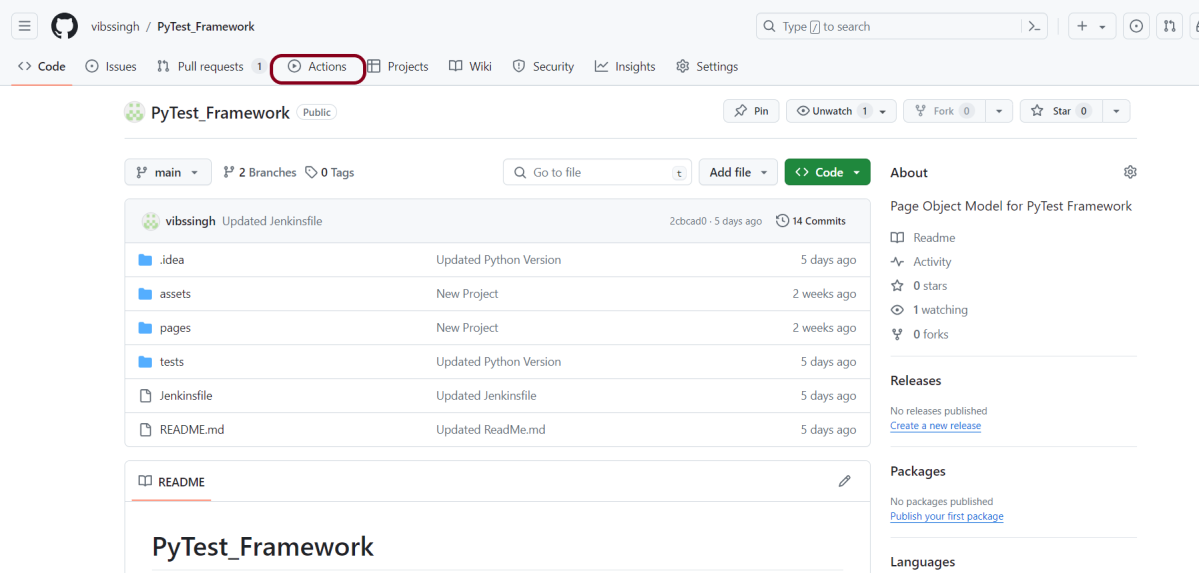
I have a repository available in GitHub – “PyTest_Framework” as shown in the below image. Go to the “Actions” tab. Click on the “Actions” tab.
Step 2 – Select the type of Actions
You will see that GitHub recommends Actions depending on the project. In our case, it is recommending actions suitable for a Java project. I have selected the “Python application” option as my project is built in Maven.

Step 3 – Generation of Sample pipeline
If you choose an existing option, it will automatically generate a .yaml for the project as shown below.

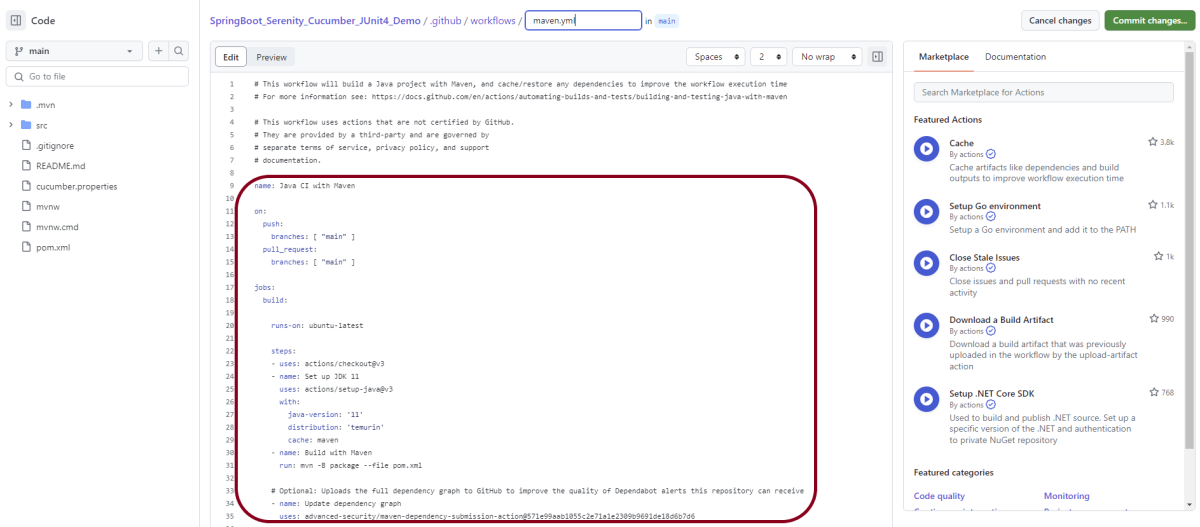
We will replace the current workflow with the following yml file as shown below:
name: PyTest Framework - Python
on:
  push:
    branches: [ "main" ]
  pull_request:
    branches: [ "main" ]

permissions:
  contents: read

jobs:
  test:
    runs-on: ubuntu-latest

    steps:
      - uses: actions/checkout@v4
      - name: Set up Python 3.12.1
        uses: actions/setup-python@v4
        with:
          python-version: 3.12.1

      - name: Install dependencies
        run: |
          python -m pip install --upgrade pip
          pip install pytest
          pip install pytest-selenium

      - name: Test with PyTest
        run: pytest --html=tests/Reports/Report.html

      - name: Test Report Generation
        uses: actions/upload-artifact@v4
        if: success() || failure()
        with:
          name: Pytest Report           # Name of the folder
          path: tests/Reports           # Path to test results
This command will update the Python’s Pip version to the latest available.
python -m pip install --upgrade pip
As we need pytest and pytest-selenium to execute the tests, we have installed them also using the below command:
pip install pytest
pip install pytest-selenium
We want the HTML Report to be generated in tests/Reports folder. So, we have mentioned the path.
  - name: Test with PyTest
    run: pytest --html=tests/Reports/Report.html
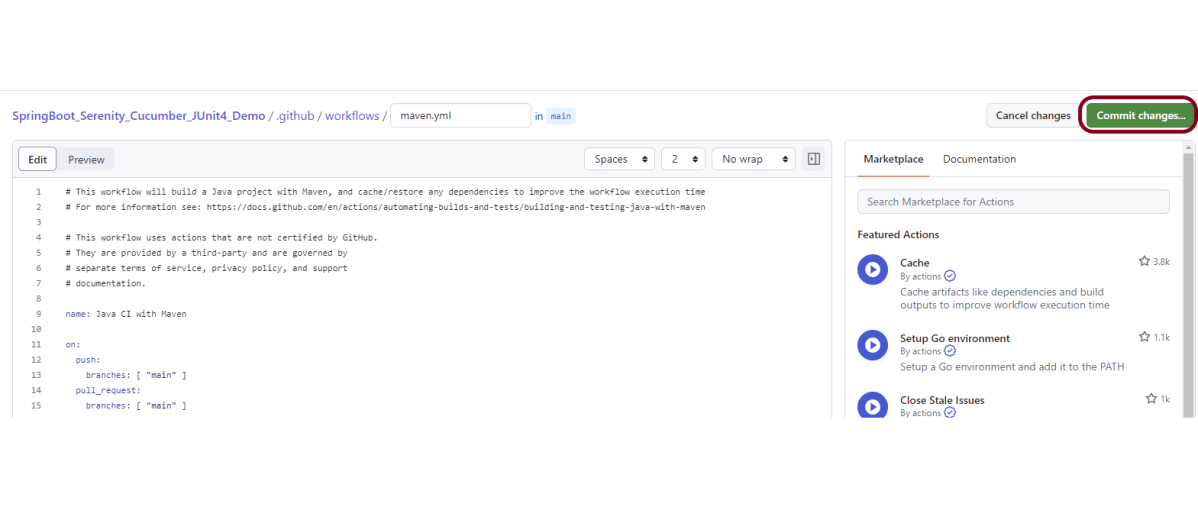
Step 4 – Commit the changes
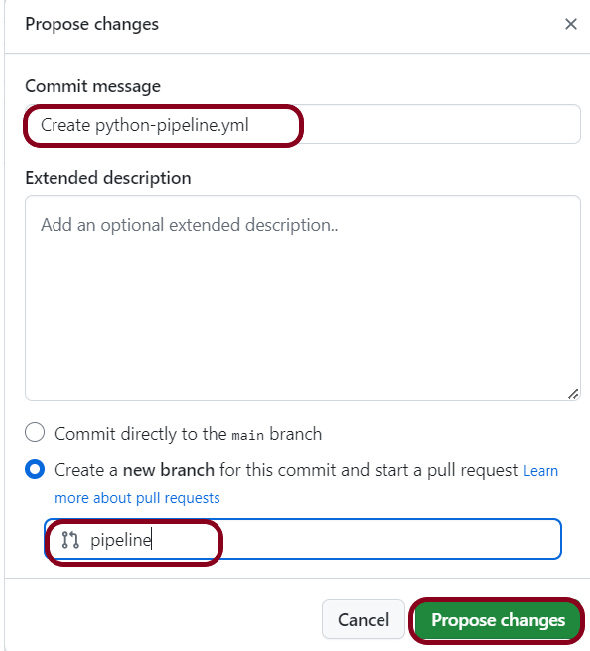
After the changes, hit the “Start Commit” button.

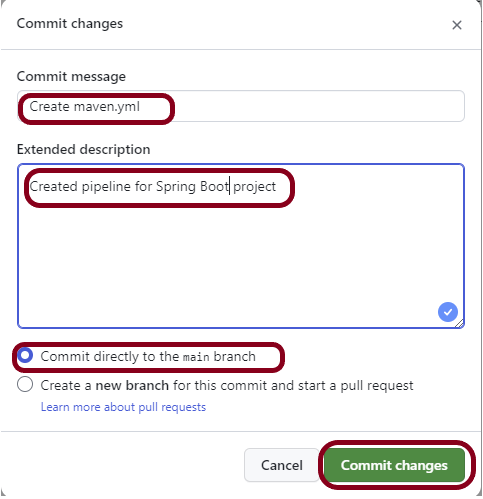
This will give the option to add a description for the commit. It will also enable the user to commit either to the main branch or commit to any other branch that exists in the project. My personal prefernece is to create a new branch like shown below and then commit the changes in that new branch.
If you have created a new branch, then it will ask to create a PULL request. Once you will create the PULL request, we can see the new workflow running.
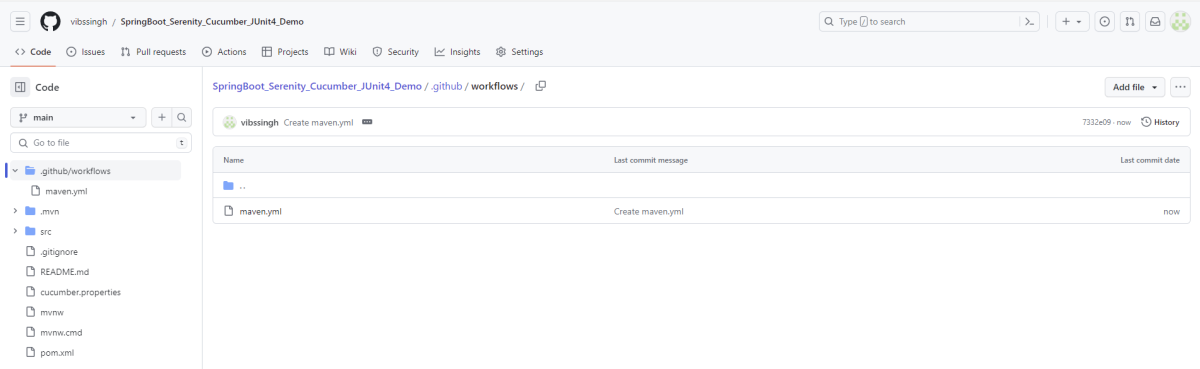
It will create a python-app.yml file as shown below in the project.

Step 5 – Verify that the workflow is running
Next, head over to the “Actions” tab, and you will see your YAML workflow file present under the tab. The yellow sign represents that the job is in the queue.

In Progress – When the job starts building and running, you will see the status change from “Queued” to “In progress”.

Passed – If the build is successful, you will see a green tick mark.
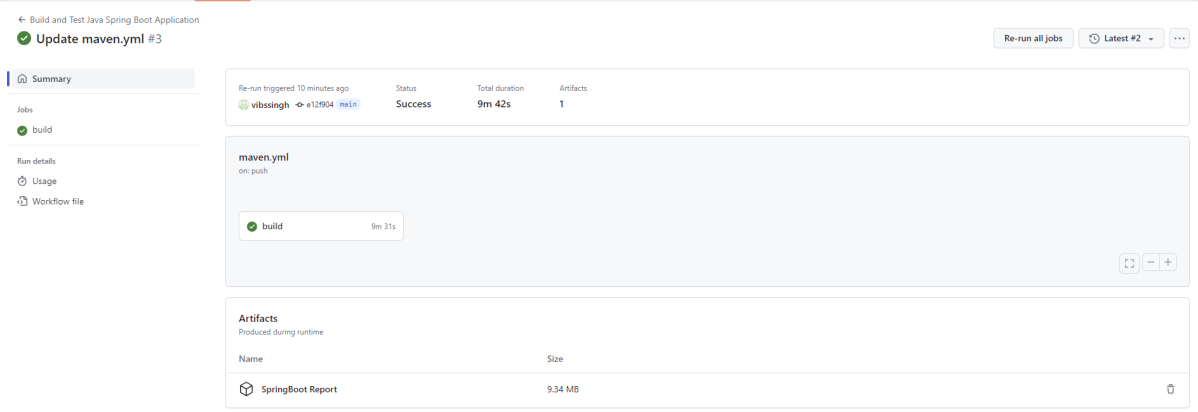
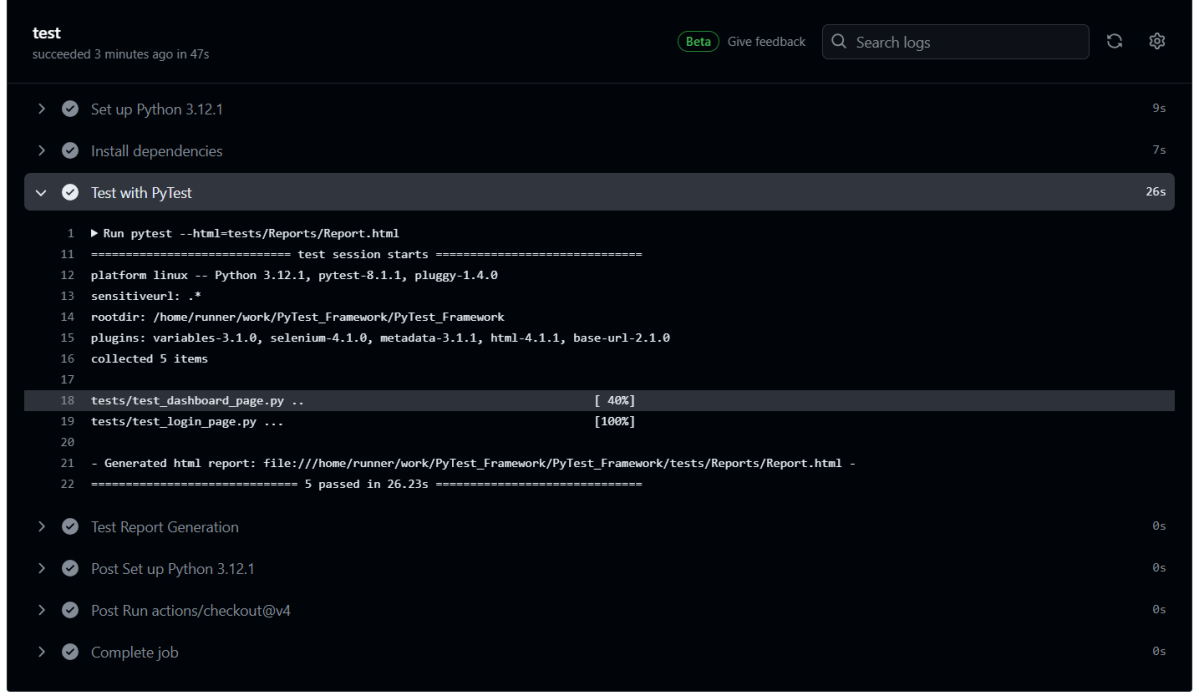
Below is the execution log. Go to “Test with PyTest“ phase.
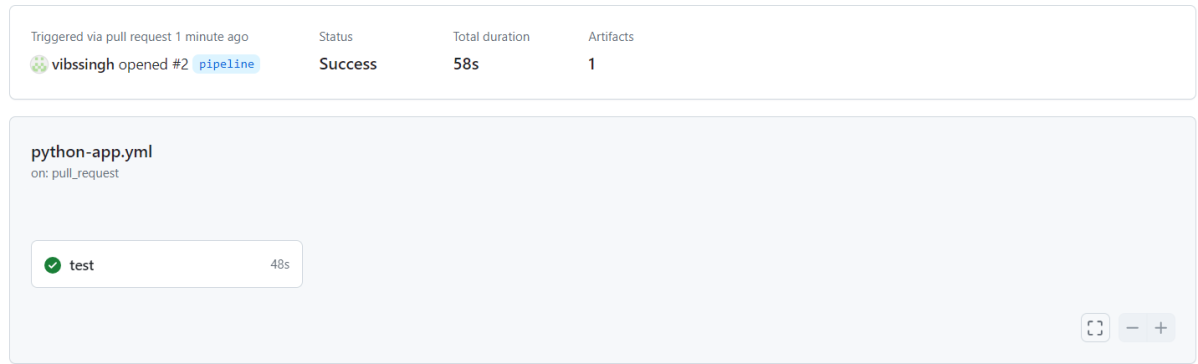
Click on the workflow and the below screen is displayed. It shows the status of the run of the workflow, the total time taken to run the workflow, and the name of the .yml file.
Below shows all the steps of the workflow.

Step 6 – Published Test Report on GitHub
From the logs of the Workflow, you can see that the “Test Report Generation” step was executed successfully.

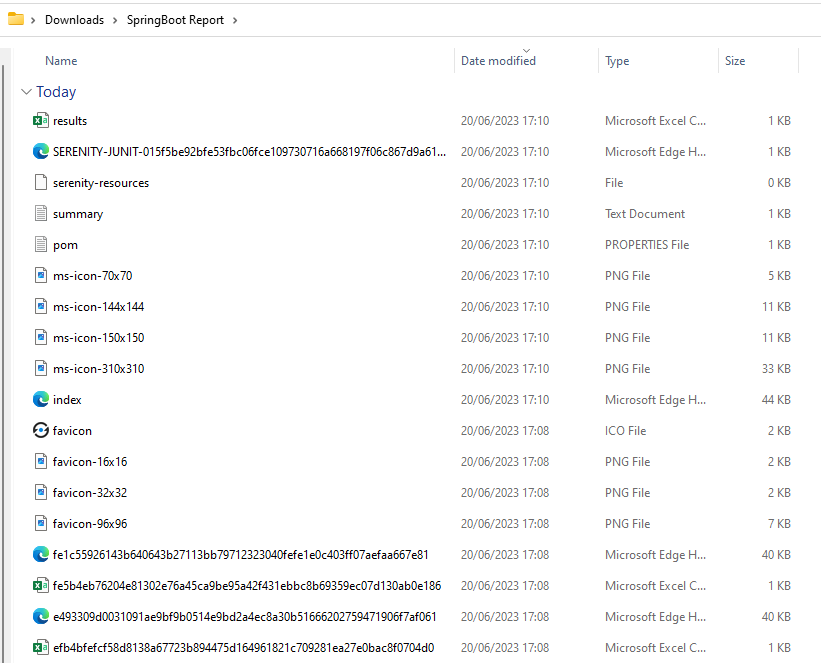
Once the pipeline run, a Report folder will be generated as shown in the below image:
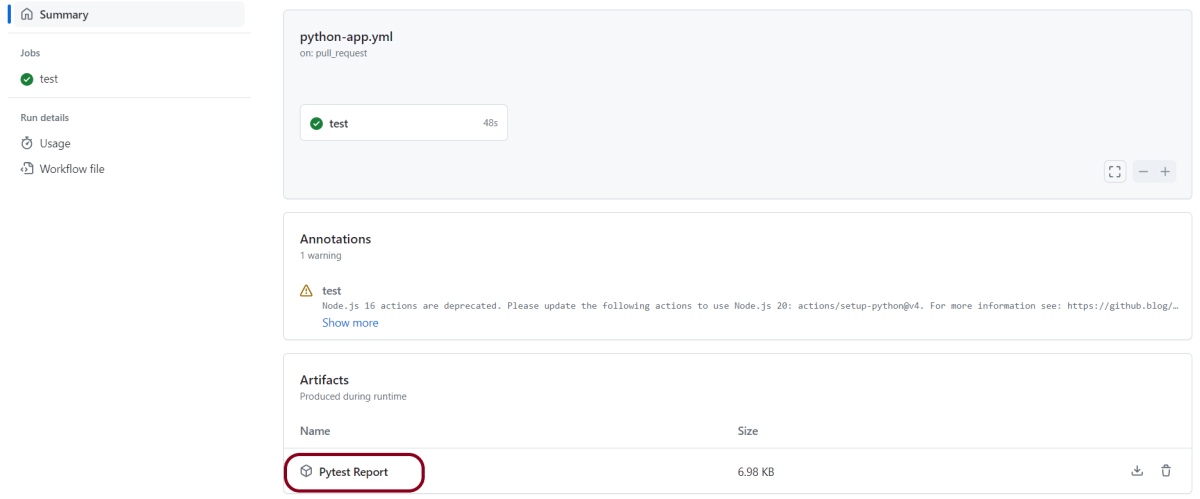
When we click on the folder PyTest Report, a zipped file will be downloaded. We can extract it to see all the files contained within it.

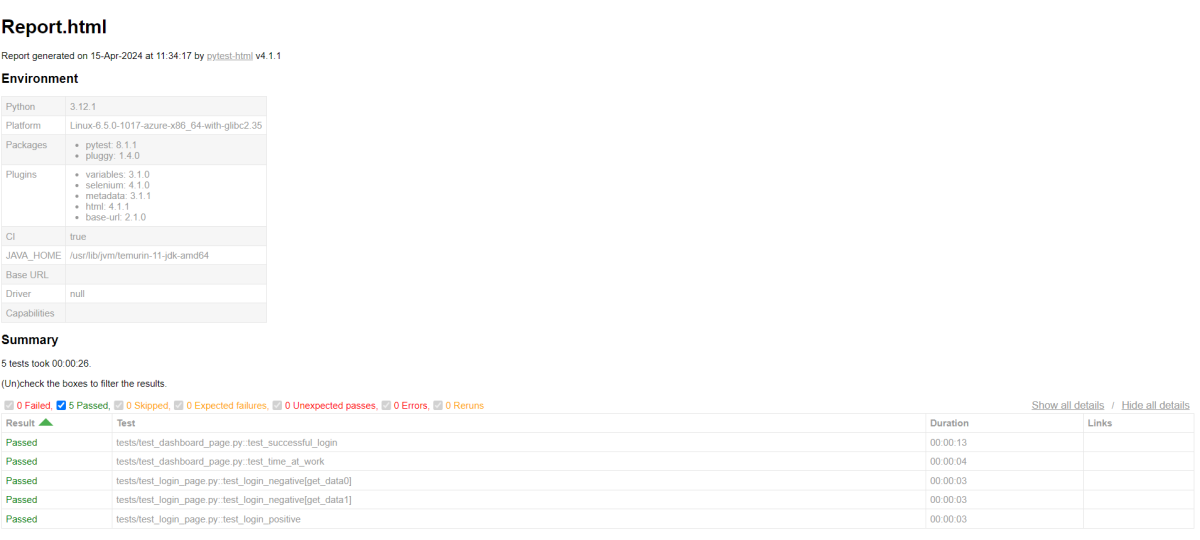
Extract the folder and see the Report.html.

Below is the image of Report.html.
The complete code can be found here on GitHub – vibssingh/PyTest_Framework.
Congratulations! We just created our CI workflow for running our Python Robot Framework.