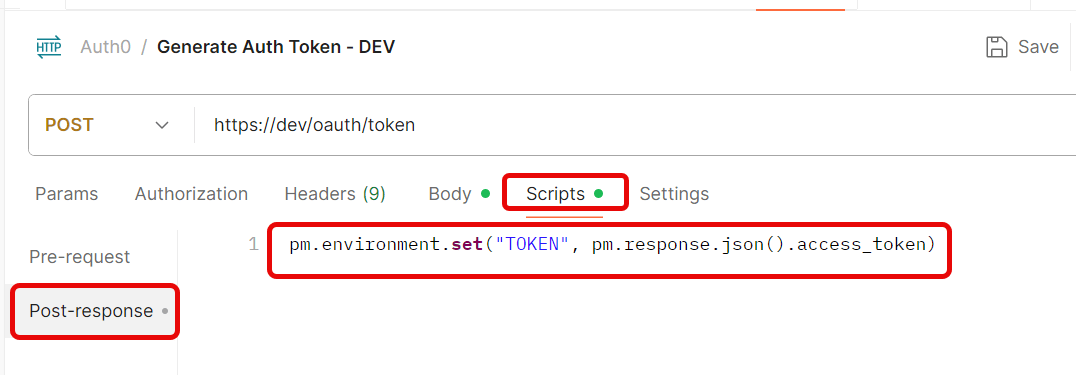
Create a new Environmentin Postman (top right → Environments → Add
Save the request.
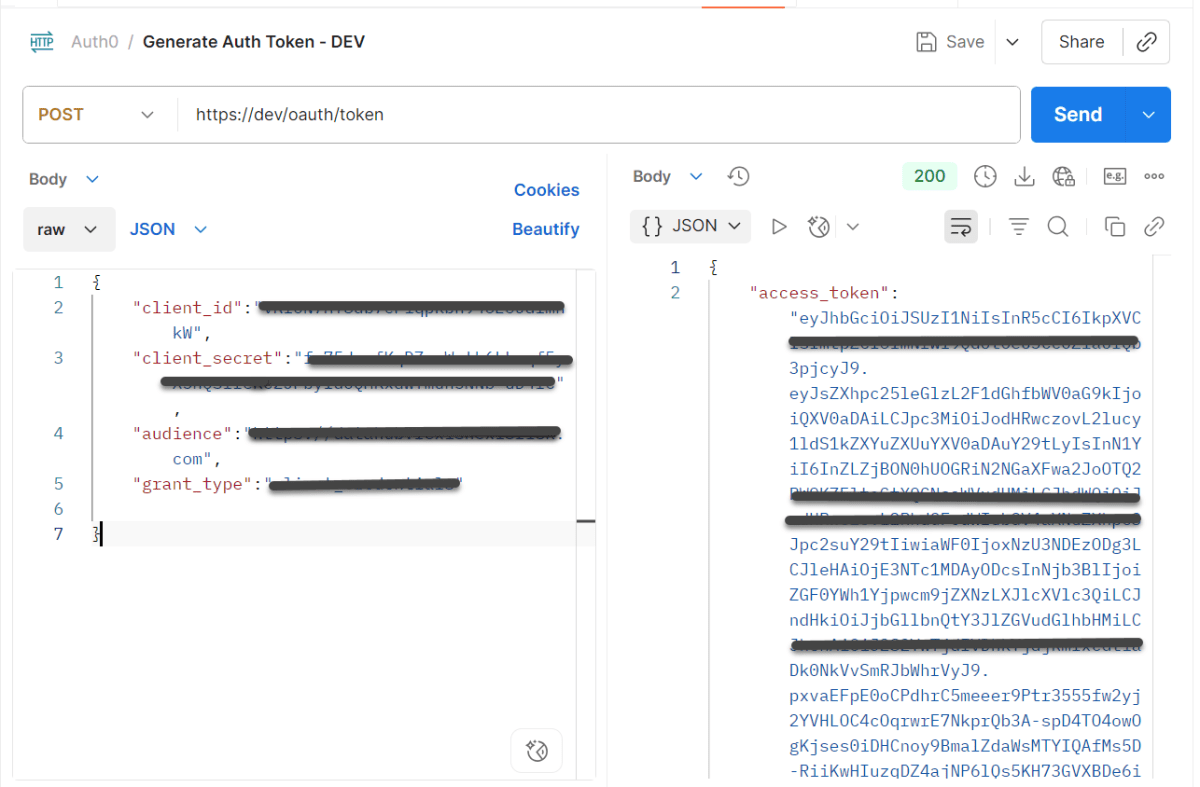
Step 3: Use the Token in Another Request
Create a new request.
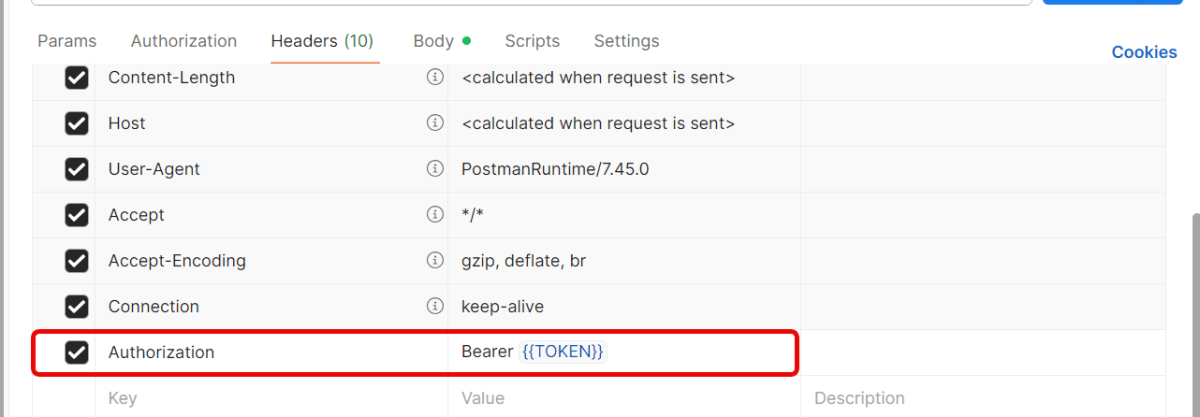
Go to the Headerstab.
Add this header:
Key: Authorization
Value: Bearer {{Token}}
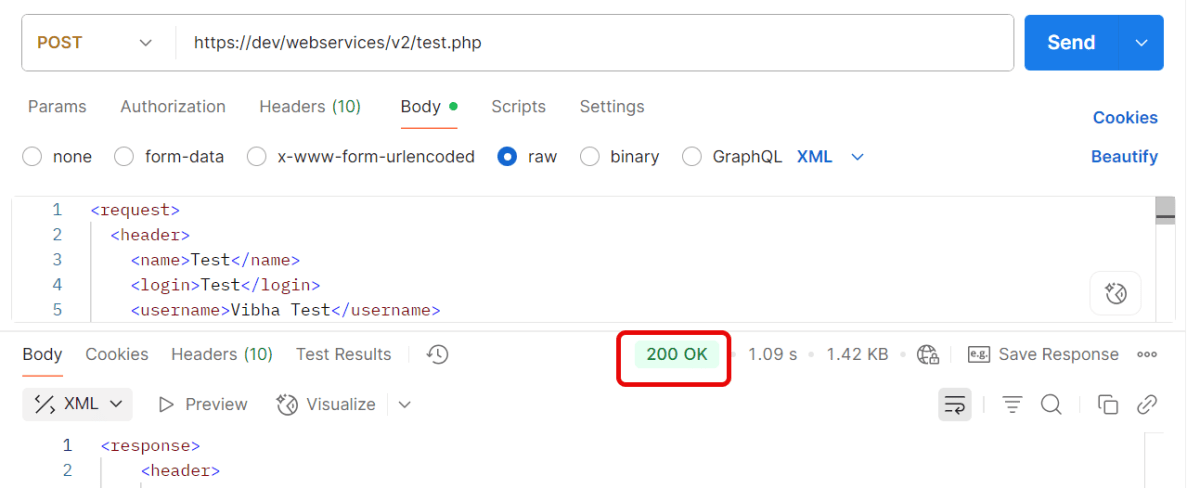
Send the request — Postman will automatically insert the token from the environment variable.
Quick Troubleshooting Checklist
1.Is the token saved correctly in environment variables? Token saved in one environment, but request uses another. Make sure you’ve selected the same environment (top-right dropdown in Postman).
2. Is the Authorization: Bearer {{Token}} header present?
3. Does the account have the correct permissions/scopes? Token is valid, but the user doesn’t have permission for that endpoint. Verify that your account has the right role/permissions.
4. Correct Content-Type is sent. Set header → Content-Type: application/json.
JSON Web Token (JWT) is an open standard (RFC 7519) that defines a compact and self-contained way for securely transmitting information between parties as a JSON object. This information can be verified and trusted because it is digitally signed. JWTs can be signed using a secret (with the HMAC algorithm) or a public/private key pair using RSA or ECDSA.
What is the JSON Web Token structure?
JSON Web Tokens consist of three parts separated by dots (.), which are:
Header: Contains metadata about the token, such as the algorithm used.
 {
    "typ":"JWT",
    "alg":"HS256"
 }
Payload: Contains claims, like subject, issuer, expiration, etc.
1. The JWT.decode() method from the auth0 library decodes the token into its components without verifying the signature.
DecodedJWT decodedJWT = JWT.decode(jwtToken);
2. Retrieving Components:
Header: The Base64Url-encoded header. Payload: The Base64Url-encoded payload. Signature: The cryptographic signature. getSubject() extracts the sub claim (subject). getIssuer() extracts the iss claim (issuer).
3. The Base64.getUrlDecoder() decodes the Base64Url-encoded header and payload into human-readable JSON strings.
String decodedHeader = new String(java.util.Base64.getUrlDecoder().decode(header));
String decodedPayload = new String(java.util.Base64.getUrlDecoder().decode(payload));
1. The DecodedJWT.getSubject() and DecodedJWT.getIssuer() methods already extract and decode the claims. The attempt to decode them manually as Base64 will fail. They are not separately Base64-encoded. They are JSON values embedded in the payload.
2. The header and payload are Base64Url-encoded, so you we decode them to get the full JSON structures.
3. The signature cannot be “decoded” because it is a hash. It can only be validated using the appropriate cryptographic key.
JSON Web Token (JWT) is an open standard (RFC 7519) that defines a compact and self-contained way for securely transmitting information between parties as a JSON object. This information can be verified and trusted because it is digitally signed. JWTs can be signed using a secret (with the HMAC algorithm) or a public/private key pair using RSA or ECDSA.
What is the JSON Web Token structure?
JSON Web Tokens consist of three parts separated by dots (.), which are:
Header: Contains metadata about the token, such as the algorithm used.
 {
    "typ":"JWT",
    "alg":"HS256"
 }
Payload: Contains claims, like subject, issuer, expiration, etc.
1. Stateless Authentication: JWTs allow for stateless authentication, meaning the server doesn’t need to store user session information. This scalability and reduced server-side storage make JWTs advantageous for distributed systems.
2. Performance: Since JWTs are stateless, server-side lookup is eliminated. It Reduces server load and Improves response times for authenticated requests.
3. Interoperability: JWTs are designed to work across different technologies and systems. This interoperability is particularly useful in microservices architectures, where services may be implemented in different languages.
4. Cross-Domain Authentication: JWTs work well for Single Sign-On (SSO) and cross-domain authentication since they are independent of the application’s storage mechanisms.Users can log in once and access multiple applications without repeatedly authenticating.
5. Secure Data Transfer: The use of signatures in JWTs ensures that the data has not been tampered with during transmission. This provides a level of security when exchanging information between the client and server. Ensures token integrity with algorithms like HS256 (HMAC) or RS256 (RSA).
6. Expiration and Revocation: JWTs include an exp (expiration) claim and can include a revocation mechanism via blacklists. Tokens expire automatically after a set time.
7. Flexibility with Custom Claims: JWT allows adding custom claims like user roles, permissions, or metadata. Tailor the token to your application’s needs.
2. To create a JWT, we use the JWT.create() method. The method returns an instance of the JWTCreator.Builder class. We will use this Builder class to build the JWT token by signing the claims using the Algorithm instance:
Explanation of Claims and Methods:
withIssuer(“QA_Automation”): Adds the iss (issuer) claim, identifying the source of the token.
withSubject(“QA_Automation Details”): Adds the sub (subject) claim, describing the token’s purpose or context (e.g., user or system identity).
withIssuedAt(new Date()): Sets the iat (issued at) claim to the current timestamp, indicating when the token was created.
withExpiresAt(new Date(System.currentTimeMillis() + 10000L)): Sets the exp (expiration) claim to 10 seconds from the current time. After this, the token will no longer be valid.
withJWTId(UUID.randomUUID().toString()): Adds a unique identifier (jti claim) for the token using a random UUID.
withNotBefore(new Date(System.currentTimeMillis() + 100L)): Adds the nbf (not before) claim, setting the token to be valid 100 milliseconds in the future.