Page Object Model with Page Factory in Selenium

HOME

What Is Page Object Model (POM)?

Page Object model is an object design pattern in Selenium, where web pages are represented as classes, and the various elements on the page are defined as variables in the class and all possible user interactions can then be implemented as methods in the class.

The benefit is that if there is any change in the UI for the page, the tests themselves don’t need to change, only the code within the page object needs to change. Subsequently all changes to support that new UI are located in one place.

Advantages:

1. Readable There is a clean separation between test code and page specific code such as locators and methods.

2. Maintainability  – In this model, separate classes are created for different pages of a web application like login page, the home page, employee detail page, change password page, etc. So, if there is any change in any element of a website then we only need to make changes in one class, and not in all classes.

3. Reusable If multiple test scripts use the same web elements, then we need not write code to handle the web element in every test script. Placing it in a separate page class makes it reusable by making it accessible by any test script.

4. Easy project Structure – Its project structure is quite easy and understandable.

5. PageFactory – It can use PageFactory in the page object model in order to initialize the web element and store elements in the cache.

In case there are lots of web elements on a page, then the object repository class for a page can be separated from the class that includes methods for the corresponding page.

Example: If the New Customer page has many input fields. In that case, there can be 2 different classes. One class called NewCustomerObjects.java that forms the object repository for the UI elements on the register accounts page.

A separate class file NewCustomerMethods.java extending or inheriting NewCustomerObjects that includes all the methods performing different actions on the page could be created.

Consider the below script to login to an application and navigate to home page.

This is a small script. Therefore, script maintenance and readability looks very easy.

Imagine there are 50 different tests present in this script. In that case, the readability of the script decreases as well as maintenance become very difficult.

Scenario

  1. Launch the Firefox browser.
  2. The demo website opens in the browser.
  3. Verify the Login Page
  4. Enter username and Password and login to the demo site.
  5. Verify the home page.
  6. Close the browser.
package PageObjectModel;

import java.util.concurrent.TimeUnit;
import org.openqa.selenium.By;
import org.openqa.selenium.WebDriver;
import org.openqa.selenium.firefox.FirefoxDriver;
import org.testng.Assert;
import org.testng.annotations.AfterTest;
import org.testng.annotations.BeforeTest;
import org.testng.annotations.Test;

public class NonPOMExample {

     WebDriver driver;

     @BeforeTest
     public void setup() {

           ChromeOptions options = new ChromeOptions();
           driver = new ChromeDriver(options);
           driver.manage().window().maximize();
           driver.manage().timeouts().implicitlyWait(10, TimeUnit.SECONDS);
           driver.get("https://opensource-demo.orangehrmlive.com/");
     }

     @Test(priority = 0)
     public void Login() {
           String pageTitle = driver.findElement(By.id("logInPanelHeading")).getText();
           Assert.assertTrue(pageTitle.contains("LOGIN Panel"));
     }

     @Test(priority = 1)
     public void HomePage() {

           driver.findElement(By.name("txtUsername")).sendKeys("Admin");
           driver.findElement(By.name("txtPassword")).sendKeys("admin123");
           driver.findElement(By.id("btnLogin")).submit();
           String homePageText = driver.findElement(By.id("welcome")).getText();
           Assert.assertTrue(homePageText.contains("Welcome"));
     }

     @AfterTest
     public void close() {
           driver.close();
     } 
}

What Is Pagefactory?

PageFactory is a way of implementing the “Page Object Model”. Here, we follow the principle of separation of Page Object Repository and Test Methods. It is an inbuilt concept of Page Object Model which is very optimized.

1. The annotation @FindBy is used in Pagefactory to identify an element while POM without Pagefactory uses the driver.findElement() method to locate an element.

2. The second statement for Pagefactory after @FindBy is assigning an <element name> of type WebElement class that works exactly similar to the assignment of an element name of type WebElement class as a return type of the method driver.findElement() that is used in usual POM (userName in this example).

Non POM

driver.findElement(By.name("txtUsername"));

POM

@FindBy(name = "txtUsername")
WebElement userName;

3. Below is a code snippet of non PageFactory Mode to set Firefox driver path. A WebDriver instance is created with the name driver and the FirefoxDriver is assigned to the ‘driver’.  The same driver object is then used to launch the demo website, locate the webelements and to perform various operations

Basically, here the driver instance is created initially and every web element is freshly initialized each time when there is a call to that web element using driver.findElement() or driver.findElements().

ChromeOptions options = new ChromeOptions();
driver = new ChromeDriver(options);
driver.manage().window().maximize();
driver.manage().timeouts().implicitlyWait(10, TimeUnit.SECONDS);
driver.get("https://opensource-demo.orangehrmlive.com/");

But with POM with PageFactory approach, all the elements are initialized with initElements() without explicitly initializing each web element.

The initElements is a static method of PageFactory class which is used to initialize all the web elements located by @FindBy annotation. Thus, instantiating the Page classes easily. It is used to initialize the WebElements declared, using driver instance from the main class. In other words, WebElements are created using the driver instance. Only after the WebElements are initialized, they can be used in the methods to perform actions.

public Login(WebDriver driver) {
           this.driver = driver;
           // This initElements method will create all WebElements
           PageFactory.initElements(driver, this);
     }

Implementation Steps

Step 1 – Create a Maven Project

Click here to know How to create a Maven project.

Step 2 – Add dependencies to the pom.xml

<project xmlns="http://maven.apache.org/POM/4.0.0" xmlns:xsi="http://www.w3.org/2001/XMLSchema-instance"
  xsi:schemaLocation="http://maven.apache.org/POM/4.0.0 http://maven.apache.org/xsd/maven-4.0.0.xsd">
  <modelVersion>4.0.0</modelVersion>

  <groupId>com.example</groupId>
  <artifactId>PageObjectModel</artifactId>
  <version>1.0-SNAPSHOT</version>
  <packaging>jar</packaging>

  <name>PageObjectModel</name>
  <url>http://maven.apache.org</url>

  <properties>
    <project.build.sourceEncoding>UTF-8</project.build.sourceEncoding>
    <selenium.version>4.21.0</selenium.version>
    <testng.version>7.10.2</testng.version>
    <maven.surefire.plugin.version>3.2.5</maven.surefire.plugin.version>
    <maven.compiler.plugin.version>3.13.0</maven.compiler.plugin.version>
    <maven.compiler.source>17</maven.compiler.source>
    <maven.compiler.target>17</maven.compiler.target>
  </properties>

  <dependencies>
    <dependency>
      <groupId>org.seleniumhq.selenium</groupId>
      <artifactId>selenium-java</artifactId>
      <version>${selenium.version}</version>
    </dependency>

    <dependency>
      <groupId>org.testng</groupId>
      <artifactId>testng</artifactId>
      <version>${testng.version}</version>
    </dependency>
  </dependencies>

  <build>
    <plugins>
      <plugin>
        <groupId>org.apache.maven.plugins</groupId>
        <artifactId>maven-compiler-plugin</artifactId>
        <version>${maven.compiler.plugin.version}</version>
        <configuration>
          <source>${maven.compiler.source}</source>
          <target>${maven.compiler.target}</target>
        </configuration>
      </plugin>
      <plugin>
        <groupId>org.apache.maven.plugins</groupId>
        <artifactId>maven-surefire-plugin</artifactId>
        <version>${maven.surefire.plugin.version}</version>
        <configuration>
          <suiteXmlFiles>
            <suiteXmlFile>testng.xml</suiteXmlFile>
          </suiteXmlFiles>
        </configuration>
      </plugin>
    </plugins>
  </build>
</project>

Step 3 – Create a Java Class for each page

In this example, we will access 2 web pages, “Login” and “Home” pages.

Hence, we will create 2 Java classes in Page Layer  –  Login.java and HomePage.java

3.1. Define WebElements as variables using Annotation @FindBy:

We would be interacting with:

  • Message on Login Page, Username, Password, Login button field on the Login Page.
  • Successful message on the Home Page

For Example: If we are going to identify the Username using attribute name, then its variable declaration is

 @FindBy(name = "txtUsername")
 WebElement userName;

3.2 Create methods for actions performed on WebElements.

Below actions are performed on WebElements in Login Page:

  • Get Text on Login Page
  • Type action on the Username field.
  • Type action in the Password field.
  • Click action on the Login Button

Note: A constructor has to be created in each of the class in the Page Layer, in order to get the driver instance from the Main class in Test Layer and also to initialize WebElements(Page Objects) declared in the page class using PageFactory.InitElement().

package com.example.pages;

import org.openqa.selenium.WebDriver;
import org.openqa.selenium.support.PageFactory;

public class BasePage {
    public WebDriver driver;

    public BasePage(WebDriver driver) {
        this.driver = driver;
        PageFactory.initElements(driver,this);
    }

}

Login Page

package com.example.pages;

import org.openqa.selenium.WebDriver;
import org.openqa.selenium.WebElement;
import org.openqa.selenium.support.FindBy;

public class LoginPage extends BasePage{

    public LoginPage(WebDriver driver) {
        super(driver);

    }

    @FindBy(name = "username")
    public WebElement userName;

    @FindBy(name = "password")
    public WebElement password;

    @FindBy(xpath = "//*[@class='oxd-form']/div[3]/button")
    public WebElement login;

    @FindBy(xpath = "//*[@id='app']/div[1]/div/div[1]/div/div[2]/div[2]/div/div[1]/div[1]/p")
    public  WebElement errorMessage;


    public void login(String strUserName, String strPassword) {

        userName.sendKeys(strUserName);
        password.sendKeys(strPassword);
        login.click();

    }

    public String getErrorMessage() {
        return errorMessage.getText();
    }


}

HomePage. java

package com.example.pages;

import org.openqa.selenium.WebDriver;
import org.openqa.selenium.WebElement;
import org.openqa.selenium.support.FindBy;

public class HomePage extends BasePage {

    public HomePage(WebDriver driver) {
        super(driver);

    }

    @FindBy(xpath = "//*[@id='app']/div[1]/div[1]/header/div[1]/div[1]/span/h6")
    public  WebElement homePageUserName;

    public String getHomePageText() {
        return homePageUserName.getText();
    }

}

Step 4 –  Create test class for the tests of these pages

package com.example.tests;

import org.openqa.selenium.WebDriver;
import org.openqa.selenium.chrome.ChromeDriver;
import org.openqa.selenium.chrome.ChromeOptions;
import org.testng.annotations.AfterMethod;
import org.testng.annotations.BeforeMethod;

import java.time.Duration;

public class BaseTests {

    public static WebDriver driver;
    public final static int TIMEOUT = 10;

    @BeforeMethod
    public void setup() {

        ChromeOptions options = new ChromeOptions();
        options.addArguments("--remote-allow-origins=*");
        options.addArguments("--no-sandbox");
        options.addArguments("--disable-dev-shm-usage");
        options.addArguments("--headless");
        driver = new ChromeDriver(options);
        driver.manage().window().maximize();
        driver.get("https://opensource-demo.orangehrmlive.com/");
        driver.manage().timeouts().implicitlyWait(Duration.ofSeconds(TIMEOUT));

    }

    @AfterMethod
    public void tearDown() {
        driver.quit();
    }

}

LoginPageTests.java

package com.example.tests;

import com.example.pages.HomePage;
import com.example.pages.LoginPage;
import org.testng.Assert;
import org.testng.annotations.Test;

public class LoginPageTests extends BaseTests{

    String actualResponse;

    @Test
    public void invalidCredentials()  {

        LoginPage objLoginPage = new LoginPage(driver);
        objLoginPage.login("admin", "admin");
        actualResponse = objLoginPage.getErrorMessage();
        Assert.assertEquals(actualResponse,"Invalid credentials");
    }

    @Test
    public void validCredentials() {

        LoginPage objLoginPage = new LoginPage(driver);
        objLoginPage.login("Admin", "admin123");
        HomePage objHomePage = new HomePage(driver);
        actualResponse = objHomePage.getHomePageText();
        Assert.assertEquals(actualResponse,"Dashboard");

    }

}

Step 5 – Execute the tests

To run the test, right click and select as Run As and then select TestNG Test (Eclipse).

Step 6 – Create TestNG.xml

You can add TestNG.xml and run the tests from there also.

<?xml version = "1.0"encoding = "UTF-8"?>
<!DOCTYPE suite SYSTEM "http://testng.org/testng-1.0.dtd">
<suite name = "PageObjectModel">
    <test name = "PageObjectModel Tests">
        <classes>
            <class name ="com.example.tests.LoginPageTests"/>
        </classes>
    </test>
</suite>

Step 7 – Run the tests from TestNG.xml

Right click on TestNG.xml and select Run As TestNG Suite.
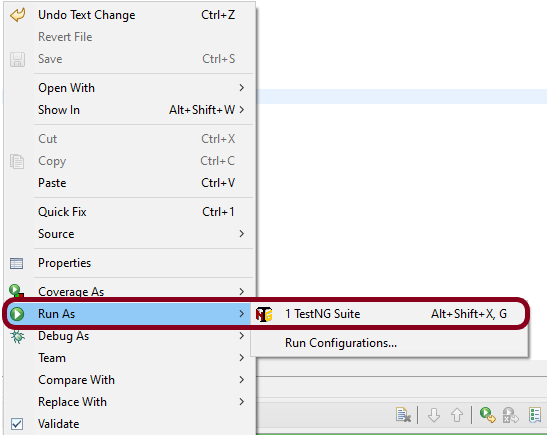
The execution status looks like as shown below.

Step 8 -TestNG Report Generation

Once the execution is finished, refresh the project. It will create a test-output folder containing various reports generated by TestNG. Below is the screenshot of the report folder.

Index.html
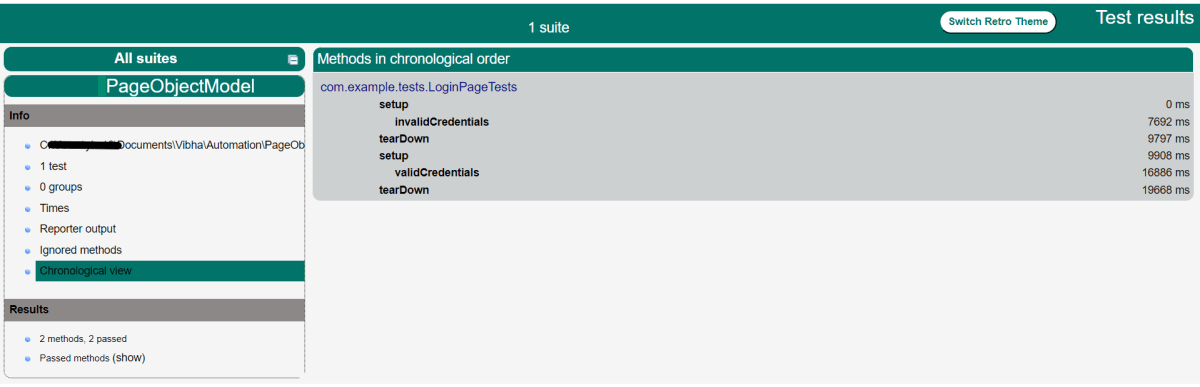
emailable-report.html

mvn clean test
How to Upload a File using Selenium Webdriver

HOME

 ChromeOptions options = new ChromeOptions();
WebDriver driver = new ChromeDriver(options);
driver.manage().window().maximize();
driver.get("https://demoqa.com/upload-download");
 WebElement upload = driver.findElement(By.id("uploadFile"));

 //Upload the file
upload.sendKeys("C:\\Users\\Vibha\\Documents\\SeleniumTest.txt");

public class Upload_Demo {

    public static void main(String[] args) {

        ChromeOptions options = new ChromeOptions();
        WebDriver driver = new ChromeDriver(options);
        driver.manage().window().maximize();
        driver.get("https://demoqa.com/upload-download");

        // Locating upload button
        WebElement upload = driver.findElement(By.id("uploadFile"));

        //Upload the file
        upload.sendKeys("C:\\Users\\Vibha\\Documents\\SeleniumTest.txt");

        String Message = driver.findElement(By.id("uploadedFilePath")).getText();
        System.out.println("Message is :" + Message);

        // close the browser
        driver.close();
    }
}

The web page after uploading the file looks something like as shown below

How to use FileHandler Class to take Screenshot in Selenium WebDriver

 HOME

In the previous post, I have explained how to capture screenshots in Selenium using FileUtils. In this post, will see another way of capturing the screenshots in Selenium.

FileHandler is new Class in Selenium which help us to store screenshots, create directory and so on. You can get full documentation of FileHandler here

Step 1- Import the new package which is

import org.openqa.selenium.io.FileHandler;

Step 2 – To capture a screenshot in Selenium, we can make use of an interface, called TakesScreenshot. This method indicates the driver, that it can capture a screenshot and store it in different ways

TakesScreenshot ts = (TakesScreenshot) driver;

Step 3 – In order to capture screenshot and store it in a particular location, there is a method called “getScreenshotAs“, where OutputType defines the output type for a screenshot.

File source = ts.getScreenshotAs(OutputType.FILE);

Step 4- Call copy method of FileHandler Class which is static method and will ask two argument First is src and another is destination. Code will look like 

FileHandler.copy(source, new File("/Screenshots/SeleniumScreenshot" + System.currentTimeMillis() + ".png"));

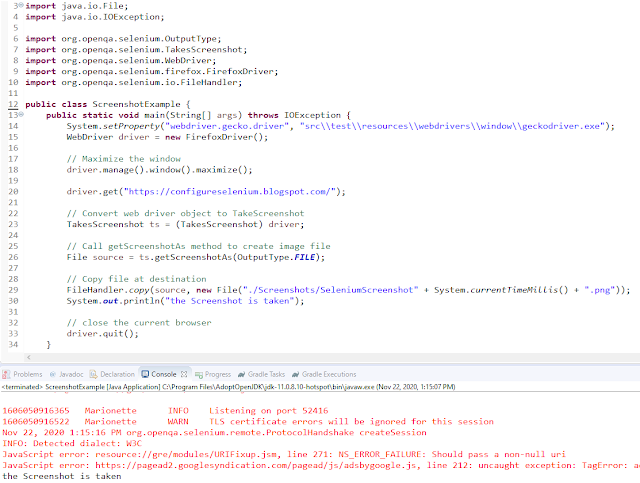
Let’s see this in a Selenium program:-

import java.io.File;
 
import java.io.IOException; 
import org.openqa.selenium.OutputType;
import org.openqa.selenium.TakesScreenshot;
import org.openqa.selenium.WebDriver;
import org.openqa.selenium.firefox.FirefoxDriver;
import org.openqa.selenium.io.FileHandler;
 
public class ScreenshotExample {
      public static void main(String[] args) throws IOException {

            System.setProperty("webdriver.gecko.driver", "src\\test\\resources\\webdrivers\\window\\geckodriver.exe");
            WebDriver driver = new FirefoxDriver();

            // Maximize the window
            driver.manage().window().maximize();
            driver.get("https://configureselenium.blogspot.com/");

            // Convert web driver object to TakeScreenshot
            TakesScreenshot ts = (TakesScreenshot) driver;

            // Call getScreenshotAs method to create image file
            File source = ts.getScreenshotAs(OutputType.FILE);

            // Copy file at destination
            FileHandler.copy(source, new File("./Screenshots/SeleniumScreenshot" + System.currentTimeMillis() + ".png"));
            System.out.println("the Screenshot is taken");

            // close the current browser
            driver.quit();
      } 
 
}

A folder with name “Screenshots” created and the screenshot placed in that folder as you can see the image below

The Screenshot looks like something as shown below

How to Capture Screenshot in Selenium Webdriver

 HOME

In Automation, it is advisable to take screenshots of failed test cases for further analysis and proof of failure. Selenium provides the capability to take screenshot. But, before we see how to capture Screenshot in Selenium, we need to add a dependency in the Maven project.

Recently Selenium has done some changes in recent version so if you are using Selenium 3.6.0 then you need to add below jar to project or if you are using then you can provide below dependency in project.

https://mvnrepository.com/artifact/commons-io/commons-io

To capture a screenshot in Selenium, we can make use of an interface, called TakesScreenshot. This method indicates the driver, that it can capture a screenshot and store it in different ways

TakesScreenshot ts = (TakesScreenshot) driver;

In order to capture screenshot and store it in a particular location, there is a method called “getScreenshotAs“, where OutputType defines the output type for a screenshot.

File source = ts.getScreenshotAs(OutputType.FILE);

Copy file to Desired Location

FileUtils.copyFile(source, newFile("./Screenshots/Selenium" + System.currentTimeMillis() + ".png"));

Let’s see the complete program

import java.io.File;
 
import java.io.IOException;
import org.apache.commons.io.FileUtils;
import org.openqa.selenium.OutputType;
import org.openqa.selenium.TakesScreenshot;
import org.openqa.selenium.WebDriver;
import org.openqa.selenium.chrome.ChromeDriver;
 
public class ScreenshotDemo {
      public static void main(String[] args) throws IOException {
                        
          System.setProperty("webdriver.chrome.driver", "src\\test\\resources\\webdrivers\\window\\chromedriver.exe");
          WebDriver driver = new ChromeDriver();
                        
          // Maximize the window
          driver.manage().window().maximize();
          driver.get("https://configureselenium.blogspot.com/");
                        
          // Convert web driver object to TakeScreenshot
          TakesScreenshot ts = (TakesScreenshot) driver;
                        
          // Call getScreenshotAs method to create image file
           File source = ts.getScreenshotAs(OutputType.FILE);
                        
          // Copy file at destination
          FileUtils.copyFile(source, new File("./Screenshots/Selenium" + System.currentTimeMillis() + ".png"));
           System.out.println("the Screenshot is taken");
                        
          // close the current browser
          driver.quit();
     }
 
}

A folder with name Screenshots created and the screenshot is placed in that folder as you can see the image below

The Screenshot looks like something below

If you don’t want to use Maven Dependency common-io, then you can use FileHandler from

import org.openqa.selenium.io.FileHandler;
 
FileHandler.copy(source, new File("C:\\Screenshots\\Selenium" + System.currentTimeMillis() + ".png"));

Difference between getText() and getAttribute() method in Selenium WebDriver

In this tutorial, we will discuss GetText() method as well as the getAttribute() method in Selenium WebDriver. These methods are used extensively in automating a web application. Before going through these methods, we should know what HTML attributes are.

What are HTML attributes?

Attributes are the additional information provided by developers in HTML tags. Attributes are normally defined using “name-pair” values. Let us see, here div is the tag, and corresponding attribute with the property name is id, and the property value is nav-xshop.
<div id= “nav-xshop”>


What is getAttribute() method?

The getAttribute() method is declared in the WebElement interface, and it returns the value of the web element’s attribute as a string. It fetches the value of an attribute, in HTML code whatever is present in the left side of ‘=’ is an attribute, and the value on the right side is an attribute value.

  • getAttibute() returns ‘null’ if there is no such attributes
  • getAttribute() method will return either “true” or null for attributes whose value is Boolean.

Where to use getAttribute() method?

Consider a scenario of movie ticket booking. The colour of booked and available seats in the movie theatre is different. So the same seat will have the supposed white colour for the available seat and blue for the booked seat. So, the colour attribute of the seat changes from white to blue for the same seat, which can be identified by the getAttribute() method. The snippet below shows the HTML code of the search box of the Amazon Home page

Below is an example of how the getAttribute() method can be used.

import org.openqa.selenium.By;
import org.openqa.selenium.WebDriver;
import org.openqa.selenium.WebElement;
import org.openqa.selenium.chrome.ChromeDriver;
 
public class GetAttributeDemo {
      public static void main(String[] args) {
 
            System.setProperty("webdriver.chrome.driver",
                                                "C:\\Users\\Vibha\\Desktop\\Drivers\\chromedriver_win32\\chromedriver.exe");
 
             WebDriver driver = new ChromeDriver();
 
             driver.get("https://www.amazon.com/");
             driver.manage().window().maximize();
 
             WebElement AmazonSearchBox = driver.findElement(By.name("field-keywords"));
             System.out.println("Name of the Email Textbox is:- " + AmazonSearchBox.getAttribute("name"));
 
             System.out.println("Class of the Email Textbox is:- " + AmazonSearchBox.getAttribute("class"));
 
             System.out.println("Value of the Email Textbox is:- " + AmazonSearchBox.getAttribute("tabindex"));
 
             System.out.println("Type of the Email Textbox is:- " + AmazonSearchBox.getAttribute("type"));
 
             System.out.println("Id of the Email Textbox is:- " + AmazonSearchBox.getAttribute("id"));
 
             // getAttibute() returns 'null' if there no such attribute
 
             System.out.println("Value of nonExistingAttribute is:- " + AmazonSearchBox.getAttribute("test"));
 
            driver.close();
       }
 
}

Output
Name of the Email Textbox is:- field-keywords
Class of the Email Textbox is:- nav-input
Value of the Email Textbox is:- 19
Type of the Email Textbox is:- text
Id of the Email Textbox is:- twotabsearchtextbox
Value of nonExistingAttribute is:- null

What is getText() method?

getText() is a method that gets us the visible (i.e. not hidden by CSS) innerText of this element, including sub-elements, without any leading or trailing white space.

Inner text is the text between the opening tags and closing tags.

This is an example of getText().

In the above example, the text  “This is the example of getText” between opening and closing tags of h1 are called inner text.

The snippet below shows the HTML code of the search box of the Amazon Home page

Below is an example of how the getText() method can be used.

import java.util.concurrent.TimeUnit;

import org.openqa.selenium.By;
import org.openqa.selenium.WebDriver;
import org.openqa.selenium.chrome.ChromeDriver;
 
public class GetTextDemo {
 
      public static void main(String[] args) {
           System.setProperty("webdriver.chrome.driver",
                                                "C:\\Users\\Vibha\\Desktop\\Drivers\\chromedriver_win32\\chromedriver.exe");
 
            WebDriver driver = new ChromeDriver();
 
            driver.get("https://www.facebook.com/");
            driver.manage().window().maximize();
            driver.manage().timeouts().implicitlyWait(30, TimeUnit.SECONDS);
 
            String FacebookText = driver
                                    .findElement(By.xpath("//*[@id='content']/div/div/div/div/div[2]/div/div[1]/div[1]/span")).getText();
            System.out.println("Text on Facebook Site:- " + FacebookText);
         driver.close();
      }
 
}

Output
Text on Facebook Site:- Create an account

Execute JavaScript with executeAsyncScript() Method in Selenium

HOME

In the previous blog, we have discussed about executeScript() method in JavaScript. JavascriptExecutor interface comprises of executeAsyncScript() method that is called an additional final argument “arguments[arguments.lenght-1];”which is a callback function to signal that async execution has finished. We have to call from JavaScript, to tell Webdriver, that our Asynchronous execution has finished. If we do not do that, then executeAsyncScpriptwill timeout and throw a timeout exception.

Before executing AsyncScript method, we have to make sure to set the script timeout. Its default is 0. If we do not set a script timeout, our executeAsyncScript will immediately timeout and it won’t work.

Below is the program which shows how to use executeAsyncScript() method

  1. First  will get the start time before waiting 5 seconds by using executeAsyncScript() method.
  2. Then, will use executeAsyncScript() to wait 5 seconds.
  3. Then, will get the current time
  4. Will subtract (current time – start time) = passed time and print the value
import org.openqa.selenium.JavascriptExecutor;
import org.openqa.selenium.WebDriver;
import org.openqa.selenium.chrome.ChromeDriver;
 
public classExecuteAsycSleepBrowserDemo {
        public static void main(String[] args) { 
    

System.setProperty("webdriver.chrome.driver","C:\\Users\\Vibha\\Desktop\\Drivers\\chromedriver_win32\\chromedriver.exe");
        WebDriver driver = newChromeDriver();
                                        
        //Create the JavascriptExecutor interface object by Type casting              
        JavascriptExecutor js = (JavascriptExecutor)driver;              
        driver.get("https://www.google.com/");                              
        driver.manage().window().maximize();
                        
        //Declare and set start time
        long startTime = System.currentTimeMillis();
                 
        //Call executeAsyncScript() method                       js.executeAsyncScript("window.setTimeout(arguments[arguments.length - 1], 5000);"); 
                 
        //Get the difference (currentTime - startTime) it should be greater than 5000
        System.out.println("Passed time: " + (System.currentTimeMillis() - startTime));
                        
          if ( (System.currentTimeMillis() - startTime) > 5000)
             {
                 System.out.println("Time difference must be greater than 5000 milliseconds");
             }
          driver.quit();      
      }

Output
Passed time: 5040
Time difference must be greater than 5000 milliseconds

Execute JavaScript with executeScript() Method in Selenium

HOME

In the previous tutorial, we have discussed about JavaScript. There are some conditions where we cannot handle some problems with WebDriver only, web controls don’t react well against selenium commands. In this kind of situations, we use Javascript. JavaScriptExecutor comes separately and also comes under the WebDriver but both do the same thing. Within the WebDriver, it is named as ExecuteScript.

JavaScriptExecutor is an interface that provides a mechanism to execute Javascript through selenium driver. It provides “executescript” & “executeAsyncScript” methods, to run JavaScript in the context of the currently selected frame or window.

ExecuteScript Method – This method executes JavaScript in the context of the currently selected frame or window in Selenium. The script used in this method runs in the body of an anonymous function (a function without a name). We can also pass complicated arguments to it. 

Execute the below selenium script. In this example,

  • Launch the site
  • Fetch the domain name of the site.
  • Fetch the URL of the site
  • Fetch the title name of the sit
  • Then navigate to a different page – google.com
  • Display Alert popup                                                                        
package SeleniumTutorial;
import org.openqa.selenium.JavascriptExecutor;
 
import org.openqa.selenium.WebDriver;
 
import org.openqa.selenium.chrome.ChromeDriver;
 
public classJavaScript_Demo {
        public static voidmain(String[] args) {
                        System.setProperty("webdriver.chrome.driver","C:\\Users\\SingVi04\\Desktop\\Drivers\\chromedriver_win32\\chromedriver.exe");
 
        WebDriver driver= new ChromeDriver();
                                        
        //Create the JavascriptExecutor interface object by Type casting                
        JavascriptExecutor js = (JavascriptExecutor)driver;             
 
        driver.get("https://configureselenium.blogspot.com/");
 
        driver.manage().window().maximize();
  
 
       //Fetching the Domain Name of the site. Tostring() change object to name.                
        String DomainName = js.executeScript("return document.domain;").toString();                 
        System.out.println("Domain name of the site = "+DomainName);                                        
                        
        //Fetching the URL of the site. Tostring() change object to name          
        String url = js.executeScript("return document.URL;").toString();                
        System.out.println("URL of the site = "+url);                                      
                        
        //Method document.title fetch the Title name of the site. Tostring() change object to name          
       String TitleName = js.executeScript("return document.title;").toString();                        
       System.out.println("Title of the page = "+TitleName);                                  
                
        //Navigate to new Page i.e to generate access page. (launch new url)             
        js.executeScript("window.location = 'https://www.google.com/'");
        String NewTitleName = js.executeScript("return document.title;").toString();                      
        System.out.println("Title of the new page = "+NewTitleName);    
 
        //Alert
        js.executeScript("alert('Hello Everyone!');");
        driver.switchTo().alert().accept();
      
        driver.quit();
    }           
 }

JavaScript and JavaScriptExecutor in Selenium


What is JavaScript?
 

JavaScript is the preferred language inside the browser to interact with HTML dom. This means that a Browser has JavaScript implementation in it and understands the JavaScript commands.
WebDriver gives you a method called Driver.executeScript which executes the JavaScript in context of the loaded browser page. There are some conditions where we cannot handle some problems with WebDriver only, web controls do not react well against selenium commands. In this kind of situations, we use Javascript. It is useful for custom synchronizations, hide or show the web elements, change values, test flash/HTML5 and so on. In order to do these, we can use Selenium’s JavascriptExecutor interface that executes JavaScript through Selenium driver.

What is JavaScriptExecutor?

JavaScriptExecutor comes separately and comes under the WebDriver but both do the same thing. Within the WebDriver, it is name as ExecuteScript. JavaScriptExecutor is an interface that provides a mechanism to execute Javascript through selenium driver. It provides “executescript” & “executeAsyncScript” methods, to run JavaScript in the context of the currently selected frame or window.

ExecuteScript Method

This method executes JavaScript in the context of the currently selected frame or window in Selenium. The script used in this method runs in the body of an anonymous function (a function without a name). We can also pass complicated arguments to it.

The script can return values. Data types returned are 

  • Boolean 
  • Long 
  • String 
  • List 
  • WebElement 
JavascriptExecutor js = (JavascriptExecutor) driver;  
js.executeScript(Script,Arguments);

Script – This JavaScript needs to execute.

Arguments – It is the arguments to the script. It is optional

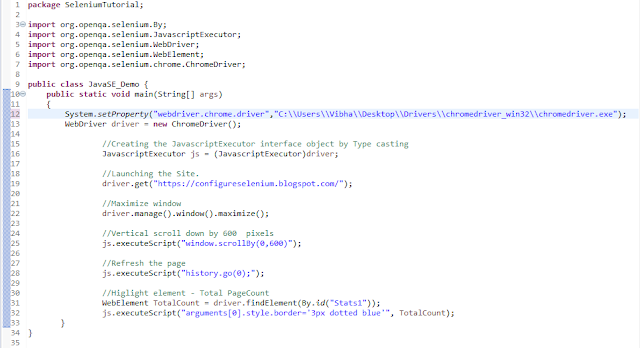
Below is an example, which shows how executeScript method can be use. In this example, 

  1. Launch the site
  2. Scroll down by 600 pixel
  3. Refresh the page
  4. Highlight a particular element
import org.openqa.selenium.By;
import org.openqa.selenium.JavascriptExecutor;
import org.openqa.selenium.WebDriver;
import org.openqa.selenium.WebElement;
import org.openqa.selenium.chrome.ChromeDriver;
 
public class JavaSE_Demo {
        public static void main(String[] args){        

System.setProperty("webdriver.chrome.driver","C:\\Users\\Vibha\\Desktop\\Drivers\\chromedriver_win32\\chromedriver.exe");
        WebDriver driver= new ChromeDriver();                         
 
        //Create the JavascriptExecutor interface object by Type casting              
         JavascriptExecutor js = (JavascriptExecutor)driver;                   
         driver.get("https://configureselenium.blogspot.com/");     
         driver.manage().window().maximize();               

         //Vertical scroll down by 600  pixels             
          js.executeScript("window.scrollBy(0,600)");                           
 
         //Refresh the page
          js.executeScript("history.go(0);");
                       
          //Higlight element - Total PageCount
          WebElement TotalCount= driver.findElement(By.id("Stats1"));
          js.executeScript("arguments[0].style.border='3px dotted blue'", TotalCount);                     
      }                          
}

How to enter text-using JavaScriptexecutor (Without Sendkeys)

import org.openqa.selenium.JavascriptExecutor;
import org.openqa.selenium.WebDriver;
import org.openqa.selenium.chrome.ChromeDriver;
 
public class JavaScript_EnterText {
        public static void main(String[] args) {
        System.setProperty("webdriver.chrome.driver","C:\\Users\\Vibha\\Desktop\\Drivers\\chromedriver_win32\\chromedriver.exe");
        WebDriver driver = newChromeDriver();
                                        
         //Creating the JavascriptExecutor interface object by Type casting              
          JavascriptExecutor js = (JavascriptExecutor)driver;              
                                        
          //Launching the Site.         
          driver.get("https://www.google.com/");                      
                     
          //Maximize window            
          driver.manage().window().maximize();       
                        
          js.executeScript("document.getElementsByName('q')[0].value = 'Selenium Introduction';");
   } 
}   

How to automate Radio Button in Selenium WebDriver

HOME

Let’s go through the scenario below:-

1) Launch Chrome Browser
2) Maximize the current window
3) Implicitly wait for 5 sec
4) Open browser – https://demo.automationtesting.in/Register.html
5) Find the locator of all Radio Buttons
6) Find the number of Radio Buttons available
7) Print the name of the first option of the radio button
8) Select the first option of the radio button
9) Print the name of the second option of the radio button
10) Select the second option of the radio button
11) Close the browser

    ChromeOptions options = new ChromeOptions();
    WebDriver driver = new ChromeDriver(options);
    
    driver.manage().window().maximize();
    
    driver.manage().timeouts().implicitlyWait(Duration.ofSeconds(5));
    driver.get("https://demo.automationtesting.in/Register.html");
    
    List<WebElement> Radio_Options = driver.findElements(By.xpath("//*[@name='radiooptions']"));
    
    int radioSize = Radio_Options.size();
    System.out.println("No Of Radio Button Options :" + radioSize);
    
    for (int i = 0; i < radioSize; i++) {
        System.out.println("Name of Radio Button :"+ Radio_Options.get(i).getAttribute("Value"));
        Radio_Options.get(i).click();
        System.out.println("Radio Button Option "+ (i+1) +" is selected");
    }
    
    driver.quit();
    

    import org.openqa.selenium.By;
    import org.openqa.selenium.WebDriver;
    import org.openqa.selenium.WebElement;
    import org.openqa.selenium.chrome.ChromeDriver;
    import org.openqa.selenium.chrome.ChromeOptions;
    
    import java.time.Duration;
    import java.util.List;
    
    public class RadioButton_Demo {
    
        public static void main(String[] args) throws InterruptedException {
    
            // Initiate Chrome browser
            ChromeOptions options = new ChromeOptions();
            WebDriver driver = new ChromeDriver(options);
    
            // Maximize the browser
            driver.manage().window().maximize();
    
            // Put an Implicit wait and launch URL
            driver.manage().timeouts().implicitlyWait(Duration.ofSeconds(5));
            driver.get("https://demo.automationtesting.in/Register.html");
    
            // Find locator of all Radio Buttons
            List<WebElement> Radio_Options = driver.findElements(By.xpath("//*[@name='radiooptions']"));
    
            // Find no of Radio Buttons available and print their values
            int radioSize = Radio_Options.size();
            System.out.println("No Of Radio Button Options :" + radioSize);
    
            Thread.sleep(5000);
    
            for (int i= 0; i< radioSize; i++) {
                System.out.println("Name of Radio Button :"+ Radio_Options.get(i).getAttribute("Value"));
                Radio_Options.get(i).click();
                System.out.println("Radio Button Option "+ (i+1) +" is selected");
            }
            driver.quit()  ;
        }
    }
    

    How to automate BootStrap DropDown using Selenium WebDriver

     
    In the previous post, we have already seen How to Handle Dropdowns in Selenium WebDriver . In this post, we will see how to handle Bootstrap Dropdown using Selenium WebDriver.
     
    What is Bootstrap?
     
    • Bootstrap is a free front-end framework for faster and easier web development
    • Bootstrap includes HTML and CSS based design templates for typography, forms, buttons, tables, navigation, modals, image carousels and many other, as well as optional JavaScript plugins
    • Bootstrap also gives you the ability to easily create responsive designs
    • Bootstrap is compatible with all modern browsers (Chrome, Firefox, Internet Explorer, Edge, Safari, and Opera)

    What is Responsive Web Design?

    Responsive web design is about creating web sites, which automatically adjust themselves to look good on all devices, from small phones to large desktops.
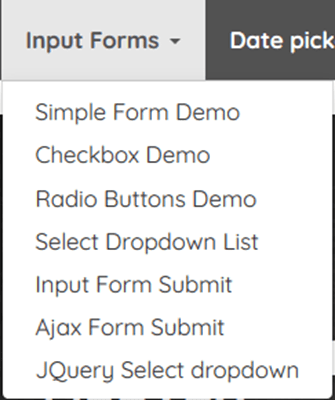
    Bootstrap dropdowns and interactive dropdowns that are dynamically position and formed using list of ul and li html tags. To know more about Bootstrap, please click here

    How to get all the options of a Bootstrap dropdown


    Below is an example which will explain how to get all the options of a Bootstrap dropdown.

    import java.util.List;
    import java.util.concurrent.TimeUnit;
    import org.openqa.selenium.By;
    import org.openqa.selenium.WebDriver;
    import org.openqa.selenium.WebElement;
     
    import org.openqa.selenium.chrome.ChromeDriver;
    public class BootStrapDemo {
            public static void main(String[] args) {
     System.setProperty("webdriver.chrome.driver","C:\\Users\\Desktop\\Drivers\\chromedriver_win32\\chromedriver.exe");
    
              WebDriver driver= new ChromeDriver();
              driver.manage().window().maximize();
              driver.get("https://www.seleniumeasy.com/test/");
              driver.manage().timeouts().implicitlyWait(20, TimeUnit.SECONDS);
    
                    // Clicking on Bootstrap Dropdown
                   driver.findElement(By.xpath("//*[@id='navbar-brand-centered']/ul[1]/li[1]/a")).click(); 
    
                    // Get the all WebElements inside the dropdown in List  
                   List dropdown_list =  driver.findElements(By.xpath("//ul[contains(@class,'dropdown-menu')]//li//a"));
    
                  // Printing the amount of WebElements inside the list
                   System.out.println("The Options in the Dropdown are: " + dropdown_list.size());
    
                  // Condition to get the WebElement for list
                  for(int i=0; i<dropdown_list.size(); i++)
                  {
                       // Printing All the options from the dropdown
                       System.out.println(dropdown_list.get(i).getText());
                }                                                                                       
          }
    }
    
    Output
    The Options in the Dropdown are: 29
    Simple Form Demo
    Checkbox Demo
    Radio Buttons Demo
    Select Dropdown List
    Input Form Submit
    Ajax Form Submit
    JQuery Select dropdown


    Here,

    1) Open a web page – https://www.seleniumeasy.com/test/
    2) Click on BootStrap DropDown – Input Forms by using (“//*[@id=’navbar-brand-centered’]/ul[1]/li[1]/a”
    3) Get the all WebElements inside the dropdown in List  by using
    (“//ul[contains(@class,’dropdown-menu’)]//li//a”)
    4) Print all the options of DropDown using dropdown_list.get(i).getText()

    How to select a particular option from Bootstrap dropdown

    In the below example, there is a Bootstrap dropdown. I want to
    Check if an element – Checkbox Demo is present in the dropdown or not.
    If Yes, click on that option.

    import java.util.List;
    import java.util.concurrent.TimeUnit;
    import org.openqa.selenium.By;
    import org.openqa.selenium.WebDriver;
    import org.openqa.selenium.WebElement;
    import org.openqa.selenium.chrome.ChromeDriver;
     
    public class BootStrapDemo {
            public static void main(String[] args) {
    
    System.setProperty("webdriver.chrome.driver","C:\\Users\\Desktop\\Drivers\\chromedriver_win32\\chromedriver.exe");
    
              WebDriver driver= new ChromeDriver();
              driver.manage().window().maximize();
              driver.get("https://www.seleniumeasy.com/test/");
              driver.manage().timeouts().implicitlyWait(20, TimeUnit.SECONDS);
     
                    // Clicking on Bootstrap Dropdown
                   driver.findElement(By.xpath("//*[@id='navbar-brand-centered']/ul[1]/li[1]/a")).click(); 
     
                    // Get the all WebElements inside the dropdown in List  
                   List dropdown_list =  driver.findElements(By.xpath("//ul[contains(@class,'dropdown-menu')]//li//a"));
     
                  // Printing the amount of WebElements inside the list
                   System.out.println("The Options in the Dropdown are: " + dropdown_list.size());
     
                  // Condition to get the WebElement for list
                  for(int i=0; i<dropdown_list.size(); i++)
                  {
                       // Printing All the options from the dropdown
                       System.out.println(dropdown_list.get(i).getText());                 
    // Checking the condition whether option in text "Checkbox Demo" is coming
     
              if(dropdown_list.get(i).getText().contains("Checkbox Demo"))
                {
                     // Clicking if text "Checkbox Demo" is there
                     dropdown_list.get(i).click();
                  // Breaking the condition if the condition get satisfied
                     break;
              }
           }
       driver.quit();            
      }
    }
    
    OutPut
    The Options in the Dropdown are: 29
    Simple Form Demo
    Checkbox Demo
    

    This program can be re-written by using Enhanced for loop instead of For loop.

    getText() can be replaced by getAttribute(“innerHTML”)

    import java.util.List;
    import java.util.concurrent.TimeUnit;
    import org.openqa.selenium.By;
    import org.openqa.selenium.WebDriver;
    import org.openqa.selenium.WebElement;
    import org.openqa.selenium.chrome.ChromeDriver;
     
    public class BootStrapDemo {
            public static void main(String[] args) {
     System.setProperty("webdriver.chrome.driver","C:\\Users\\Desktop\\Drivers\\chromedriver_win32\\chromedriver.exe");
    
              WebDriver driver= new ChromeDriver();
              driver.manage().window().maximize();
              driver.get("https://www.seleniumeasy.com/test/");
              driver.manage().timeouts().implicitlyWait(20, TimeUnit.SECONDS);
     
                    // Clicking on Bootstrap Dropdown
                   driver.findElement(By.xpath("//*[@id='navbar-brand-centered']/ul[1]/li[1]/a")).click(); 
     
                    // Get the all WebElements inside the dropdown in List  
                   List dropdown_list =  driver.findElements(By.xpath("//ul[contains(@class,'dropdown-menu')]//li//a"));
     
                  // Printing the amount of WebElements inside the list
                   System.out.println("The Options in the Dropdown are: " + dropdown_list.size());
     
                  // Condition to get the WebElement using Enhanced For loop
     
                   for(WebElement element:dropdown_list)
     
                  {
                       // Printing All the options from the dropdown
                       System.out.println(element.getAttribute("innerHTML"));             
     
                      // Checking the condition whether option in text "Checkbox Demo" is coming
           if(element.getAttribute("innerHTML").contains("Checkbox Demo")) 
                {
                     // Clicking if text "Checkbox Demo" is there
                     element.click();
                  // Breaking the condition if the condition get satisfied
                     break;
              }
           }
       driver.quit();            
      }
    }