Report
Cucumber Report Service
Reports can be generated in Cucumber in 2 ways.
- Generate report using Cucumber Report Services
- Generate local reports using built-in reporter plugins – html, json, junit, pretty
In this tutorial, I’ll explain about Cucumber Report Services. To use this service, we need to add Cucumber-jvm of version 6.7.0 and above.
<!-- https://mvnrepository.com/artifact/io.cucumber/cucumber-jvm -->
<dependency>
    <groupId>io.cucumber</groupId>
    <artifactId>cucumber-jvm</artifactId>
    <version>6.8.1</version>
    <type>pom</type>
</dependency>
Another important pre-requisite is addition of below instruction in cucumber.properties file
cucumber.publish.enabled=true
Cucumber.properties file should be present in src/test/resources.
Now, execute the Cucumber tests by using command — mvn clean test in command line.
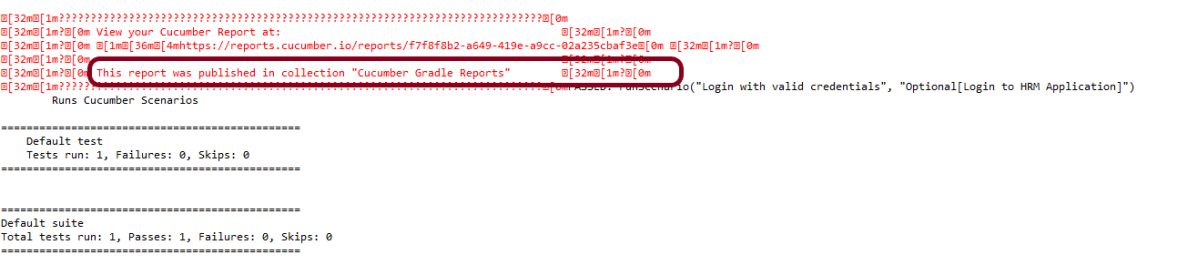
Below image shows the Console message generated

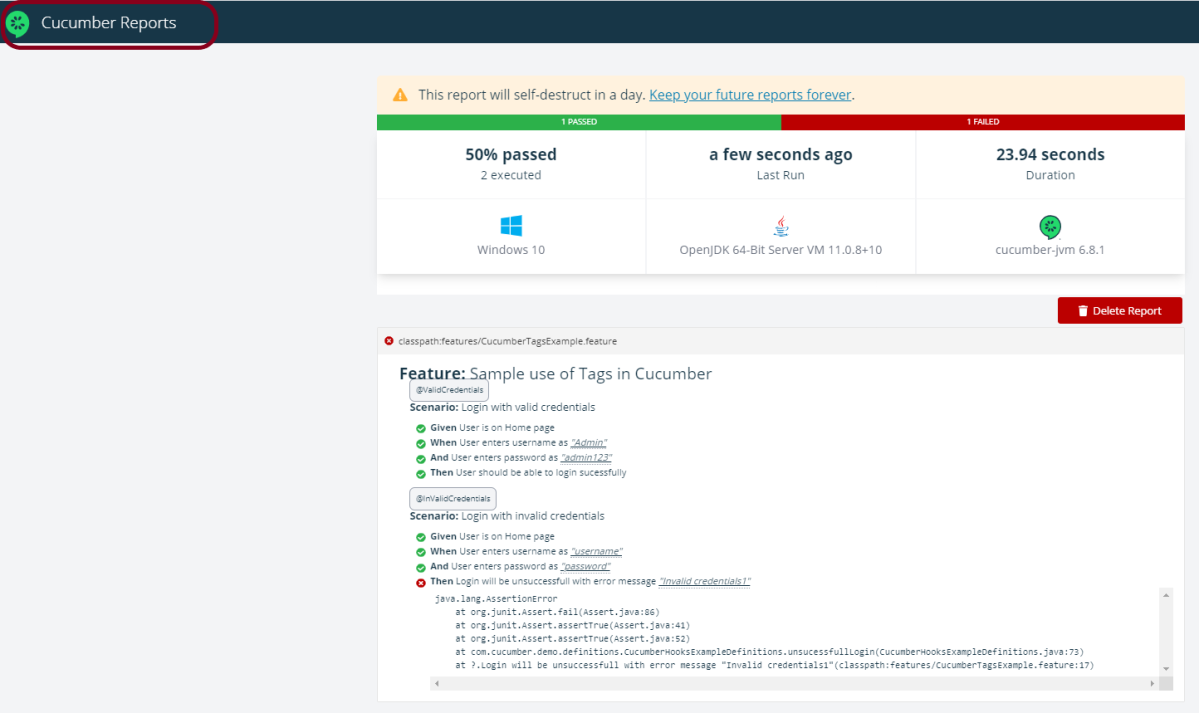
If you follow the link, you’ll see your report rendered in glorious color. Below is the image of such Cucumber Report. This report provide the information about
- No Of Test Scenarios Executed
- Passed vs Failed percentage
- When the tests are executed like 8 minutes ago or 15 hours ago
- Time taken to execute the Test Suite
- Window Version
- Java Version
- Cucumber-jvm Version
- Name of the feature file executed
- Test Scenario step execution – passed, failed, pending
The report is self destructed in 24 hours. It is mentioned as a warning at the top of the report.
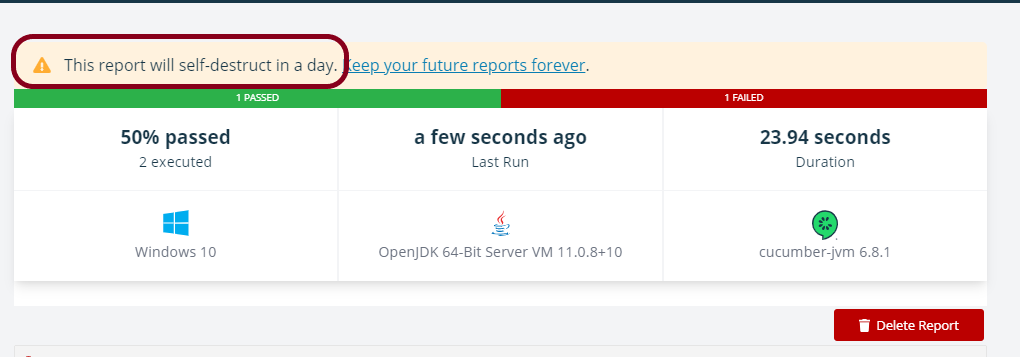
To save the report for future use, click on the link – Keep your future reports forever. It will open a dialog box as shown below. You can create a Report Collection and the reports present in Report Collection are not auto-deleted.

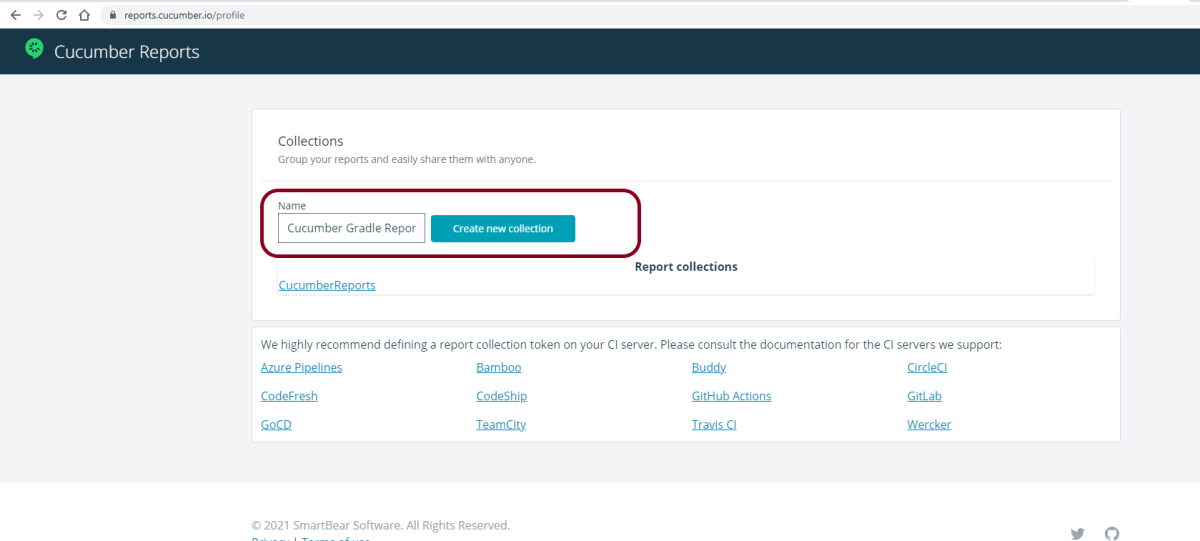
Login to GitHub. A new page as shown below will appear. Create a collection by providing the name in the Name box and click the “Create new collection“ button.
This page contains a token as shown in the image in the below screen. Mention this environment variable with token in cucumber.properties file which is present within src/test/resources.
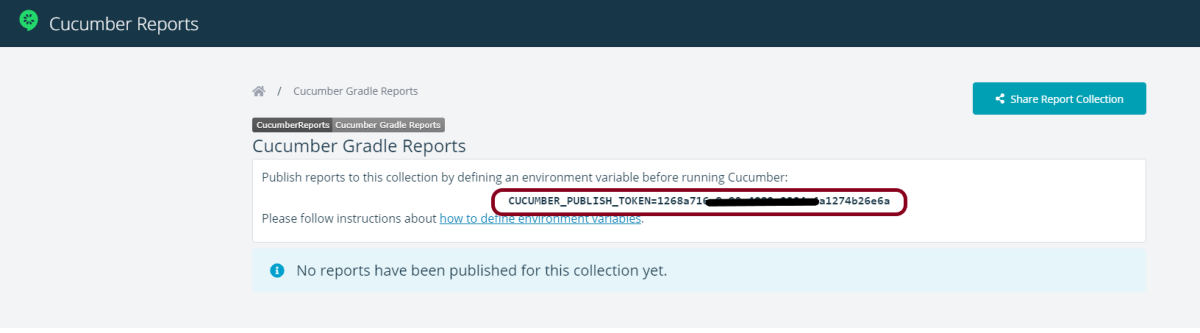
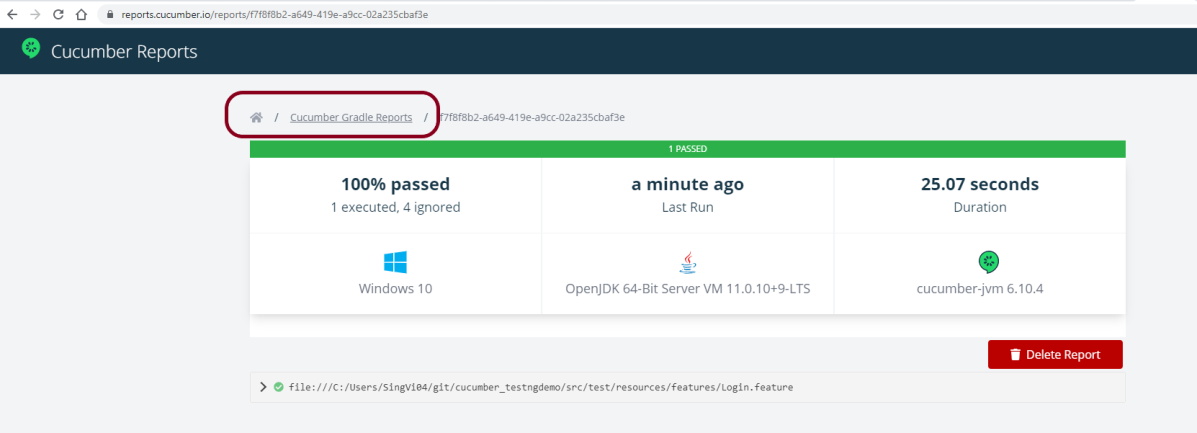
When the tests will be executed, now the report will be saved under Cucumber Gradle Reports Collection.
Below is the image of the report which is saved under Cucumber Gradle Reports collection in GitHub.
If you have not added cucumber.properties to your project, then will get a screen as shown below.

Delete Report
The report can be deleted by clicking on Delete button on the report. Once you have clicked on Delete Report button, a dialog box as shown below is displayed. Once you click on Delete button present in the dialog box, the report is deleted permanently.

That’s it! Congratulations on making it through this tutorial and hope you found it useful! Happy Learning!!
