Static method is a method that belongs to the class, not to the instance of the class.
It can be access without creating the object of the class.
Static method can only access static variables, static methods of same class or another class.
Method Overriding – Static methods cannot be overridden because of early binding
Memory Allocation – In static method, memory allocation happens only once, because the static keyword fixed a particular memory for that method in ram. So when the method calls every time in a program, each time that particular memory is used.
Below is an example that shows how the static methods can be use without creating an object of the class.
package com.example.definitions;

public class staticMyClass {

    static void MyStatic_Method() { // Static Method
        System.out.println("Static method can be accessed without creating object");
    }

    public void MyPublic_Method() { // Public Method
        System.out.println("Public  method can be accessed only by creating object");
    }

    public static void main(String[] args) {
        MyStatic_Method(); // Calling Static Method

    }
}
The output of the above program is
Non Static Method
Non Static can be public, private, protected or default. They do not have static or non-static keyword before their method name.
It can be access by creating the object of the class.
Non Static method can access static variables, static methods of same class or another class as well as non-static variables and methods.
Method Overriding – Non Static methods can be overridden because of runtime binding
Memory Allocation – In non-static method, memory allocation happens when the method invokes and the memory is allocated every time when the method is called. So more memory is used here as compared to static method.
public class nonStaticClass {

    static void MyStatic_Method() { // Static Method
        System.out.println("Static method can be accessed without creating object");
    }

    public void MyPublic_Method() { // Public Method
        System.out.println("Public method can be accessed only by creating object");
    }

    public static void main(String[] args) {

        nonStaticClass stat = new nonStaticClass();
        stat.MyPublic_Method();   // Calling Non Static Method


    }
}
In this blog, we will discuss Classes and Objects. Java is an Object-Oriented Programming language. Class, Objects, Variables, Methods, and Constructors are the building blocks of Object-Oriented language.
What is a Class?
A class is a user-defined template or prototype that is used to create objects and define object data types and methods.
What is an Object?
An object is an instance of a class. An entity that has state and behaviour.
Let us consider the Phone as the object. The state of the Phone is coloured grey, and black, and types like IPhone, Samsung, and behaviour is calling, sending messages, and internet browsing.
How to create a class?
To create a class, a keyword class is used.
Here, I am creating a class with the name Student with the variable Name.
public class Student {
          String Name;
}
How to create an Object?
To create an object, specify a class name like Student, an object name like stud, and use a new keyword.
Student stud = new Student();
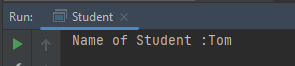
Let us create a class and an object of its class and print the value of the variable name.
public class Student {

    String Name = "Tom";
    public static void main(String[] args)

    {
        Student stud = new Student();
        System.out.println("Name of Student :"+stud.Name);
    }
}
The output of the above program is
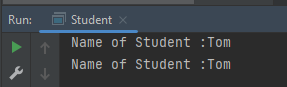
Multiple Objects of a Class
We can create multiple objects of a class. In the below example, we have created 2 objects of class Student.
public class Student {

    String Name = "Tom";
    public static void main(String[] args)
    {
        Student stud1 = new Student();
        Student stud2 = new Student();
        System.out.println("Name of Student :"+stud1.Name);
        System.out.println("Name of Student :"+stud2.Name);
    }
}
The output of the above program is
Multiple Classes
We can create a class and then create an object of that class in another class. Like, here, we have created a class called Student.java and another class is Student_Demo.java where we will create the object of class Student. This is a better approach than the previous one.
public class Student {
          String Name = "Tom";
}


public class Student_Test{
    public static void main(String[] args)
    {
        Student stud = new Student();
        System.out.println("Name of Student :"+stud.Name);
    }
}
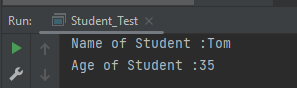
There are multiple ways to initialize the classes and objects.
1) Initialize through reference
Here, initializing an object means storing data in the object. Let’s see a simple example where we are going to initialize the object through a reference variable.
public class Student {
          String Name ;
          int Age;
}

public class Student_Test {
    public static void main(String[] args)
    {
        Student stud = new Student();
        stud.Name ="Tom";
        stud.Age=35;
        System.out.println("Name of Student :"+stud.Name);
        System.out.println("Age of Student :"+stud.Age);
    }
}
The output of the above program is
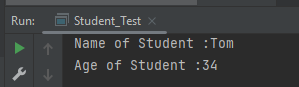
2) Initializing through method
We are creating the two objects of the Student class and initializing the value to these objects by invoking the InsertData() method. Here, we are displaying the state (data) of the objects by invoking the DisplayData() method.
public class Student {
	String Name;
	int Age;

	void InsertData(String n, int a) {
		Name = n;
		Age = a;
	}

	void DisplayData() {
		System.out.println("Name of Student :" + Name);
		System.out.println("Age of Student :" + Age);
	}
}


public class Student_Test {

    public static void main(String[] args) {
        Student stud = new Student();
        stud.InsertData("Tom", 34);
        stud.DisplayData();
    }
}
The output of the above program is
We can create multiple objects
public class Student {
String Name ;
int Age;
void InsertData(String n, int a)
{
Name =n;
Age = a;
}
void DisplayData()
{
System.out.println("Name of Student :"+Name);
System.out.println("Age of Student :"+Age);
}
}
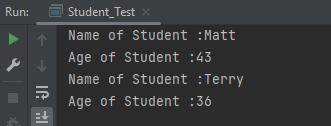
public class Student_Test {
public static void main(String[] args) {
Student stud1 = new Student();
Student stud2 = new Student();
stud1.InsertData("Matt",43);
stud1.DisplayData();
stud2.InsertData("Terry",36);
stud2.DisplayData();
}
}
The output of the above program is
We are done! Congratulations on making it through this tutorial and hope you found it useful! Happy Learning!!
It is a feature that allows a class to have more than one method of the same name, but different parameters. The method can be overloaded if:-
No of parameters are different in two methods
Type of parameters are different
Sequence of parameters are different
Note:- If two methods have same name, same no of parameters, same sequence of parameters and same type of parameters but different return type, then the methods are not overloaded. It will show compile time error.
Why do we need Method Overloading?
If we need to perform the same kind of operation with different data inputs, we go for method overloading. Below is an example of an addition operation with different inputs to explain method overloading. It is an example of static polymorphism early binding or compile time binding. Here, the binding of the method call to its definition happens at compile time.
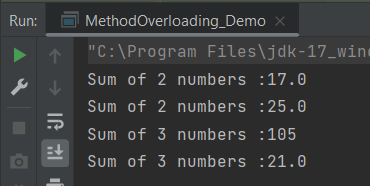
Below is an example of method overloading.
public class MethodOverloading_Demo {

    public void Calculation(int a, float b) {
        System.out.println("Sum of 2 numbers :" + (a + b));
    }

    //Different type of parameters
    public void Calculation(float x, float y) {
        System.out.println("Sum of 2 numbers :" + (x + y));
    }

    //Different number of parameters
    public void Calculation(int i, int j, int k) {
        System.out.println("Sum of 3 numbers :" + (i + j + k));
    }

    //Different sequence of parameters
    public void Calculation(float p, int r) {
        System.out.println("Sum of 3 numbers :" + (p + r));
    }

    public static void main(String[] args) {

        MethodOverloading_Demo add = new MethodOverloading_Demo();

        //Call overloaded methods
        add.Calculation(5, 12f);
        add.Calculation(13f, 12.0f);
        add.Calculation(22, 33, 50);
        add.Calculation(11f, 10);
    }

}
The output of the above program is
What is Type Promotion?
When a data type of smaller type, promote to bigger type, it called type promotion. Suppose a method has double data type and object provides float, then the program works fine. Float will be promote to double.
Let us explain this with an example. In the below example, object has provided float data type, but method has double data type, so there is type promotion.
public class Addition {

    public void Calculation(int a, int b)  {
        System.out.println("Sum of 2 numbers :"+(a+b));
    }

    public void Calculation(int x, double y)   {
        System.out.println("Sum of 2 numbers :"+(x+y));
    }

    public static void main(String[] args) {
        Addition add = new Addition();
        //Type Promotion method
        add.Calculation(5,12);
        add.Calculation(13,12f);
    }
}
The output of the above program is
We are done! Congratulations on making it through this tutorial and hope you found it useful! Happy Learning!!
In this tutorial, you will see the various questions related to Exception Handling.
Example1
1. Find the output of the following program.
public class ExceptionHandlingDemo {

	public static void main(String[] args) {

		try {
			int a[] = new int[5];
			a[5] = 30 / 0;
		} catch (ArithmeticException e) {
			System.out.println("Arithmetic Exception occurs");
		} catch (ArrayIndexOutOfBoundsException e) {
			System.out.println("ArrayIndexOutOfBounds Exception occurs");
		} catch (Exception e) {
			System.out.println("Parent Exception occurs");
		}
		System.out.println("Continue the program..");
	}
}
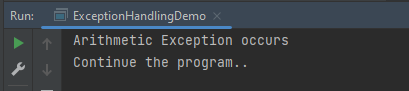
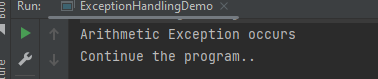
A. Arithmetic Exception occurs, Continue the program.. B. Continue the program.. C. Parent Exception occurs, Continue the program.. D. Continue the program..
Answer A. Arithmetic Exception occurs, Continue the program..
Here, we have multiple catch blocks with different types of exceptions. 30 is divided by 0 which throws ArithmeticException. So, the catch block for ArithmeticException is executed. Once the try-catch block is executed, the program runs in normal flow.
The output of the above program is
Example2
2. Find the output of the following program.
public class ExceptionHandlingDemo {

	public static void main(String[] args) {

		try {
			int a[] = new int[5];
			a[5] = 30 / 15;
		} catch (ArithmeticException e) {
			System.out.println("Arithmetic Exception occurs");
		} catch (ArrayIndexOutOfBoundsException e) {
			System.out.println("ArrayIndexOutOfBounds Exception occurs");
		} catch (Exception e) {
			System.out.println("Parent Exception occurs");
		}
		System.out.println("Continue the program..");
	}
}
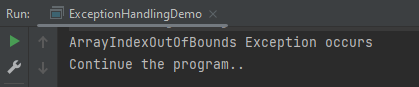
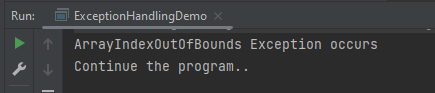
A. ArrayIndexOutOfBounds Exception occurs , Continue the program.. B. Continue the program.. C. Parent Exception occurs, Continue the program.. D. ArrayIndexOutOfBounds Exception occurs
Answer A. ArrayIndexOutOfBounds Exception occurs , Continue the program..
Here, we are trying to access a[5] where index 5 is out of range, which throws ArrayIndexOutOfBoundsException. So, the catch block for ArrayIndexOutOfBoundsException is executed. Once the try-catch block is executed, the program runs in normal flow.
The output of the above program is
Example3
3. Find the output of the following program.
public class ExceptionHandlingDemo {

	public static void main(String[] args) {
		try {
			int a[] = new int[5];

			System.out.println(a[7]);
		} catch (ArithmeticException e) {
			System.out.println("Arithmetic Exception occurs");
		} catch (ArrayIndexOutOfBoundsException e) {
			System.out.println("ArrayIndexOutOfBounds Exception occurs");
		} catch (Exception e) {
			System.out.println("Parent Exception occurs");
		}
		System.out.println("Continue the program..");
	}
}

Output
ArrayIndexOutOfBounds Exception occurs
Continue the program..
A. ArrayIndexOutOfBounds Exception occurs , Continue the program.. B. Continue the program.. C. Parent Exception occurs, Continue the program.. D. ArrayIndexOutOfBounds Exception occurs
Answer A. ArrayIndexOutOfBounds Exception occurs , Continue the program..
Here, we are trying to access a[7] where index 7 is out of range, which throws ArrayIndexOutOfBoundsException. So, the catch block for ArrayIndexOutOfBoundsException is executed. Once the try-catch block is executed, the program runs in normal flow.
The output of the above program is
Example4
4. Find the output of the following program.
public class ExceptionHandlingDemo {

	public static void main(String[] args) {
		try {
			int a[] = new int[5];
			a[5] = 30 / 0;
			System.out.println(a[10]);
		} catch (ArithmeticException e) {
			System.out.println("Arithmetic Exception occurs");
		} catch (ArrayIndexOutOfBoundsException e) {
			System.out.println("ArrayIndexOutOfBounds Exception occurs");
		} catch (Exception e) {
			System.out.println("Parent Exception occurs");
		}
		System.out.println("Continue the program..");
	}
}
A. Arithmetic Exception occurs , Continue the program.. B. ArrayIndexOutOfBounds Exception occurs , Continue the program.. C. Parent Exception occurs, Continue the program.. D. ArrayIndexOutOfBounds Exception occurs
Answer A. Arithmetic Exception occurs , Continue the program..
Here, the try block contains two exceptions. But at a time only one exception occurs and its corresponding catch block is executed. So, the first exception is 30 divided by 0 which throws an ArithmeticException. So, the catch block for ArithmeticException is executed. Once the corresponding catch block is executed, the program runs in normal flow.
The output of the above program is
Example5
5. Find the output of the following program.
public class ExceptionHandlingDemo {

    public static void main(String[] args) {
        try {
            String name = null;
            System.out.println(name.length());
        } catch (ArithmeticException e) {
            System.out.println("Arithmetic Exception occurs");
        } catch (ArrayIndexOutOfBoundsException e) {
            System.out.println("ArrayIndexOutOfBounds Exception occurs");
        } catch (Exception e) {
            System.out.println("Parent Exception occurs");
        }
        System.out.println("Continue the program..");
    }
}
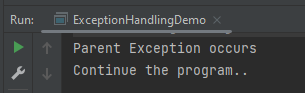
A. NullPointerException , Continue the program.. B. ArrayIndexOutOfBounds Exception occurs , Continue the program.. C. Parent Exception occurs, Continue the program.. D. ArrayIndexOutOfBounds Exception occurs
Answer C. Parent Exception occurs, Continue the program..
Here, the try block contains NullPointerException. But, there is no NullPointerException present in any of the catch blocks. In such a case, the catch block containing the parent exception class Exception will be invoked.
The output of the above program is
Example6
6. Find the output of the following program.
public class ExceptionHandlingDemo {

	public static void main(String[] args) {
		try {
			int a[] = new int[5];
			a[5] = 30 / 0;
		} catch (Exception e) {
			System.out.println("common task completed");
		} catch (ArithmeticException e) {
			System.out.println("Arithmetic Exception occurs");
		} catch (ArrayIndexOutOfBoundsException e) {
			System.out.println("ArrayIndexOutOfBounds Exception occurs");
		}
		System.out.println("Continue the program..");
	}
}
A. Continue the program.. B. ArrayIndexOutOfBounds Exception occurs , Continue the program.. C. Parent Exception occurs, Continue the program.. D. Compile Time error
Answer D. Compile Time error
Here, the order of exceptions is not maintained like most specific to general exceptions. The exception is the parent exception, so should be mentioned as the last exception. As a result, there is a compile-time error.
The output of the above program is
Example7
7. Find the output of the following program.
public class ExceptionHandlingDemo {

    public static void main(String args[]) {
        int x = 0;
        int y = 10;
        int z = y/x;
    }
}
Here, ArithmeticException is an unchecked exception that is not checked at a compiled time. So the program compiles fine but throws ArithmeticException.
The output of the above program is
Example8
8. Find the output of the following program.
public class ExceptionHandlingDemo {

    public static void main(String[] args) {
        try {
            int a[] = { 1, 2, 3, 4 };
            for (int i = 1; i <= 4; i++) {
                System.out.println("a[" + i + "]=" + a[i]);
            }
        }

        catch (Exception e) {
            System.out.println("error = " + e);
        }

        catch (ArrayIndexOutOfBoundsException e) {
            System.out.println("ArrayIndexOutOfBounds Exception occured");
        }
    }
}
Here, ArrayIndexOutOfBoundsException has been already caught by the base class Exception. When a subclass exception is mentioned after the base class exception, then an error occurs.
The output of the above program is
Example9
9. Find the output of the following program.
public class Example9 {

	public static void main(String[] args) {
		try {
			int a[] = { 1, 2, 3, 4 };
			for (int i = 1; i <= 4; i++) {
				System.out.println("a[" + i + "]=" + a[i]);
			}
		}

		catch (ArrayIndexOutOfBoundsException e) {
			System.out.println("ArrayIndexOutOfBounds Exception occured");
		}

		catch (Exception e) {
			System.out.println("error = " + e);
		}
	}
}
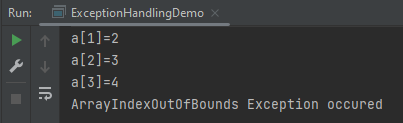
Here, the try block prints a[1] to a[3] and then throws ArrayIndexOutOfBoundsException which is handled by the corresponding catch block.
The output of the above program is
Example10
10. Find the output of the following program.
public class ExceptionHandlingDemo {

	public static void main(String[] args) {

		// outer try block
		try {

			// inner try and catch block 1
			try {
				System.out.println("going to divide by 0");
				int b = 40 / 0;
			}
			catch (ArithmeticException e) {
				System.out.println(e);
			}

			// inner try and catch block 2
			try {
				int a[] = new int[5];

				// assigning the value out of array bounds
				a[5] = 4;
			}
			catch (ArrayIndexOutOfBoundsException e) {
				System.out.println(e);
			}

			System.out.println("No more inner try catch block");
		}

		// catch block of outer try block
		catch (Exception e) {
			System.out.println("Handled the exception of outer try");
		}

		System.out.println("Continue the program..");
	}
}
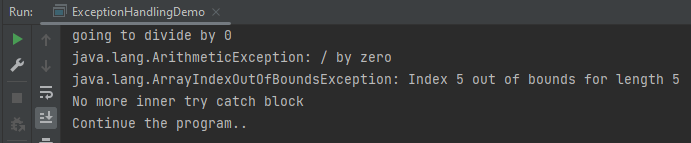
Here, the first inner try-catch block is executed. Then second inner try-catch block is executed and at last outer try-catch block is executed. Post all these, the program runs in normal flow.
The output of the above program is
Example11
11. Find the output of the following program.
public class ExceptionHandlingDemo {

	public static void main(String[] args) {

        // outer try block
        try {

            // inner try block 1
            try {

                // inner try block 2
                try {
                    int x = 25 / 0;
                    System.out.println("Value of x :" + x);
                }

                // to handles ArrayIndexOutOfBoundsException
                catch (ArrayIndexOutOfBoundsException e) {
                    System.out.println("Arithmetic exception");
                    System.out.println(" inner try block 2");
                }
            }

            // to handle ArrayIndexOutOfBoundsException
            catch (ArrayIndexOutOfBoundsException e) {
                System.out.println("Arithmetic exception");
                System.out.println("inner try block 1");
            }
        }

        // to handle ArithmeticException
        catch (ArithmeticException e) {
            System.out.println(e);
            System.out.println("Outer try block");
        } catch (Exception e) {
            System.out.print("Exception");
            System.out.println("Handled in main try block");
        }
    }
}
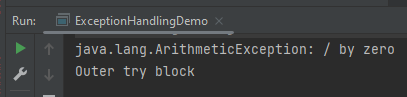
Here, the try block within the nested try block (inner try block 2) does not handle the exception. The control is then transferred to its parent try block (inner try block 1) and it also does not handle the exception, then the control is transferred to the main try block (outer try block) where the appropriate catch block handles the exception.
The output of the above program is
Example12
12. Find the output of the following program.
public class ExceptionHandlingDemo {

	public static void main(String[] args) {

		// outer try block
		try {

			// inner try block 1
			try {

				// inner try block 2
				try {
					int x = 25 / 0;
					System.out.println(x);
				}

				// to handles ArrayIndexOutOfBoundsException
				catch (ArrayIndexOutOfBoundsException e) {
					System.out.println("Arithmetic exception");
					System.out.println(" inner try block 2");
				}
			}

			// to handle ArithmeticException
			catch (ArithmeticException e) {
				System.out.println("Arithmetic exception");
				System.out.println("inner try block 1");
			}
		}

		// to handle ArithmeticException
		catch (ArithmeticException e) {
			System.out.print(e);
			System.out.println("Outer try block");

		} catch (Exception e) {
			System.out.print("Exception");
			System.out.println("Handled in main try block");
		}
	}
}
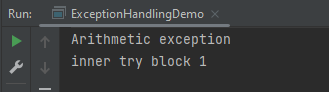
Here, the try block within the nested try block (inner try block 2) does not handle the exception. The control is then transferred to its parent try block (inner try block 1) and it does handle the exception, so the catch block of inner try block 1 handles the exception.
The output of the above program is
Example13
13. Find the output of the following program.
public class ExceptionHandlingDemo {

	public static void main(String[] args) {
		try {
			// below code do not throw any exception
			int data = 25 / 5;
			System.out.println(data);
		}

		// catch won't be executed
		catch (NullPointerException e) {
			System.out.println(e);
		}

		// This is executed whether exception occurs or not
		finally {
			System.out.println("finally block is always executed");
		}

		System.out.println("Continue the Program ..");
	}
}

Output
5
finally block is always executed
Continue the Program ..
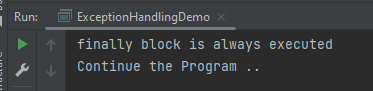
Here, no exception is thrown, so the catch block is not executed. finally block is always executed irrespective the catch block is executed or not.
The output of the above program is
Example14
14. Find the output of the following program.
public class ExceptionHandlingDemo {

	public static void main(String[] args) {
		try {

			System.out.println("Inside the try block");

			// below code throws divide by zero exception
			int data = 25 / 0;
			System.out.println(data);
		}

		catch (NullPointerException e) {
			System.out.println("Exception handled");
			System.out.println(e);
		}

		// executes regardless of exception occurred or not
		finally {
			System.out.println("finally block is always executed");
		}

		System.out.println("Continue the Program ..");
	}
}
Here, the code throws an exception, however, the catch block cannot handle it. Despite this, the finally block is executed after the try block and then the program terminates abnormally.
The output of the above program is
Example15
15. Find the output of the following program.
public class ExceptionHandlingDemo {

	public static void main(String[] args) {

       try {

			System.out.println("Inside try block");

			// below code throws divide by zero exception
			int data = 25 / 0;
			System.out.println(data);
		}

		// handles the Arithmetic Exception
		catch (ArithmeticException e) {
			System.out.println("Exception is handled");
			System.out.println(e);
		}

		// executes regardless of exception occured or not
		finally {
			System.out.println("finally block is always executed");
		}

		System.out.println("Continue the Program ..");
	}
}
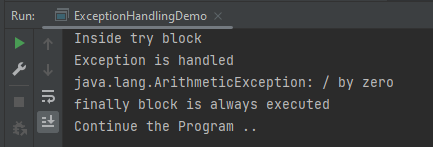
Here, the code throws an exception and the catch block handles the exception. Later the finally block is executed after the try-catch block. Further, the rest of the code is also executed normally.
The output of the above program is
Example16
16. Find the output of the following program.
public class ExceptionHandlingDemo {

	public static void main(String[] args) {
		try {
			int a = 0;
			System.out.println("a = " + a);
			int b = 20 / a;
			System.out.println("b = " + b);
		}

		catch (ArithmeticException e) {
			System.out.println("Divide by zero error");
		}

		finally {
			System.out.println("inside the finally block");
		}
	}
}
Here, a is printed. Then, 20 is divided by 0, which throws ArithmeticException and control goes inside the catch block. Also, the finally block is always executed whether an exception occurs or not.
The output of the above program is
Example 17
17. Find the output of the following program.
public class ExceptionHandlingDemo {

	public static void main(String[] args) {
		int data = 50 / 0; // may throw exception

		System.out.println("rest of the code");
	}

}
Here, there is no try-catch block. So, the error is thrown.
The output of the above program is
Example 18
18. Find the output of the following program.
public class ExceptionHandlingDemo  {

	public static void main(String[] args) {
		try {
			int data1 = 50 / 0;

		}
		catch (Exception e) {
			// generating the exception in catch block
			String name = null;
			System.out.println(name.length());

		}
		System.out.println("Continue the Program ..");
	}

}

Output
Exception in thread "main" java.lang.NullPointerException
Here, the catch block didn’t contain the exception code. So, enclose the exception code within a try block and use a catch block only to handle the exceptions.
The output of the above program is
Example 19
19. Find the output of the following program.
public class ExceptionHandlingDemo {

	static void checkEligibilty(int age, int marks) {
		if (age < 18 && marks < 90) {
			throw new ArithmeticException("Student is not eligible for admission");
		} else {
			System.out.println("Student Entry is Valid!!");
		}
	}

	public static void main(String[] args) {
		System.out.println("Welcome to the Admission process!!");
		checkEligibilty(17, 80);
		System.out.println("Continue the Program ..");
	}
}
Here, an unchecked exception was thrown and it is not handled, so the program halts.
The output of the above program is
Example 20
20. Find the output of the following program.
public class ExceptionHandlingDemo {

	public static void myMethod(int testnum) throws Exception {
		System.out.println("start - myMethod");
		if (testnum < 100)
			throw new Exception();
		System.out.println("end - myMethod");
		return;
	}

	public static void main(String args[]) {
		int testnum = 90;
		try {
			System.out.println("try - first statement");
			myMethod(testnum);
			System.out.println("try - last statement");
		} catch (Exception ex) {
			System.out.println("An Exception");
		} finally {
			System.out.println("finally");
		}
		System.out.println("Out of try/catch/finally - statement");
	}
}
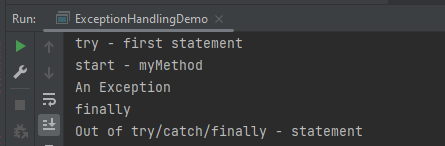
Here, an exception is thrown in the try block, which is handled by the catch block. A finally block is executed, and then the program continues as usual.
The output of the above program is
Example 21
21. Find the output of the following program.
public class ExceptionHandlingDemo {

   public static void main(String args[]) {
      try {
         throw 10;
      }
      catch(int e) {
         System.out.println("Got the  Exception " + e);
      }
  }
}
In Java, only throwable objects (Throwable objects are instances of any subclass of the Throwable class) can be thrown as exceptions. So basic data types can not be thrown at all.
The output of the above program is
Example 22
22. Find the output of the following program.
public class ExceptionHandlingDemo {

	public static void main(String[] args) {

      try {
			throw new Test();
		} catch (Test t) {
			System.out.println("Got the Test Exception");
		} finally {
			System.out.println("Inside finally block ");
		}
	}
}
The output of the above program is
Example 23
23. Find the output of the following program.
class Base extends Exception {
}

class Derived extends Base {
}

 class ExceptionHandlingDemo  {

    public static void main(String[] args) {
        try {

            throw new Derived();
        } catch (Base b) {
            System.out.println("Caught base class exception");
        } catch (Derived d) {
            System.out.println("Caught derived class exception");
        }
    }
}
‘throw’ keyword is used to explicitly throw an exception. Call to method C() throws an exception. Thus, control goes to the catch block of method B() which again throws an exception. Then finally block is always executed even when an exception occurs. Now, control goes to the catch block of method A().
The output of the above program is
Example 25
25. Find the output of the following program.
public class ExceptionHandlingDemo {

	 void m() {
        int data = 50 / 0;
    }

    void n() {
        m();
    }

    void p() {
        try {
            n();
        } catch (Exception e) {
            System.out.println("Exception Handled");
        }
    }

    public static void main(String args[]) {
        ExceptionHandlingDemo obj = new ExceptionHandlingDemo();
        obj.p();
        System.out.println("Continue the program..");
    }
}
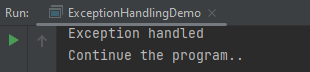
Here, the exception occurs in the m() method where it is not handled, so it is propagated to the previous n() method where it is not handled, again it is propagated to the p() method where the exception is handled.
The output of the above program is
Example 26
26. Find the output of the following program.
public class ExceptionHandlingDemo {

	void m() {
        throw new IOException("device error");// checked exception
    }

    void n() {
        m();
    }

    void p() {
        try {
            n();
        } catch (Exception e) {
            System.out.println("Exception Handled");
        }
    }

    public static void main(String args[]) {
        ExceptionHandlingDemo obj = new ExceptionHandlingDemo();
        obj.p();
        System.out.println("Continue the program..");
    }
}
Here, the exception occurs in the m() method where it is not handled, so it is propagated to the previous n() method where it is not handled, it is propagated to the p() method where the exception is supposed to be handled, but as it is checked Exception which can not be handled by Exception.
The output of the above program is
Example 27
27. Find the output of the following program.
public class ExceptionHandlingDemo {

    void m() {
        throw new ArithmeticException("Arithmetic Exception occured ");
    }

    void n() {
        m();
    }

    void p() {
        try {
            n();
        } catch (Exception e) {
            System.out.println("Exception handled");
        }
    }

    public static void main(String args[]) {
        ExceptionHandlingDemo obj = new ExceptionHandlingDemo();
        obj.p();
        System.out.println("Continue the program..");
    }
}
a) Arithmetic Exception b) Exception Handled, Continue the program.. c) Runtime Exception d) Compile Time Error
Answer b) Exception Handled, Continue the program..
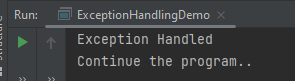
Here, the exception occurs in the m() method – ArithmeticException where it is not handled, so it is propagated to the previous n() method where it is not handled, again it is propagated to the p() method where the exception is handled.
The output of the above program is
Example 28
28. Find the output of the following program.
public class ExceptionHandlingDemo {

	public static void main(String args[]) {
		try {
			int i, sum;
			sum = 10;
			for (i = -1; i < 3; ++i)
				sum = (sum / i);
		} catch (ArithmeticException e) {
			System.out.print("0");
		}
		System.out.print(sum);
	}
}
a) 0 b) -1 c) Runtime Exception d) Compile Time Error
Answer c) Runtime Exception
Here, the value of the variable sum is printed outside of the try block, the sum is declared only in the try block, and outside try block it is undefined.
The output of the above program is
Example 29
29. Find the output of the following program.
public class ExceptionHandlingDemo {
public static void main(String args[]) {
try {
String str = "beginnersbook";
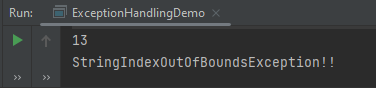
System.out.println(str.length());
char c = str.charAt(0);
c = str.charAt(40);
System.out.println(c);
} catch (StringIndexOutOfBoundsException e) {
System.out.println("StringIndexOutOfBoundsException!!");
}
}
}
Here, an exception occurred because the referenced index was not present in the String.
The output of the above program is
Example 30
30. Find the output of the following program.
public class ExceptionHandlingDemo {

    public static void main(String[] args) {

            try {
                int num = Integer.parseInt("XYZ");
                System.out.println(num);
            } catch (StringIndexOutOfBoundsException e) {
                System.out.println("String IndexOutOfBounds Exception occurred!!");
            } catch (NumberFormatException e) {
                System.out.println("Number format exception occurred");
            } catch (Exception e) {
                System.out.println("Exception occurred");
            }
        }
    }
a) String IndexOutOfBounds Exception occurred!! b) Number format exception occurred c) Exception occurred d) None
Answer b) Number format exception occurred
Here, an exception is not of type StringIndexOutOfBounds, so moved to the next catch where the exception is handled.
This tutorial describes how to download and install Apache POI.
Selenium does not have an inbuilt method to read data from an Excel File. However, there are various libraries in JAVA that help in reading/writing data from Excel files. Apache POI is one of the most used libraries, which provides various classes and methods to read/write data from various formats of Excel files(xls, xlsx etc).
Apache POI, where POI stands for (Poor Obfuscation Implementation) is the Java API for Microsoft Documents that offers a collection of Java libraries that helps us to read, write, and manipulate different Microsoft files such as Excel sheets, PowerPoint, and Word files.
Download Apache POI
POI 5.2.3 was the last version where we produced a set of poi-bin*.zip and poi-bin*.tgz files. We will continue to publish jars to Maven Central. If you are not using a build tool like Apache Maven or Gradle, you can still find these jars by traversing the directories at https://repo1.maven.org/maven2/org/apache/poi/. The jar files are present here. Download them from here.
Go to poi and get the latest jar file from here.
Step 1 – To download Apache POI, go to its official site, here. Click on the Download as shown in the image. This link will navigate to the page showing the latest release of Apache POI. The latest Apache POI version is 5.2.3. You can follow the same steps for any version of POI.
Step 2 – This page shows the latest Apache POI Release Artifacts. Here, you can see POI 5.0.0 is the latest one. Download any one of the Binary Distribution options. One option is .ztar.gz and another option is .zip. I have selected .zip option.
Step 3 – After clicking on the link, it navigates to another page as shown below. I have used the highlighted link to download the POI library files.
Step 4 – Once POI.zip is downloaded and extracted, this is how the folder looks like
How to add POI libraries in Eclipse?
Step 1 – Below is the Java project present in Eclipse.
Step 2 – To add POI libraries to this project, Right-click on the project, hover over the Build path, select Configure Build Path.
Step 3 – It will open the “Properties” of the project. After that, select the Librariestab. Finally, click on the Add External JARs as highlighted below.
Step 4 – Select the JARs in the parent folder of the unzipped POI files. Subsequently, click on the Openbutton to include them in the Eclipse project.
Step 5 – Next, select the JARs under the ooxml-lib folder in the unzipped POI folder as highlighted below:
Step 6 – Select the JARs under the lib folder in the unzipped POI folder as highlighted below.
Step 7 – After that, once all the POI JARs add, click on the Apply and Close button as highlighted below.
Step 8 – Once all the POI libraries successfully install in the Eclipse project, they will reflect under the Referenced Libraries folder in the left pane of the Eclipse project structure, as shown below:
How to add POI libraries to Maven Java Project
You can add the poi and poi-ooxml jar files to the Maven project by mentioning the dependencies in pom.xml.
It’s necessary for us to establish connections to many databases during test automation. This article will teach us how to use an example code snippet to establish a Java connection to Microsoft SQL Server. However, before we do so, let’s first examine the various automation situations that call for database connections.
Why do we need to connect to databases in automation?
To get test data – If the database is automated, test data may be immediately retrieved and processed using a test automation script. To verify the result – To confirm the outcome, we may use automation to cross-check the front-end result to the database’s back-end record. To delete test data created – It is best practice in automation to remove test data that has been created. In order to do this, we use database automation and immediately execute the delete query. To update certain data – Update queries can be used to update test data in accordance with the requirements of the test script.
Connecting to SQL Server in Java
Get a connection to the Database
Create a statement object
Execute the SQL query
Process the Result Set
Get a connection to the Database
Need a connection string in the form of a JDBC URL.
You can connect to MySQL, MS MySql Server, or Oracle using the below syntax:
MS MySql Server - jdbc:odbc:DemoDSN
MySQL - jdbc:mysql://localhost:3306/demodb
Oracle - jdbc:orac;e:thin@myserver:1521:demodb
Failure to connect to the database will throw an exception:-
java.sql.SQLException : bad url or credentials
java.lang.ClassNotFoundException: JDBC driver not in classpath
Create a statement object
The statement object is based on connection. It will be used later to execute SQL query.
The DriverManager class acts as an interface between users and drivers. DriverManager helps to connect an application based on the database connection string.
We use the statement object to execute the SQL Query. Pass in the SQL query.
executeQuery method returns a result table in a ResultSet object. After you obtain the result table, you need to use ResultSet methods to move through the result table and obtain the individual column values from each row.
ResultSet result = stmt.executeQuery("select * from employee");
Process the result Set
Result Set is initially placed before the first row. Result.next() – It moves forward one row and returns true if there are more rows to process Looping through the result set.
import java.sql.*;

public class JdbcTest {

    public static void main(String[] args) throws SQLException {

        Connection conn;
        Statement stmt = null;
        ResultSet result = null;

        String dbUrl = "jdbc:mysql://localhost:3306/demo";
        String username = "student";
        String password = "student1$";

        try {
            //Get a connection to database
            conn = DriverManager.getConnection(dbUrl, username, password);

            System.out.println("Database connection is successful\n");

            //Create a statement
            stmt = conn.createStatement();

            //Execute the SQL Query
            result = stmt.executeQuery("Select * from employees");

            //Process the result set
            while (result.next()) {
                System.out.println("First_Name :" + result.getString("first_name") + " , " + ("Last_Name :" + result.getString("last_name")));

            }

        } catch (Exception e) {
            e.printStackTrace();
        }
    }
}
The output of the above program is
Let us go to MySQL Server and run the command. Before that, if you want to create an “employees” table in the demo database, please use the below script:
create database if not exists demo;

use demo;

drop table if exists employees;

CREATE TABLE `employees` (
  `id` int(11) NOT NULL AUTO_INCREMENT,
  `last_name` varchar(64) DEFAULT NULL,
  `first_name` varchar(64) DEFAULT NULL,
  `email` varchar(64) DEFAULT NULL,
  `department` varchar(64) DEFAULT NULL,
  `salary` DECIMAL(10,2) DEFAULT NULL,
  PRIMARY KEY (`id`)
) ENGINE=InnoDB AUTO_INCREMENT=1 DEFAULT CHARSET=latin1;

INSERT INTO `employees` (`id`,`last_name`,`first_name`,`email`, `department`, `salary`) VALUES (1,'Doe','John','john.doe@foo.com', 'HR', 55000.00);
INSERT INTO `employees` (`id`,`last_name`,`first_name`,`email`, `department`, `salary`) VALUES (2,'Public','Mary','mary.public@foo.com', 'Engineering', 75000.00);
INSERT INTO `employees` (`id`,`last_name`,`first_name`,`email`, `department`, `salary`) VALUES (3,'Queue','Susan','susan.queue@foo.com', 'Legal', 130000.00);

INSERT INTO `employees` (`id`,`last_name`,`first_name`,`email`, `department`, `salary`) VALUES (4,'Williams','David','david.williams@foo.com', 'HR', 120000.00);
INSERT INTO `employees` (`id`,`last_name`,`first_name`,`email`, `department`, `salary`) VALUES (5,'Johnson','Lisa','lisa.johnson@foo.com', 'Engineering', 50000.00);
INSERT INTO `employees` (`id`,`last_name`,`first_name`,`email`, `department`, `salary`) VALUES (6,'Smith','Paul','paul.smith@foo.com', 'Legal', 100000.00);

INSERT INTO `employees` (`id`,`last_name`,`first_name`,`email`, `department`, `salary`) VALUES (7,'Adams','Carl','carl.adams@foo.com', 'HR', 50000.00);
INSERT INTO `employees` (`id`,`last_name`,`first_name`,`email`, `department`, `salary`) VALUES (8,'Brown','Bill','bill.brown@foo.com', 'Engineering', 50000.00);
INSERT INTO `employees` (`id`,`last_name`,`first_name`,`email`, `department`, `salary`) VALUES (9,'Thomas','Susan','susan.thomas@foo.com', 'Legal', 80000.00);

INSERT INTO `employees` (`id`,`last_name`,`first_name`,`email`, `department`, `salary`) VALUES (10,'Davis','John','john.davis@foo.com', 'HR', 45000.00);
INSERT INTO `employees` (`id`,`last_name`,`first_name`,`email`, `department`, `salary`) VALUES (11,'Fowler','Mary','mary.fowler@foo.com', 'Engineering', 65000.00);
INSERT INTO `employees` (`id`,`last_name`,`first_name`,`email`, `department`, `salary`) VALUES (12,'Waters','David','david.waters@foo.com', 'Legal', 90000.00);
Now execute the below SQL command:-
select * from demo.employees;
The output of the above program is
We are done! Congratulations on making it through this tutorial and hope you found it useful! Happy Learning!!
The AssertJproject provides fluent assertion statements for test code written in Java. These assert statements are typically used with Java JUnit tests.
AssertJ is composed of several modules:
A core module to provide assertions for JDK types (String, Iterable, Stream, Path, File, Map…) 1. A Guava module to provide assertions for Guava types (Multimap, Optional…) 2. A Joda Time module to provide assertions for Joda Time types (DateTime, LocalDateTime) 3. A Neo4J module to provide assertions for Neo4J types (Path, Node, Relationship…) 4. A DB module to provide assertions for relational database types (Table, Row, Column…) 5. A Swing module provides a simple and intuitive API for functional testing of Swing user interfaces
What is AssertJ Core?
AssertJ is a Java library that provides a rich set of assertions and truly helpful error messages, improves test code readability, and is designed to be super easy to use within any IDE.
AssertJ Core major versions depend on different Java versions:
AssertJ Core 3.x requires Java 8 or higher
AssertJ Core 2.x requires Java 7 or higher
AssertJ Core 3.x includes all AssertJ Core 2.x features and adds Java 8 specific ones (like exception assertions with lambdas).
The Assertions class is the only class you need to start using AssertJ, it provides all the methods you need.
import static org.assertj.core.api.Assertions.*;
1. Simple Assertion
Verify that age is greater or equal to 50. This assertion will fail
int age = 20;
assertThat(age).isGreaterThanOrEqualTo(30);
The output of the above program is
There is another way to perform the same test. Don’t import the static package.
import org.assertj.core.api.Assertions;
int age = 20;

// Verify that age is greater or equal to 50
Assertions.assertThat(age).isGreaterThanOrEqualTo(30);
This assertion will pass.
int age = 50;

// Verify that age is greater or equal to 50
Assertions.assertThat(age).isGreaterThanOrEqualTo(30);
2. Array Assertions
For an Iterable or an Array there are multiple ways of asserting that their content exist. One of the most common assertions would be to check if an Iterable or Array contains a given element:
int age = 30;
List<Integer> ages = Arrays.asList(20, 25, 33, 45);

// Verify that ages list contains age(30) or not
Assertions.assertThat(ages).contains(age);
Verify if a List starts with a given character. For example “Ugly”:
	List<String> names = Arrays.asList("Here", "Keep", "Ugly", "door", "time");

	@Test
	public void assertJAssertionsExample8() {

		// Verify that ages list contains age(30) or not
		Assertions.assertThat(names).startsWith("Ugly");

	}
The output of the above program is
Assert the size of the list
List<Integer> ages = Arrays.asList(20, 25, 33, 45);

// Verify that list ages contains 5 elements
Assertions.assertThat(ages).hasSize(5);
The output of the above program is
Chaining of assertions
AssertJ allows you to be concise by chaining multiple assertions.
int age = 30;
List<Integer> ages = Arrays.asList(20, 25, 33, 45);

// Verify that the list of age contains 20, and size of list is 4 and match the
// values of all elements
Assertions.assertThat(ages).contains(20).hasSize(4).allMatch(a -> a >= 10 && a <= 30);
The output of the above program is
3. Assertion description
It is often valuable to describe the assertion performed, especially for boolean assertions, where the default error message just complains that it got false instead of true (or vice versa).
You can set such a description as (String description, Object… args) but remember to do it before calling the assertion otherwise it is simply ignored as a failing assertion breaks the chained calls.
Example of a failing assertion with a description:
String name = "Happy Days are here";
Assertions.assertThat(name).as("check name").startsWith("Life");
The error message starts with the given description in [check name]
The output of the above program is
4. Assertions for Date
AssertJ provides special assertions for the Java date class.
Soft assertions AssertJ collects all assertion errors instead of stopping at the first one. Since soft assertions don’t fail at the first error, you need to tell AssertJ when to report the captured assertion errors, we are using assertAll().
SoftAssertions softly = new SoftAssertions();

softly.assertThat("George Martin").as("great authors").isEqualTo("JK Rowling");
softly.assertThat(42).as("comparison").isGreaterThan(120);
softly.assertThat("50").isEqualTo("23");

// Don't forget to call assertAll() otherwise no assertion errors are reported!
softly.assertAll();
The output of the above program is
6. Object Assertions
Objects can be compared in various ways, either to determine the equality of two objects or to examine the fields of an object.
public class AssertJEmployee {

	String name;
	int age;
	float salary;

	public AssertJEmployee(String name, int age, float salary) {
		super();
		this.name = name;
		this.age = age;
		this.salary = salary;
	}

	public String getName() {
		return name;
	}

	public void setName(String name) {
		this.name = name;
	}

	public int getAge() {
		return age;
	}

	public void setAge(int age) {
		this.age = age;
	}

	public float getSalary() {
		return salary;
	}

	public void setSalary(float salary) {
		this.salary = salary;
	}

}
@Test
public void test() {

	AssertJEmployee emp1 = new AssertJEmployee("Tim", 24, 24000);
	AssertJEmployee emp2 = new AssertJEmployee("Tim", 20, 24000);

	Assertions.assertThat(emp1).usingRecursiveComparison().isEqualTo(emp2);
}
The output of the above program is
In the below example, we have used isEqualTo() method that compares object references. We can see that both objects are the same but have different references. So, the assertion fails here.
@Test
public void test() {

	AssertJEmployee emp1 = new AssertJEmployee("Tim", 24, 24000);
	AssertJEmployee emp2 = new AssertJEmployee("Tim", 24, 24000);

	Assertions.assertThat(emp1).isEqualTo(emp2);
}
The output of the above program is
Congratulation! We are able to understand the use of AssertJ. Happy Learning!!
The two most used classes for managing Excel Workbooks are:
HSSFWorkbook – These class methods are used to read/write data to Microsoft Excel file in .xls format. It is compatible with MS-Office versions 97–2003.
XSSFWorkbook – These class methods are used to read-write data to Microsoft Excel in .xls or .xlsx format. It is compatible with MS-Office versions 2007 or later.
How to read Excel (.xlsx) from specific cell value?
Step 1 – To locate the location of file.
File file = new File("C:\\Selenium_ReadTestData.xlsx");
Import File from package
import java.io.File;
Step 2– Instantiate FileInputStream to read from the file specified.
Here getRow(0) will look into the first row, and getCell(0) will look into the first column, i.e. A1.
To retrieve the String value we are making use of getStringCellValue in the end.
Below is the Excel which I’m using to read the data as mentioned below:-
We want to get the value of Row 1, Cell B
We want to get the value of Row 3, Cell A
Let us create a program for the same scenario:
import java.io.FileInputStream;
import java.io.IOException;
import org.apache.poi.xssf.usermodel.XSSFSheet;
import org.apache.poi.xssf.usermodel.XSSFWorkbook;

public class ReadSpecificData {

	public static void main(String[] args) {

     String path = "C:\\Selenium_ReadTestData.xlsx";

		try {

			//Create an object of FileInputStream class to read excel file
			FileInputStream fis = new FileInputStream(path);

			//Create object of XSSFWorkbook class
			XSSFWorkbook wb = new XSSFWorkbook(fis);

			//Read excel sheet by sheet name
			XSSFSheet sheet1 = wb.getSheet("Read_TestData");

			//Get data from specified cell
			System.out.println(sheet1.getRow(1).getCell(1).getStringCellValue());
			System.out.println(sheet1.getRow(3).getCell(0).getStringCellValue());

		} catch (IOException e) {
			e.printStackTrace();
		}

	}

}
The output of the above program is
How to read the entire Excel sheet?
To read the complete data from Excel, you can iterate over each cell of the row, present in the sheet.
To get the last and first-row numbers, there are two methods in the sheet class:
getLastRowNum()
getFirstRowNum()
int rowCount=sheet.getLastRowNum()-sheet.getFirstRowNum();
Once you get the row, you can iterate over the cells present in the row by using the total number of cells, which we can calculate using getLastCellNum() method:
int cellcount=sheet.getRow(1).getLastCellNum();
Below is the entire program to read complete Excel.
import java.io.FileInputStream;
import java.io.IOException;
import org.apache.poi.ss.usermodel.Sheet;
import org.apache.poi.ss.usermodel.Workbook;
import org.apache.poi.xssf.usermodel.XSSFWorkbook;

public class ReadExcelFile {
	public static  void main(String args[]) throws IOException {

		String path = "C:\\Selenium_ReadTestData.xlsx";

		//Create an object of FileInputStream class to read excel file
		FileInputStream fis = new FileInputStream(path);

		//Create object of XSSFWorkbook class
		Workbook workbook = new XSSFWorkbook(fis);

		//Read excel sheet by sheet name
		Sheet sheet = workbook.getSheet("Read_TestData");


		//Find number of rows in excel file
	    int rowCount=sheet.getLastRowNum()-sheet.getFirstRowNum();
	    System.out.println("row count:"+rowCount);

		 //iterate over all the row to print the data present in each cell.
	    for(int i=0;i<=rowCount;i++){

	        //get cell count in a row
	        int cellcount=sheet.getRow(i).getLastCellNum();

	        //iterate over each cell to print its value
	        for(int j=0;j<cellcount;j++){
	            System.out.print(sheet.getRow(i).getCell(j).getStringCellValue().toString() +"||");
	        }
	        System.out.println();
		}
	}
}
The output of the above program is
That’s it! We are done.
Congratulations on making it through this tutorial and hope you found it useful! Happy Learning!! Cheers!!
The LinkedHashMapClass is just like HashMapwith an additional feature of maintaining an order of elements inserted into it. However, the linked hash map is based on both a hash table and a linked list to enhance the functionality of the hash map.
It maintains a doubly-linked list running through all its entries, in addition to an underlying array of default size 16.
LinkedHashMap contains values based on the key. It implements the Map interface and extends the HashMap class.
Create a LinkedHashMap object as shown below from:-
import java.util.LinkedHashMap;
Syntax of LinkedHashMap
LinkedHashMap<String, String> employeeDetail = new LinkedHashMap<String, String>();

LinkedHashMap<String, String> employeeDetail = new LinkedHashMap<>();

LinkedHashMap<String, Integer> employeeDetail = new LinkedHashMap<String, Integer>();
Adding the Elements
Below is an example where we are adding items to HashMap by using put() method.
import java.util.LinkedHashMap;

public class LinkedHashMap_Demo {
    public static void main(String a[]) {

        // Creating an empty LinkedHashMap
        LinkedHashMap<String, String> linkedHashMap = new LinkedHashMap<String, String>();

        // Adding entries in Map using put() method
        linkedHashMap.put("Tim", "DBA");
        linkedHashMap.put("Cillian", "SDET");
        linkedHashMap.put("Patrick", "BA");
        linkedHashMap.put("Brendan", "Dev");

        // Printing all entries inside Map
        System.out.println("Linked HashMap :" + linkedHashMap);

    }
}
The output of the above program is
Accessing an Element
To access a value in the LinkedHashMap, use the get() method and refer to its key:-
import java.util.LinkedHashMap;

public class LinkedHashMap_Demo {
    public static void main(String a[]) {

        // Creating an empty LinkedHashMap
        LinkedHashMap<String, String> linkedHashMap = new LinkedHashMap<String, String>();

        // Adding entries in Map using put() method
        linkedHashMap.put("Tim", "DBA");
        linkedHashMap.put("Cillian", "SDET");
        linkedHashMap.put("Patrick", "BA");
        linkedHashMap.put("Brendan", "Dev");

        // Printing all entries inside Map
        System.out.println("Linked HashMap :" + linkedHashMap);

        // Access a value
        System.out.println("Access Value of Key Patrick :" + linkedHashMap.get("Patrick"));

    }
}
The output of the above program is
Removing an Element
To remove an item, use the remove() method and refer to the key:
import java.util.LinkedHashMap;

public class LinkedHashMap_Demo {
    public static void main(String a[]) {

        // Creating an empty LinkedHashMap
        LinkedHashMap<String, String> linkedHashMap = new LinkedHashMap<String, String>();

        // Adding entries in Map using put() method
        linkedHashMap.put("Tim", "DBA");
        linkedHashMap.put("Cillian", "SDET");
        linkedHashMap.put("Patrick", "BA");
        linkedHashMap.put("Brendan", "Dev");

        // Printing all entries inside Map
        System.out.println("Linked HashMap :" + linkedHashMap);

        // Removing the mapping with Key Brendan
        linkedHashMap.remove("Brendan");

        // Printing the updated map
        System.out.println("Updated Map :" + linkedHashMap);

    }
}
The output of the above program is
To remove all items, use the clear()method:-
import java.util.LinkedHashMap;

public class LinkedHashMap_Demo {
    public static void main(String a[]) {

        // Creating an empty LinkedHashMap
        LinkedHashMap<String, String> linkedHashMap = new LinkedHashMap<String, String>();

        // Adding entries in Map using put() method
        linkedHashMap.put("Tim", "DBA");
        linkedHashMap.put("Cillian", "SDET");
        linkedHashMap.put("Patrick", "BA");
        linkedHashMap.put("Brendan", "Dev");

        // Printing all entries inside Map
        System.out.println("Linked HashMap :" + linkedHashMap);

        // Removing the mapping with Key Brendan
        linkedHashMap.clear();

        // Printing the updated map
        System.out.println("Updated Map :" + linkedHashMap);

    }
}
The output of the above program is
Iterating through the LinkedHashMap
There are multiple ways to iterate through the LinkedHashMap. The most famous way is to use a for-each loop over the set view of the map (fetched using the map.entrySet() instance method). Then for each entry (set element), the values of key and value can be fetched using the getKey() and the getValue() method.
import java.util.LinkedHashMap;
import java.util.Map;
public class LinkedHashMap_Demo {
public static void main(String a[]) {
// Creating an empty LinkedHashMap
LinkedHashMap<String, String> linkedHashMap = new LinkedHashMap<String, String>();
// Adding entries in Map using put() method
linkedHashMap.put("Tim", "DBA");
linkedHashMap.put("Cillian", "SDET");
linkedHashMap.put("Patrick", "BA");
linkedHashMap.put("Brendan", "Dev");
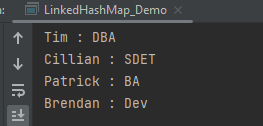
// For-each loop for traversal over Map
for (Map.Entry<String, String> mapElement : linkedHashMap.entrySet()) {
String key = mapElement.getKey();
// Finding the value
// using getValue() method
String value = mapElement.getValue();
// Printing the key-value pairs
System.out.println(key + " : " + value);
}
}
}
The output of the above program is
Methods in LinkedHashMap
import java.util.LinkedHashMap;

public class LinkedHashMap_Demo {
    public static void main(String a[]) {

        // Creating an empty LinkedHashMap
        LinkedHashMap<String, String> linkedHashMap = new LinkedHashMap<String, String>();

        // Adding entries in Map using put() method
        linkedHashMap.put("Tim", "DBA");
        linkedHashMap.put("Cillian", "SDET");
        linkedHashMap.put("Patrick", "BA");
        linkedHashMap.put("Brendan", "Dev");

        // Getting and printing value for a specific key
        System.out.println("Getting value for key 'Patrick' :" + linkedHashMap.get("Patrick"));

        // Getting size of Map using size() method
        System.out.println("Size of the map :" + linkedHashMap.size());

        // Checking whether Map is empty or not
        System.out.println("Is map empty? :" + linkedHashMap.isEmpty());

        // Using containsKey() method to check for a value
        System.out.println("Contains value 'SDET' "  + linkedHashMap.containsValue("SDET"));

        // Using containsKey() method to check for a key
        System.out.println("Contains key 'Brendan'? :" + linkedHashMap.containsKey("Brendan"));

        // Removing entry using remove() method
        System.out.println("Delete element 'Brendan' :" + linkedHashMap.remove("Brendan"));

        // Printing mappings to the console
        System.out.println("Mappings of LinkedHashMap :" + linkedHashMap);
        }
}
The output of the above program is
We are done! Congratulations on making it through this tutorial and hope you found it useful! Happy Learning!!
In Java we have already defined exception classes such as ArithmeticException, NullPointerException, ArrayIndexOutOfBounds exception etc. These exceptions are set to trigger on different conditions. For example when we divide a number by zero, this triggers ArithmeticException, when we try to access the array element out of its bounds then we get ArrayIndexOutOfBoundsException.
The Java throw keyword is used to throw an exception explicitly. We specify the exception object which is to be thrown. The Exception has some message with it that provides the error description. These exceptions may be related to user inputs, server, etc.
We can throw either checked or unchecked exceptions in Java by throw keyword. It is mainly used to throw a custom exception.
throw Instance
Example:
throw new ArithmeticException("/ by zero");
Instance must be of type Throwable or a subclass of Throwable. For example Exception is a sub-class of Throwable and user defined exceptions typically extend Exception class.Data types such as int, char, floats or non-throwable classes cannot be used as exceptions.
The flow of execution of the program stops immediately after the throw statement is executed and the nearest enclosing try block is checked to see if it has a catch statement that matches the type of exception. If it finds a match, controlled is transferred to that statement otherwise next enclosing try block is checked and so on. If no matching catch is found then the default exception handler will halt the program.
public class Example1 {

	public static void test() {
		try {
			throw new ArithmeticException(" Hello ");
		} catch (ArithmeticException e) {
			System.out.println("Caught throw exception in method.");
			throw e; // rethrowing the exception
		}
	}

	public static void main(String args[]) {
		try {
			test();
		} catch (ArithmeticException e) {
			System.out.println("Caught exception in main.");
		}
	}
}

Output
Caught throw exception in method.
Caught exception in main.
Let us take another example where we have created the validate method that takes integer value as a parameter. If the age is less than 18, we are throwing the ArithmeticException otherwise print a message “Person is eligible to drive!!” .
public class Example1 {

	public static void validate(int age) {
		if (age < 18) {

			// throw Arithmetic exception if not eligible to drive
			throw new ArithmeticException("Person is not eligible to drive");
		} else {
			System.out.println("Person is eligible to drive!!");
		}
	}

	public static void main(String args[]) {
		validate(13);

	}
}

Exception in thread "main" java.lang.ArithmeticException: Person is not eligible to drive
	at ExceptionsExamples.Example1.validate(Example1.java:9)
	at ExceptionsExamples.Example1.main(Example1.java:16)
We are done! Congratulations on making it through this tutorial and hope you found it useful! Happy Learning!!