This article shows how to read JSON using JSON.simple.
This project was formerly JSON.simple 1.x from a Google code project by Yidong, now maintained by Clifton Labs, read this JSON.simple history
JSON.simple is available at the Central Maven Repository. Maven users add this to the POM.
<!-- https://mvnrepository.com/artifact/com.github.cliftonlabs/json-simple -->
<dependency>
    <groupId>com.github.cliftonlabs</groupId>
    <artifactId>json-simple</artifactId>
    <version>4.0.1</version>
</dependency>
If the project is Gradle, add the below dependency in build.gradle.
// https://mvnrepository.com/artifact/com.github.cliftonlabs/json-simple
implementation("com.github.cliftonlabs:json-simple:4.0.1")
Read Simple JSON from File using JSON.simple
Below is the sample JSON which is used as an example . I have saved this file in resources/Payloads as simple.json.
{
  "store": {
    "book": "Harry Potter",
    "author": "J K Rowling",
    "price": 100
  }
}
The complete program looks like as shown below:
import com.github.cliftonlabs.json_simple.JsonException;
import com.github.cliftonlabs.json_simple.JsonObject;
import com.github.cliftonlabs.json_simple.Jsoner;

import java.io.IOException;
import java.math.BigDecimal;
import java.nio.file.Files;
import java.nio.file.Paths;

public class SimpleJsonExample {

    public static void main(String args[]) throws IOException {

        String jsonString = new String(Files.readAllBytes(Paths.get("src/test/resources/Payloads/simple.json")));
        try {
            JsonObject jsonObject = (JsonObject) Jsoner.deserialize(jsonString);

            // Accessing the "store" object
            JsonObject store = (JsonObject) jsonObject.get("store");

            // Accessing the "book" object
            String book = (String) store.get("book");
            System.out.println("Book: " + book);

            // Accessing the "author" object
            String author = (String) store.get("author");
            System.out.println("Author - " + author);

            // Accessing the "price" field
            BigDecimal price = (BigDecimal) store.get("price");
            System.out.println("Price: " + price);

        } catch (JsonException e) {
            throw new RuntimeException(e);
        }
    }
}
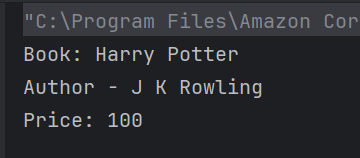
The output of the above program is
Explanation
1.Read all bytes from the file path and converting it to a String.
String jsonString = new String(Files.readAllBytes(Paths.get("src/test/resources/Payloads/simple.json")));
2. Parse the jsonString into a JsonObject using Jsoner.deserialize(jsonString). The parsed JSON object is stored in the jsonObject variable.
JsonObject jsonObject = (JsonObject) Jsoner.deserialize(jsonString);
3. The code accesses the nested “store” object using jsonObject.get(“store”) and casts it to a JsonObject. It then retrieves specific fields from this “store” object.
JsonObject store = (JsonObject) jsonObject.get("store");
4. Extracts the “book” field and casts it to a String, then prints it.
String book = (String) store.get("book");
System.out.println("Book: " + book);
5. Extracts the “author” field and casts it to a String, then prints it.
String author = (String) store.get("author");
System.out.println("Author - " + author);
6. Extracts the “price” field and casts it to a BigDecimal, then prints it.
BigDecimal price = (BigDecimal) store.get("price");
System.out.println("Price: " + price);
Read Complex JSON from File using JSON.simple
Below is the complex JSON. I have saved this file in resources/Payloads as complex.json.
public class ComplexJsonExample {

    public static void main(String args[]) throws IOException {

        String jsonString = new String(Files.readAllBytes(Paths.get("src/test/resources/Payloads/complex.json")));
        try {
            JsonObject jsonObject = (JsonObject) Jsoner.deserialize(jsonString);

            // Accessing the "store" object
            JsonObject store = (JsonObject) jsonObject.get("store");

            // Accessing the "book" array
            JsonArray books = (JsonArray) store.get("book");
            for (Object bookObj : books) {
                JsonObject book = (JsonObject) bookObj;
                String category = (String) book.get("category");
                String author = (String) book.get("author");
                String title = (String) book.get("title");
                BigDecimal price = (BigDecimal) book.get("price");

                System.out.println("Book: " + title + " (Category: " + category + ", Author: " + author + ", Price: " + price + ")");
            }

            // Accessing the "bicycle" object
            JsonObject bicycle = (JsonObject) store.get("bicycle");
            String color = (String) bicycle.get("color");
            BigDecimal bicyclePrice = (BigDecimal) bicycle.get("price");
            System.out.println("Bicycle: Color - " + color + ", Price - " + bicyclePrice);

            // Accessing the "expensive" field
            BigDecimal expensiveValue = (BigDecimal) jsonObject.get("expensive");
            System.out.println("Expensive threshold: " + expensiveValue);

        } catch (JsonException e) {
            throw new RuntimeException(e);
        }
    }
}
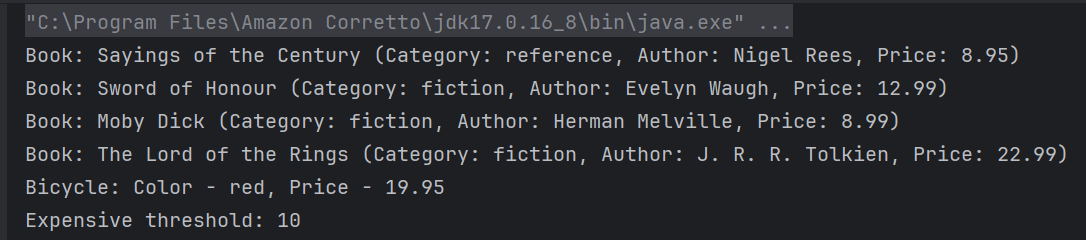
The output of the above program is
Explanation
1.Read all bytes from the file path and converting it to a String.
String jsonString = new String(Files.readAllBytes(Paths.get("src/test/resources/Payloads/complex.json")));
2. Parse the jsonString into a JsonObject using Jsoner.deserialize(jsonString). The parsed JSON object is stored in the jsonObject variable.
JsonObject jsonObject = (JsonObject) Jsoner.deserialize(jsonString);
3. The code assumes that within the “store” object, there is a key “book” which corresponds to a JSON array. It retrieves this array and stores it in a JsonArray variable named books.
 // Accessing the "store" object
JsonObject store = (JsonObject) jsonObject.get("store");

// Accessing the "book" array
JsonArray books = (JsonArray) store.get("book");
4. A for-each loop iterates over each element in the books array. Each element is considered an object, and it’s cast to JsonObject named book. Within each iteration, several attributes of the book JSON object are accessed like category, author, title, price
 for (Object bookObj : books) {
       JsonObject book = (JsonObject) bookObj;
       String category = (String) book.get("category");
       String author = (String) book.get("author");
       String title = (String) book.get("title");
       BigDecimal price = (BigDecimal) book.get("price");

        System.out.println("Book: " + title + " (Category: " + category + ", Author: " + author + ", Price: " + price + ")");
      }
5. The code accesses the nested “bicycle” object using jsonObject.get(“bicycle”) and casts it to a JsonObject. It then retrieves specific fields from this “bicycle” object. Extracts the “color” and “price” field and casts it to a String and BigDecimal, then prints it.
 // Accessing the "bicycle" object
 JsonObject bicycle = (JsonObject) store.get("bicycle");
String color = (String) bicycle.get("color");
BigDecimal bicyclePrice = (BigDecimal) bicycle.get("price");
System.out.println("Bicycle: Color - " + color + ", Price - " + bicyclePrice);
6. Extracts the “expensive” field and casts it to a BigDecimal, then prints it.
BigDecimal expensiveValue = (BigDecimal) jsonObject.get("expensive");
System.out.println("Expensive threshold: " + expensiveValue);
We are done! Congratulations on making it through this tutorial and hope you found it useful! Happy Learning!!