Last Updated On
Attaching screenshots to failed tests is a beneficial practice in testing, especially for browser automation testing. It helps in visualizing what went wrong and aids in debugging. Here’s how you can attach screenshots to failed tests using Playwright.
Table of Contents
- Update Playwright Test Configurations
- Run the test through Test Explorer View
- Run the tests through Command Line
1. Update Playwright Test Configurations
You can configure the playwright.config.js file to take screenshots for failed tests. These screenshots are saved in the test-results folder and attach to the index.html report:
import { defineConfig, devices } from '@playwright/test';

export default defineConfig({

  testDir: './tests',

  /* Retries each failed test 1 time automatically */
  retries: 0,

  /* Run tests in files in parallel */
  fullyParallel: true,

  /* Reporter to use. See https://playwright.dev/docs/test-reporters */
  reporter: 'html',

  /* Shared settings for all the projects below. See https://playwright.dev/docs/api/class-testoptions. */
  use: {

    /* Collect trace when retrying the failed test. See https://playwright.dev/docs/trace-viewer */
    trace: 'on-first-retry',

    headless: false,

    screenshot: 'only-on-failure',
  },

  /* Configure projects for major browsers */
  projects: [
    {
      name: 'chromium',
      use: { ...devices['Desktop Chrome'] },
    },

     ],

});
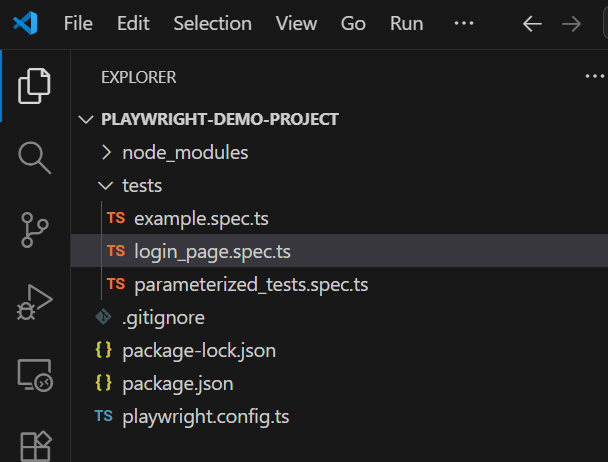
Below is the project structure.
Below are the tests.
import { test, expect } from '@playwright/test';

test('has title', async ({ page, browserName }) => {
  await page.goto('https://opensource-demo.orangehrmlive.com/');

  // Print the browser name
  console.log(`Running test on browser: ${browserName}`);

  // Expect a title "to contain" a substring.
  await expect(page).toHaveTitle(/OrangeHRM/);
});


test('valid login', async ({ page, browserName }) => {

  const username = 'Admin';
  const password = 'admin123'

  await page.goto('https://opensource-demo.orangehrmlive.com/');

  // Print the browser name
  console.log(`Running test on browser: ${browserName}`);

  // Fill in the username
   await page.fill('input[name="username"]', username);

  // Fill in the password
  await page.fill('input[name="password"]', password);

  // Click the login button - Use XPath to locate and click the login button
  const loginButton = await page.locator('//button[@type="submit" and contains(@class, "orangehrm-login-button")]').click();

  // Get the text content from the element
  const dashboardText = await page.locator('//h6[contains(@class, "oxd-topbar-header-breadcrumb-module")]').textContent();

  // Print the text
  console.log(`Dashboard text: ${dashboardText}`);

  expect(dashboardText).toContain('Dashboard1');

});
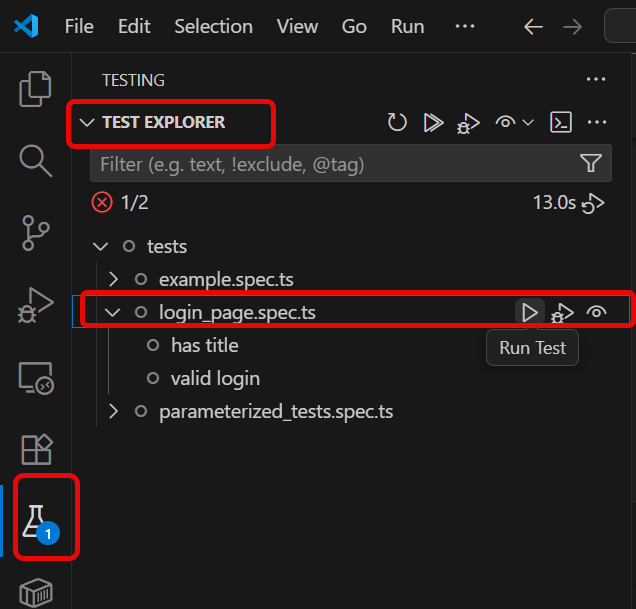
2. Run the test through Test Explorer View
Go to the funnel shape icon called “Testing” or “Test Explorer View”. You can run the tests from the test Explorer view too now. You can run all of the tests in all of the test specs in this directory.
You can also come in and run all of the tests in a particular specification file. Alternatively, run individual tests within a specification file. Here, I want to run the tests of login_page.spec.ts file.
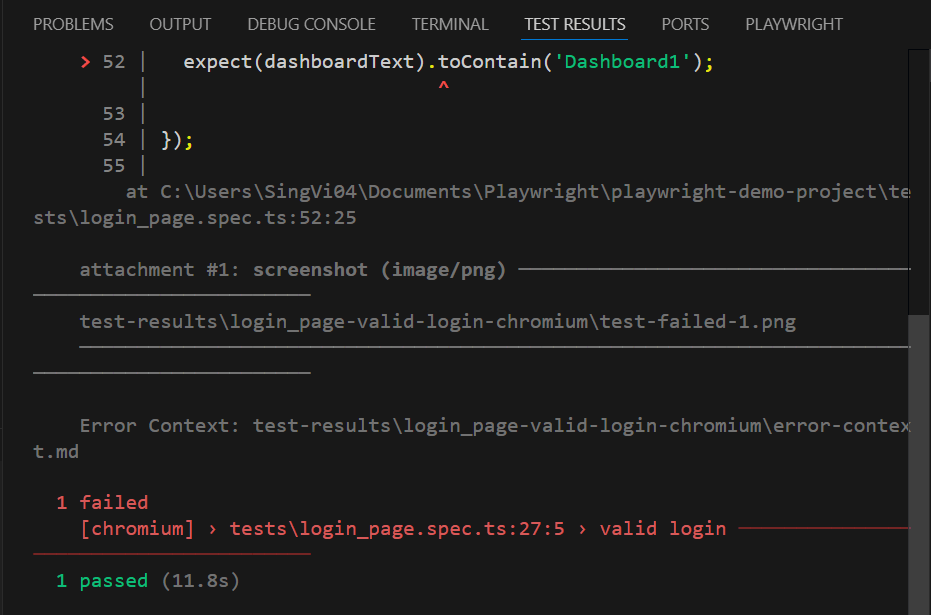
The output of the above program is
We can see that playwright-report folder is created. This folder contains index.html.
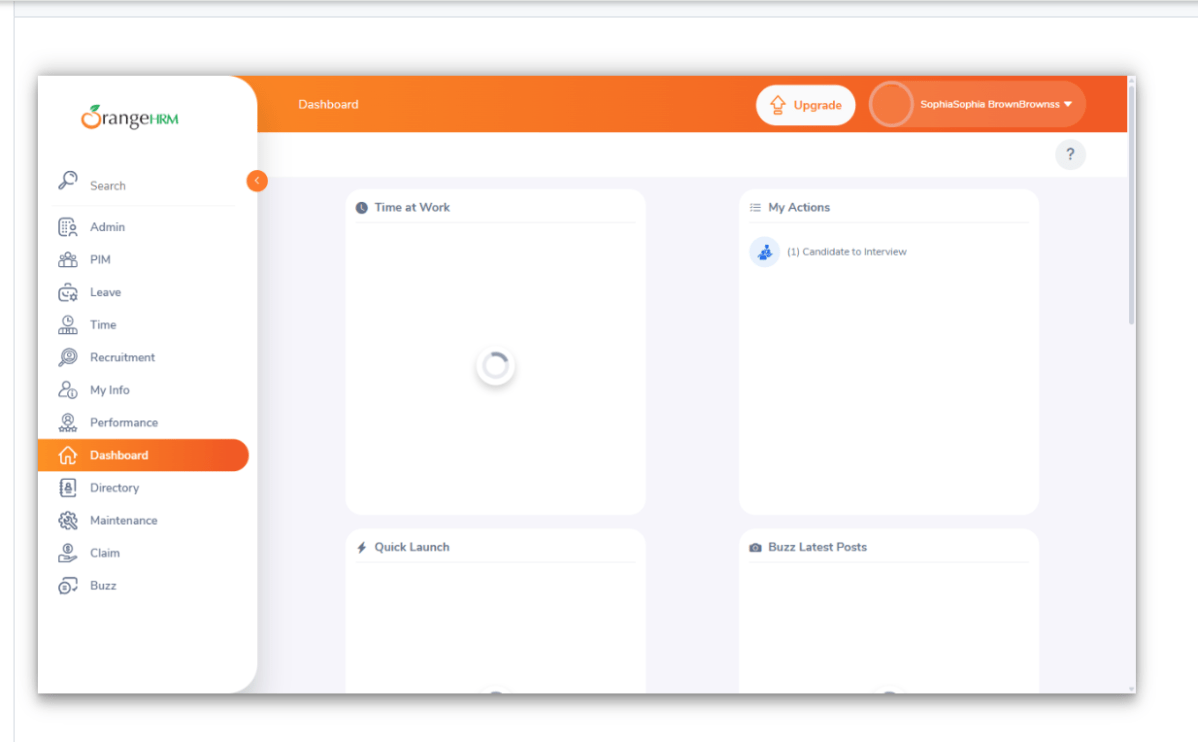
test-results folder is created that contains the screenshot of the failed test with the name of “test-failed-1.png”
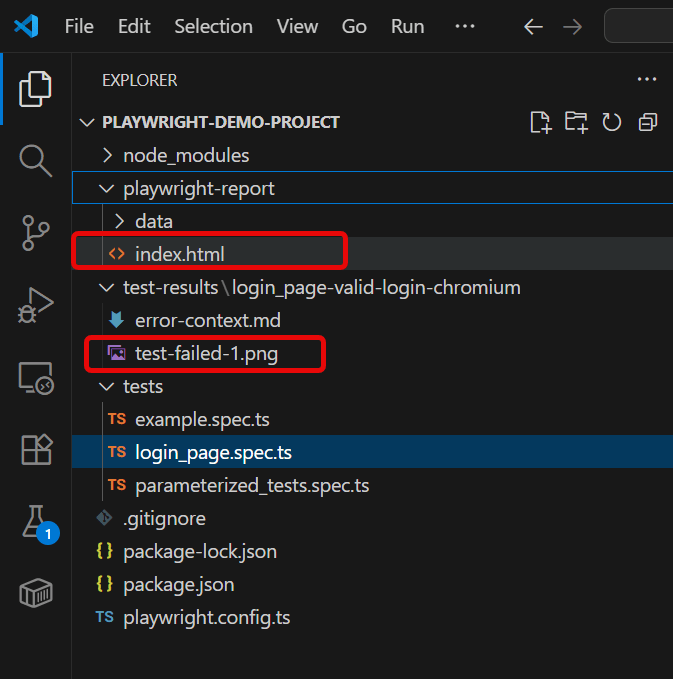
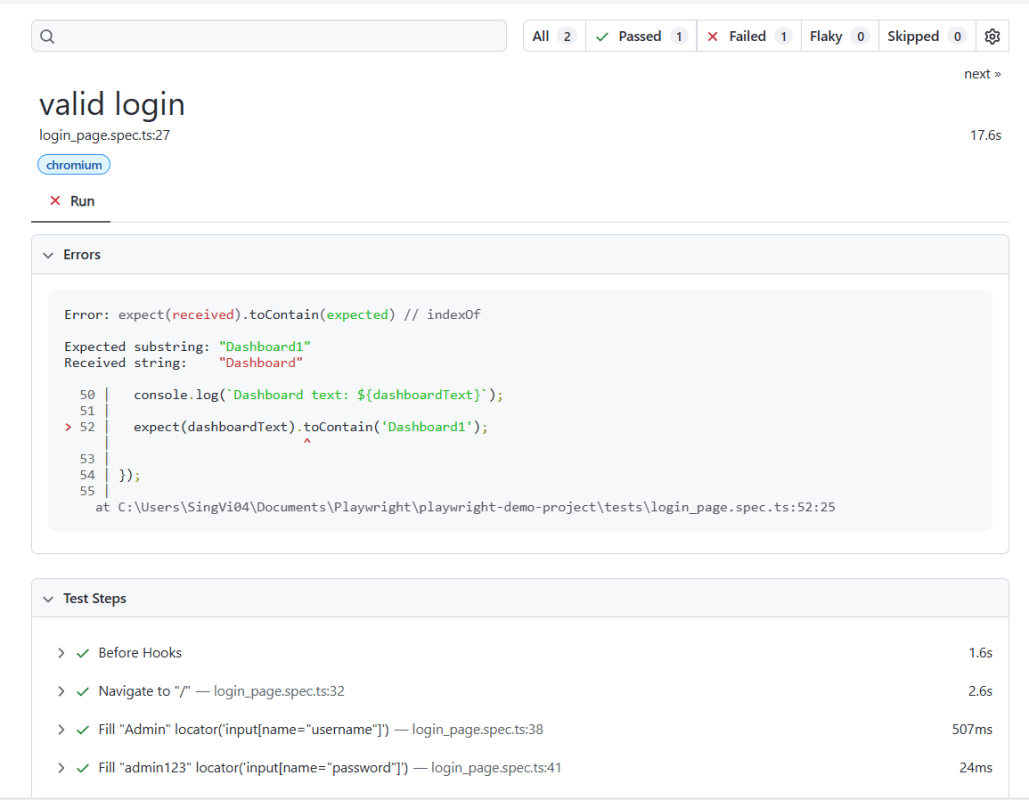
Below is the image of the index.html report.
3. Run the tests through Command Line
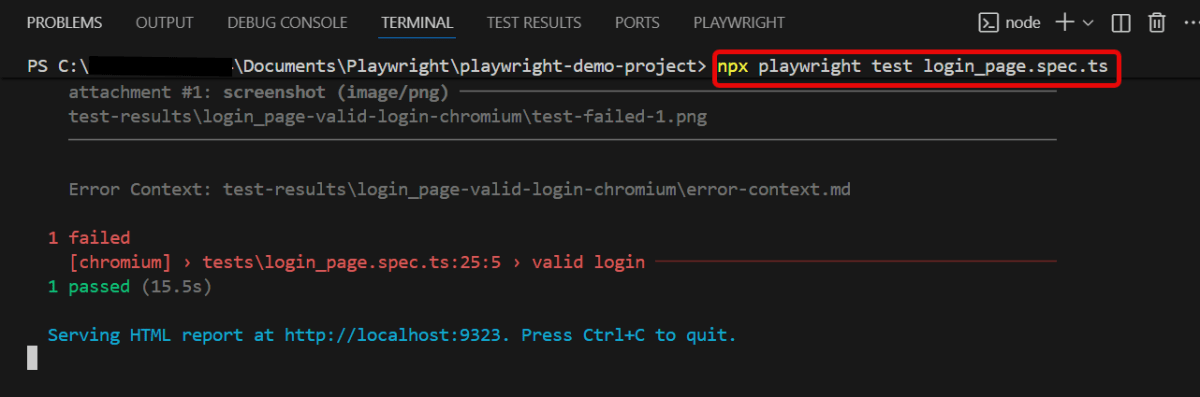
You can also run the tests through the command line
npx playwright test login_page.spec.ts
This command runs the tests. It generates the screenshot of the failed tests. It attaches the failed tests screenshot to the index.html report.
To know more about Playwright UI mode, please refer to this website – https://playwright.dev/docs.
