By default, Playwright runs in headless mode, but you can switch to UI mode by configuring the browser options.
Why do we need to run the tests in UI mode?
UI mode allows testers to see each step of their script being executed visually, which is incredibly useful for debugging. You can observe visual changes and responses in real-time. It helps in identifying visual and interaction-based errors. These errors might only manifest when elements are rendered visibly. Examples include layout issues, hidden buttons, or dynamic element changes.
There are multiple ways to run the tests in UI mode.
1.Update Playwright Test Configurations
Playwright’s test runner has configuration options. You can set it in the configuration file to run tests in UI mode for specific scenarios. Alternatively, you can configure it to run tests in UI mode generally. Modify the playwright.config.js:
import { defineConfig, devices } from '@playwright/test';

/**
 * See https://playwright.dev/docs/test-configuration.
 */

export default defineConfig({
  testDir: './tests',

  /* Run tests in files in parallel */
  fullyParallel: true,

  /* Opt out of parallel tests on CI. */
  workers: process.env.CI ? 1 : undefined,

  /* Reporter to use. See https://playwright.dev/docs/test-reporters */
  reporter: 'html',

 /* Shared settings for all the projects below. See https://playwright.dev/docs/api/class-testoptions. */
  use: {

   // Running tests in UI mode
    headless: false
  }

});
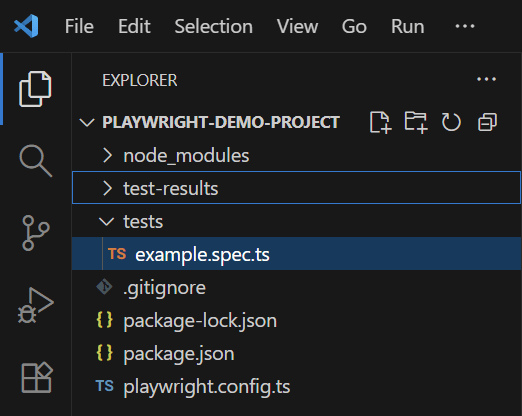
Below is the project structure.
Below are the tests.
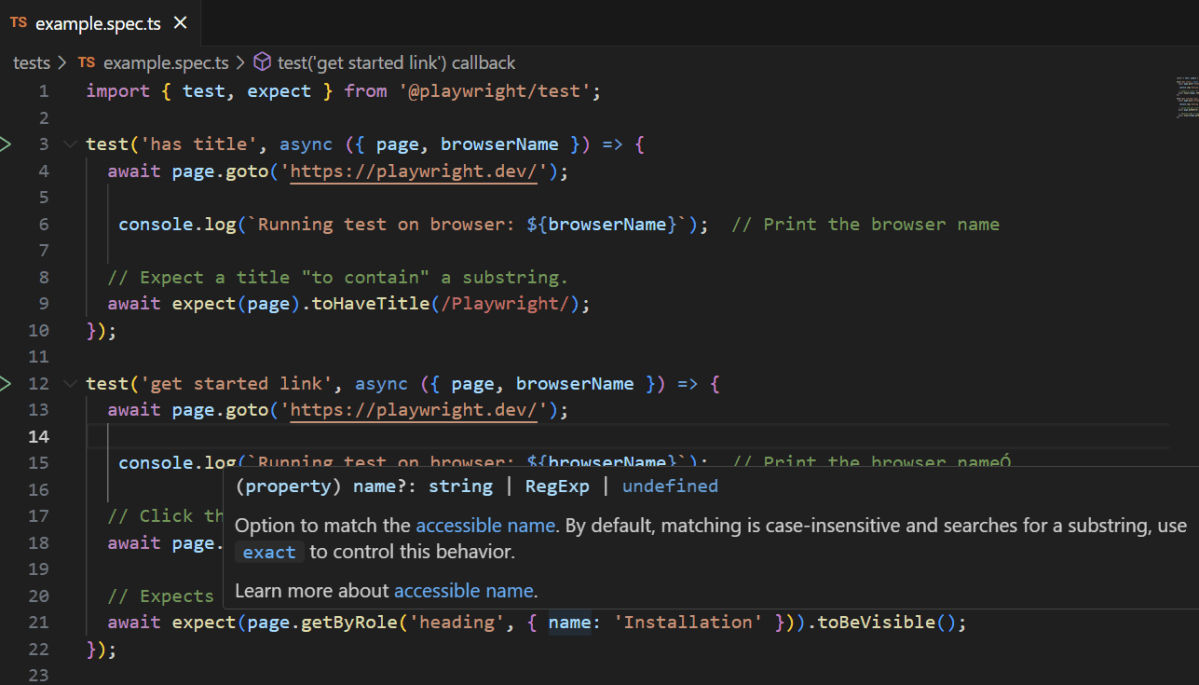
import { test, expect } from '@playwright/test';
test('has title', async ({ page, browserName }) => {
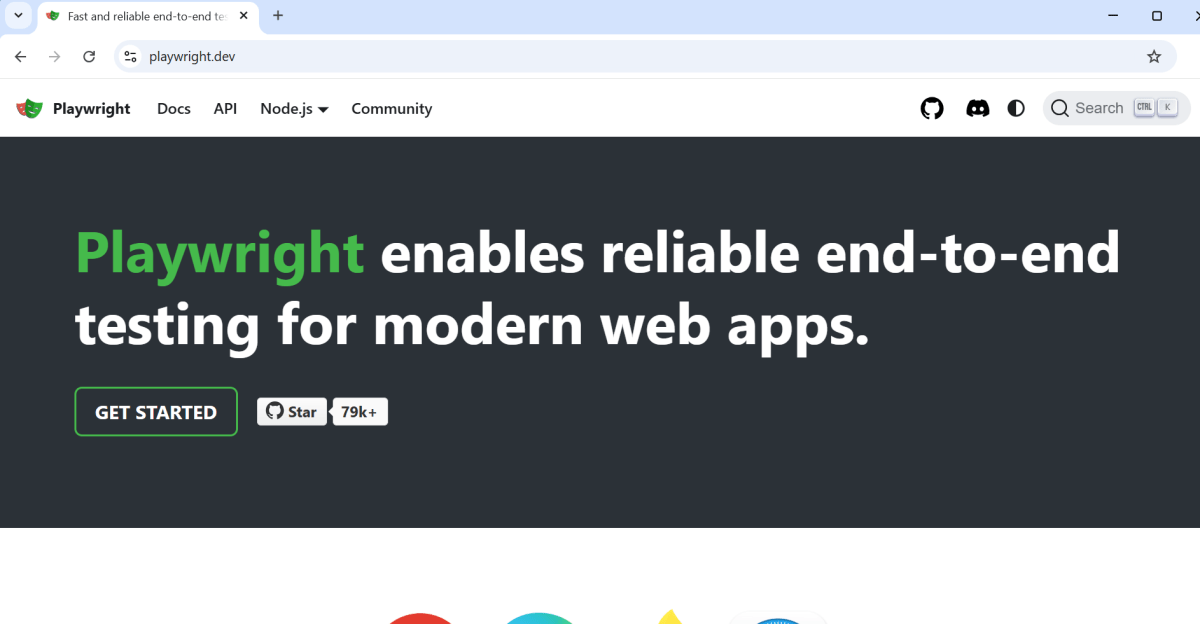
await page.goto('https://playwright.dev/');
console.log(`Running test on browser: ${browserName}`); // Print the browser name
// Expect a title "to contain" a substring.
await expect(page).toHaveTitle(/Playwright/);
});
test('get started link', async ({ page, browserName }) => {
await page.goto('https://playwright.dev/');
console.log(`Running test on browser: ${browserName}`); // Print the browser nameÓ
// Click the get started link.
await page.getByRole('link', { name: 'Get started' }).click();
// Expects page to have a heading with the name of Installation.
await expect(page.getByRole('heading', { name: 'Installation' })).toBeVisible();
});
Go to the funnel shape icon called “Testing” or “Test Explorer View”. You can run the tests from the test Explorer view too now. You can run all of the tests in all of the test specs in this directory.
You can also come in and run all of the tests in a particular specification file. Alternatively, run individual tests within a specification file.
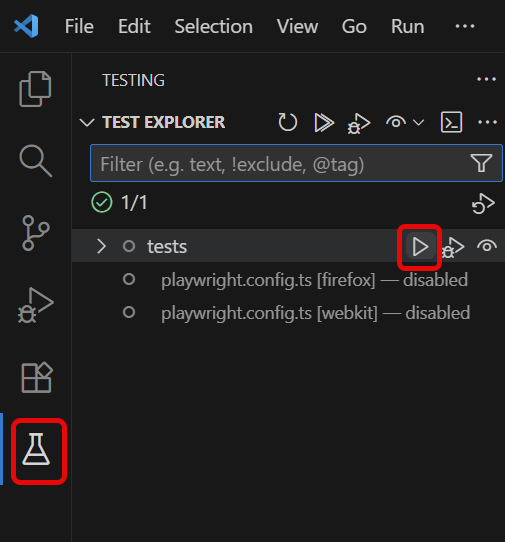
Click on the inverted triangle red icon. The tests are running in UI mode now.
2. Launch Tests in UI Mode
To start running your tests in UI mode, execute the following command from your project’s root folder:
npx playwright test --ui
This command opens the Playwright Test Runner in UI mode. You will see a graphical interface where you can:
- Watch Test Execution: See individual tests being run and viewing the browser interactions step-by-step.
- Inspect Elements: Directly interact with the page under test.
- Debug Failed Tests: Access console logs, network information, and more.
- Rerun Specific Tests: Select different tests to rerun without restarting the whole suite
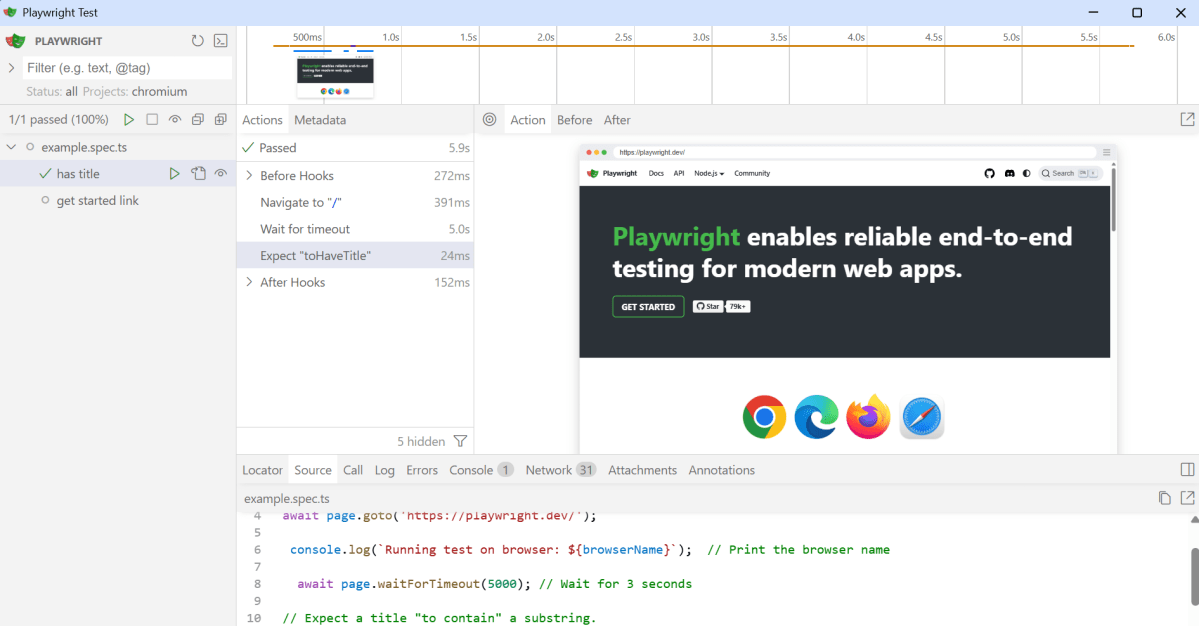
The Playwright UI allows you to:
- Filter Tests: Use search functionality to find specific tests.
- Select Browsers: Choose different browsers to execute the tests.
- Pause and Step Through: Review the execution step-by-step for a deeper understanding of test behavior.
Simply close the UI or stop the command line process to exit the UI mode.
To know more about Playwright UI mode, please refer to this website – https://playwright.dev/docs/test-ui-mode.
