Last Updated On
In this tutorial, we will see the steps to schedule the run of Collections in the Postman.
Table of Contents
Postman provides the capability to run the collections at specific times each day or week. For example, you may want to run a collection that tests the functionality of your API every day. You can use the Collection Runner to schedule collection runs to execute automatically at specified days and times.
- Scheduled runs execute in the Postman Cloud.
- Schedules share permissions with their collections. For example, if you have permissions to edit a collection, you’ll be able to edit that collection’s schedules.
- Personal, private, and team workspaces support scheduling collection runs.
- If you import or export a collection, its schedules don’t import or export with it. However, if you delete a collection, its schedules are deleted also.
- Scheduled collection runs have the same usage limits as monitors.
When you schedule a collection run with the Collection Runner, the scheduled run is added to the collection’s Runs tab. You can view, pause, edit, and delete scheduled collection runs from the collection’s Runs tab.

Scheduling a Collection Run
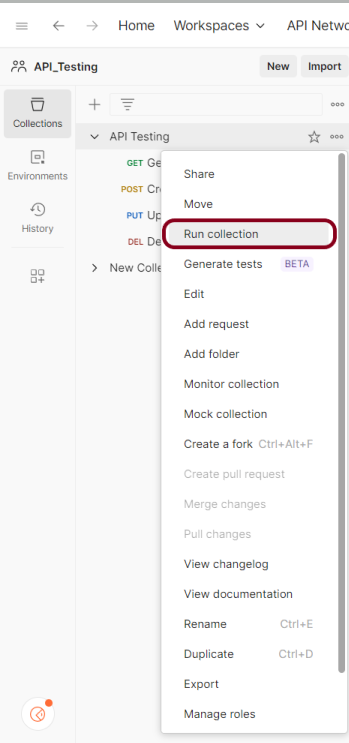
Step 1 – Click “Run Collections”
Select Collections in the sidebar and select the collection or folder you want to schedule. Click on the “Run Collection”.
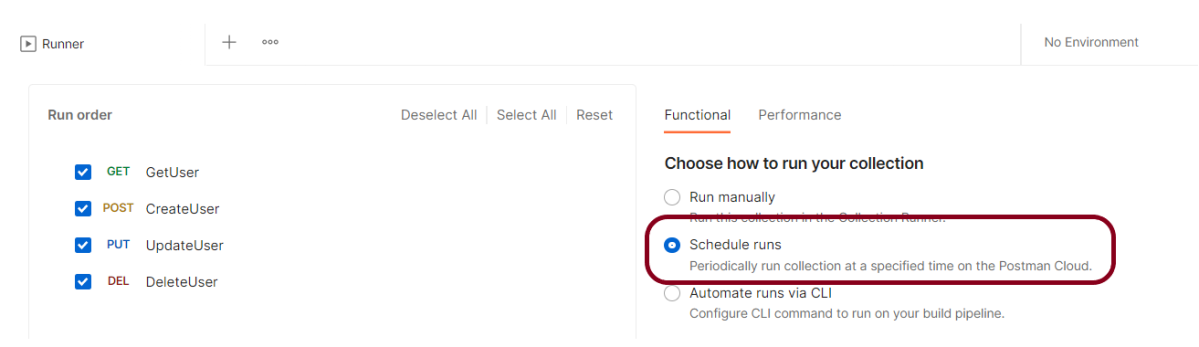
Step 2 – Schedule the Run
On the Functional tab, select Schedule runs.
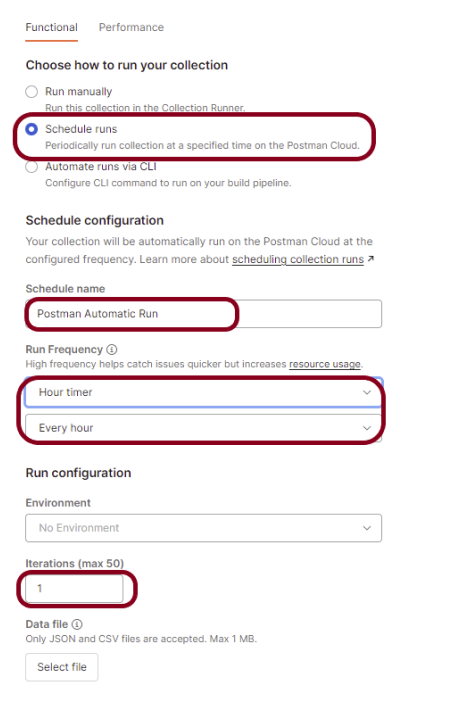
Step 3 – Select Configuration options
Choose any configuration options:
- The schedule’s name – Postman Automatic Run
- The run’s frequency – Hourly
- An environment associated with the collection (optional) – No
- How many times you want the collection to run (iterations) – 1
- A
JSONorCSVdata file (optional) - Notification recipients (optional)
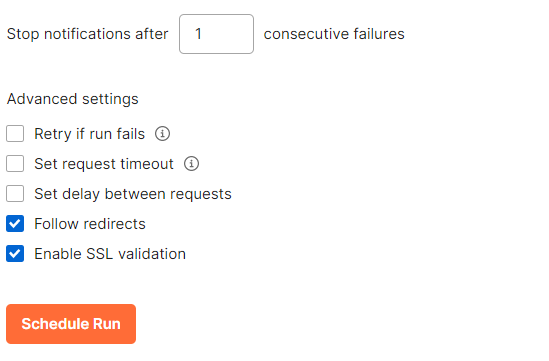
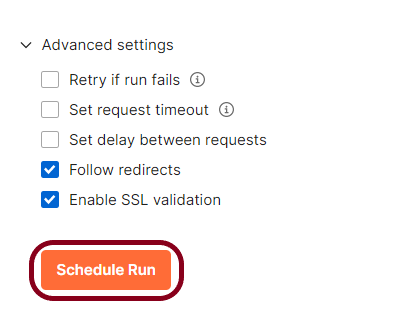
- Advanced settings (optional)
- Retry if run fails
- Set request timeout
- Set delay between requests
- Follow redirects
- Enable SSL validation
By default, your queries are executed in the collection’s list order. Select the request you want to move, then drag it to the new position in the execution sequence. By unchecking the box next to a certain request’s name, you can also delete that request from the run.
Click the “Schedule Run“ button.
Viewing a scheduled run
Step 1 – View the schedule in Postman console
Select Collections in the sidebar and select the collection with the scheduled run you want to view.
Select the Runs tab.
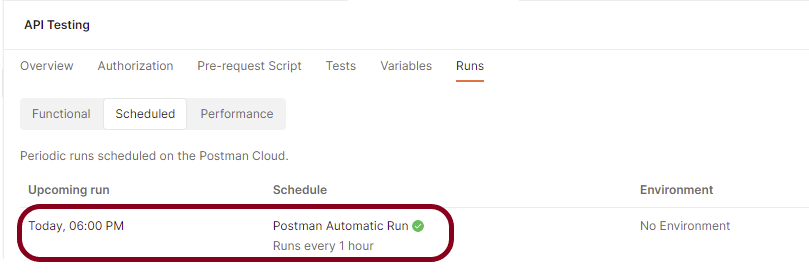
Select the Scheduled runs tab, hover over your scheduled run, and Select View.
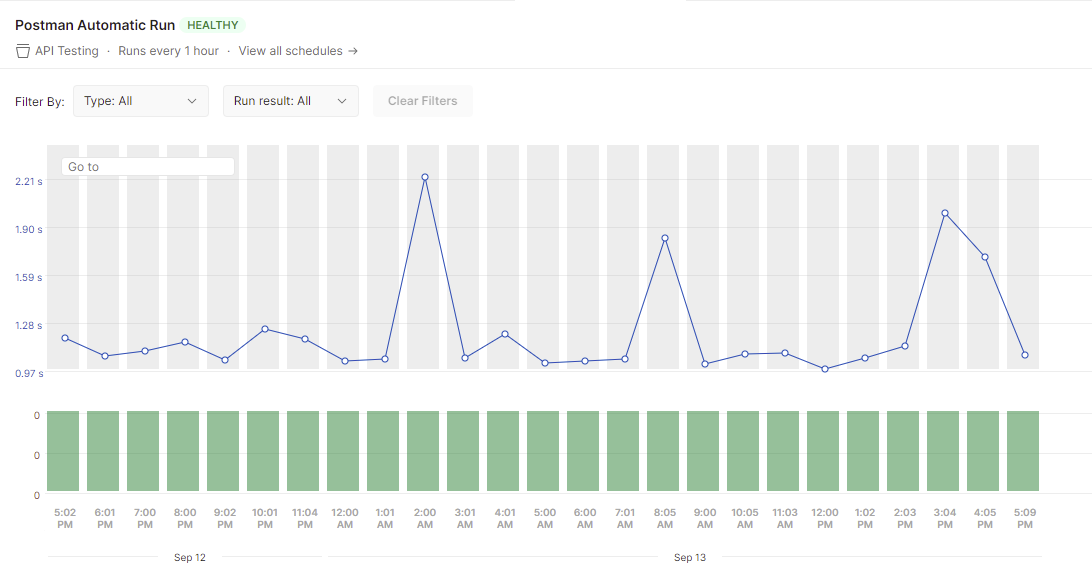
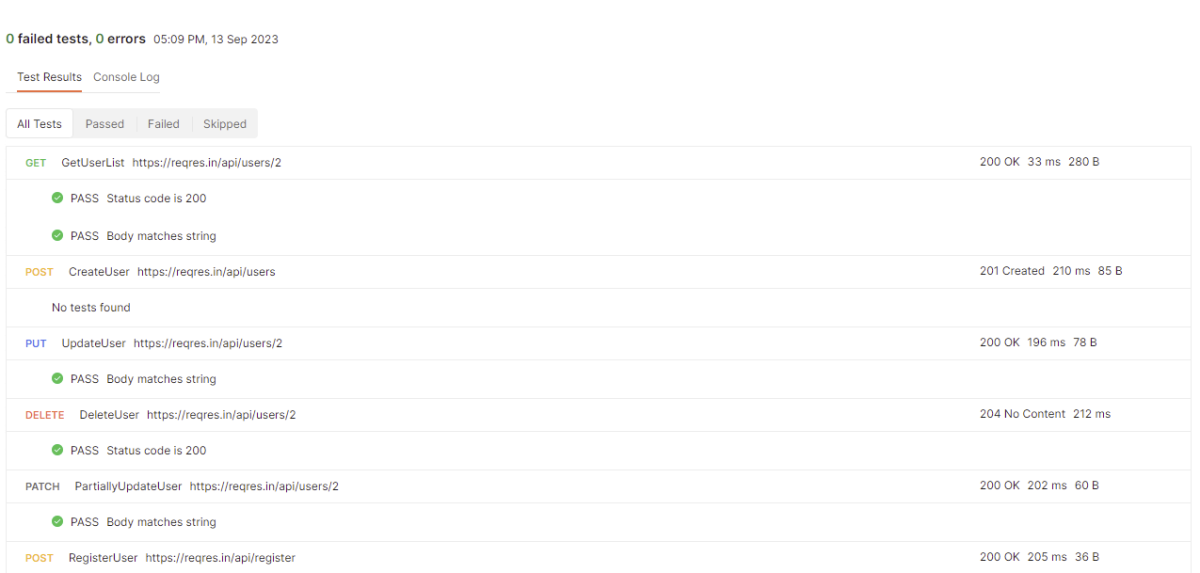
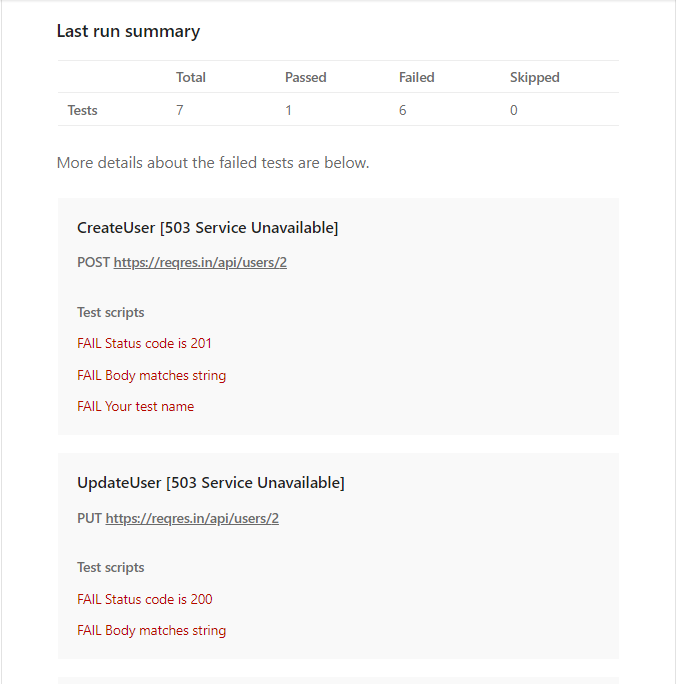
Double-click on any green bar and it shows all the test result.
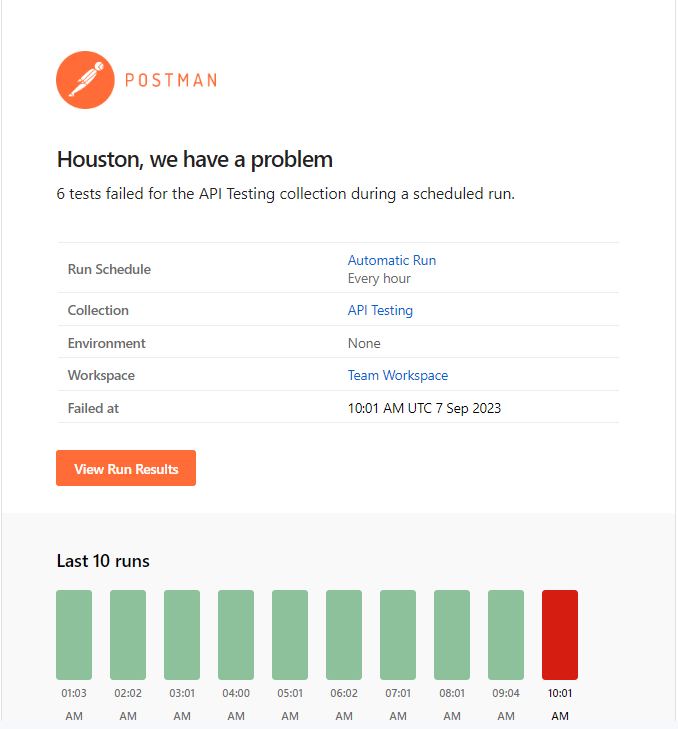
Step 2 – View the email
Postman sends email as you have configured in the runner option. Here, I have configured to send email after failure of 1 consecutive run. So, we can see the sample email below:
Sample Email
Congratulations. This tutorial has explained the steps to schedule the Collection run in the Postman. Happy Learning!!
