In this tutorial, we will create DELETE request in Postman and see how to execute it.
Table of Contents
What is DELETE Request?
The HTTP DELETE method is used to delete a resource from the server. Unlike GET requests, the DELETE requests may change the server state.
The DELETE method is defined to be idempotent, which means that sending the same HTTP DELETE request multiple times will have the same effect on the server and will not additionally affect the state or cause additional side effects.
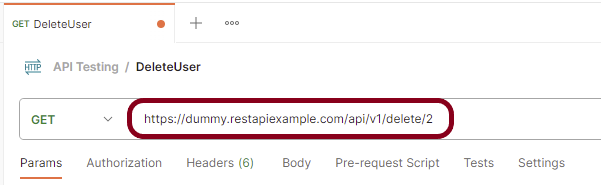
We will use the following URL for this Postman tutorial.
https://dummy.restapiexample.com/api/v1/delete/2
Implementation Steps
To create the first DELETE request in Postman, follow the following steps:
Create a Collection
Step 1: Create a Collection, click on Collections, and then click on the “+” plus button.
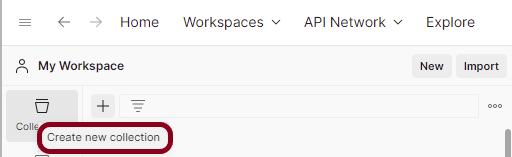
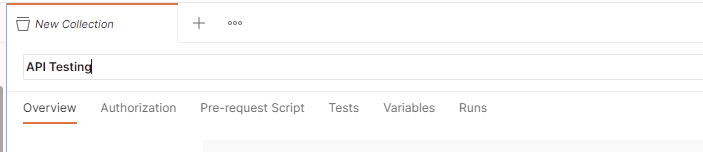
Step 2: Provide a name to the collection – “API Testing”.
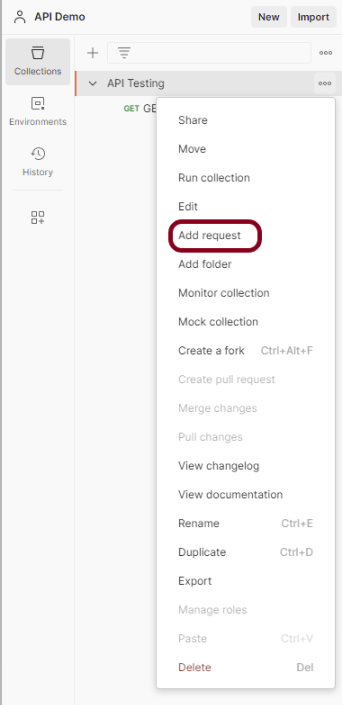
Add a request to the Collection
Step 3: To create a new request, click on “Add a request” if it is a new Collection. Otherwise, click on the 3 dots and select “Add request”.
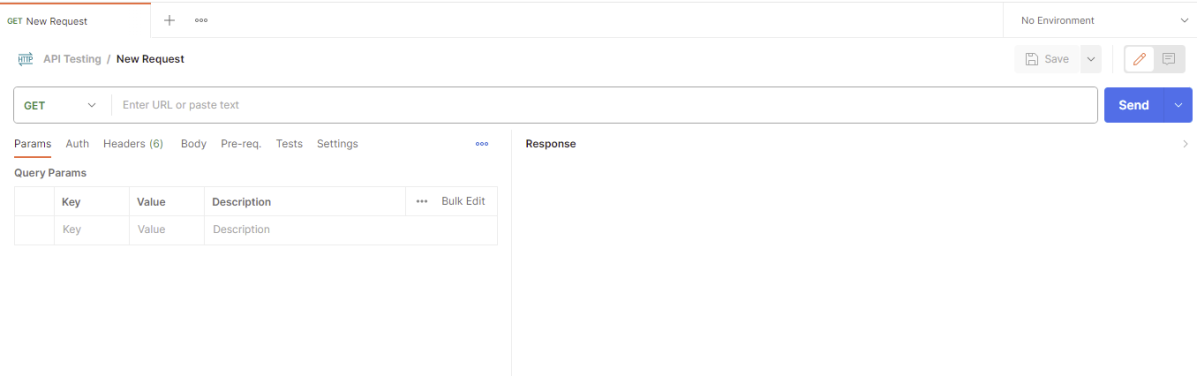
Step 4: Once you create a new request, then you will get the following window:
Enter the details of request
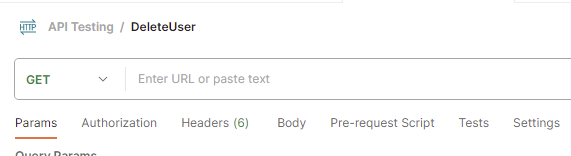
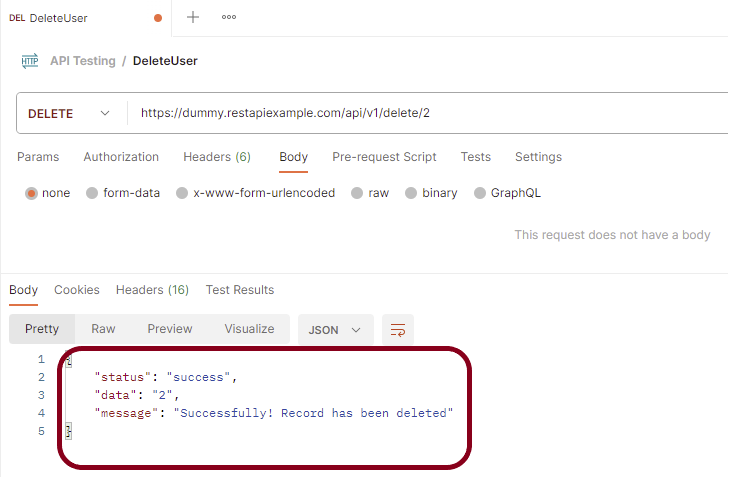
Step 5: Enter the “name” in the request. Here, the name is “DeleteUser”.
Step 5: Enter the “URL” in the address bar.
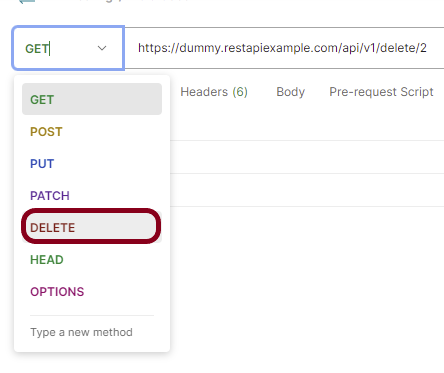
Step 6: Now, select the “DELETE” request from the list of request methods.
Step 7: Press the “Send” button.
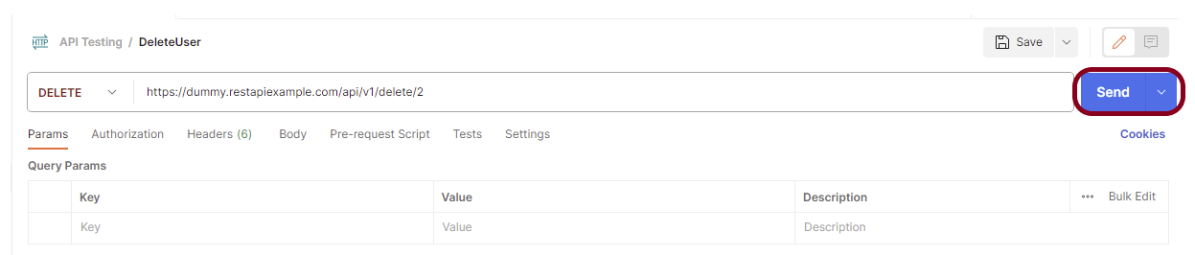
Step 8: Once you press the send button, you will get the response from the server. Make sure you have a proper internet connection; otherwise, you will not get a response.
Verify the Response
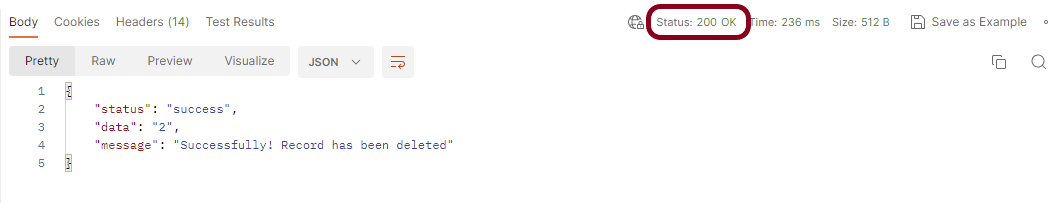
Status
You can check the status code. Here, we got the status code 200, which means we got a successful response to the request.
Body
In the Body tab of the response box, we have multiple options to see the response in a different format.
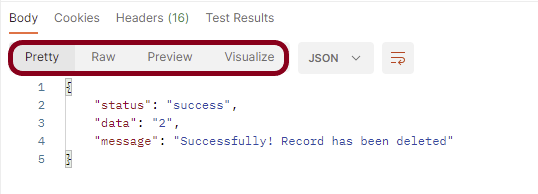
Format Type
Each request has a defined response to it as defined by the Content-Type header. That response can be in any format. Such as in the above example, we have JSON code file.
Below are the various format type present in Postman.
XML

HTML

Text

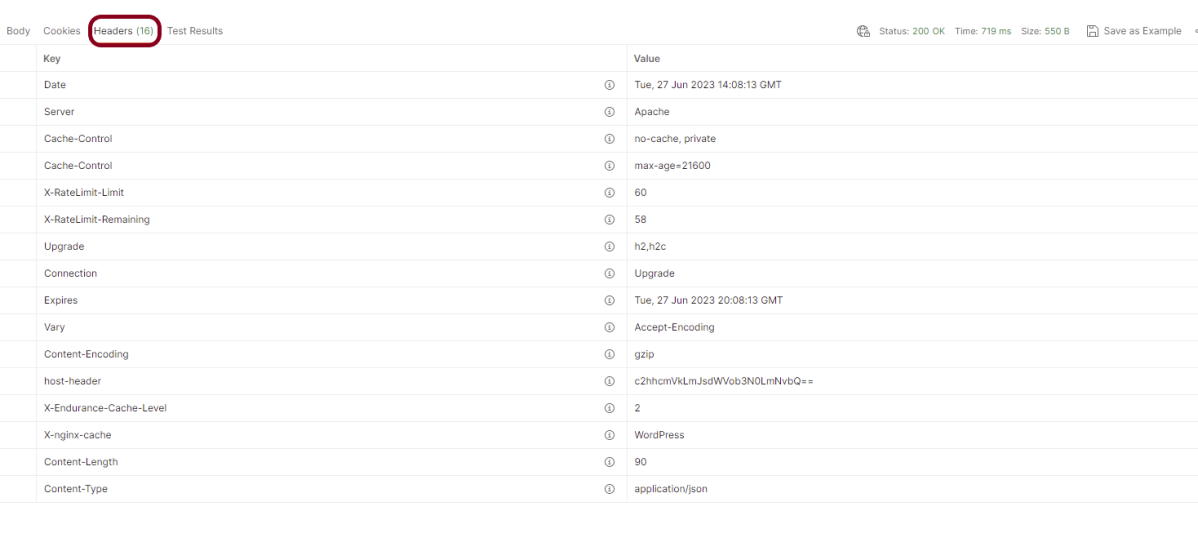
Headers
Headers are the extra information that is transferred to the server or the client. In Postman, headers will show like key-value pairs under the headers tab. Click on the Headers link as shown in the below image:
Congratulations on making it through this tutorial and hope you found it useful! Happy Learning!! Cheers!!
