In this tutorial, we will discuss the integration of Allure Report with the Robot Framework.
Table of Contents:
- What is Allure Report?
- Prerequisite
- Implementation Steps
- Create a new project
- Install allure-robotframework plugin
- Add allure-robotframework package to the PyCharms
- Create 3 new directories in the new project
- Create the test code
- Execute the tests
- View Report and Log
- Generate the Allure Report
- Allure Report Dashboard
- Categories in Allure Report
- Suites in Allure Report
- Graphs in Allure Report
- Timeline in Allure Report
- Behaviours of Allure Report
- Packages in Allure Report
What is Allure Report?
Allure Framework is a flexible lightweight multi-language test report tool that not only shows a very concise representation of what has been tested in a neat web report form but allows everyone participating in the development process to extract maximum useful information from everyday execution of tests.
From the dev/qa perspective, Allure reports shorten common defect lifecycle: test failures can be divided into bugs and broken tests, also logs, steps, fixtures, attachments, timings, history, and integrations with TMS and bug-tracking systems can be configured, so the responsible developers and testers will have all information at hand.
Prerequisite:
- Install Python
- Install PIP
- Install Robot Framework
- Install Robot framework Selenium Library
- Install PyCharm IDE
Please refer to this tutorial to install Robot Framework – How to install and setup Robot Framework for Python.
Implementation Steps:
Step 1 – Create a new project
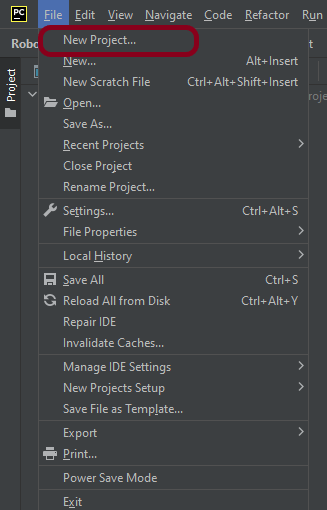
Step 1.1 – Open PyCharm and create a new project. Go to File and select New Project from the main menu.
Step 1.2 – Choose the project location. Click the “Browse” button next to the Location field and specify the directory for your project.
Deselect the Create a main.py welcome script checkbox because you will create a new Python file for this tutorial.
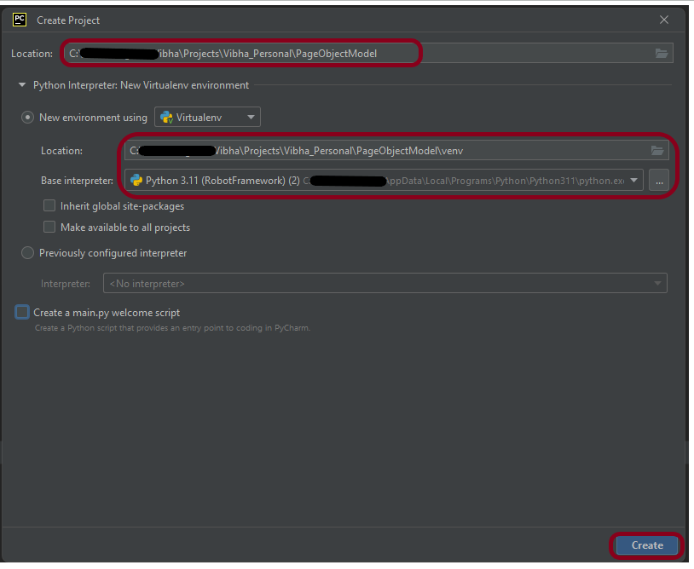
Click on the “Create” Button.
Step 1.3 – A new dialog appears asking to open the project using any one of the given options. I have selected New Window as I like to have separate windows for each project.

Below is the image of the new project created in PyCharms.

Step 2 – Install allure-robotframework plugin
Go to the command prompt and run the below-mentioned command to download the plugin:
pip install allure-robotframework
The below image shows that the plugin is installed successfully.

Step 3 – Add allure-robotframework package to the PyCharms
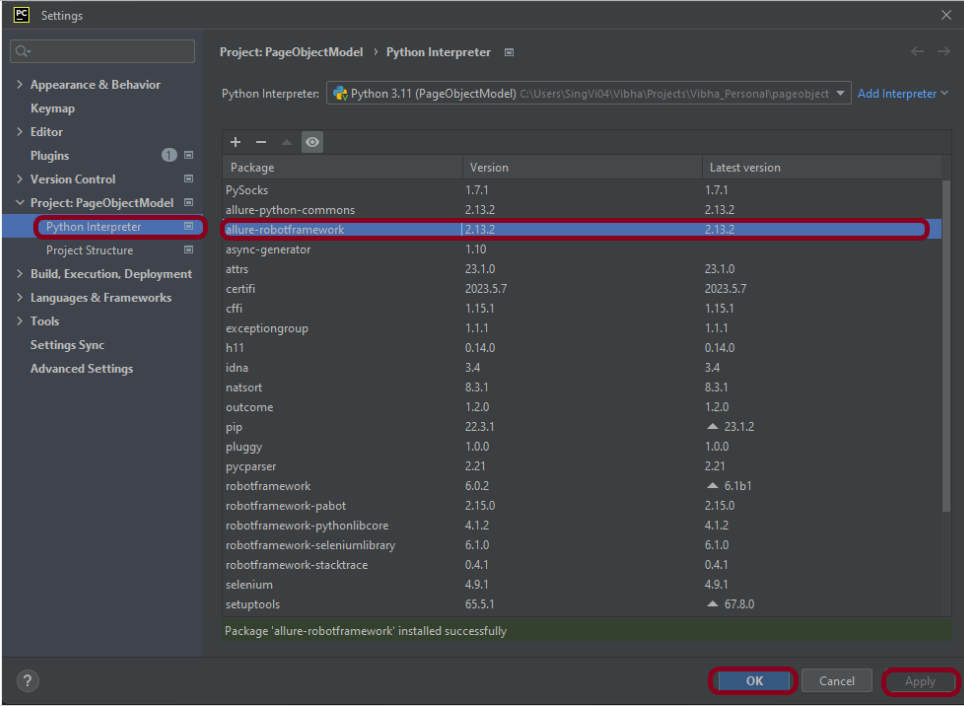
Go to File->Settings ->Project:RobotFramework_Demo ->Python Interpreter.
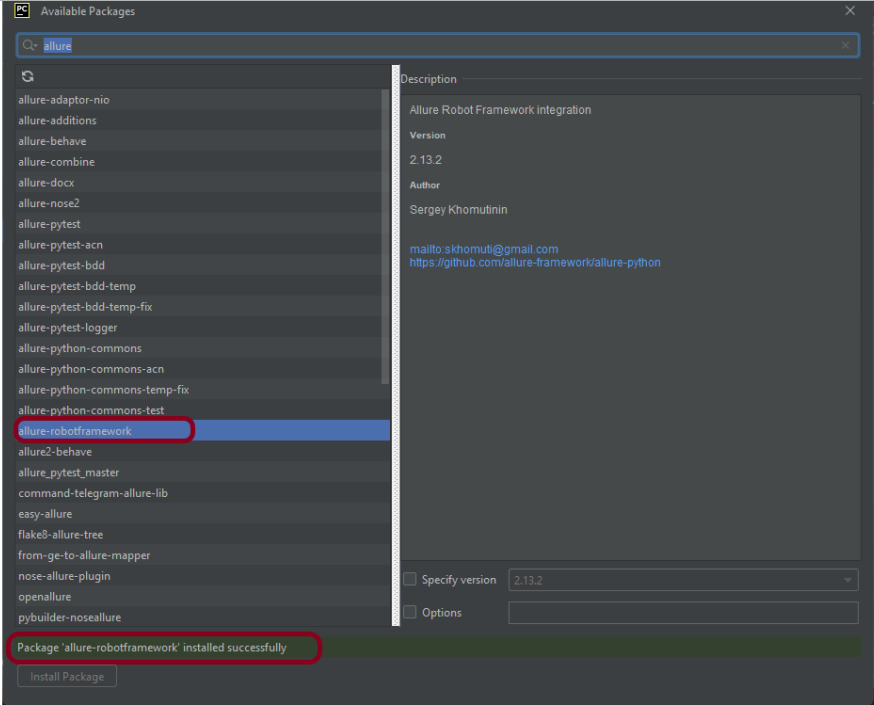
Click on the “+” sign and enter allure-r in the search bar. It will show a list of packages. Select the “allure-robotframework” package and click on the “Install Package”.

Once the package is installed, we will see the message that the package is installed successfully.
Once the package is installed, it can be seen under the package list as shown below:
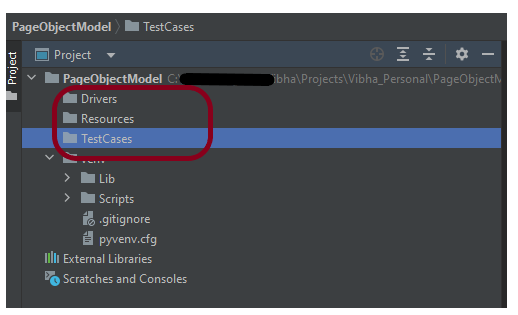
Step 4 – Create 3 new directories in the new project
Right-Click on the project, select New->Directory and provide the name as TestCases, Drivers, and Resources
Step 5 – Create the test code
To know the framework, tests, and corresponding keywords can be referred from here – Page Object Model in the Robot Framework.
Step 6 – Execute the tests
We need the below command to run the Robot Framework script using Allure listener.
robot --listener allure_robotframework --outputdir ./output/robot ./TestCases
The output of the above program is

Step 7 – View Report and Log
We have the test case passed. The Robot Framework generates log.html, output.xml, and report.html by default.
These reports are generated in the output/robot folder as I have provided –outputdir ./output/robot in the command line.

Let us now see the report and log details.
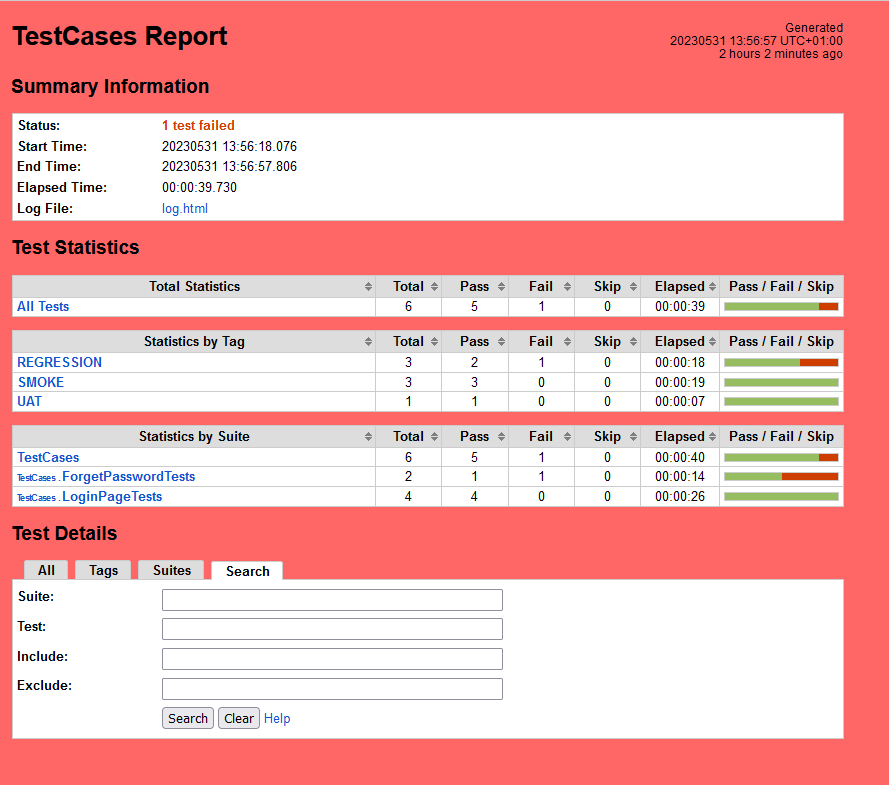
Report
Right-click on report.html. Select Open In->Browser->Chrome(any browser of your wish).
As one of the tests purposefully failed to demonstrate how the report would look in the event of a failure, we can see that it is now a Red report. The framework generated the following report:
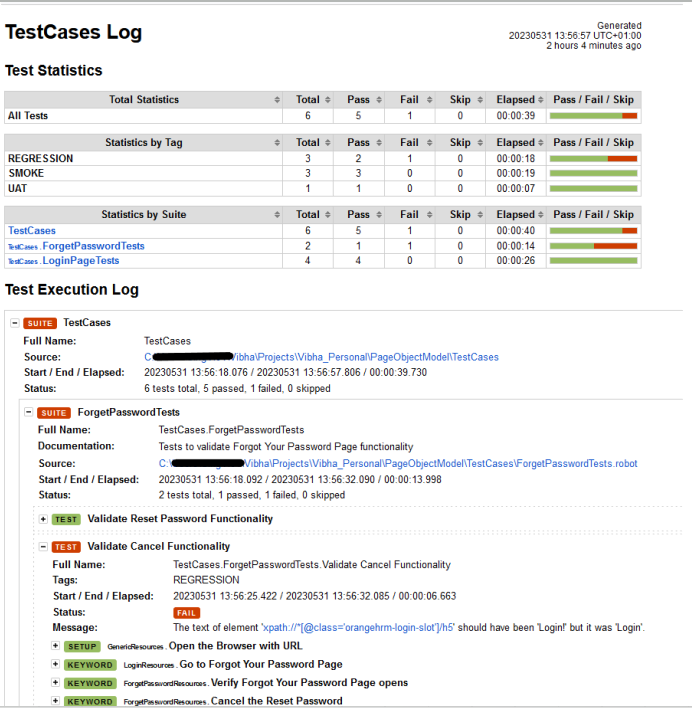
Log
Robot Framework has multiple log levels that control what is shown in the automatically generated log file. The default Robot Framework log level is INFO.
Right-click on log.html. Select Open In->Browser->Chrome(any browser of your wish).
Step 8 – Generate the Allure Report
To create Allure Report, use the below command
allure serve ./output/allure

This will generate the beautiful Allure Test Report as shown below.
Step 9 – Allure Report Dashboard
The overview page hosts several default widgets representing the basic characteristics of your project and test environment.
- Statistics – overall report statistics.
- Launches – if this report represents several test launches, statistics per launch will be shown here.
- Behaviours – information on results aggregated according to stories and features.
- Executors – information on test executors that were used to run the tests.
- History Trend – if tests accumulated some historical data, it’s trend will be calculated and shown on the graph.
- Environment – information on the test environment.

Categories in Allure Report
The categories tab gives you a way to create custom defect classifications to apply for test results. There are two categories of defects – Product Defects (failed tests) and Test Defects (broken tests).

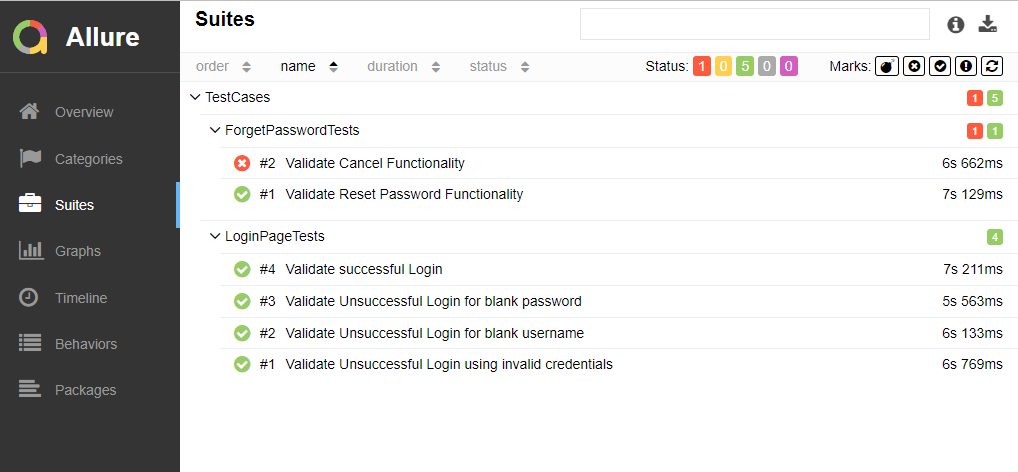
Suites in Allure Report
On the Suites tab a standard structural representation of executed tests, grouped by suites and classes can be found.
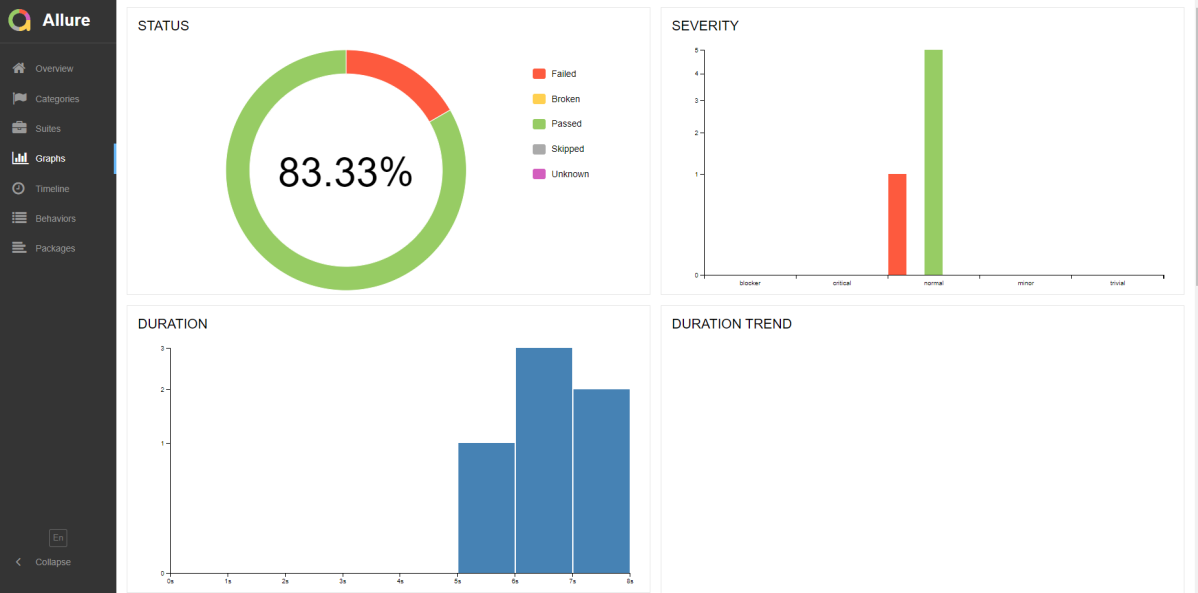
Graphs in Allure Report
Graphs allow you to see different statistics collected from the test data: statuses breakdown or severity and duration diagrams.
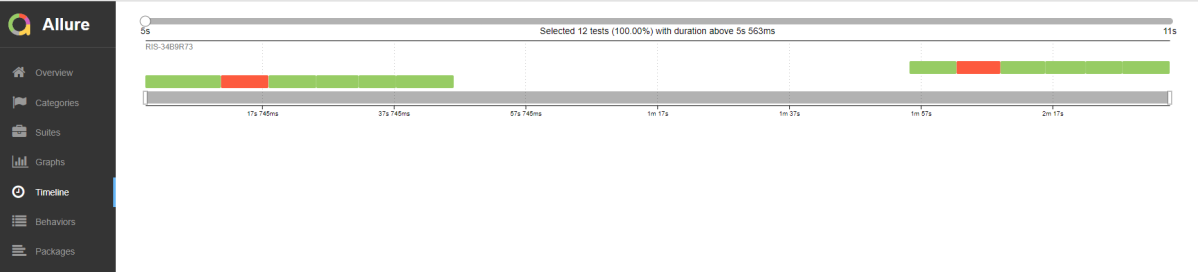
Timeline in Allure Report
The timeline tab visualizes retrospective of tests execution, allure adaptors collect precise timings of tests, and here on this tab, they are arranged accordingly to their sequential or parallel timing structure.
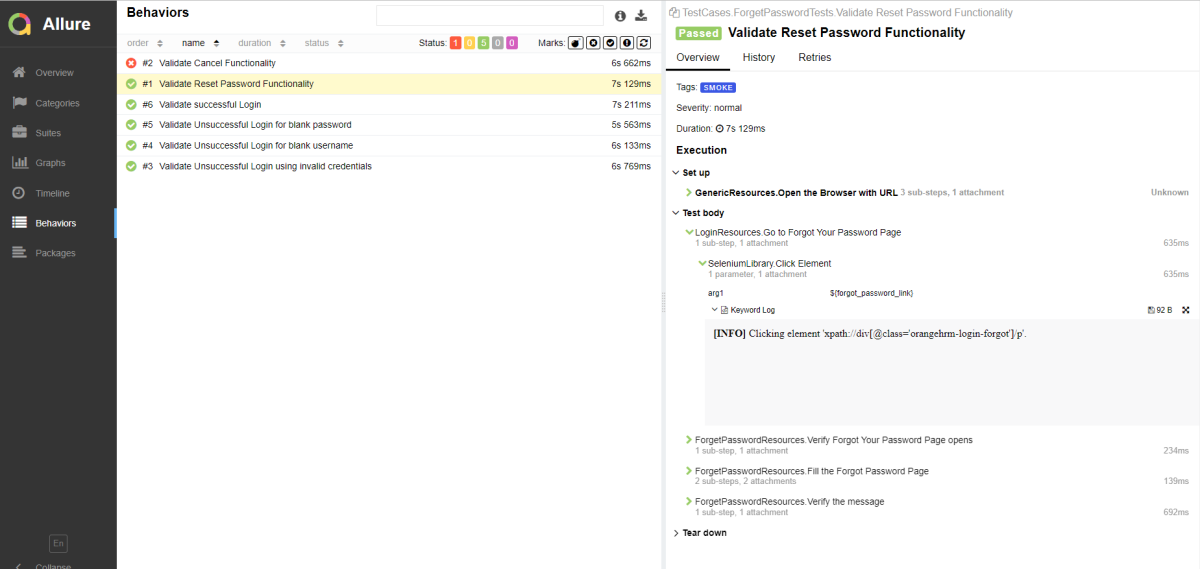
Behaviours of Allure Report
This tab groups test results according to Epic, Feature, and Story tags.
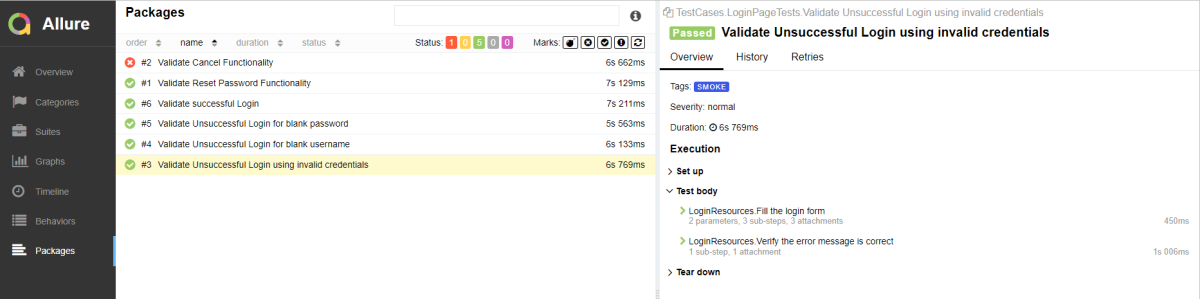
Packages in Allure Report
The packages tab represents a tree-like layout of test results, grouped by different packages.
That’s it! Congratulations on making it through this tutorial and hope you found it useful! Happy Learning!!

I am getting the below error for typing the command:
allure serve ./output/allure
allure : The term ‘allure’ is not recognized as the name of a cmdlet, function, script file, or operable program. Check the spelling of the name, or if a
path was included, verify that the path is correct and try again.
At line:1 char:1
LikeLike
Hi Varun, have you installed Allure already on your system? This error shows that the system does not recognize the term “allure”. You can check if allure is already installed or not by using the command allure –version
LikeLike
allure-version
LikeLike